


Creating a River Flood Scenario - Hazard Services
Create a River Flood Scenario
Purpose:
The purpose of this jobsheet is to create a river flood scenario by modifying hydro forecast point data to support testing Hazard Services. This jobsheet will use the CreateRiverFloodScenario.py option on a cloned test river forecast point, and it will require the Hydro Database Manager password.Tasks:
For background on the multiple ways the hydro database can be modified, see the Create River Flood Scenario Reference page.
If you are using an archived case with river flooding at a specific time, you will need to set your CAVE clock to the time of the data. After doing so, go to the MapData menu --> Point Data Control and click "Map" to see the gauges appear. Be sure the "Show NonFcstPoints" checkbox is off.
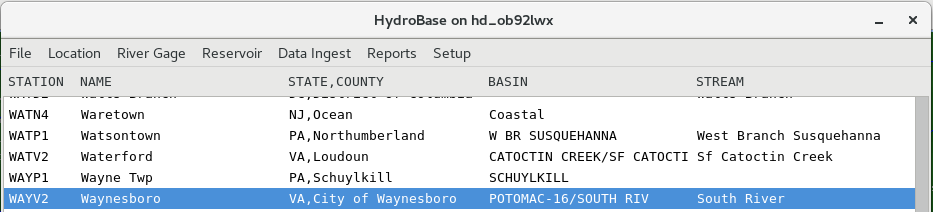
- Identify a commonly-used river forecast point that ideally has been verified to work with Hazard Services (e.g. WAYV2).
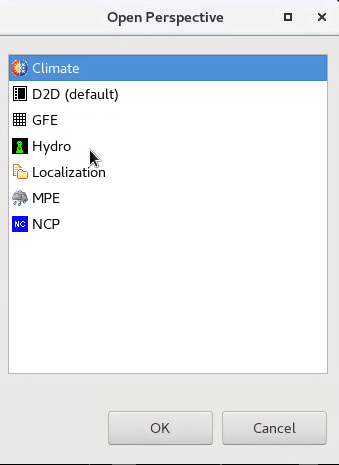
- Open the Hydro perspective.

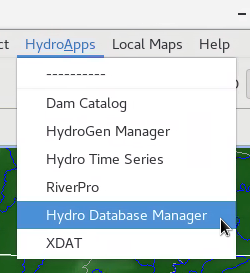
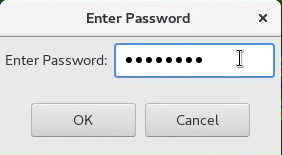
- Open HydroBase (HydroApps->Hydro Database Manager), enter your hydro database manager password, and click OK.
- If you do not have a special test group set up for RiverPro, you’ll need to add one (continue to step 5). If you already have a test group, skip to step 9.
-
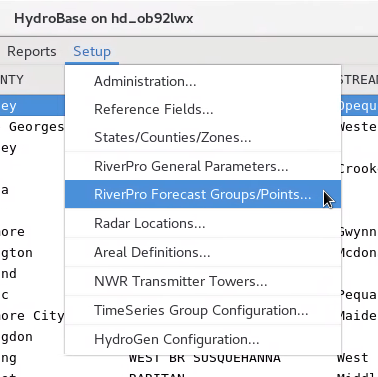
Go to Setup->RiverPro Forecast Groups/Points.
-
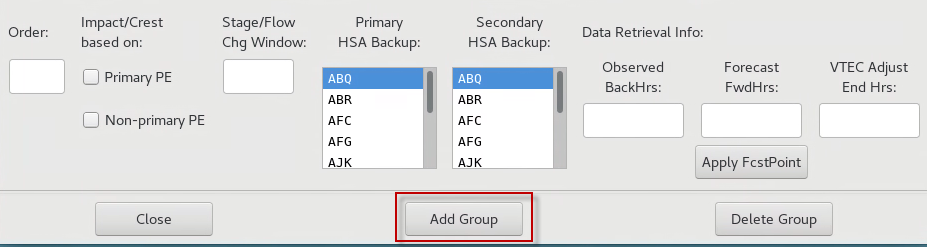
Click “Add Group” button on the bottom of the GUI. The Selected Forecast Group entries will empty out.
-
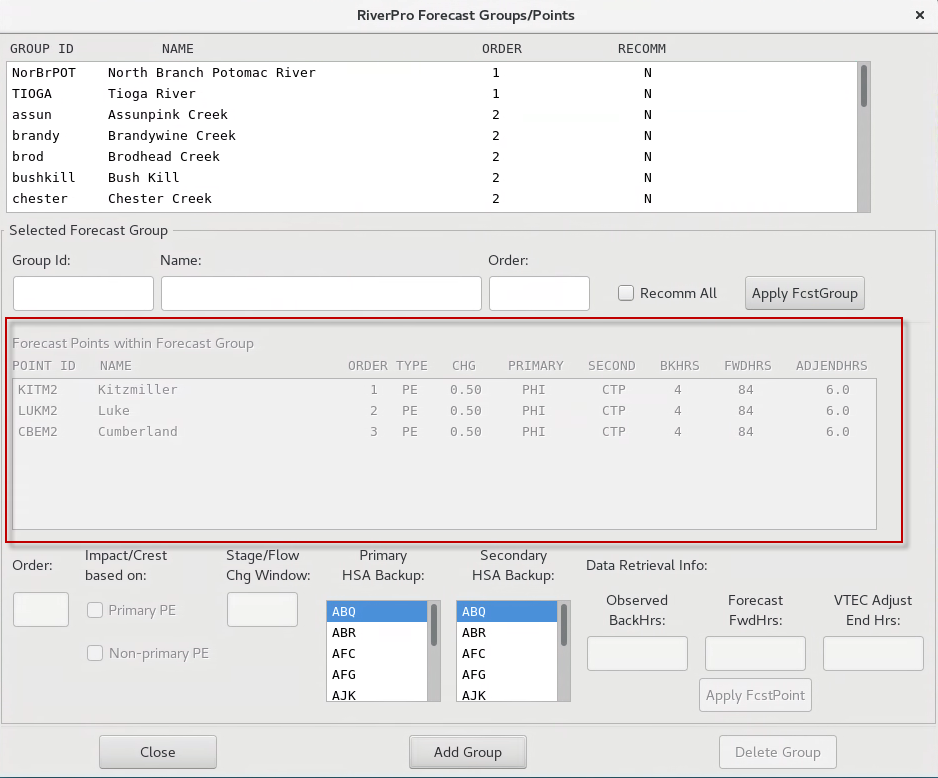
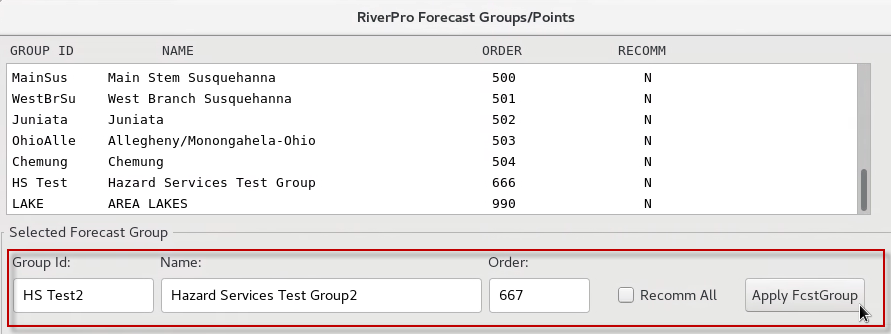
Enter a new Group Id (e.g. HS Test2), Name (e.g. Hazard Services Test Group 2), and Order (e.g. 667) in the appropriate fields. Identify numbers not being used in the ORDER column for the "Order" entry. Then click “Apply FcstGroup” button to add the new group to the database.
-
Click "Close" in the bottom-left corner of the RiverPro Forecast Groups/Points window.
-
The recommended approach to creating a new forecast point used in the next steps is to clone an existing forecast point to a new test forecast point. Cloning the point will create all of the appropriate metadata for the new location.
-
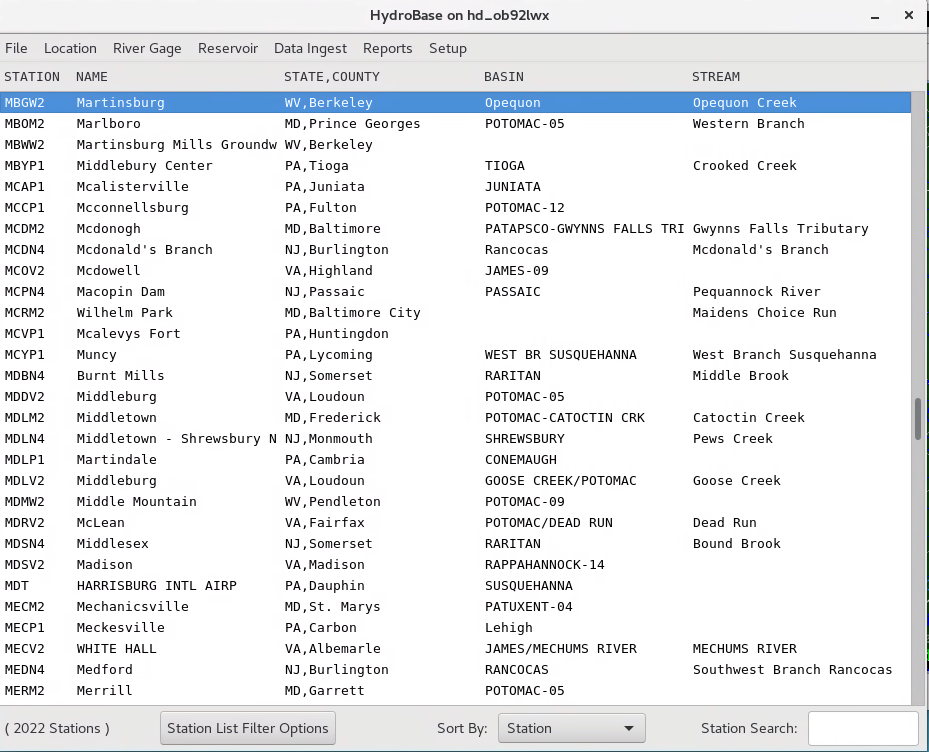
Select the "STATION" (e.g. WAYV2) that you want to clone from the HydroBase main display window.
-
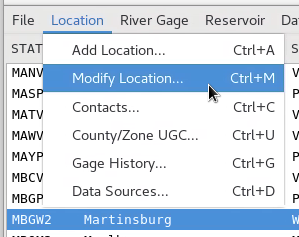
Click "Location->Modify Location".
-
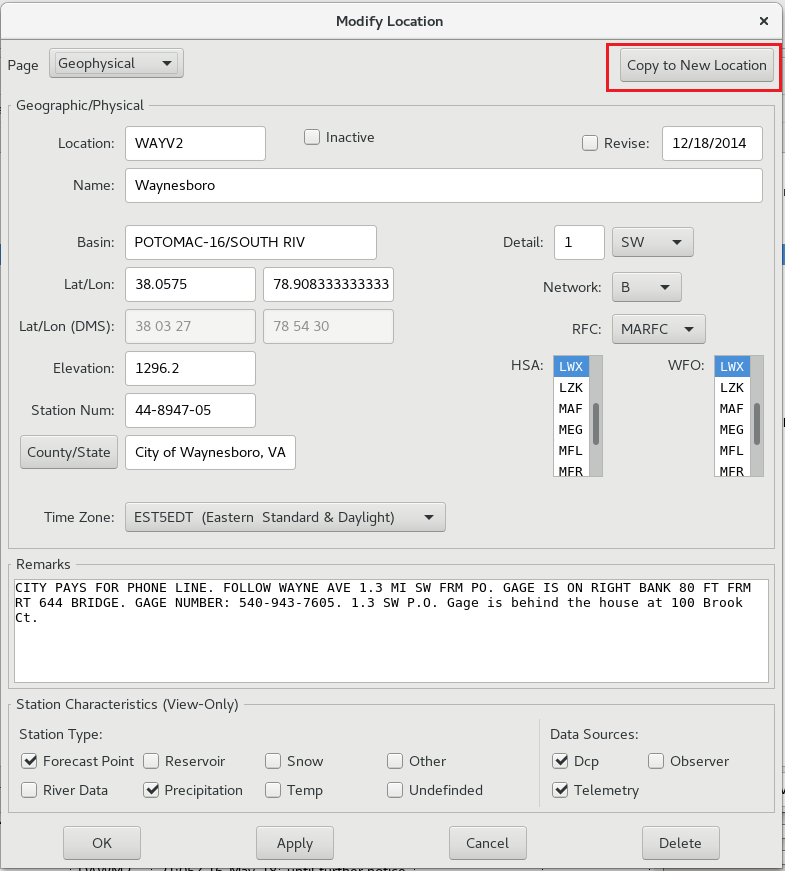
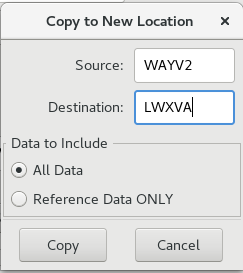
Click “Copy to New Location” in the upper right of the Modify Location GUI.
-
In the "Destination" box, add a new Location ID (LID). Best practices for choosing this ID:
-
Choose something 5 characters in length or else you will get a VTEC error when creating your product.
-
Make sure the new LID destination is not a valid in-use LID by checking the NWSLI database (Web link). Avoiding using a number as the last character is one way to prevent conflicting with a valid LID.
-
Choose something unique to your database to avoid it being overwritten by the database of your backup sites. Suggestion: CWASA where "CWA" represents your CWA abbreviation, "S" represents the first letter of the state of the primary CWA where the forecast point exists, and "A" represents an index to allow you to create more than one test point, e.g. for an LWX author's cloned point in the Virginia (i.e. LWX) office's CWA: LWXVA, LWXVB, LWXVC, etc.
-
Note: For some CWAs sharing the same state, the 4th character may need to be something unique, like the first letter of the CWA the point is in (e.g. LWXPA for an LWX authored point in the PHI backup office's CWA and LWXCA for an LWX authored point in the CTP office's CWA). Or you could use N/S/E/W of the cardinal direction for a relative location. As long as there is no overlap of test names between neighboring/backup CWAs, any combination will work.
-
-
When ready, click "Copy". In the “Data to Include” section, “All Data” is selected by default. This will copy all of the dynamic (height, discharge, etc) data in addition the static (location, riverstat, floodstmt, etc) data. Either selection will work. If you choose to only copy the static data, you will need to create all new dynamic data for testing. It will take a minute for this to complete and the Copy window to go away.
-
-
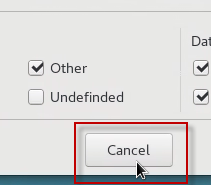
After the previous step's copy window disappears, click "Cancel" on the bottom of the Modify Location GUI.
-
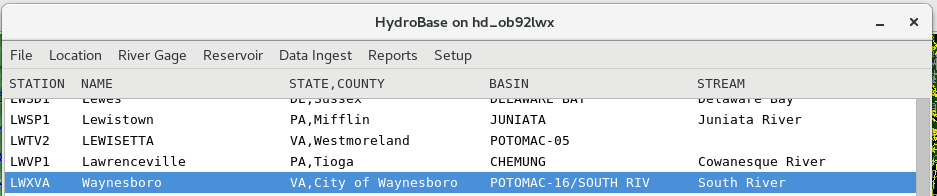
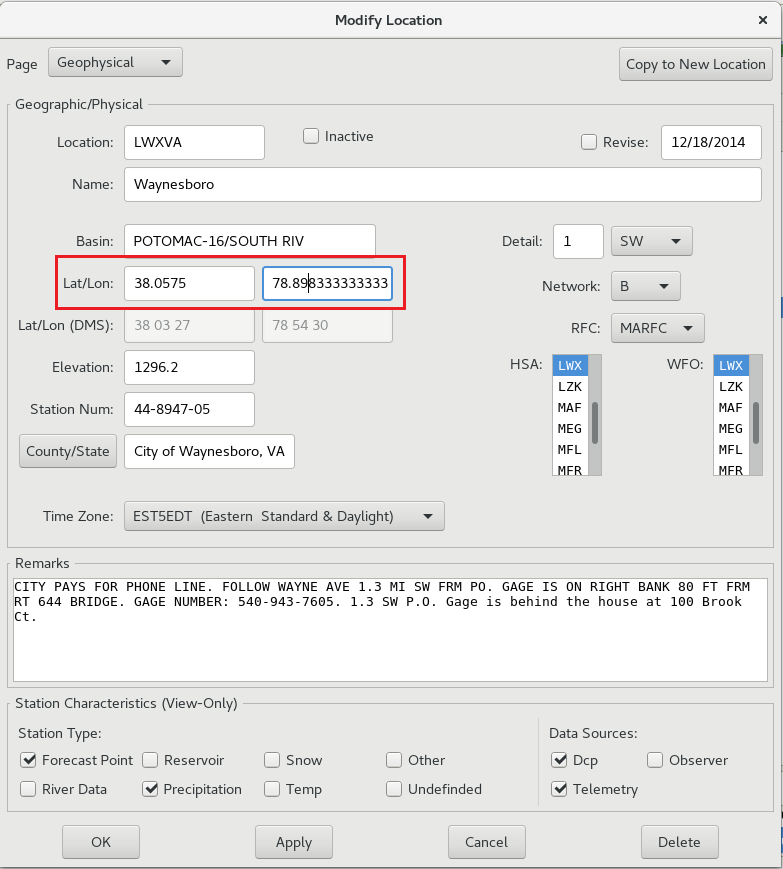
Using the STATION name column, select the new point (e.g. LWXVA) in the Hydrobase main display. Double click to open the Modify Location GUI (or go to Location --> Modify Location)
-
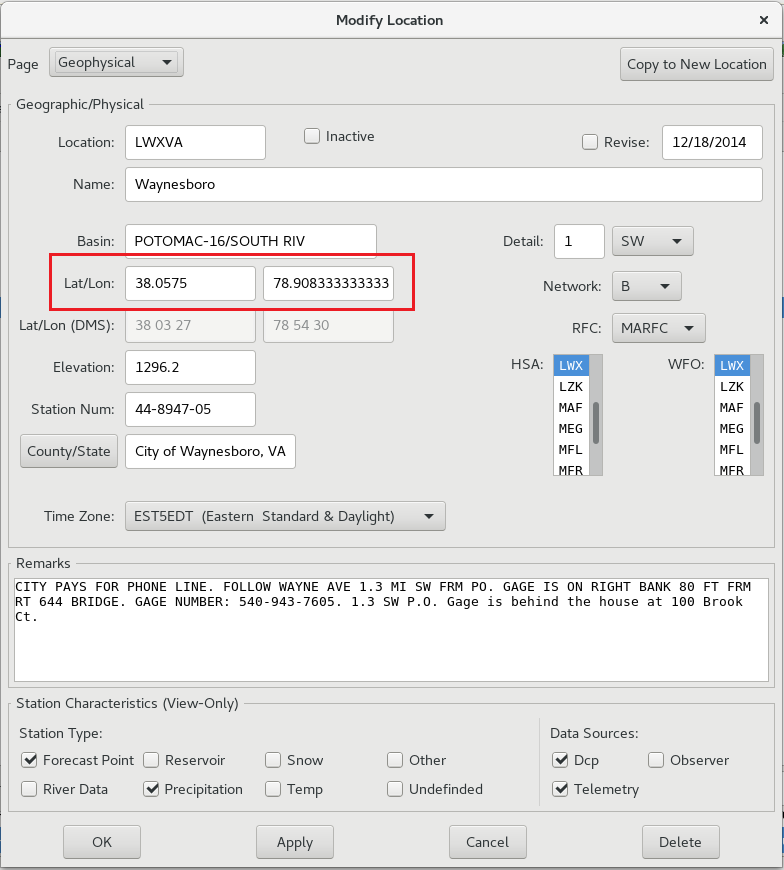
Adjust the "Lat/Lon" to give it a slightly different location than the original forecast point.

-
Press Apply and then OK to close the dialogue box.
-
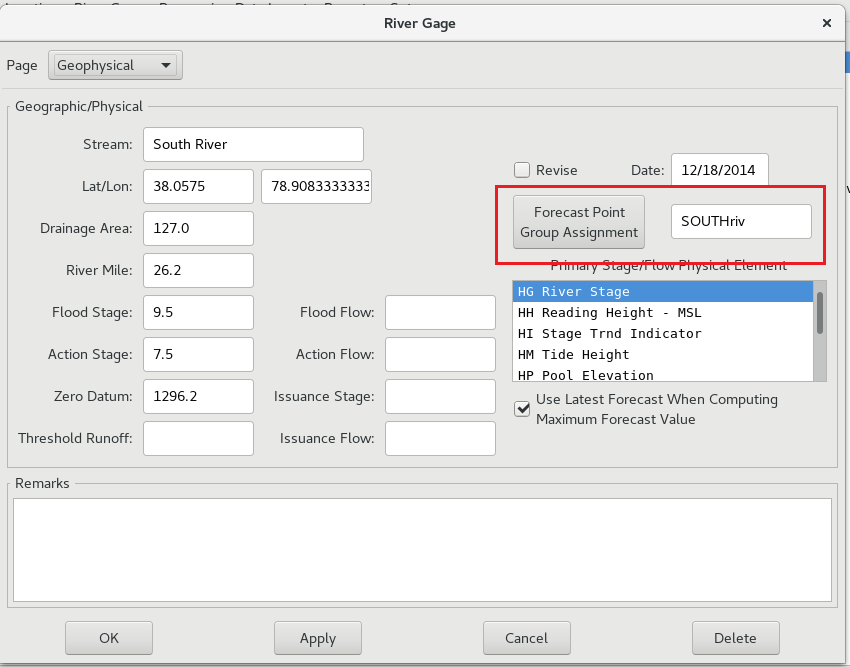
Open the River Gage menu (River Gage --> River Gage)
-
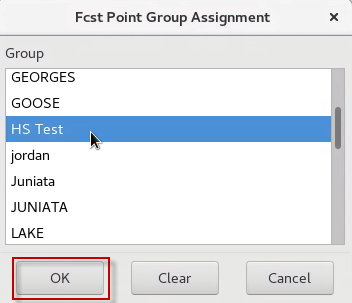
Click the “Forecast Point Group Assignment” button.
-
Select the test river group (e.g. HS Test) that you created before and click "OK".
-
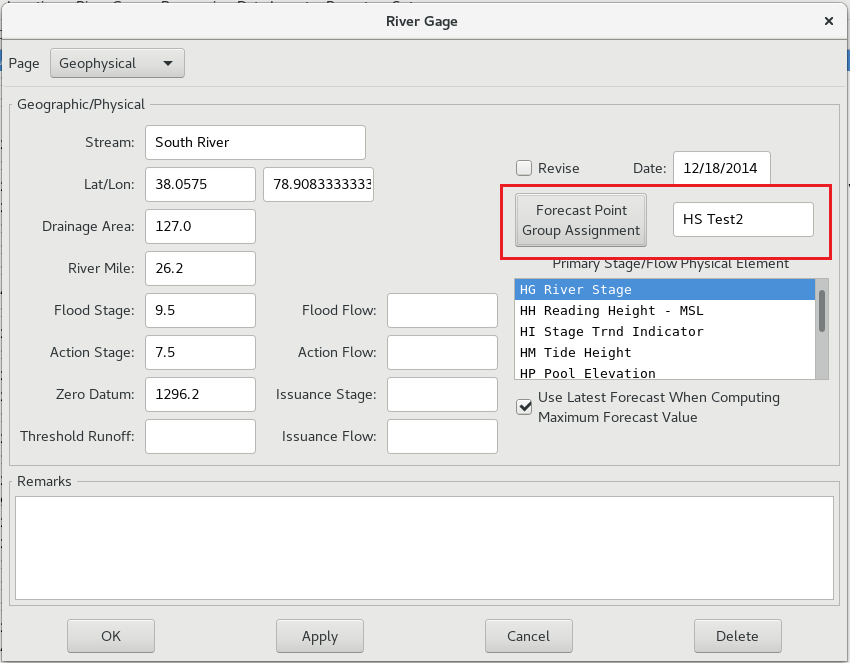
Note your Forecast Point Group Assignment has been selected. Then click "OK" to exit out of the River Gage GUI.
-
NOTE: In order to see your new forecast point show up on the display, you will need to restart CAVE. This is not required, and you can complete the jobsheet without doing so if you don't care to see the location of the new gauge. The forecast point should show up at the same time as as your hydro database, so if you are working with an archived dataset be sure to set your CAVE clock back and reload the gauges.
-
You may need to remove the test location from hgstation on a live AWIPS to prevent the data from being sent to AHPS. Note that the location will not display without AHPS CMS configuration. This does not appear to be necessary on standalone workstations. If you need to do this, here are the steps:
-
Go to Setup->HydroGen Configuration.
-
Find entries for the test location.
-
Select and delete the entries.
-
-
Have your local ITO download the CreateRiverFloodScenario.py program from the SCP to insert data into the test river forecast point. See user guide PDF for background on this application. There are pre-built scenario templates for different river flood situations with individual files for observations and forecast stage values. Right click on the Redhat desktop background and select "Open Terminal". Then cd ~/CreateRiverFloodScenario and list out the files.
e.g. obsTmpFile_fly_can_flw_new.txt contains the observations for a flood advisory cancellation followed by a new flood warning
e.g. fcstTmpFile_fly_can_flw_new.txt contains the forecast for an advisory followed by a new flood warning
-
Identify an obsTmpFile* and a fcstTmpFile* to use to modify your test river forecast point.
-
Run the CreateRiverFloodScenario.py program on the test river forecast point you just created with the appropriate arguments to create a SHEF file from the scenario templates specified that will be ingested into EDEX:
e.g../CreateRiverFloodScenario.py -l LWXVA -p SHEFTEST --oi=30 --fi=12 --obsFile=obsTmpFile_flw_new.txt --fcstFile=fcstTmpFile_flw_new.txt

-
The program will create a SHEF file that is ingested into EDEX and will write out the data as the current time. If you run Hazard Services and the River Flood Recommender with the CAVE clock set to the current time, the forecast point should trigger the appropriate hazard. Double click on the CAVE clock at the bottom of CAVE and select "Use current real time" and click "OK".

-
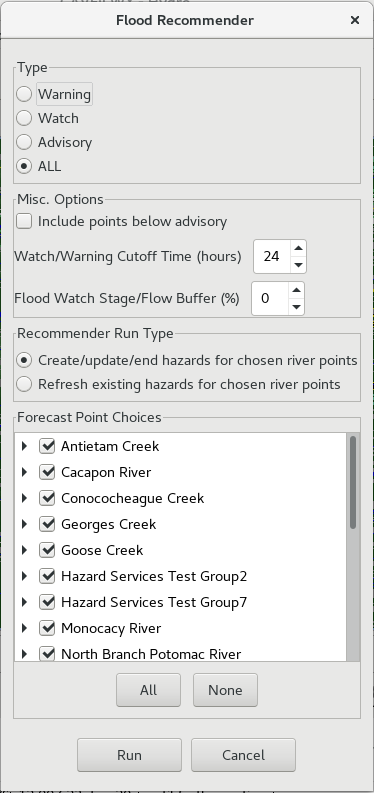
Run the River Flood Recommender from the Tools button for All Types. The results window should contain a recommended event for your forecast point. NOTE: It may take a minute or so for the changes from the script to apply, even though the script is done running. If you run the recommender and don't see your new forecast point as a recommended hazard, wait about a minute and try again.

-
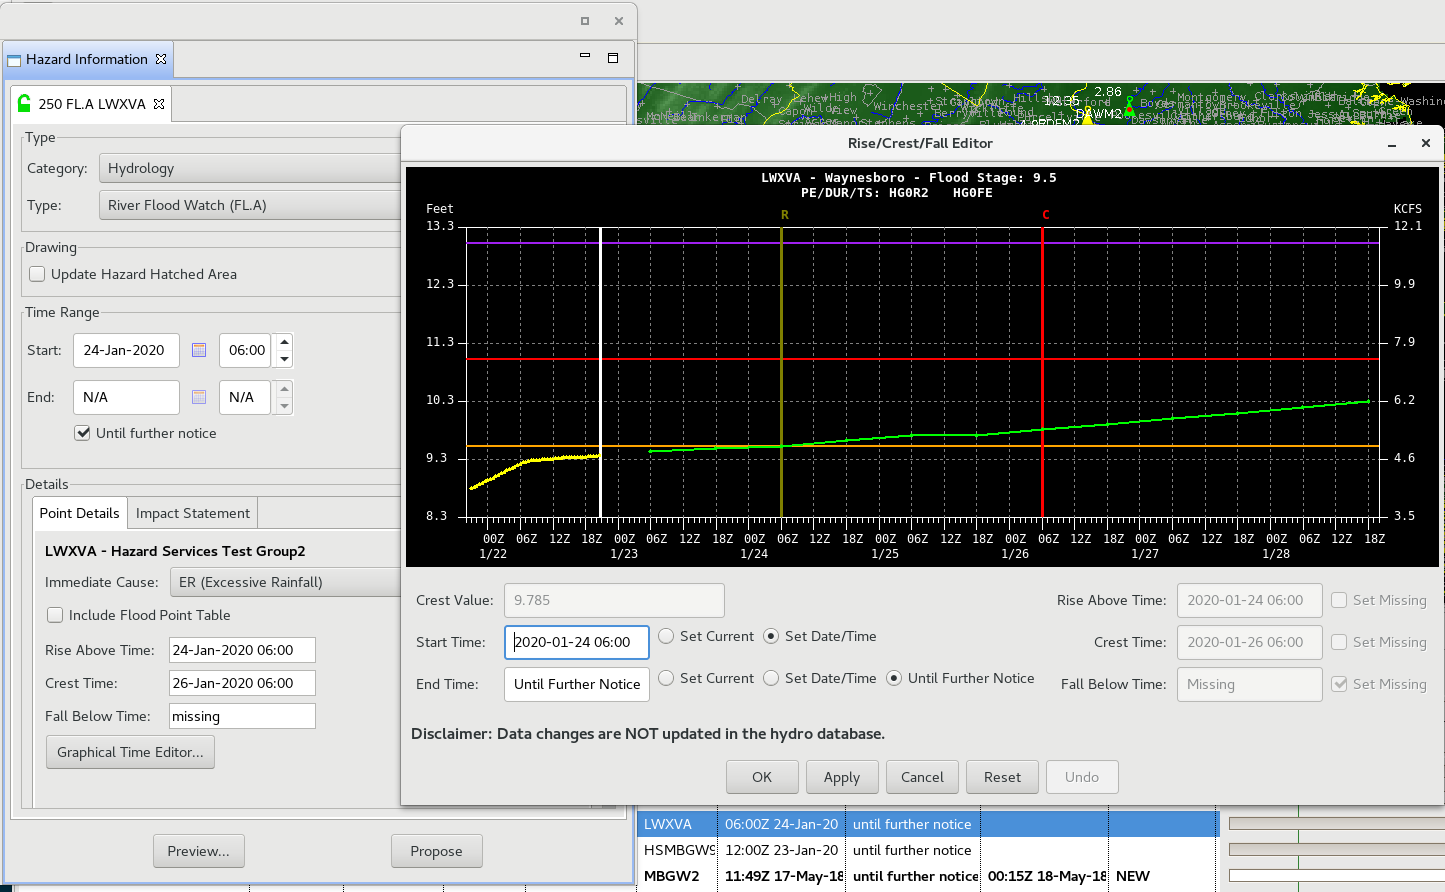
Select your recommended hazard in the Console, and use the Graphical Time Editor in the HID to view the river stage time series you just applied. Note that when you run the program on the same test forecast point using a new template, it will update the values each time you run this. The CreateRiverFloodScenario.py also has a time option to be able to write out the data for a particular time. See the user guide for more information.
-
You are done!