Purpose:
This jobsheet walks the user through using select by area to create a winter hazard and then remove it.
Tasks:
- Ensure Forecast Zones or Forecast Zones XXX (where XXX is your site ID) are loaded from either GFE or Hazard Services.
- Highlight desired valid time of hazard in the GFE grid manager, if it is desired to have the hazard time pre-populate.
- Select the Maps (icon) pull-down menu on the Hazard Services Console Toolbar and Select Forecast Zones or Forecast Zones XXX.

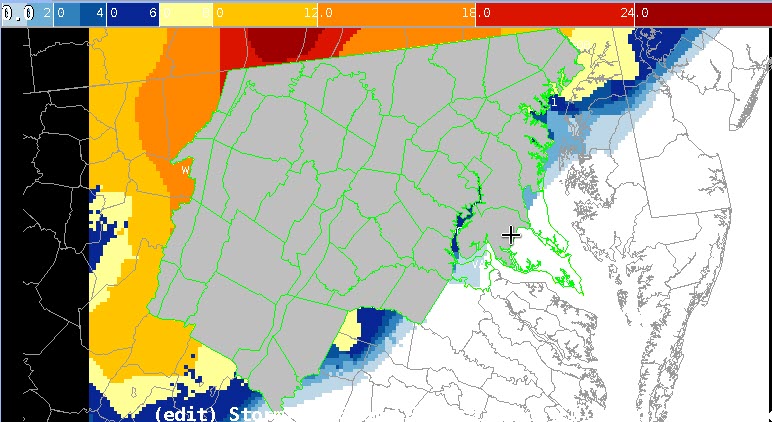
- Verify the Forecast Zones are displayed in green on the Spatial Display:

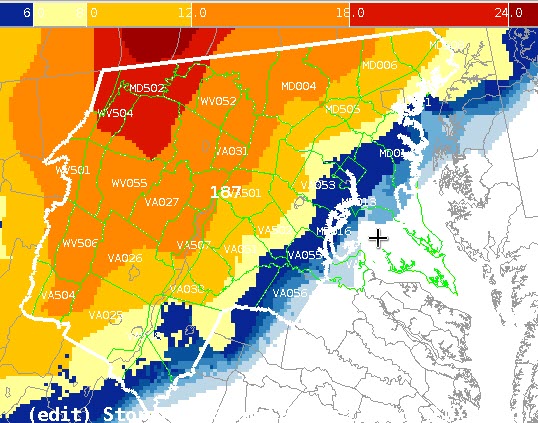
- On the Spatial Display, MB1 (Left-Click) on the desired zones. The selected zones will turn grey as shown below:
- MB3 (Right-Click) to end the selecting of zones. A white polygon will be displayed on the Spatial Display, delineating the outline of the selected zones:
- The Hazard Information Dialog (HID) launches
- From the Type pull-down menu in the Hazard Information Dialog, select desired Hazard (e.g. Winter Storm Watch)
- In the Hazard Information Dialog, adjust Time Range as needed, and select any appropriate additional impacts or CTAs.
- In the Hazard Information Dialog, select Propose.
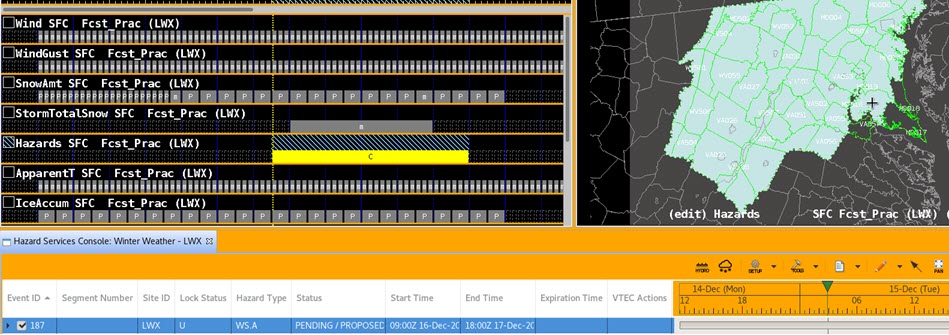
- Verify a Hazards grid is written to the GFE grid manager and that the hazard status is Pending/Proposed in the console:
- If the HID was left open, now click Preview.
- If the HID was closed after clicking Propose, click on the hazard event in the console as shown above to launch the HID and then click Preview.
- The Product Editor launches.
- Verify all the proper wording was translated into the WWW_WSW_Formatter messages.
- Select Dismiss.
- Close the Hazard Information Dialog window.
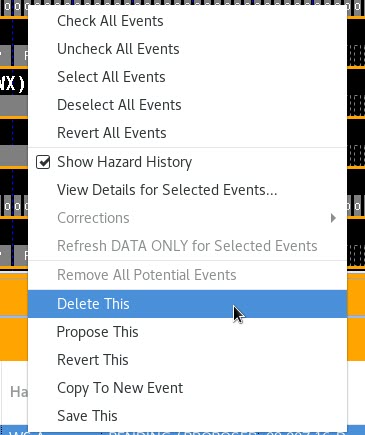
- MB3 on the PENDING/PROPOSED winter hazard event in the Hazard Services Console and select Delete This to remove it.