Using Settings/Filters (10-15 min) - Hazard Services
Filters: Completion Time ~ 15 min
Purpose:
In this jobsheet you will load the Hazard Services Settings from the SETUP icon on the console and set the default Setting for your user.Tasks:
NOTES:
- The recommenders available are also controlled by the settings. For example, the "River Flood Recommender" is not available from the "Hydrology_NonRiver" settings. The "Hydrology_All" setting has everything turned on.
- When Hazard Services is started, the configured default Setting will be loaded. The site default can be configured by the focal point, and the user can configure their own default Setting.
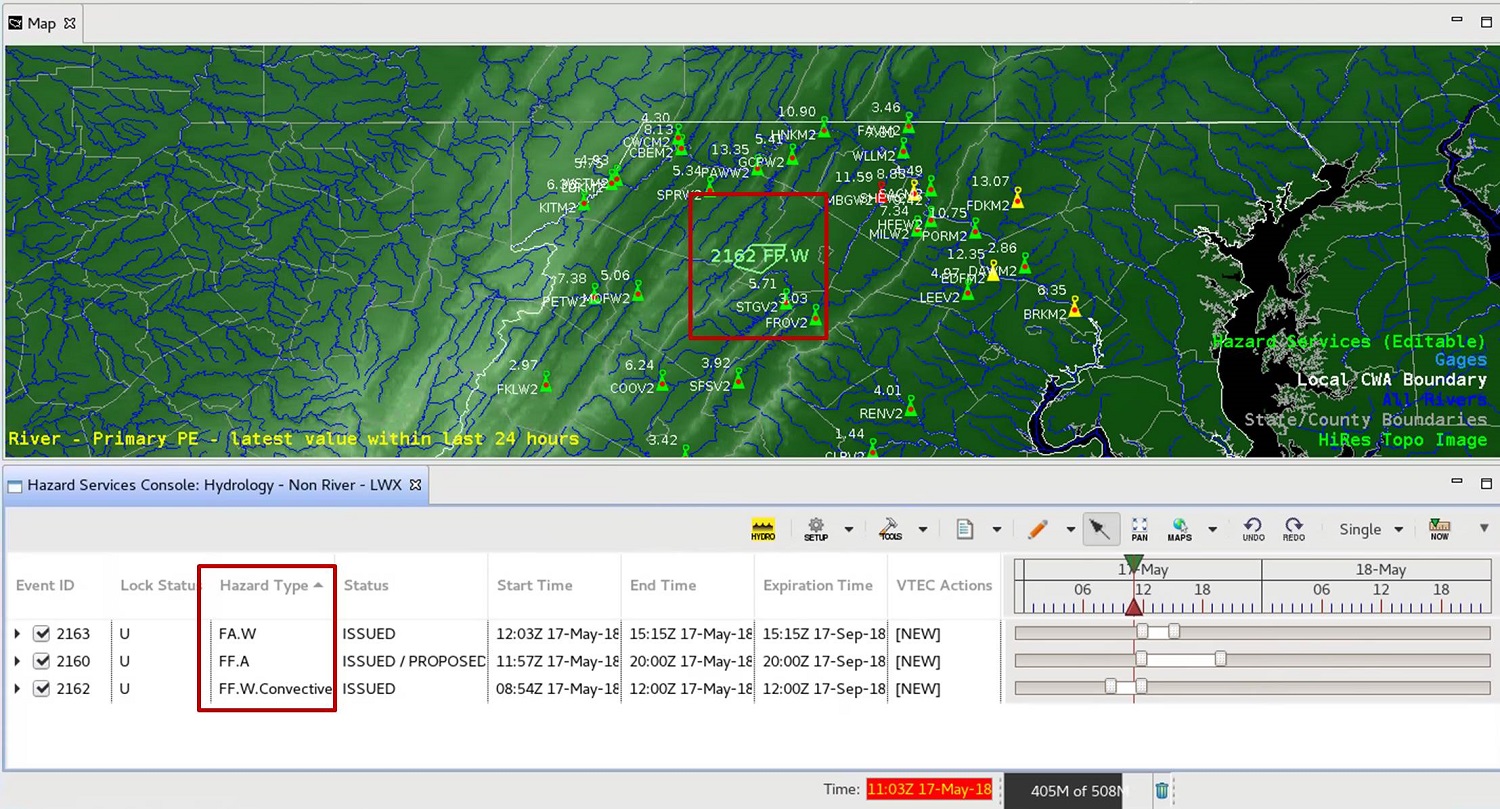
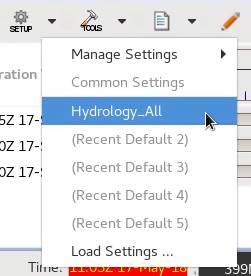
- The name of the Setting used follows the "Hazard Services Console: " text in the tab name located in the upper-left corner of the Console. In the image below, the setting is "Hydrology - All" and the site is "LWX".

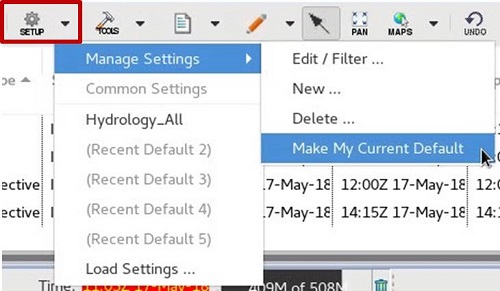
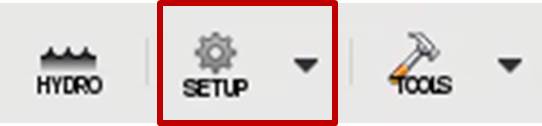
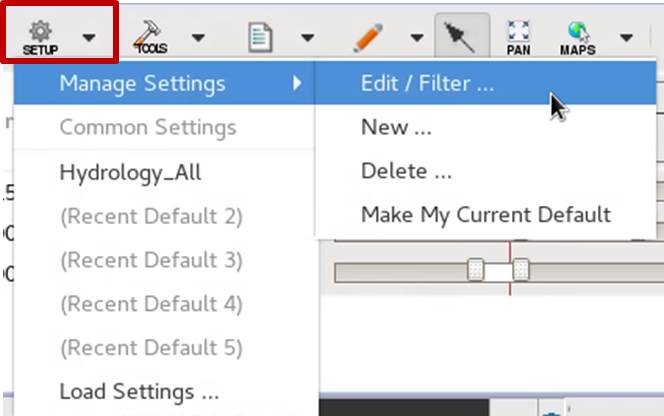
- To work with the Setting, click either the SETUP icon or the down arrow to the right of the icon.
- To load a different setting, click the “Load Settings…” menu.

- The baseline settings available are: Hydrology_All, Hydrology_ESF, Hydrology_NonRiver, Hydrology_River, and Hydrology_WarningAdvisory. User-defined settings may also be listed.
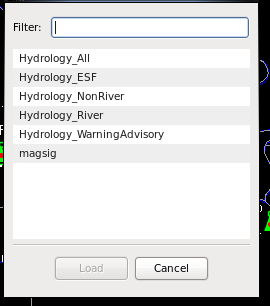
- Choose the Hydrology_NonRiver Setting and click Load. If you currently have any live river flood hazards, they will be filtered from the Console and Spatial Display, leaving only non river hazards. If river flood hazards have been filtered from the display, the HYDRO filter status button will also turn yellow.
When you want to see everything, Hydrology - All is recommended. Choose a more restrictive filter if the console is too busy and you want to focus on a particular group of hazards.
- As you use different settings, they will be added to the "Common Settings" part of the Setup icon menu.
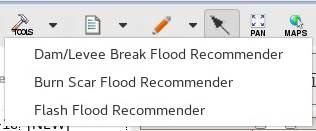
- Click on the TOOLS icon in the console to reveal the available recommenders and notice the River Flood Recommender has been filtered out of the recommender list:
- To load a different setting, click the “Load Settings…” menu.
- While using Hazard Services, you may need to change the Setting. For instance, you may need to display “Ended” or “Elapsed” events that are filtered out by default. You can also configure some column cells to color based on a value (e.g. color the Hazard Type cell background green when Hazard Type is FF.W.Convective). Or in service backup testing, you will need to change the Site IDs that are displayed. Here is a short description of the tabs that set the defaults for a particular Setting:
Hazards Filter - assigns product types, site IDs for service backup, and status types to display
Console - assigns the default columns visible, sorting and secondary sorting conventions, time range display (e.g. 48hrs), and Misc Options (advanced; currently unknown)
Console Coloring - color codes, blinks, or italicizes a column cell based on value
HID/Spatial - sorting conventions for streamName, riverMile, and eventID; Default Duration (advanced; currently unknown); Spatial Display default map center/zoom; Filter Pending By Time (advanced; currently unknown)
Recommenders - recommenders to be displayed in the REC button
Maps/Overlays - sets default maps when Hazard Services is loaded
- To display “Ended” events, go to the SETUP -> Manage Settings -> Edit/Filter menu, and click the “ended” check boxes.
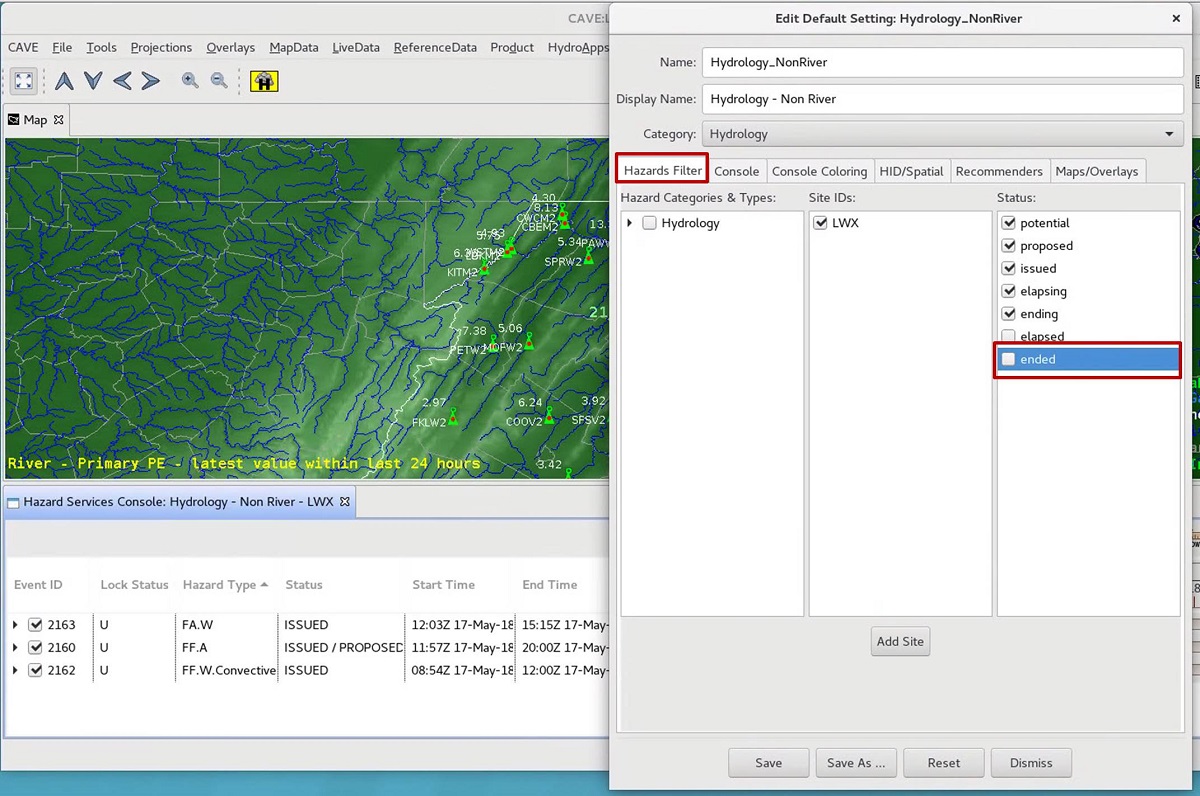
- Once you select the ended hazards, the Console and Spatial Display immediately respond. If you don't have any ended hazards, nothing will change (you may need to come back to this jobsheet after ending hazards in later jobsheets).
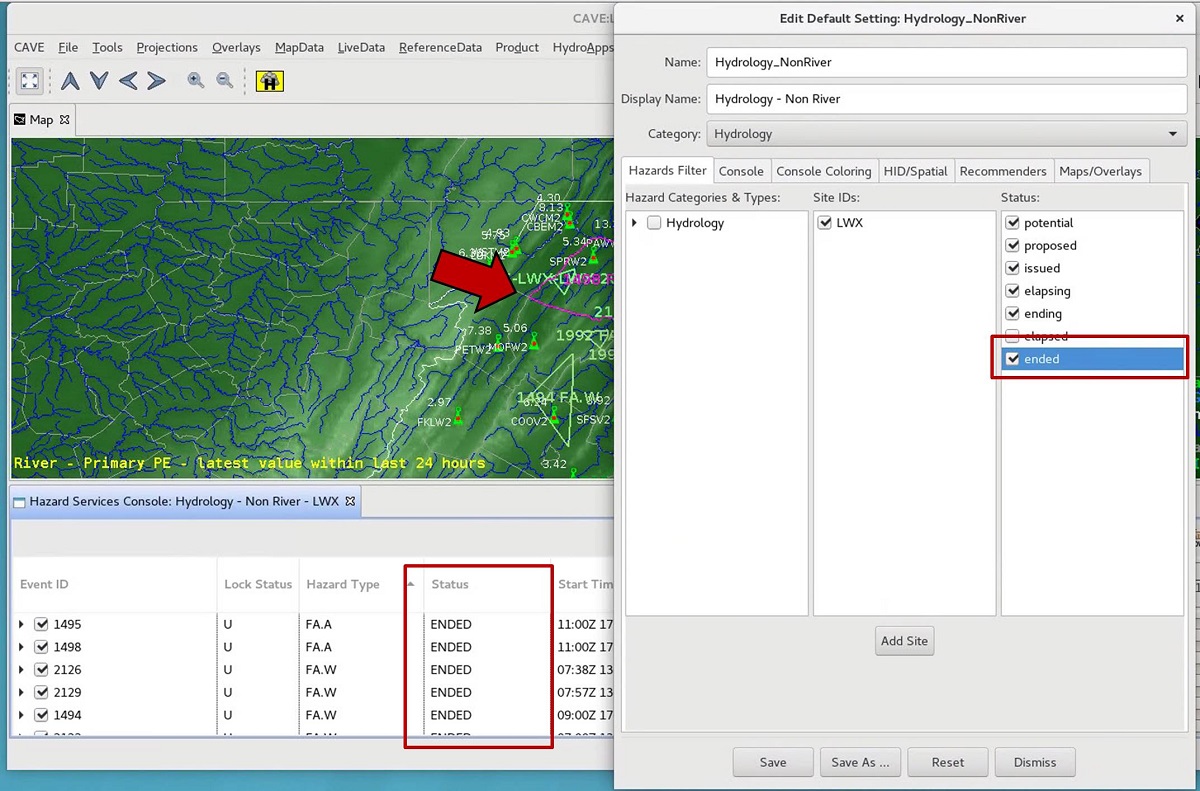
- Toggle off the ended hazards in the Setting editor, and then:
- click on the "Console Coloring" tab
- click on the "Add" button
- in the "New Console Color Configuration" window, select "Hazard Type" from the "Column Name" pulldown menu
- type in the value of a Hazard Type displayed in the Console (e.g. FF.W.Convective)
- change the color sliders to the desired color
- click the "Add" button.
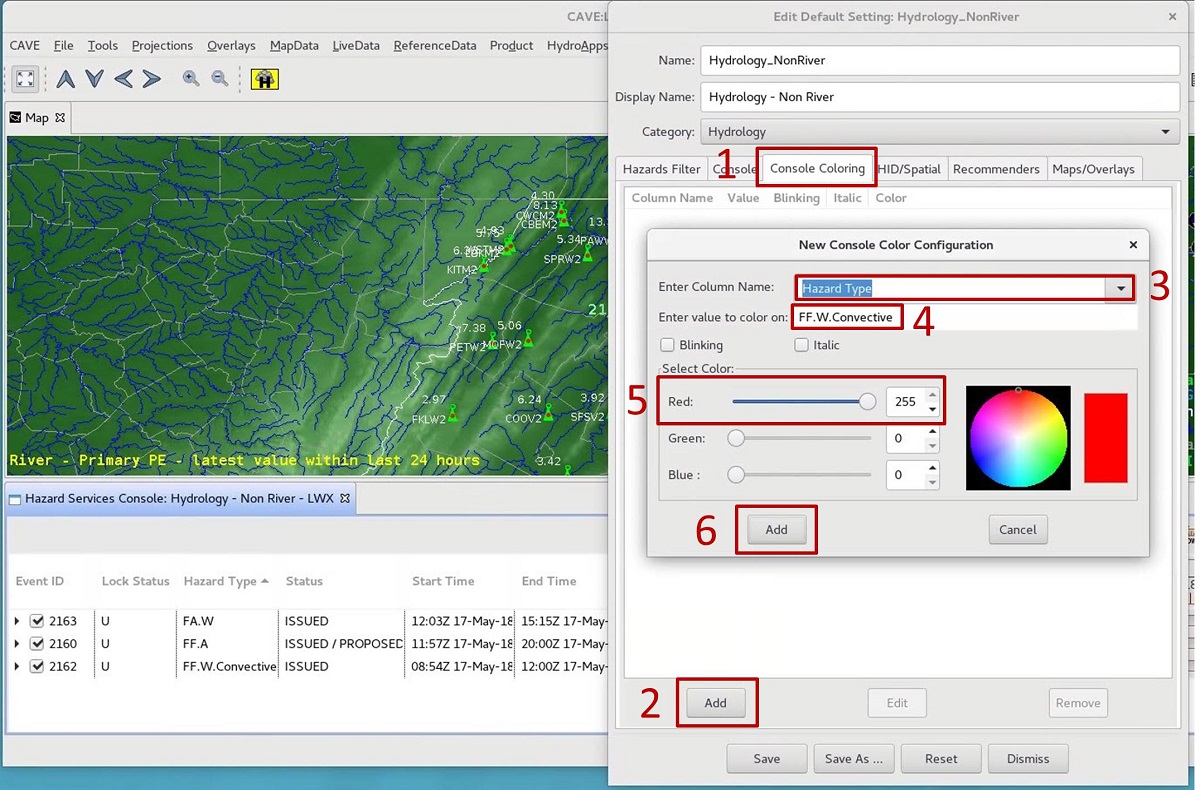
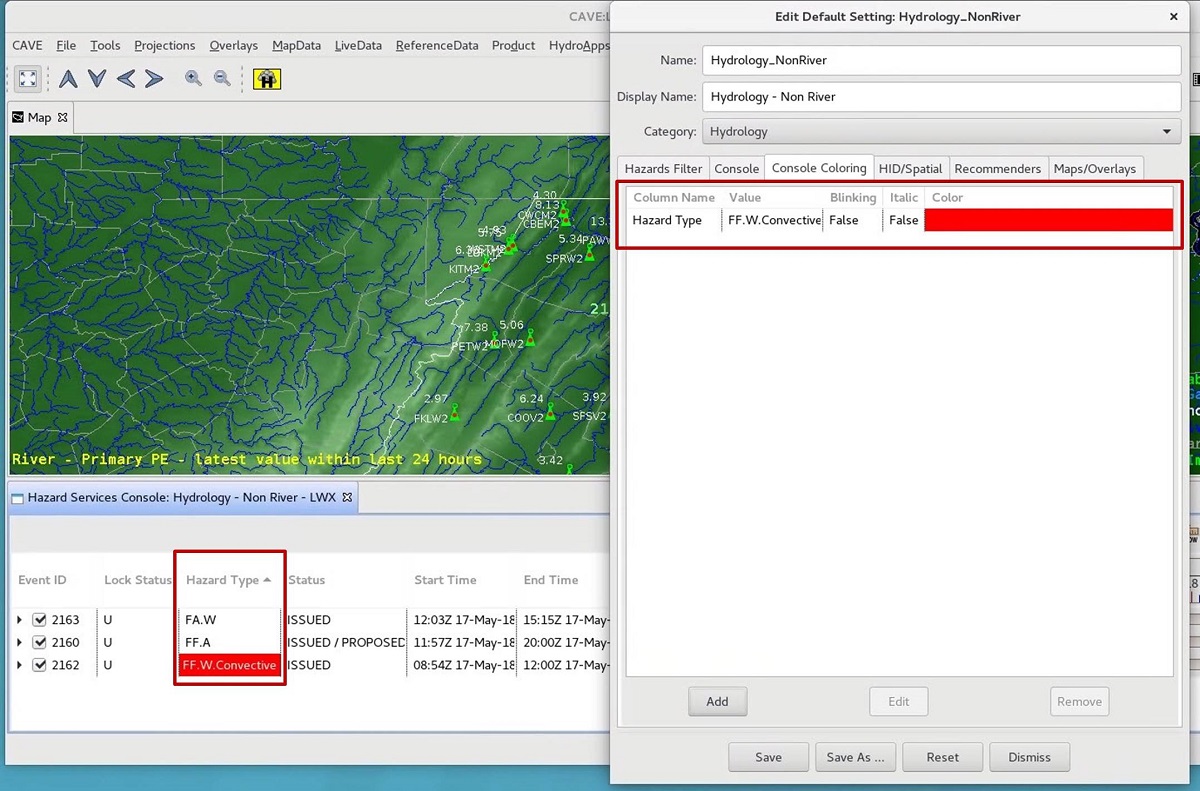
- Note that cell contents will change color.
- Note the format of the Event IDs in the Console, and click on the Console button in the edit Settings window and change the Display EventID Type to "ALWAYS_FULL".
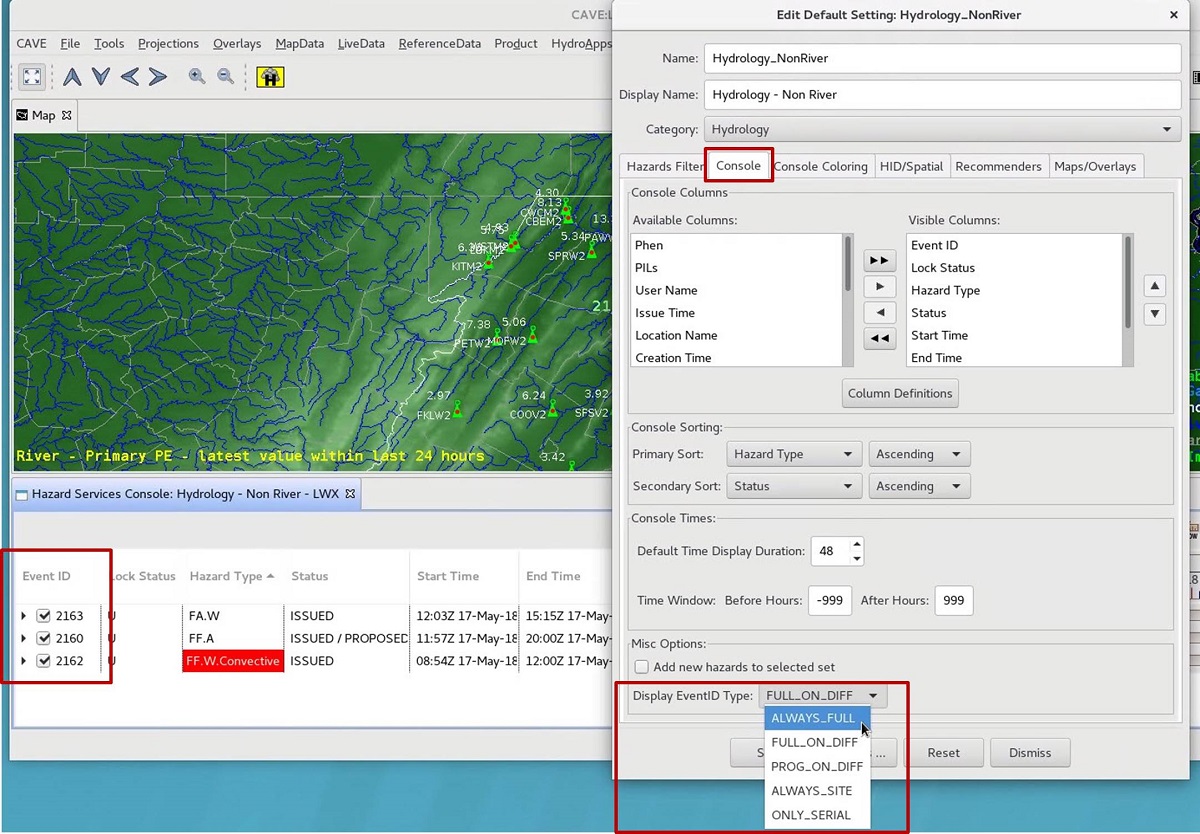
- Hazard Services uses Event IDs to manage hazards internally (not included in products), and the full Hazard Event ID contains the CWA over which the event is valid, followed by the CWA who issues the hazard (e.g. HZ-2018-CTP-LWX-2 would indicate LWX created Hazard Event 2 in service backup for CTP).
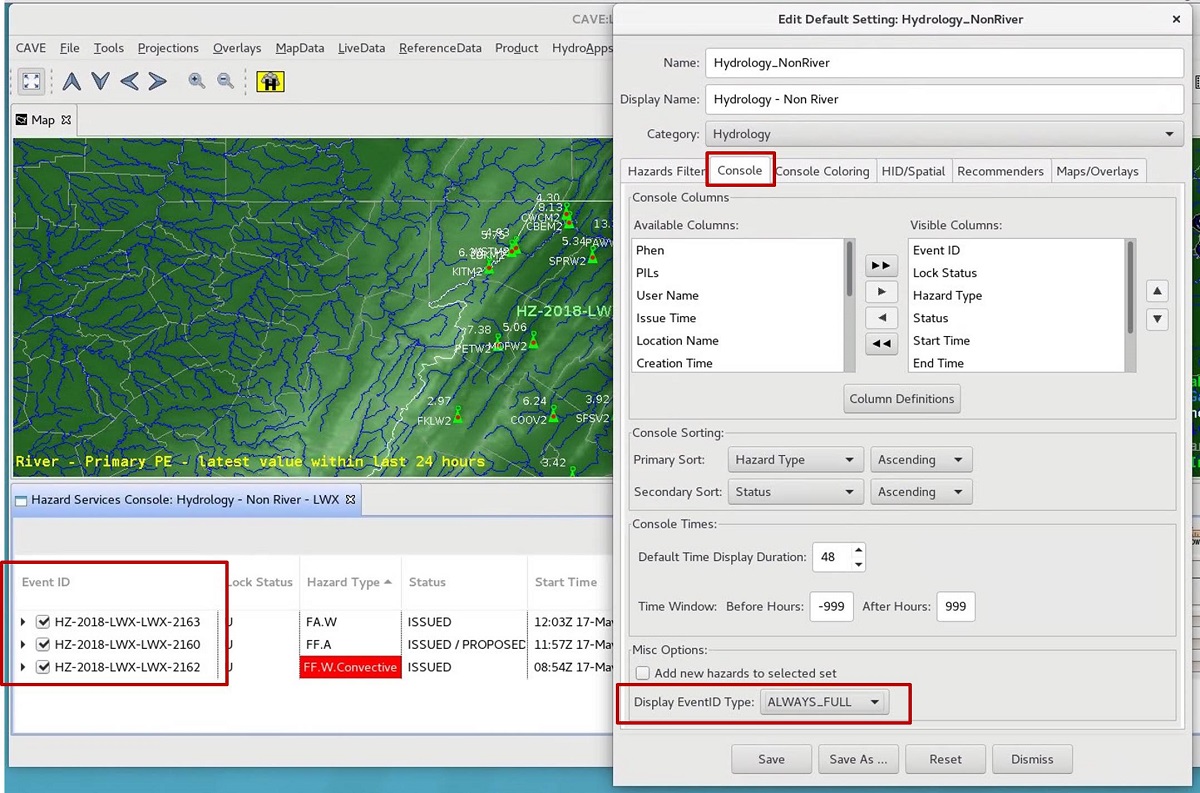
- Normally you are going to want the short name of the Event ID (try Only_SERIAL in the Display EventID Type) to save space in the console, but when in service backup it can be handy to have the long name. If you wanted to save the Setting for later use, you can Save or Save As, and it will make a user override for the Setting being modified (e.g. Hydrology_NonRiver). Click on the Reset button to reset all the changes you have made to the Setting.
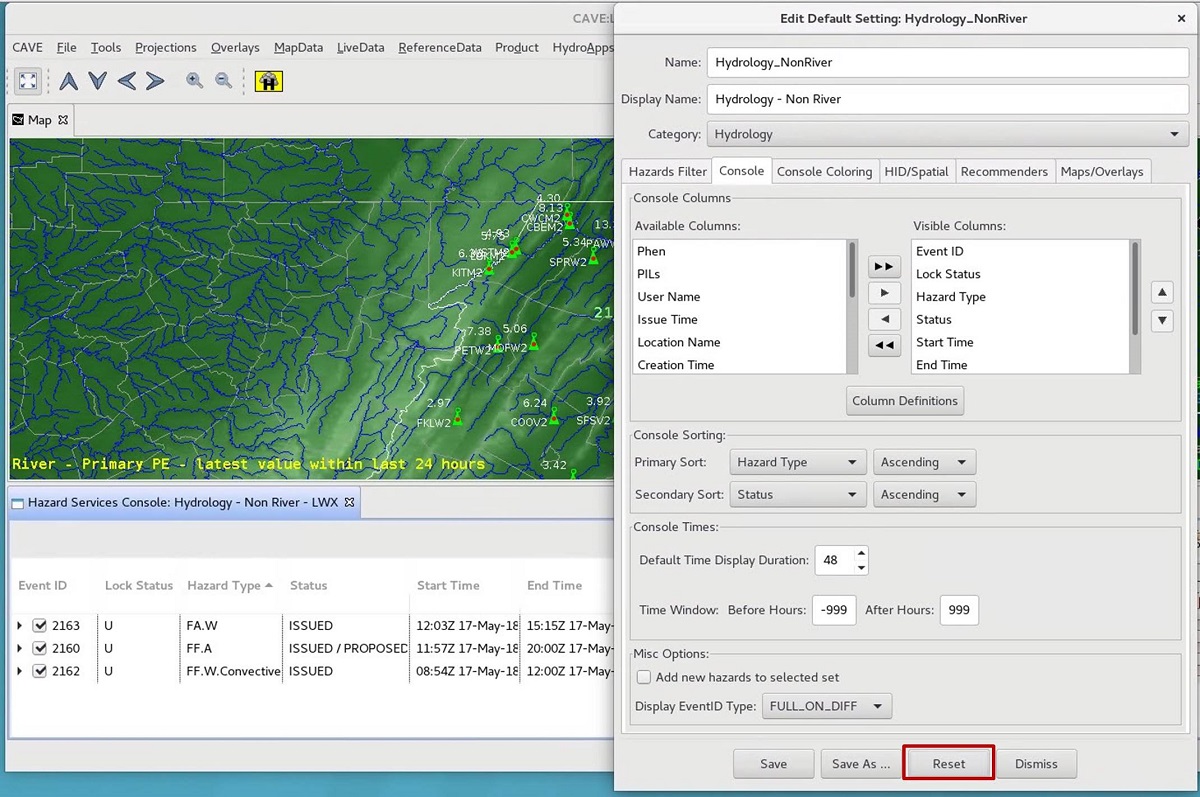
- The "Edit Default Setting" window allows you to change a lot of the other default configuration of Hazard Services displays (notice the various tabs). Many of these are not commonly changed. If you do personalize settings, you should use the Save As button to save your own custom setting.
- To display “Ended” events, go to the SETUP -> Manage Settings -> Edit/Filter menu, and click the “ended” check boxes.
- To make the current Setting the default, click the SETUP icon -> Manage Settings -> Make My Current Default. This Setting will come up by default when you restart Hazard Services, including when you restart CAVE.