


Using the Console (15 min) - Hazard Services
Console: Completion Time ~ 15 min
Purpose:
In this jobsheet you will practice interacting with the different left-click and right-click options in the Console. There is a lot of dynamic capability in the Console that optimizes workflow with Hazard Services.Tasks:
The table in the console is dynamic in many ways. Left-clicking and right-clicking at different locations in the console can produce different results.
Console Columns
- To configure the columns in the Console, right-click on the header row above the hazards. Practice checking on/off any of the boxes like "Time to Expiration".
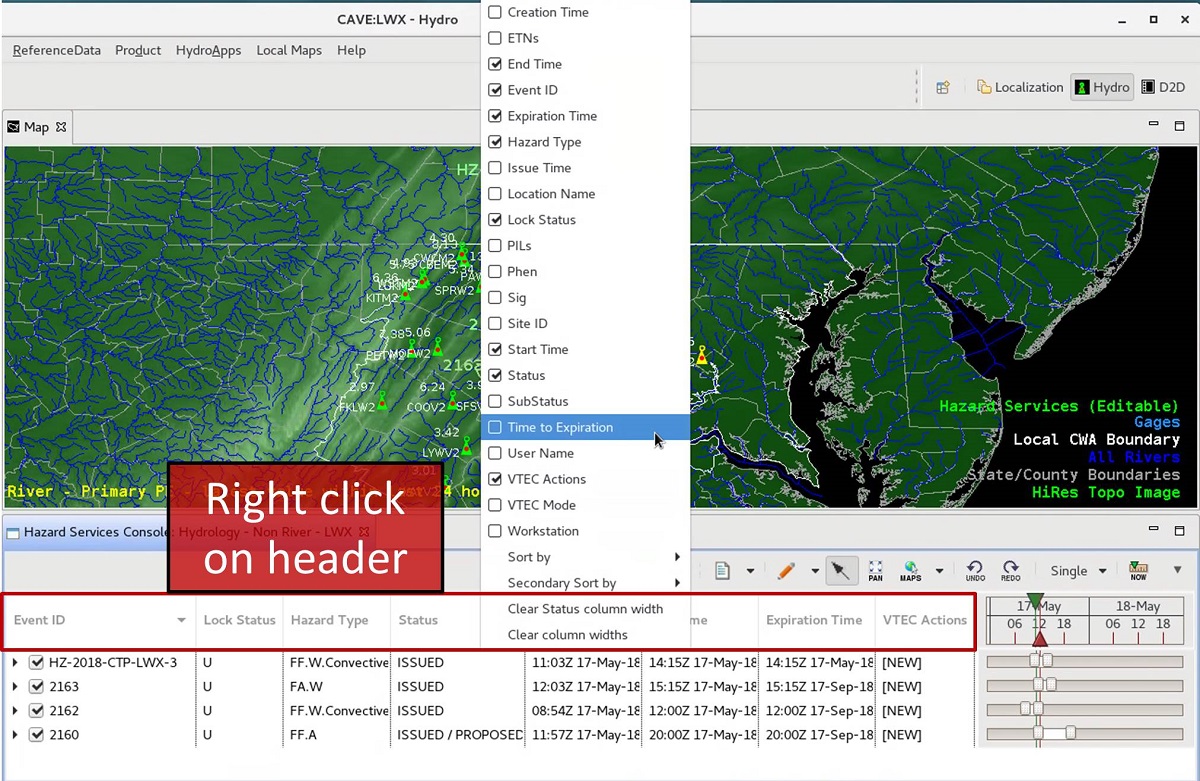
NOTE: Left-clicking on a column header sorts the column, and you can reorder the columns by left click dragging the column header and dropping it where you want it. You can also configure a secondary sort by right-clicking on the header row and selecting "Secondary Sort by". Practice sorting the hazards in the console by left-clicking on the different column headers and moving the columns around.
Options from Right-Clicking a Hazard Row
- Left-click a hazard row in order to select it. Now, right-click the row to see the list of options.
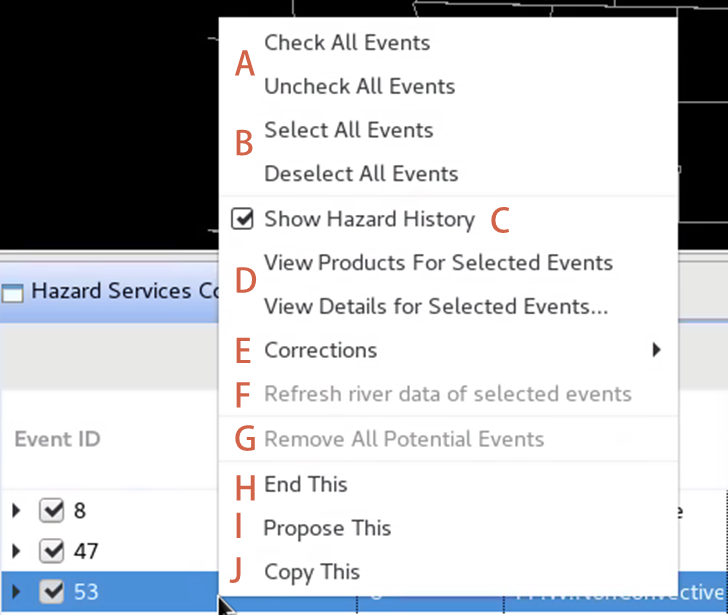
- Toggling the Event ID checkbox in the console will control the visibility of the hazard in the spatial display. The "Check All Events" and "Uncheck All Events" (see A in image above) will effectively toggle all polygons on and off in the spatial display.
- When you select a row in the console, the spatial display will recenter on that hazard and highlight the polygon. The HID will also populate with the contents relevant for that hazard, allowing you to interact with the hazard. The "Select All Events" will select every row (handy for ending multiple hazards at once), and "Deselect All Events" will deselect all rows (B).
- The "Show Hazard History" (C) is on by default and enables the time history of the products to be displayed using the drop-down triangles on the left side of the Console.
- You can conveniently view the product directly using the "View Products for Selected Events", while the "View Details for Selected Events" menu displays a large number of Hazard Services hazard attributes (D).
- If you are within the appropriate time window to issue a correction for the product, you can issue a COR using the "Corrections" menu pullout and "Correct This Event" (E). In Hazard Services when you start correcting a hazard, it puts you in a special mode, and to get out of correction mode you need to use the Cancel Correction option from this menu.
- If you are working with a river hazard for some time and you need to update the new stage levels, clicking "Refresh river data of selected events" (F) will update the river data for your hazards (text changing to "Refresh DATA ONLY for Selected Events" in later builds).
- If you have run a recommender that provides a large number of events, you can conveniently get rid of them using the "Remove All Potential Events" (G). This is particularly useful when you want to rerun the recommender.
- In order to cancel a hazard from the console you need to select the hazard, right-click, and select "End This" (H). You can also end hazards from the spatial display (covered in other jobsheets).
- "Propose This" directly saves the hazard for others to view and collaborate on. This is the same as using the Propose button in the HID.
- "Copy This" creates a new Hazard Event (polygon and ID) based off an existing hazard (text changing to Copy to New Event" in later builds).
Managing Multiple Hazards
Hazard Services can be used to manage multiple hazards at once which is common when running the River Flood Recommender.
- To see multiple hazards at once, left-click at least two rows using the Shift or Ctrl buttons. This creates a Hazard Services "selected set". The Hazard Information Dialog (HID) will pop up with multiple tabs at the top. The lock status icon in the tab will reflect whether the tab is locked or unlocked.
NOTE: If you choose more than two hazards, you may not see all the tabs depending on the size of the HID. Simply widen the display.
NOTE2: In later builds, the order of the text is changing in the Type: selector in the HID. For example the FL.W (RIVER FLOOD WARNING) in the image below becomes River Flood Warning (FL.W). This will be different in the HID images in all the jobsheets. 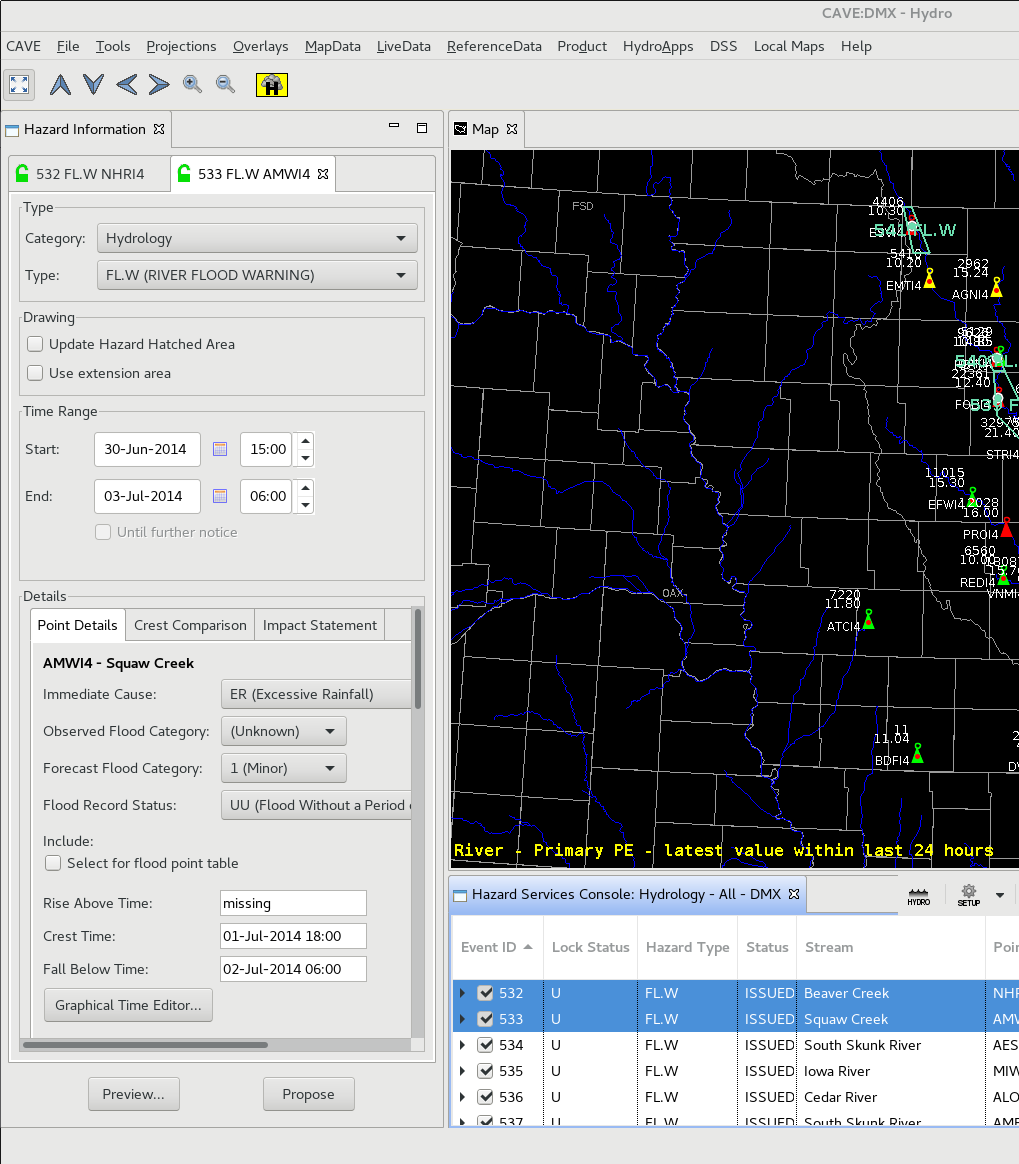
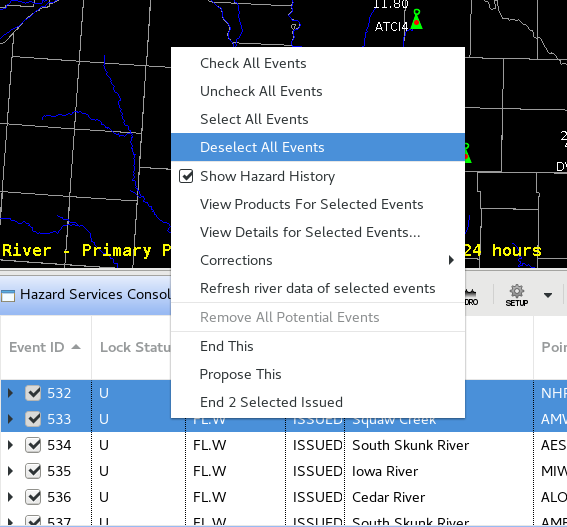
- With multiple hazards selected, right-click on the hazard rows to see the options. All of the options are the same as those mentioned above. The only difference is the "End XX Selected Issued", which simply allows you to end multiple hazards at once.
Time Slider
- In the following steps we will use the D2D Perspective with the hydrology Non River Setting to illustrate the Spatial Display changes associated with the timeline.
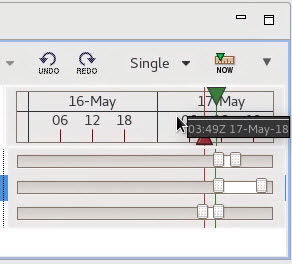
- The time slider on the far right of the console (see image below) controls the time window used to display hazards in the Spatial Display. The green triangle indicates the current time. The red triangle(s) represent the selected time, which can operate in a Single, Range, or Show All Time modes. Click on the button to the left of the NOW button and select Single.
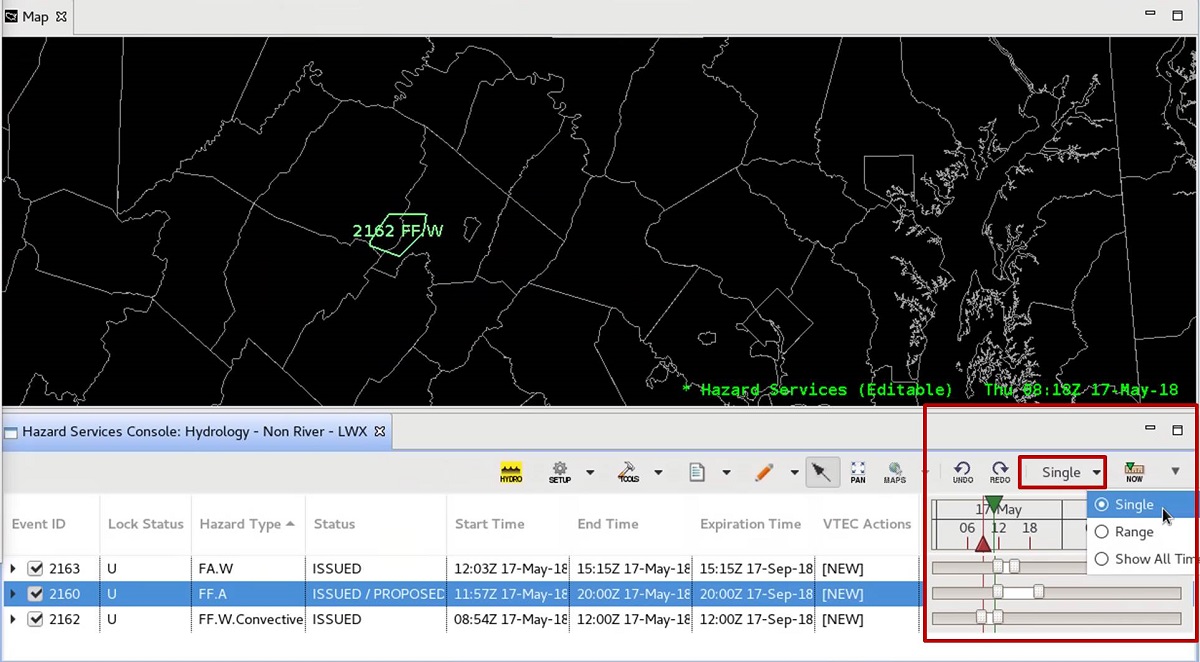
- Grab the red triangle and move it to where it does not intersect one of the white bars indicating the times of each hazard. Your polygons should disappear. Note that filtering the hazard from the spatial display with the time window does not remove the hazard from the console.
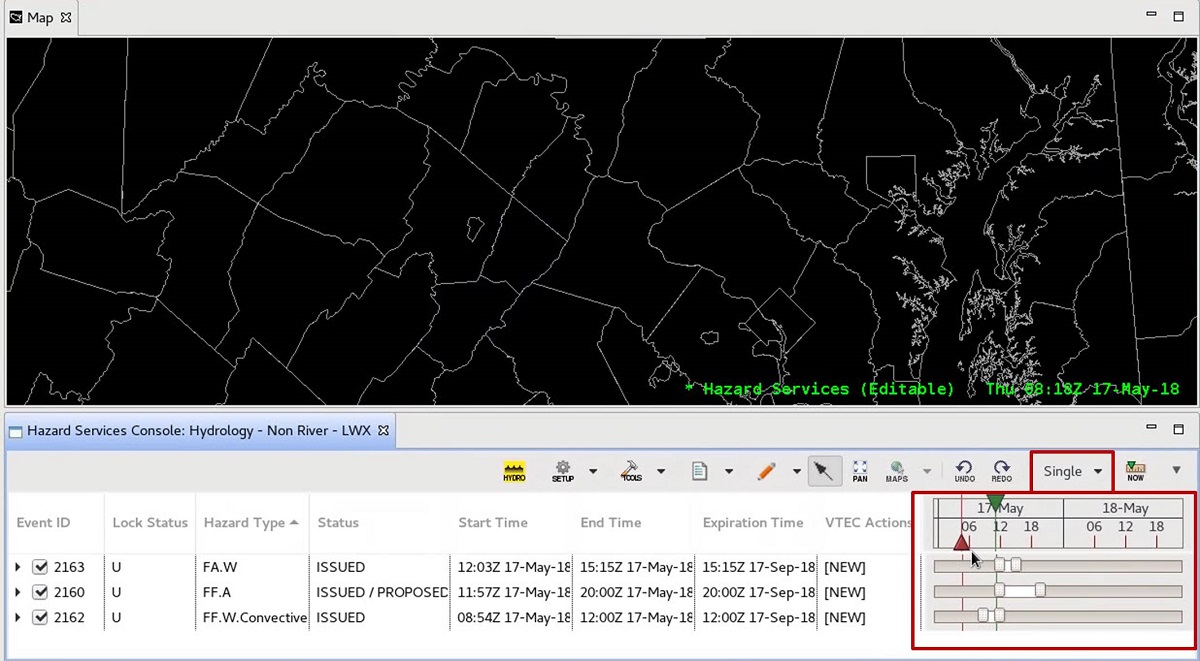
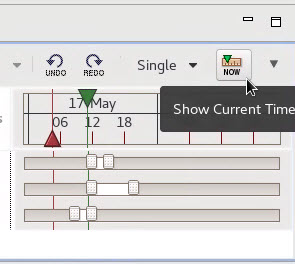
- Click on the NOW button to reset the time to the current time.
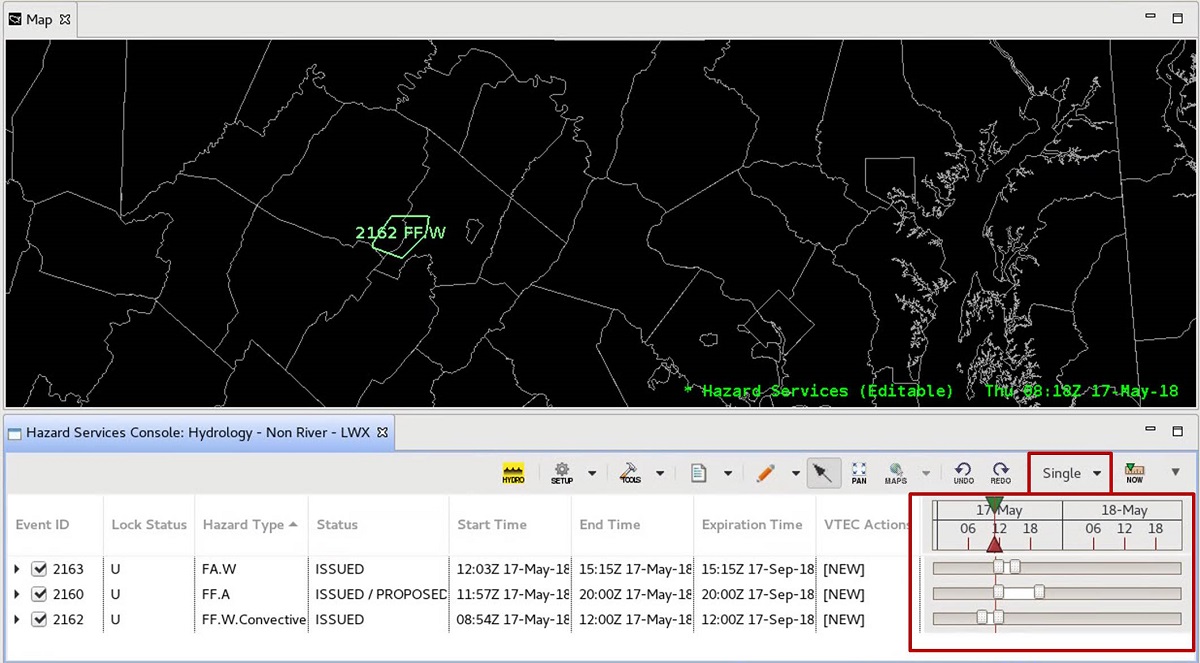
- In the button to the left of the NOW button, select Show All Time to put the time slider in Range mode with the selected time range bound by the earliest and latest times for all hazard currently visible with this Setting. All your polygons should display for the hazards in the Console. You cannot move the split red triangles in Show All Time mode. If you change the mode to Range, then you can adjust the time range for hazards displayed in the Spatial Display using either split red triangle.
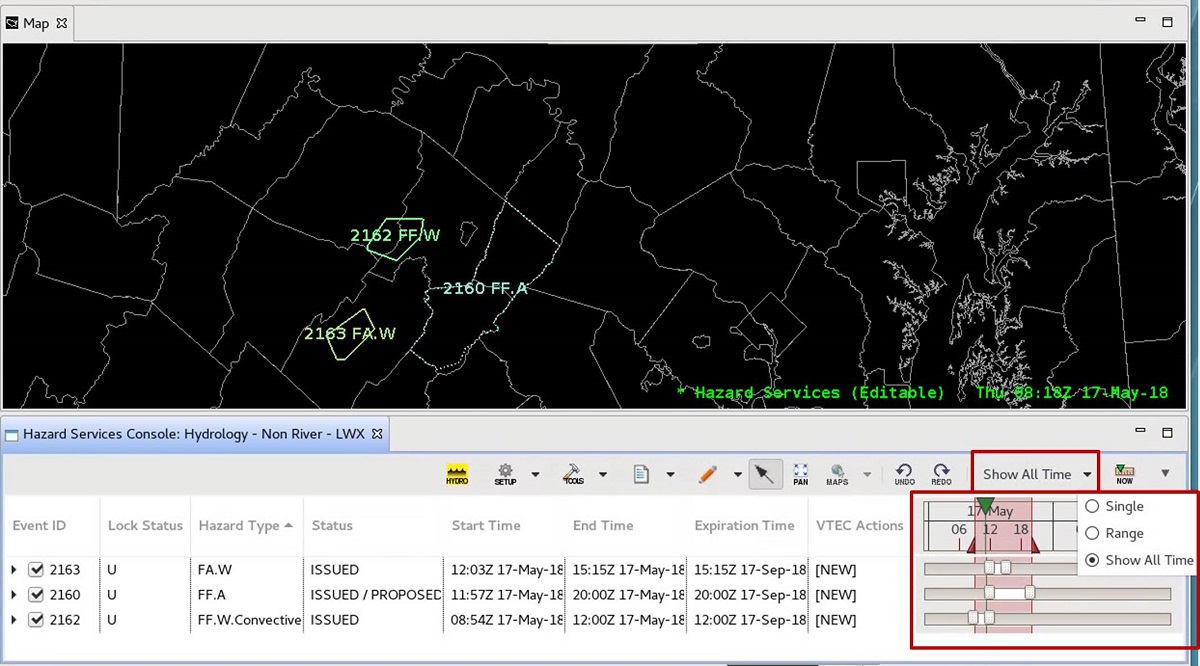
- Note that the time of each hazard is displayed with a white bar bracketed by rectangular fixed slider bars, and the slider controls cannot be moved. You can resize the time window by left click and dragging the timeline header. You can also zoom in and out of the time using the scroll wheel on the timeline header.
- If you choose to use the Single mode, beware when clicking on different hazards as your selected time will change as you select different hazards. This can cause some of your polygons to disappear from the Spatial Display. If you always want to see them on, then you probably want to set your timeline to Show All Time.