


Creating a Non-River Flood Watch (FF.A, FA.A; 10 min) - Hazard Services
Creating a Non-River Flood Watch: Completion Time ~ 10 min
Purpose:
In this jobsheet you will issue a non-river flood watch using the select by area capability for a loaded map. This jobsheet should be done with CAVE in practice mode after the local focal has configured Hazard Services.Tasks:
NOTES:
- Note that you can use any of the drawing tools to create these watches, but the method discussed here is most analogous to the the GHG work flow of selecting zones from a map.
- Note that when Hazard Services transmits a non-river flood watch, it writes out the Fcst and Official grids to the GFE Hazard grids using the area of the polygon in Hazard Services.
- So while your text products are based on zones and do not contain the the polygon information, the GFE Hazard grids are based off the polygons. Because polygon-based watches have not been incorporated into standard policy, most sites should avoid using polygons to create watches to limit confusion in collaborating and publishing the GFE Hazard grids.
- This jobsheet will use the D2D Perspective with the Hydrology All Setting.
- From the Maps menu, load the "Forecast Zones".
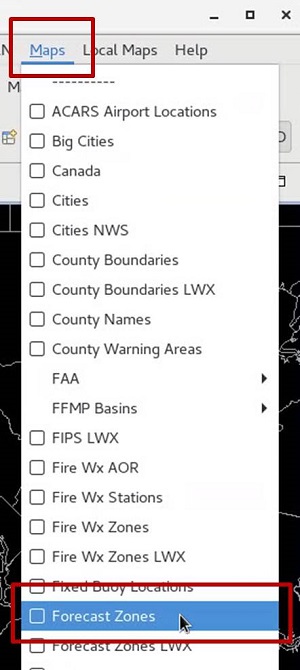
- Click on the MAPS icon on the Hazard Services console to select the "Forecast Zones XXX" map.

- The map boundaries will turn green and the mouse pointer will become a “+”. Left-click specific zones that you want to include in the watch, or left-click and drag over the zones to paint the selected zones in the map.
- Note: if the green selectable map isn't visible over your display, you can change the map overlay characteristics by right clicking on the Forecast Zones (Select By Area) text legend and assigning a new color, width, etc. Currently, the default green color or line characteristics are not configurable.
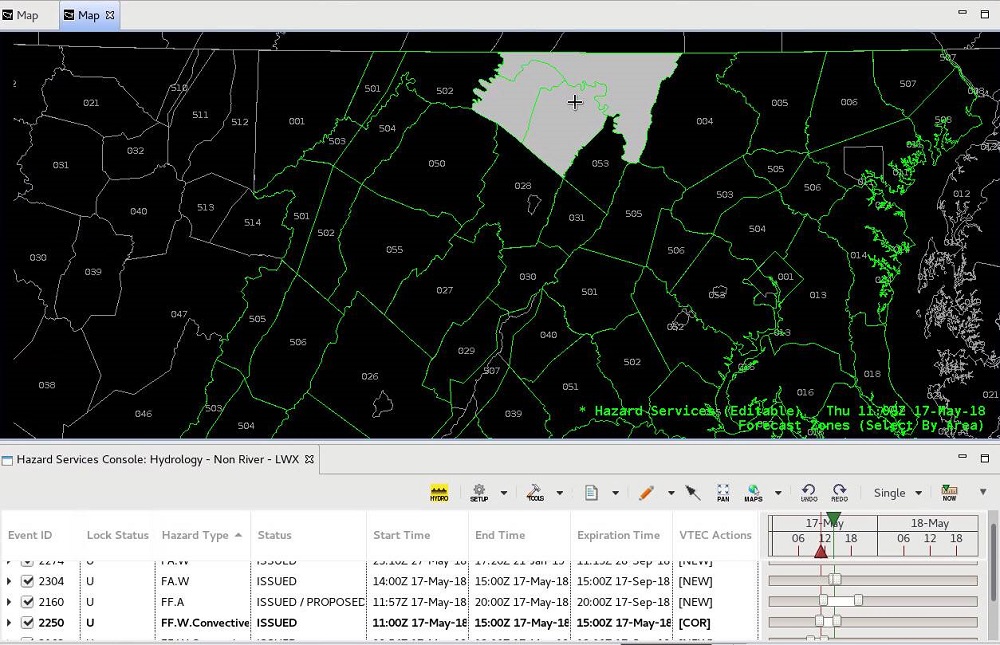
- Note: if the green selectable map isn't visible over your display, you can change the map overlay characteristics by right clicking on the Forecast Zones (Select By Area) text legend and assigning a new color, width, etc. Currently, the default green color or line characteristics are not configurable.
- When done, right-click to trigger the painted area to be converted to a polygon. The HID will open with only the “Hydrology” category selected.
- Note: the Forecast Zones (Select By Area) overlay is removed after creating the polygon, so you will need to select the map from the MAPS icon in the console to generate another polygon. Any color or other map changes to the Forecast Zones (Select By Area) will need to be reconfigured as in the previous step.
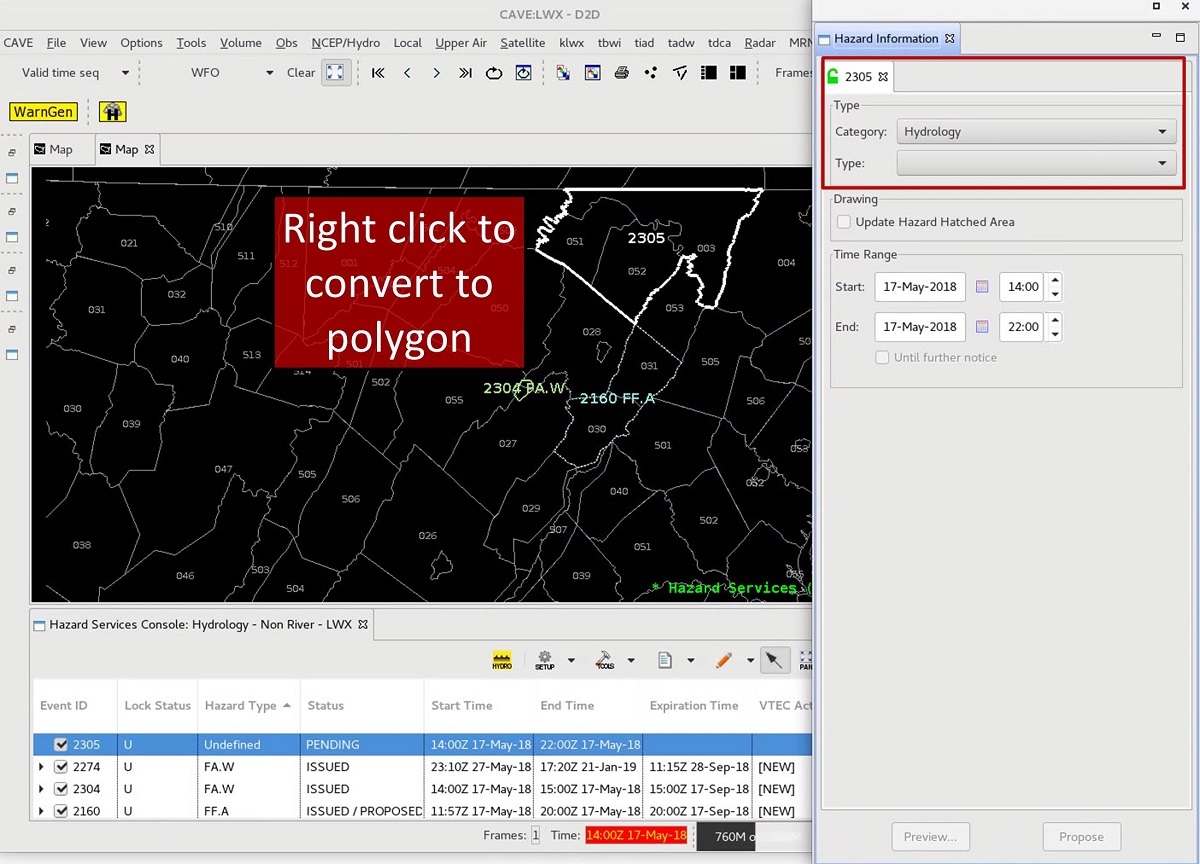
- Note: the Forecast Zones (Select By Area) overlay is removed after creating the polygon, so you will need to select the map from the MAPS icon in the console to generate another polygon. Any color or other map changes to the Forecast Zones (Select By Area) will need to be reconfigured as in the previous step.
- Set the "Type" to be FF.A, and then click Preview. In later builds the FF.A (FLASH FLOOD WATCH) will change to Flash Flood Watch (FF.A).
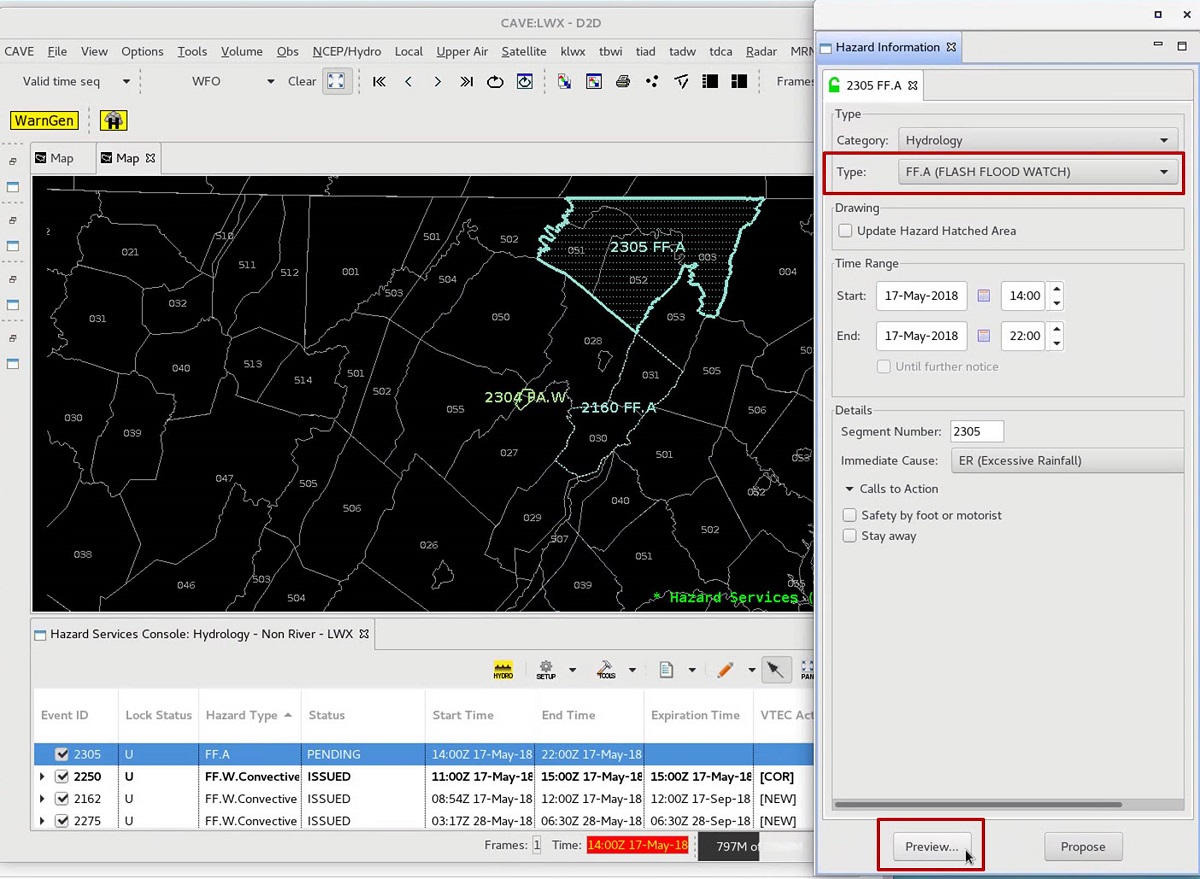
- The Product Editor will open. Enter the necessary details of the Basis Bullet and Impacts Bullet for each zone, and then click "Issue All".

- When the “Live Active Product” dialog comes up, click the "Issue" button.

- To add/remove zones to an existing watch (e.g. create EXA), you will interact with the map after selecting the hazard (see the extension in area jobsheet), and for more complex transitions see the More complex extension in area and time jobsheet).