


Creating Multiple Hazards at Once - Hazard Services
Creating Multiple Hazards at once
Purpose:
This jobsheet will create multiple winter hazards for issuance in one WSWTasks:
NOTE: These jobsheets work best if GFE has data populated in the various winter weather elements.
- Ensure Forecast Zones or Forecast Zones XXX (where XXX is your site ID) are loaded from either GFE or Hazard Services.
- Select the Maps (icon) pull-down menu on the Hazard Services Console Toolbar and Select Forecast Zones or Forecast Zones XXX. Ensure Persist Select By Area is on.

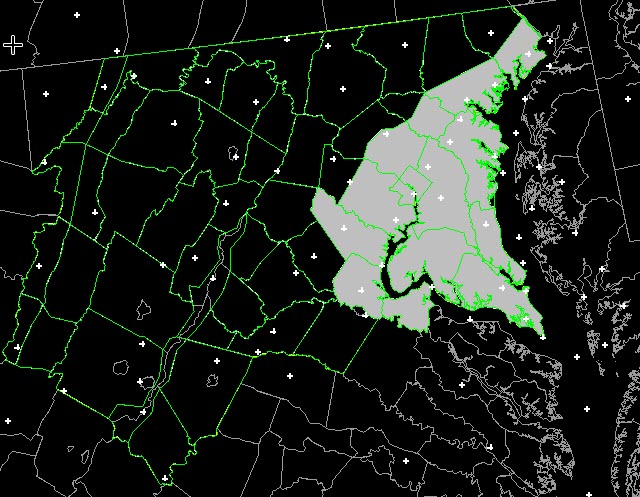
- Verify the Forecast Zones are displayed in green on the Spatial Display:

- In the GFE Grid Manager, highlight the time range you wish the first hazard to cover.
- On the Spatial Display, MB1 (Left-Click) on the desired zones. The selected zones will turn grey as shown below:
-
MB3 (Right-Click) to end the selecting of zones. A white polygon will be displayed on the Spatial Display, delineating the outline of the selected zones.
-
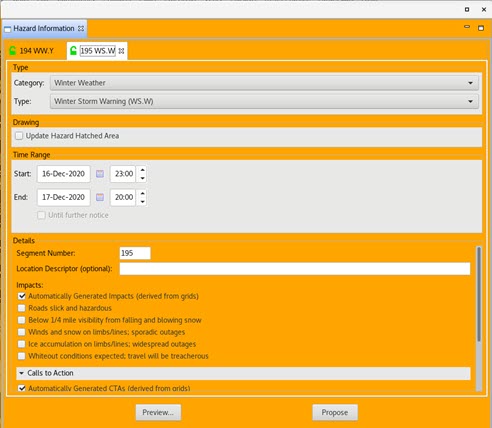
The Hazard Information Dialog launches. Verify Category is set to Winter Weather.
-
Set Type to Winter Weather Advisory (WW.Y). Adjust the valid time as needed.
- Click Propose. Verify the correct Hazards grid is written to the GFE grid manager and that the hazard status is Pending/Proposed in the console.
- In the Grid Manager, adjust the time range, as needed for the second hazard.
- In the Spatial Editor, MB1-click on the desired zones for the second hazard and MB3 to end.
- In the Hazard Information Dialog, select type Winter Storm Warning (WS.W), adjust the valid time as needed, and click Propose.
- Verify the warning was added tot he existing Hazards grid in the GFE grid manager and that the hazard status is Pending/Proposed in the console.
- To generate the WSW text product, select the two hazards from the Console (they turn blue and become checked, as shown).

- The HID will pop up. Verify there are two tabs (WW.Y and WS.W). The HID may look similar to this:
- Select Preview.
- The Product Editor launches.
- Select Issue All and select Issue on the resulting pop-up with a stop sign.
- Verify the events have a Status of ISSUED in the Hazard Services Console, and the VTEC Actions is NEW.
End the Winter Weather Advisory (WW.Y) and Winter Storm Warning (WS.W)
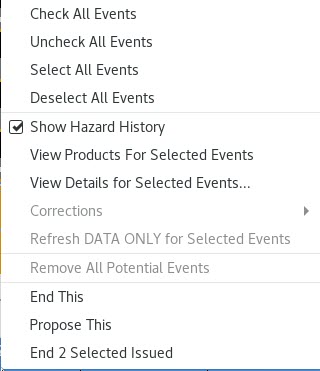
- In the Hazard Services Console, MB3 on the recently created WW.Y and WS.W (select both events using the Shift key).
- Select End 2 Selected Issued.
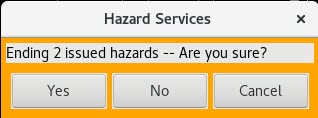
- Select Yes at the prompt ‘Ending 2 issued hazards -- Are you sure?’
- The Hazard Information Dialog launches (if not already opened).
- Select Ending Option(s).
- Select Propose, then select Preview.
- The Product Editor launches.
- Select Issue All → Issue.
- Verify the event has a Status of ENDED in the Hazard Services Console and a VTEC Actions entry is CAN.
- The Hazard Event may disappear from the Console if you have your Filters hiding ENDED events. To view the ENDED events, you may select Setup → Manage Settings… → Edit/Filter … and then enable the ended checkbox.
- Dismiss the dialog box.