


Correcting a Product (5 min) - Hazard Services
Correcting a Product: Completion Time ~ 5 min
Purpose:
In this jobsheet you will issue a correction to a recently issued non-river hydro hazard. Corrections are only possible within 10 minutes of issuing non-river hydro hazard eventsTasks:
Make sure you have issued or updated a non-river hydro hazard within the last 10 minutes.
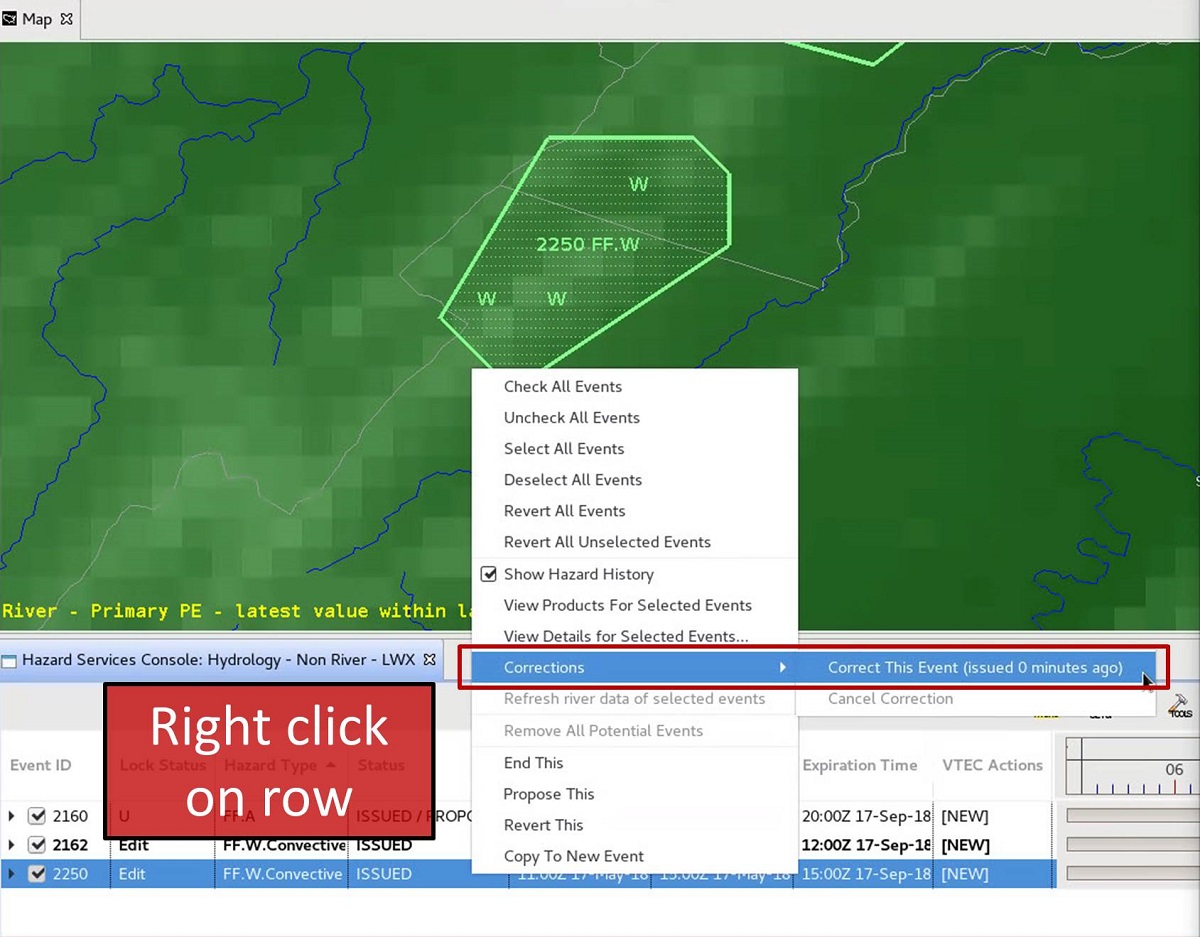
- Left-click on a freshly issued hazard in the console in order to select it. Right-click the hazard row, and in the "Corrections" menu choose “Correct This Event”. Alternatively, you could also go to the Products icon on the console and select "Correct Product". After ten minutes, the "Corrections" menu will become greyed out and unusable.
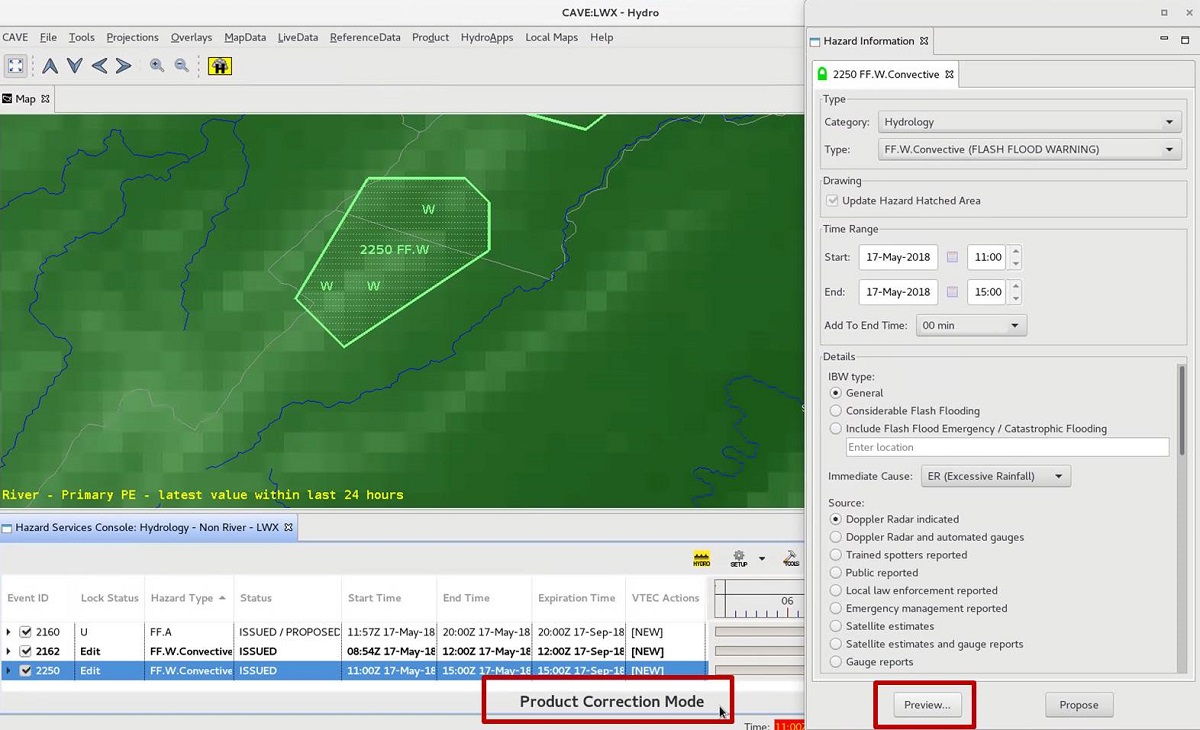
- Depending on the product you are correcting, you will get a pop-up that asks you to "Select initial Segment(s) to Correct" (click "Continue" if appears). Once you start correcting a product you have entered a special mode in Hazard Services. You will see Production Correction Mode labeled on the bottom of the Console.

Now the HID knows to assign a correction to the hazard (COR) and not continue (CON) or cancel (CAN), so you must finish this correction before working with other hazards. If you decide not to correct the hazard, you will need to return to the hazard's "Corrections" menu and select "Cancel Correction" before you can work with other hazards (see #1 image).
- When the HID opens click the "Preview" button. Note depending on which product you are using you may encounter a Product Staging dialog (if so, click Continue).
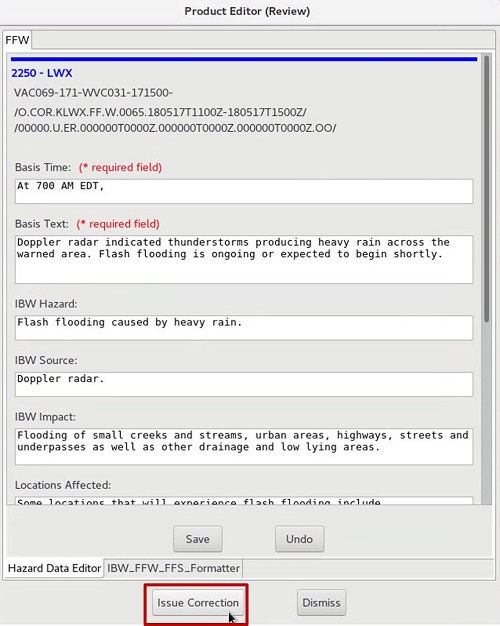
- In the Product Editor make some text changes to the product and then click "Issue Correction". In later builds the "Issue Correction" button is changing to "Issue All" and "Review Correction", so you will be reviewing the correction by clicking on "Review Correction" and issuing the correction by clicking "Issue All".
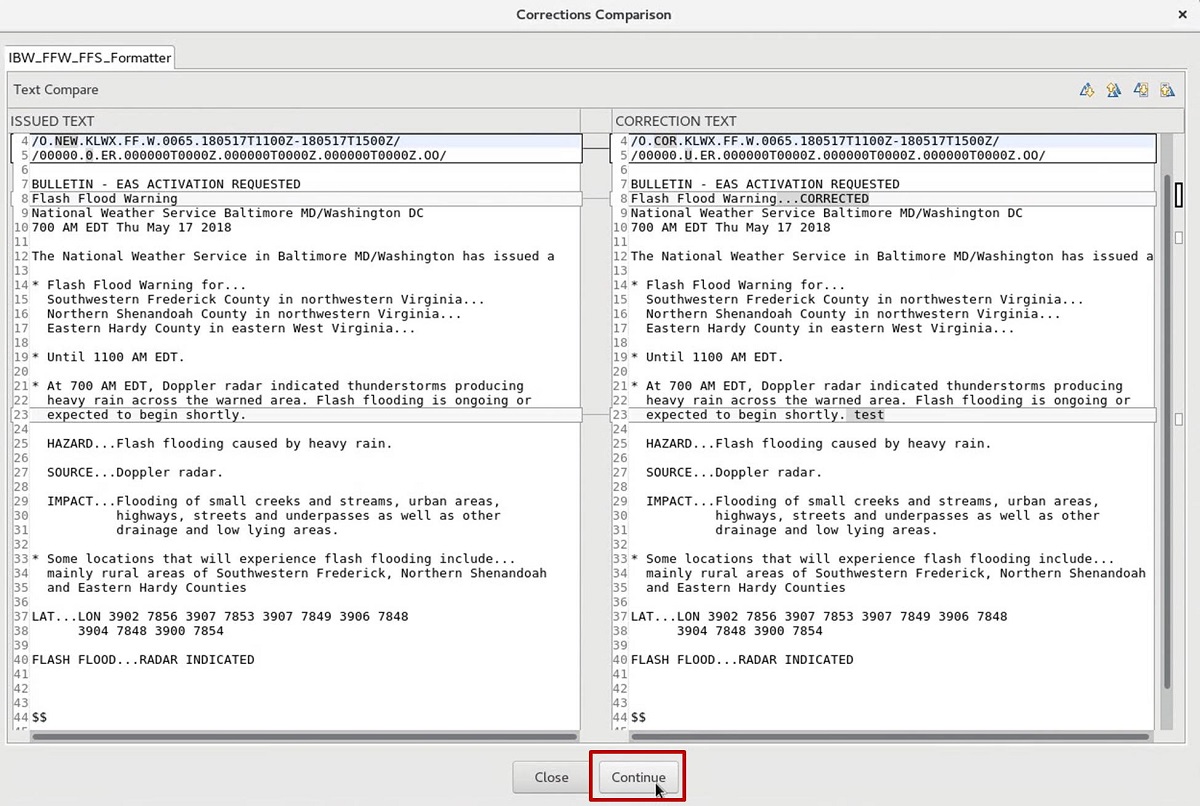
- A "Corrections Comparison" window will pop up. The original ISSUED text will be displayed next to the initial CORRECTION product. Make sure everything is correct in the corrected text product and note any differences between the two. Then click Continue. In later builds this is changing to just be a "Dismiss" button.
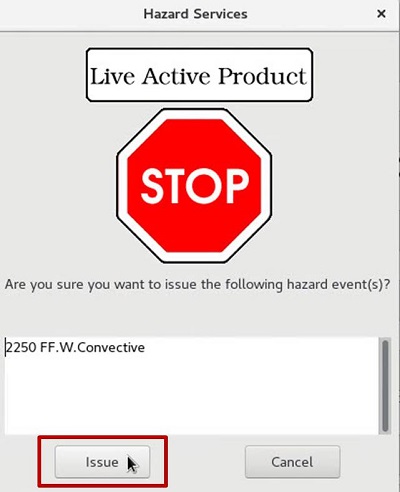
- In the Live Active Product window click Issue.
- Your VTEC Actions entry will change to COR in the console.
