


Following Up a Non-River Event (20-30 min) - Hazard Services
Following up a non-river event (completion time 30min)
Purpose:
In this jobsheet you will issue follow-up statements, extend events in time, and extend events in area for non-river events. This jobsheet should be done with CAVE in practice mode after the local focal has configured Hazard Services and you have issued a non-river event in the previous jobsheet.Tasks:
Sections
This jobsheet assumes you created a non-river hazard and are ready to follow that up. This will work best if the coverage is over multiple counties. We will use an areal flood warning (FA.W). See the Short-Fused jobsheet for how to create a non-river hazard.
- To follow up a hazard, simply select the hazard row from the console or select the polygon from the spatial display.
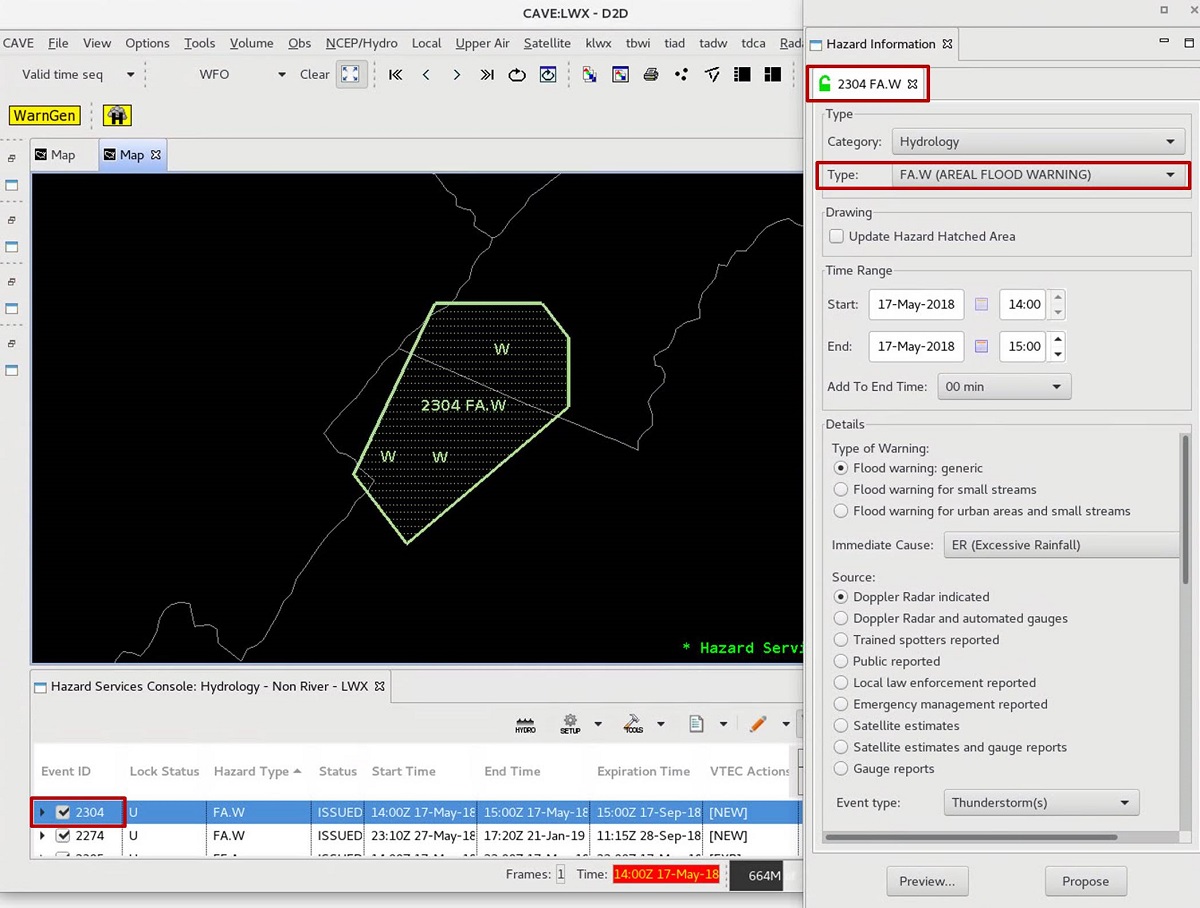
- If your polygon covers multiple counties with a short-fused polygon-based hazard, then go ahead and shrink the polygon by dragging vertices. Modify any text in the HID for your follow-up statement. Click "Preview" in the HID.

- If you shrunk the polygon and triggered removal of a county, the Product Editor will contain a CAN and CON. If you have entered the time window for the EXP near the end of the hazard, then you will get an EXP. Note that in a partial cancellation there is no manual selection of "Ending Synopsis" in the HID as in a full cancellation (see jobsheet on Ending an Event), so you need to pay attention to the default Ending Synopsis and make any situation-specific changes. Modify your text and click "Issue All".
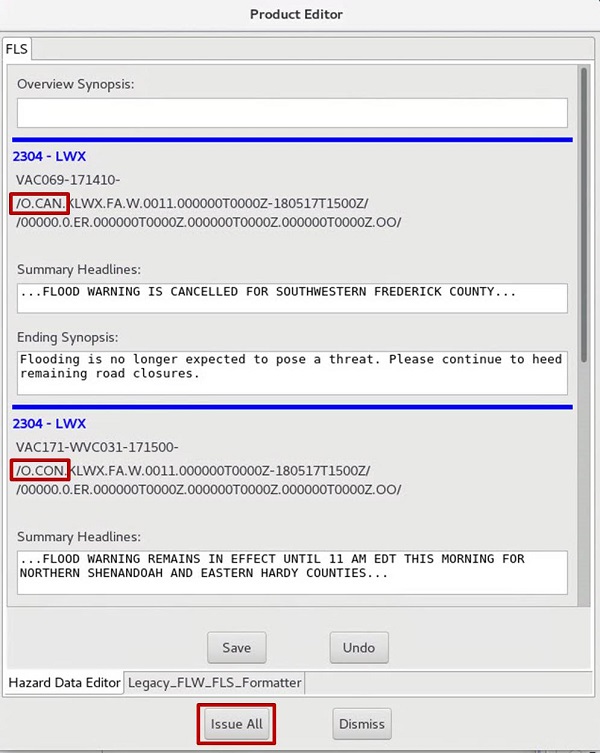
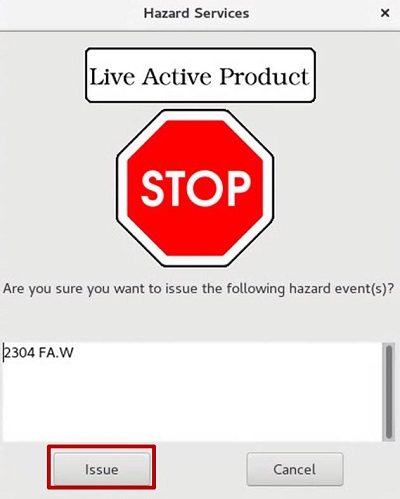
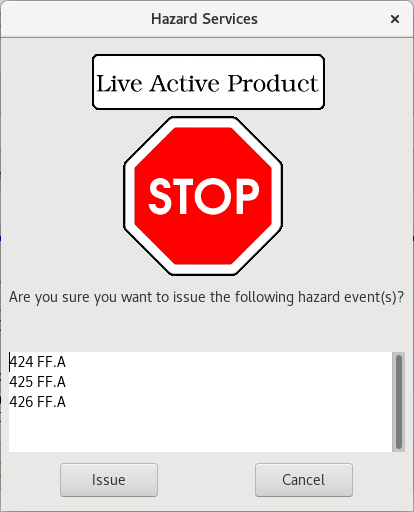
- When the "Live Active Product" dialog comes up, click the "Issue" button.
- The Console will update with the new event. When "Show Hazard History" has been enabled in the console (default), you can see the history of the CAN/CON update by clicking on the triangle next to the Event ID.

2. Extension in area (where allowed by policy)
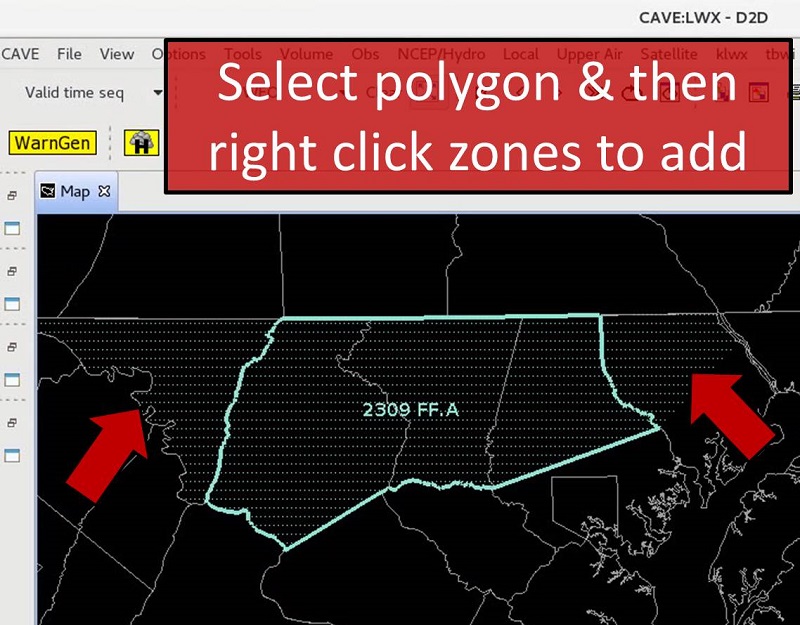
- Select an existing hazard in the console or spatial display that you want to extend in area. This example will extend the area of an FF.A.
- Right-click a neighboring zone or zones to add to the event (they will become hatched).
- Modify the HID if desired and click "Preview".
- The spatial display will merge the new area and two segments will display in the Product Editor: a CON for the zones that were previously part of the event and an EXA for the recently added zones. Modify any of the required bullets, and click "Issue All".

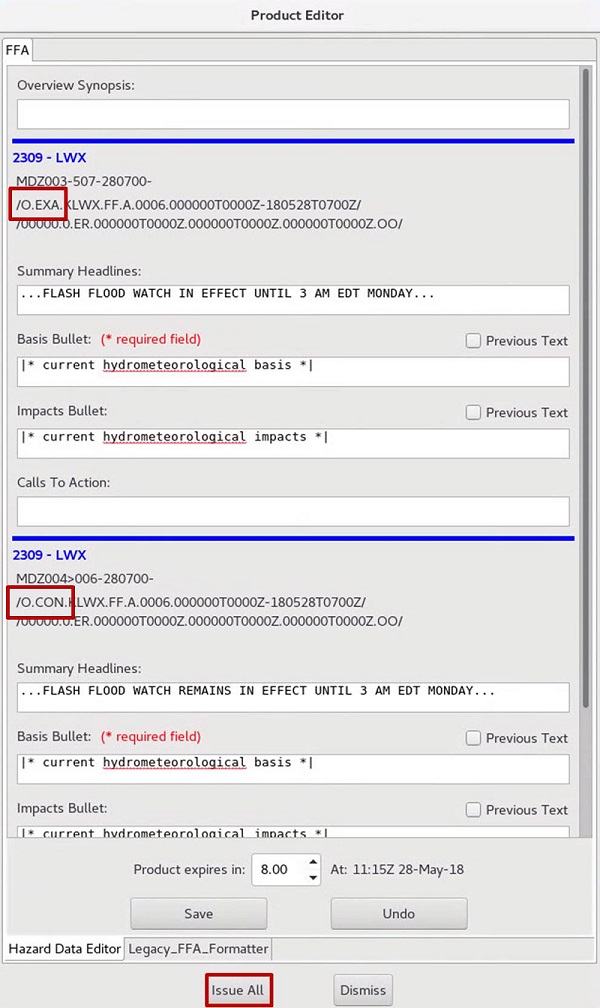
- The spatial display will merge the new area and two segments will display in the Product Editor: a CON for the zones that were previously part of the event and an EXA for the recently added zones. Modify any of the required bullets, and click "Issue All".
- When the “Live Active Product” dialog comes up, click the "Issue" button.

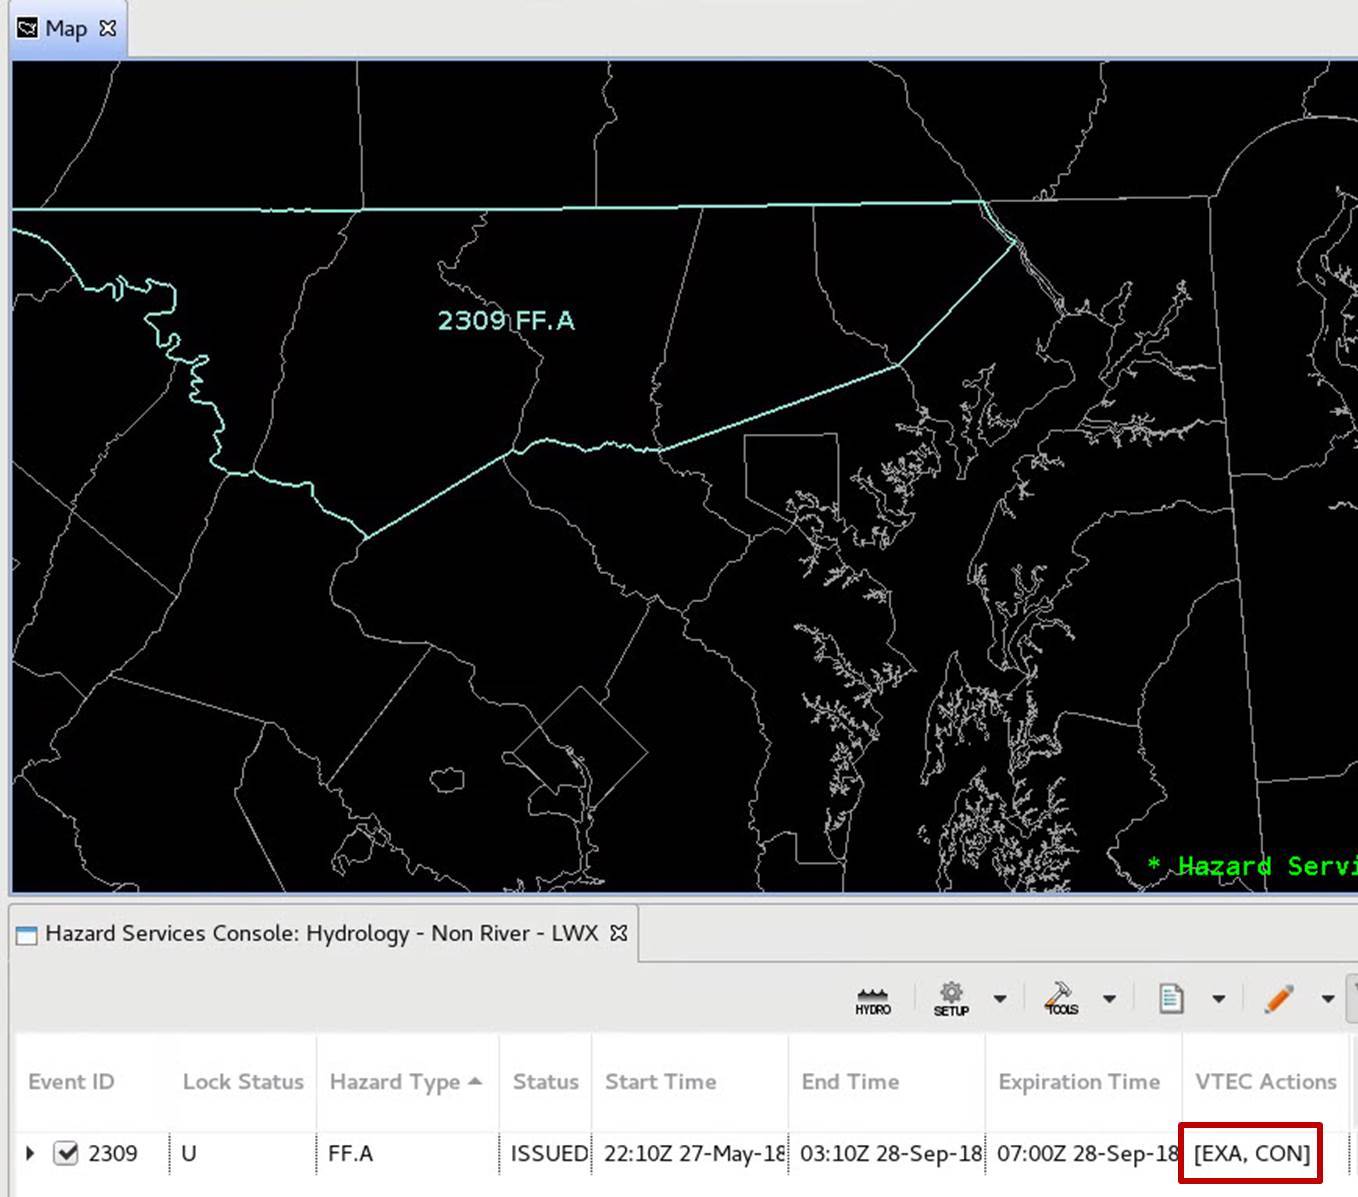
- The Console will contain an EXA in the VTEC Actions column.
- This jobsheet will walk through extending a long-fuse flash flood watch in time with no change in area.
- Note: Short-fuse hazards have different rules than long-fuse hazards. When you extend a short-fuse FFW in time, you cannot modify the area at the same time. An ideal approach for short-fuse hazards is to change the area first with an FFS and then issue the EXT. If you instead issue the EXT first and then trim the area, if you have a considerable or catastrophic tag, that would trigger the Wireless Emergency Alerts unnecessarily for those who are being removed.
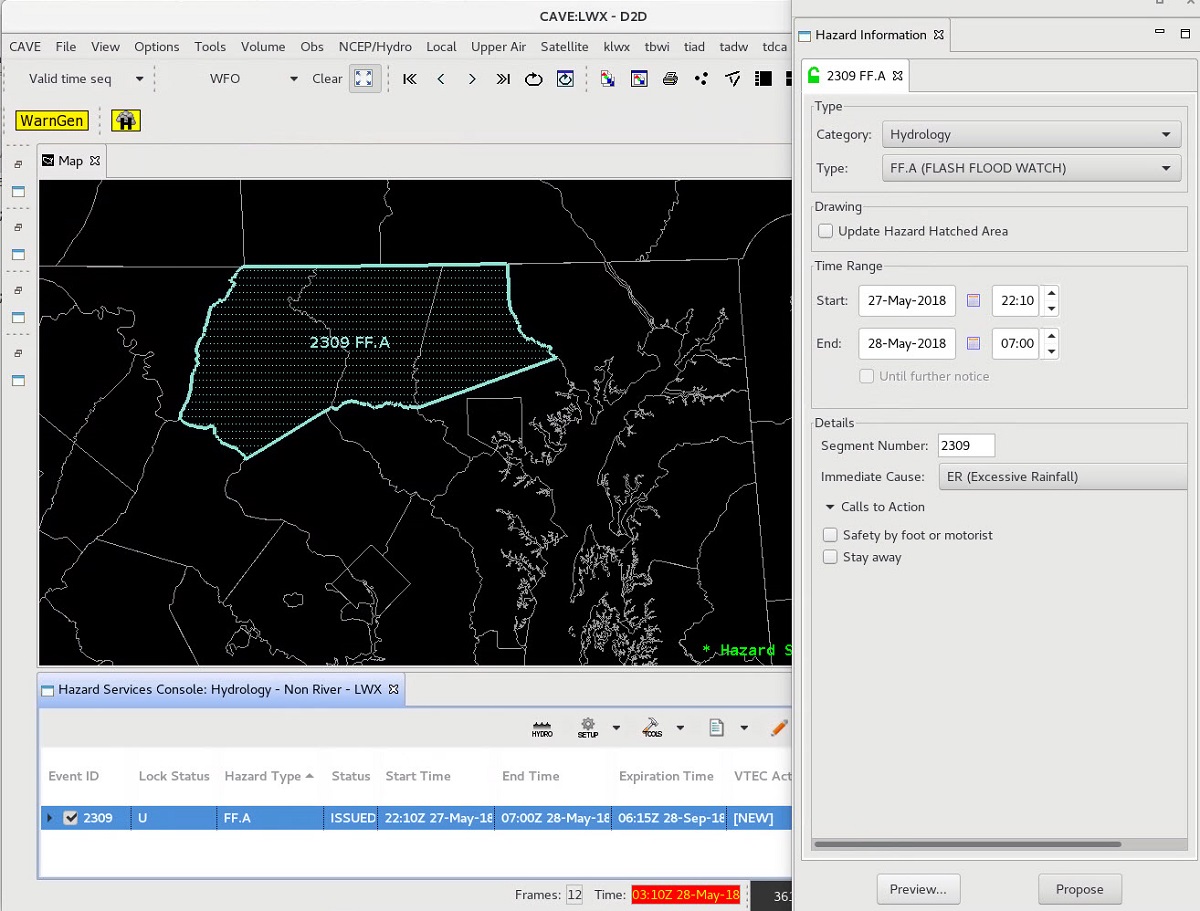
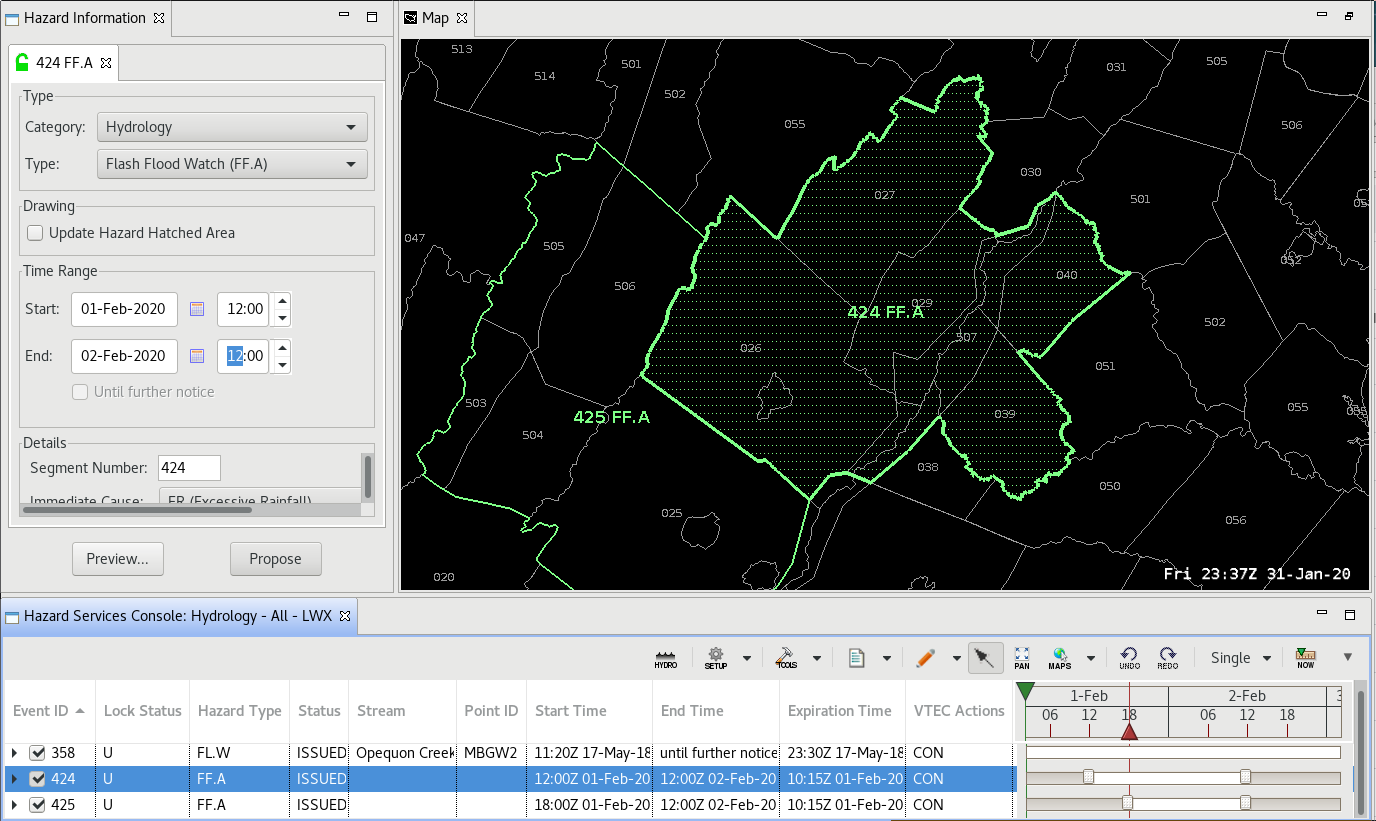
- Select an existing hazard in the console or spatial display that you want to extend in time. This example will extend a flash flood watch in time.
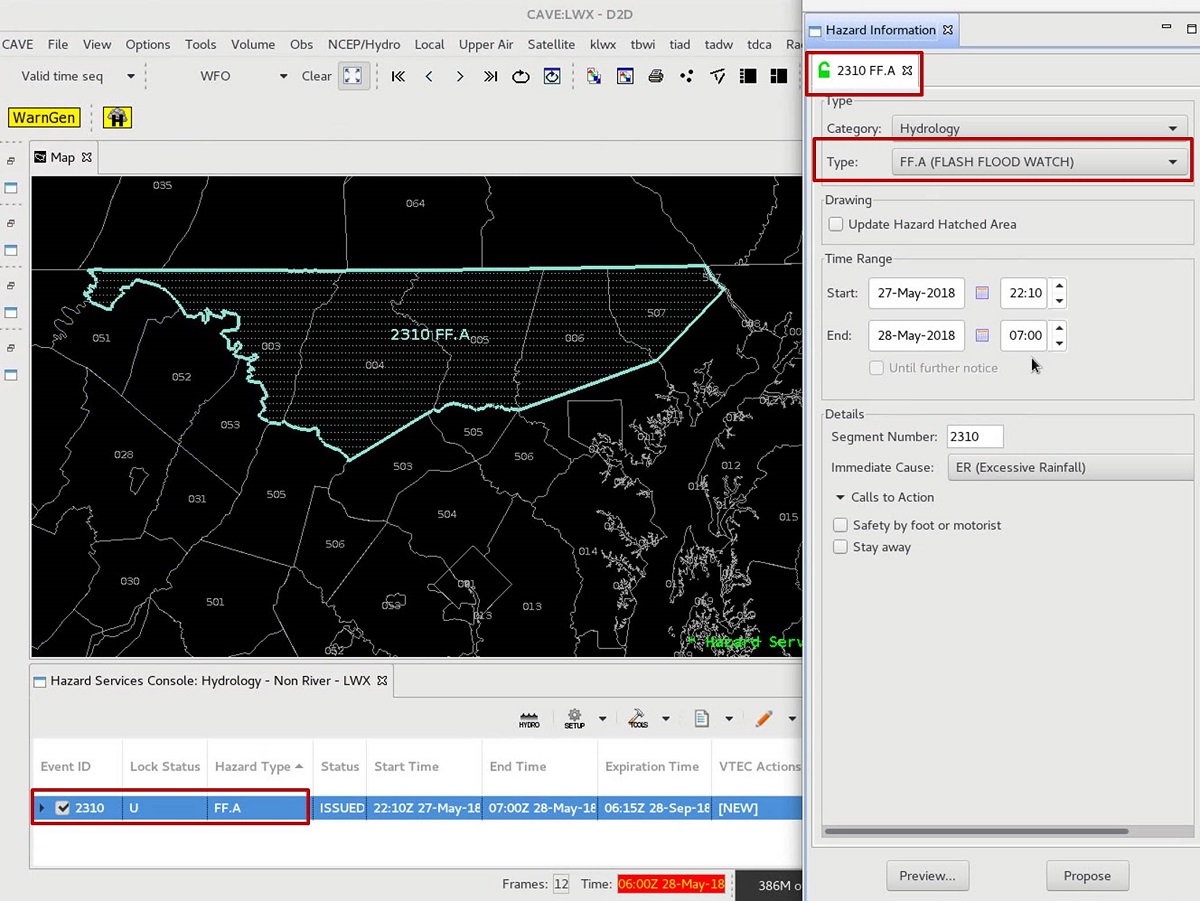
- For non-river events, extend the End time in the HID to the time desired and click "Preview".
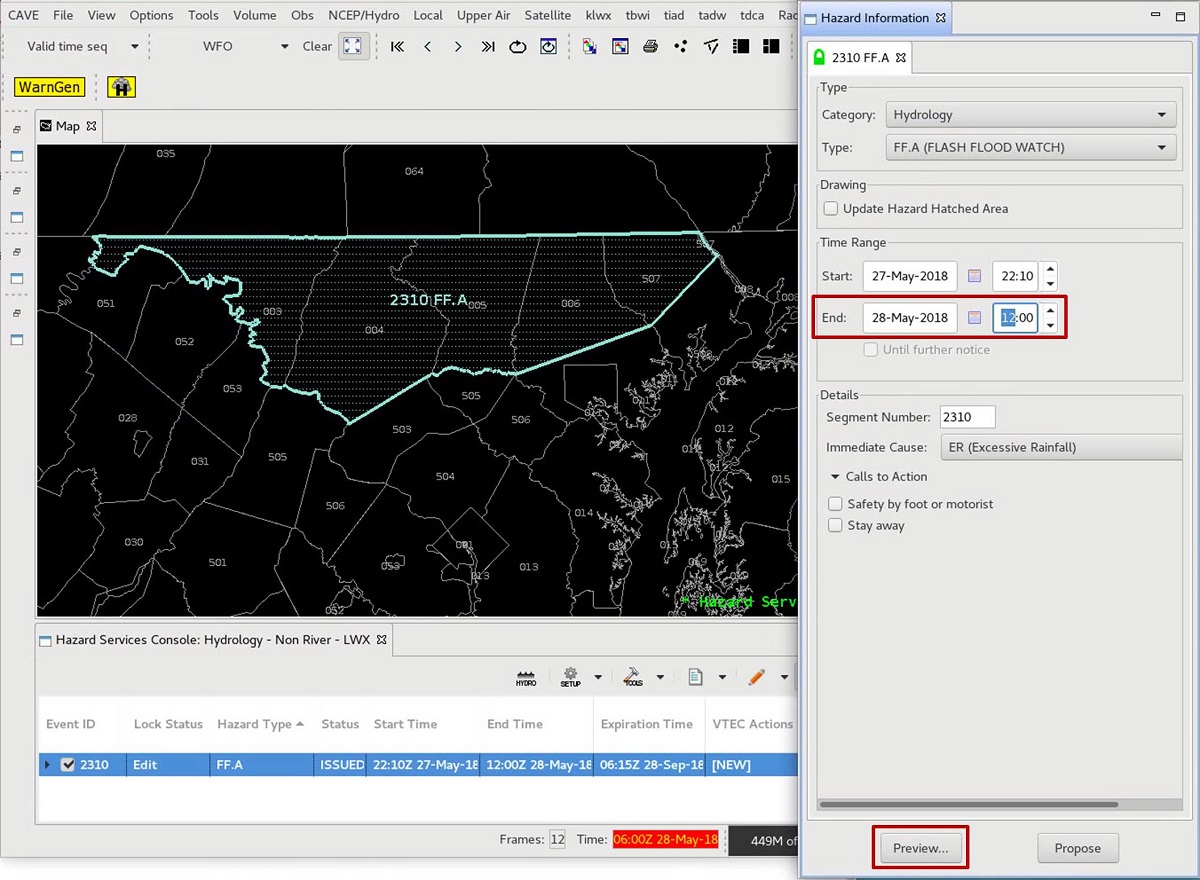
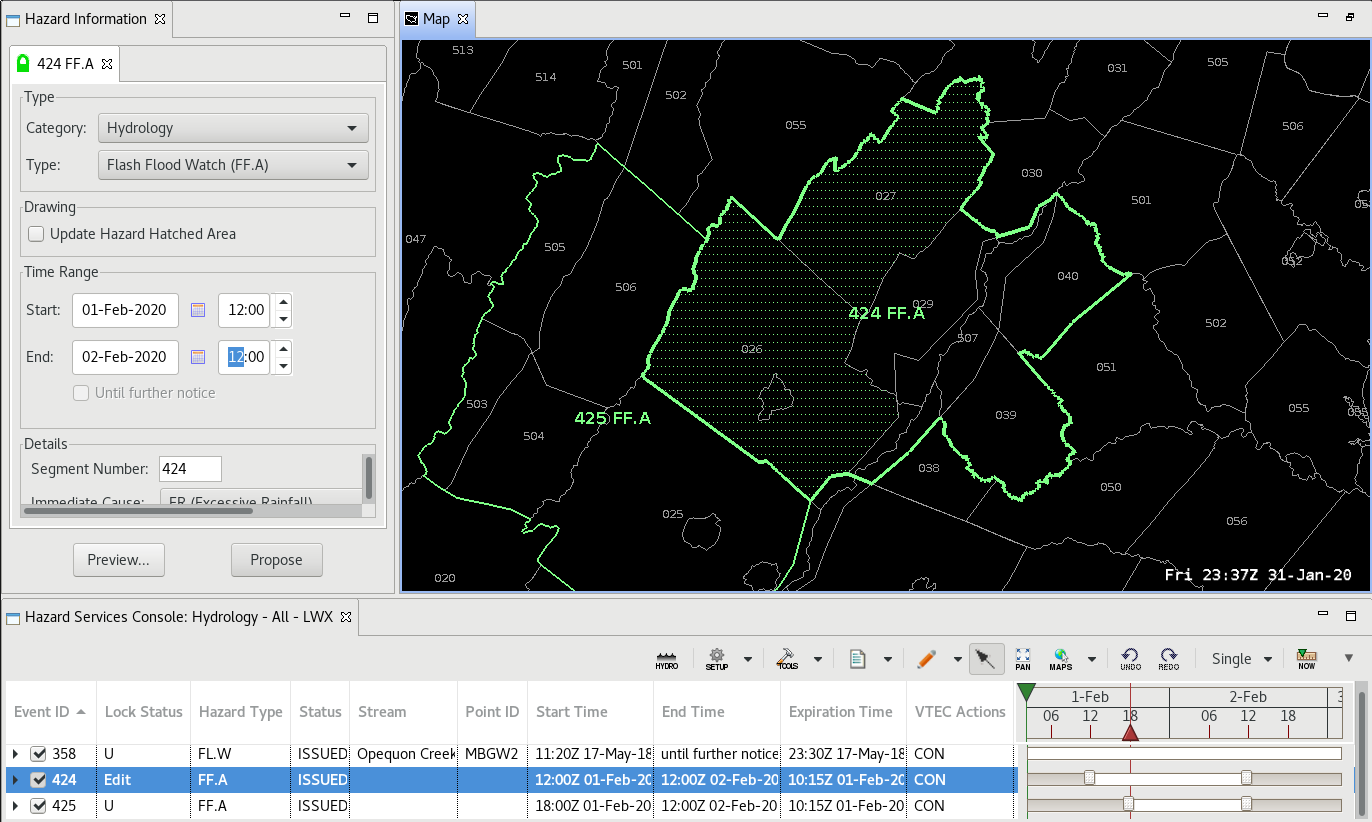
- The locked VTEC code will contain an EXT and the new end time. Modify the required bullets and click "Issue All".
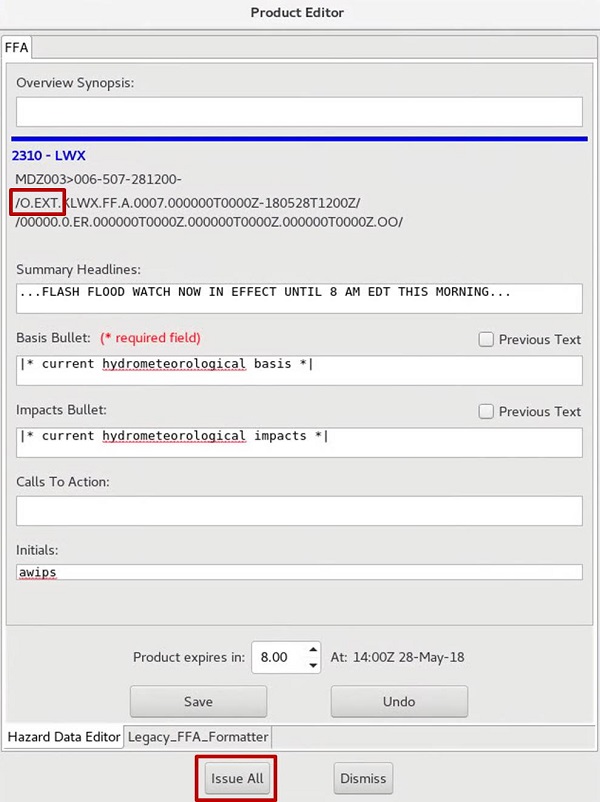
- When the "Live Active Product" dialog comes up, click the "Issue" button.

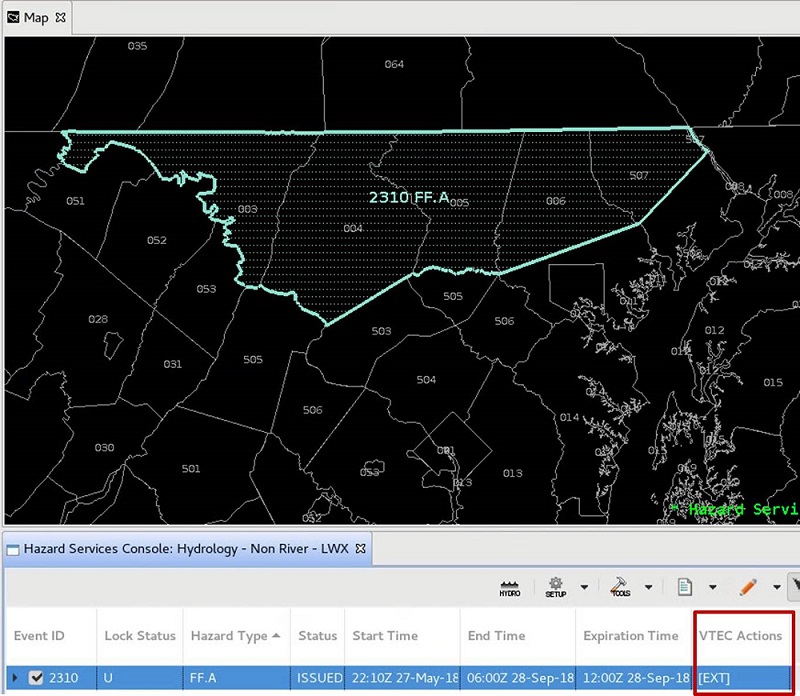
- The Console will display the EXT in the VTEC Action column.
4. More Complex Extension in Area and Time (where allowed by policy)
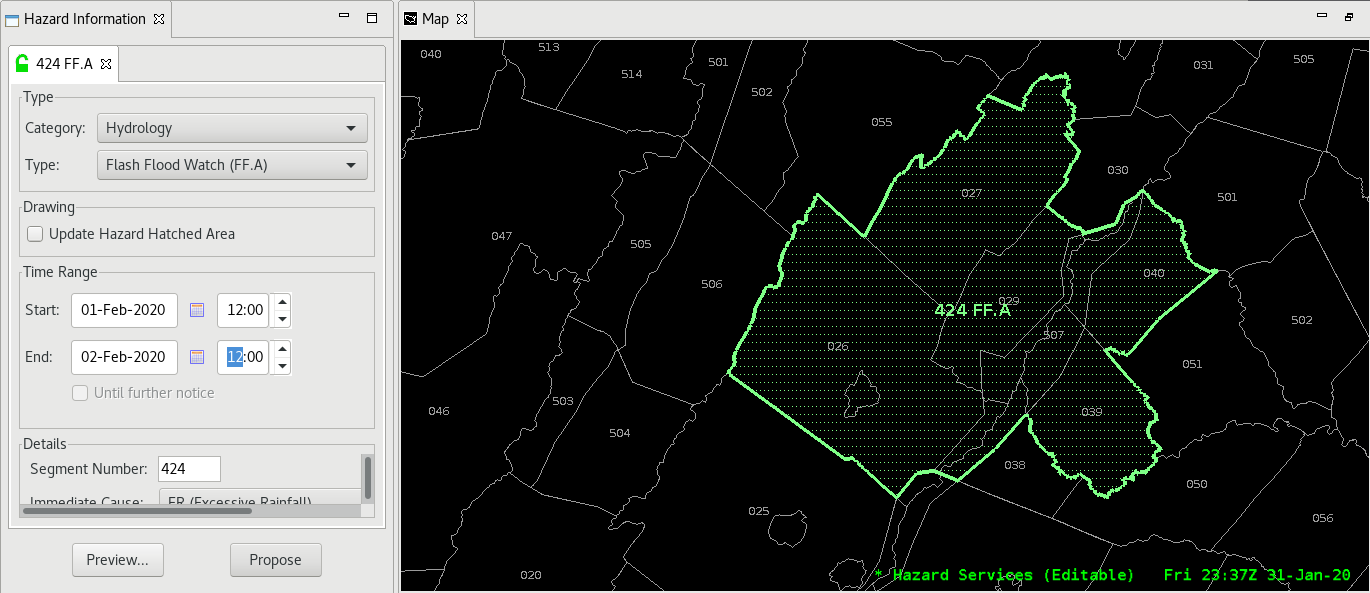
- This section will add zones with different timing to an existing watch and will change the timing of zones in an existing watch. Start with a flash flood watch containing a limited number of counties (create one if necessary using the Non-River Flood Watch jobsheet). The key steps to this approach will be to add a hazard event or split a hazard event into two hazard events in order to be able to specify different times in the HID for different segments.
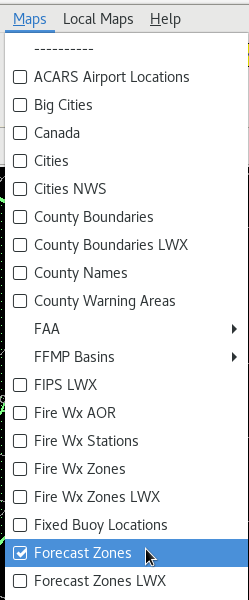
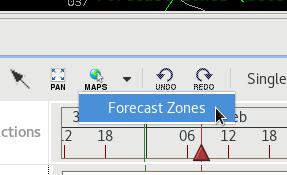
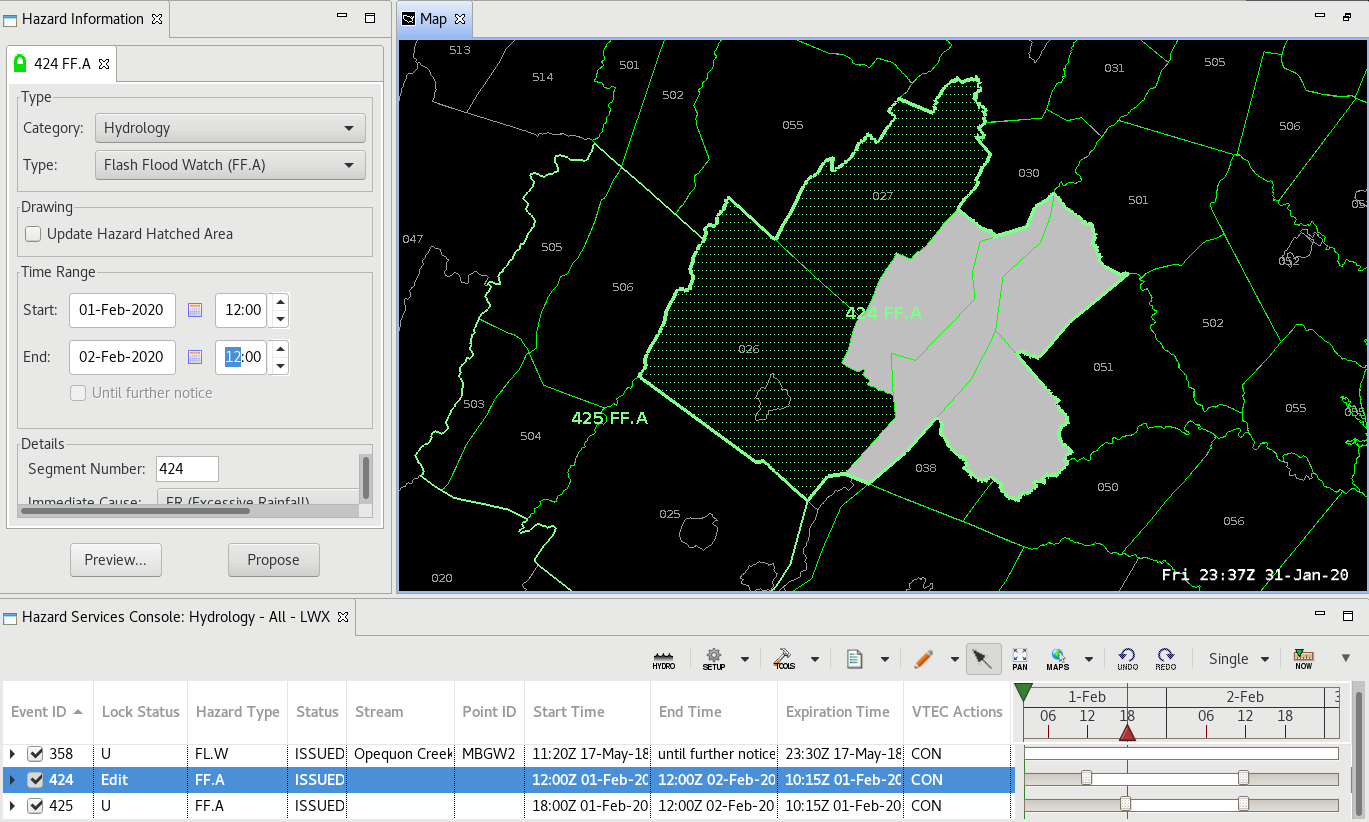
- Under the CAVE Maps menu load the Forecast Zones. Then select Forecast Zones under the MAPS icon in the console.
- In the green highlighted forecast zones, hold down the left mouse button and move the mouse to paint some extra forecast zones on the edge of the existing FFA. We are going to add a new FF.A segment with different timing for the watch as would happen when the threat shifts. *Note that if we just right clicked on the counties to add to the selected hazard (as in the very first extension in area watch jobsheet) we would just be adding zones to one hazard event, and there would only be one Time Range to modify in the HID for the old and new segments. This different approach is going to give us two hazard events and Time Range options for different segments.

- Right click on the shape to convert the shape to a polygon.

- Select FF.A for the Type and change the Time Range to be different than the original FF.A as you would if the threat shifted later in time.
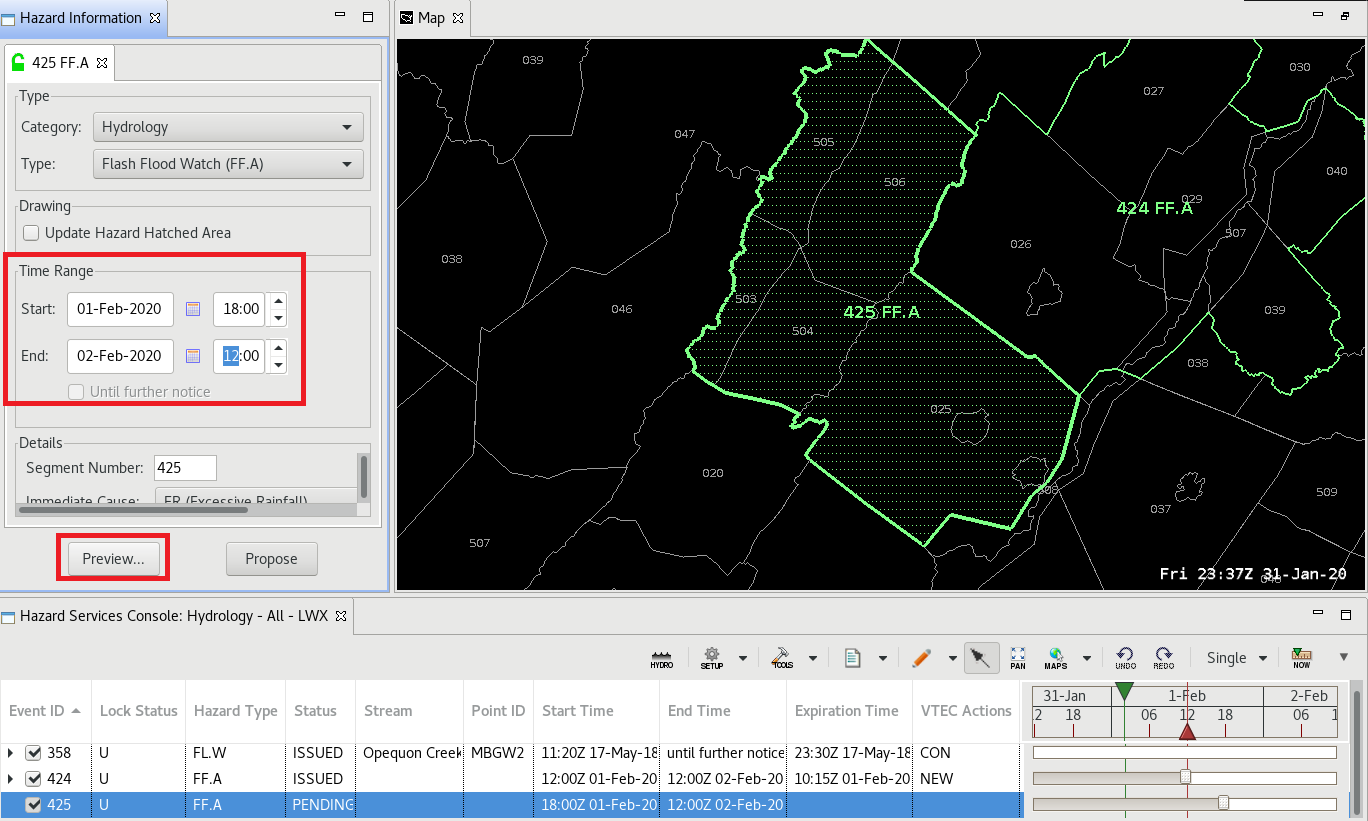
- Click Preview in the HID and notice you have two segments with two hazard IDs, a CON and an EXB.

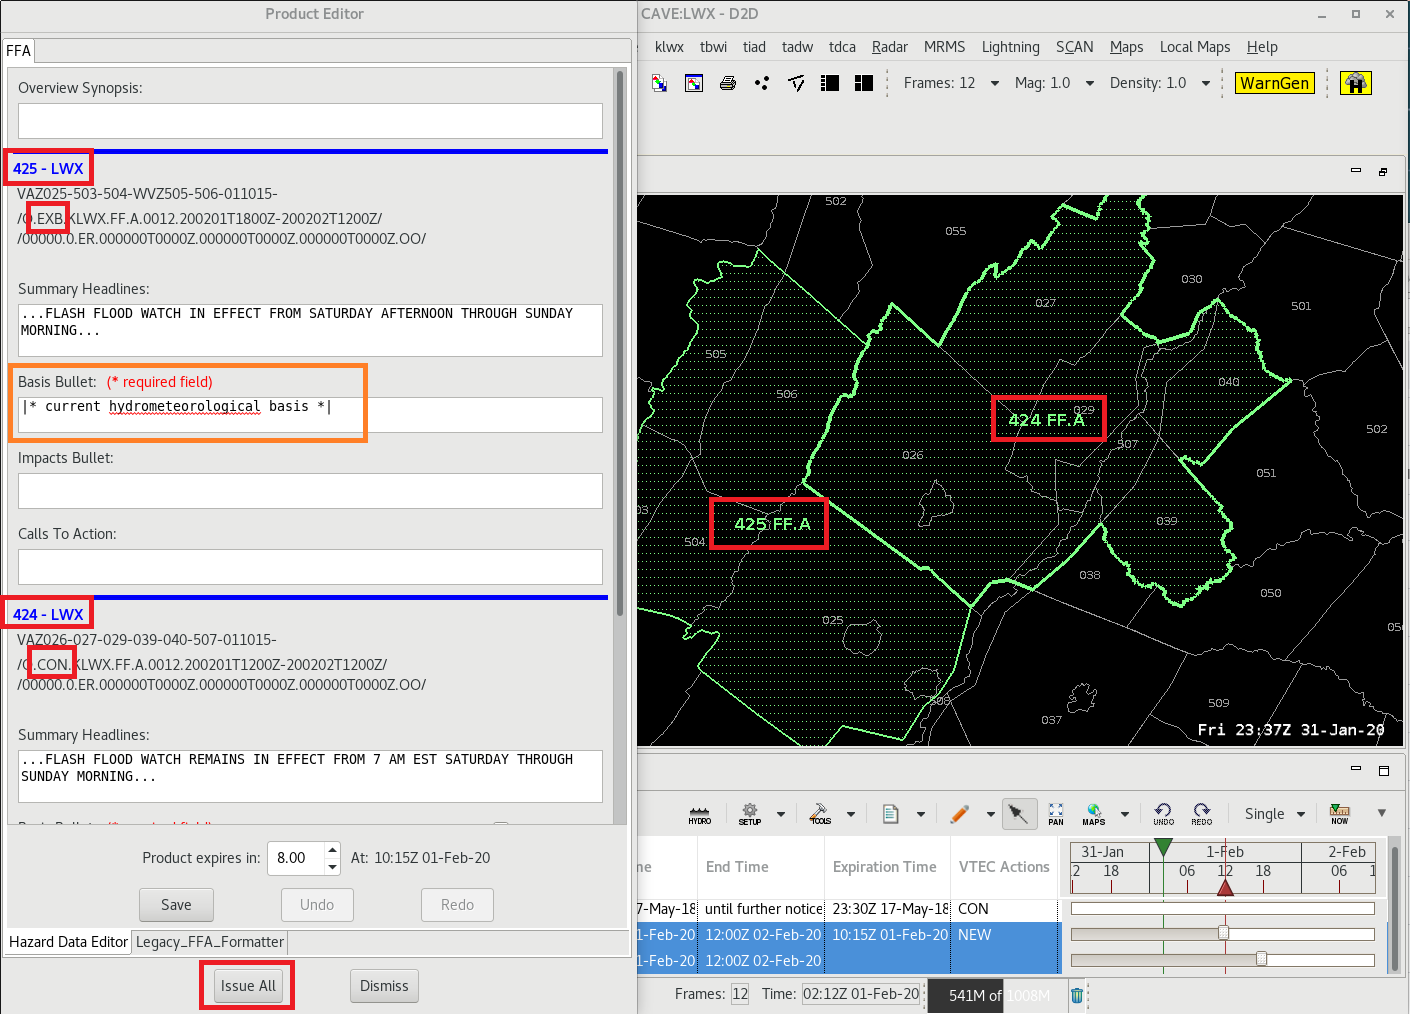
- Enter some text for the Basis Bullets on each segment and click Issue All to issue the FF.A for both segments. Then click Issue on the stop sign popup to issue both segments of the FF.A.

- Now let's split one hazard event into two, so we can adjust the time differently for different segments in one watch. Select your original FF.A in either the spatial display or the console.
- Choose some zones that will have the times adjusted, like when the threat ends earlier than originally anticipated in one area. Right click on the zones to remove them from the selected hazard. The hatching should disappear from those zones. If we were to Preview the hazard now (don't do it!), we would cancel the removed zones. The trick here is that we are going to fill in the zones with another watch of the same type before previewing, and since watch segments will always be combined together, we will actually end up issuing an EXB instead of a CAN.
- Select Forecast Zones from the MAPS icon in the console and paint only the forecast zones you just removed from the original FF.A.
- Right click on the shape to convert it to a polygon and new hazard event.
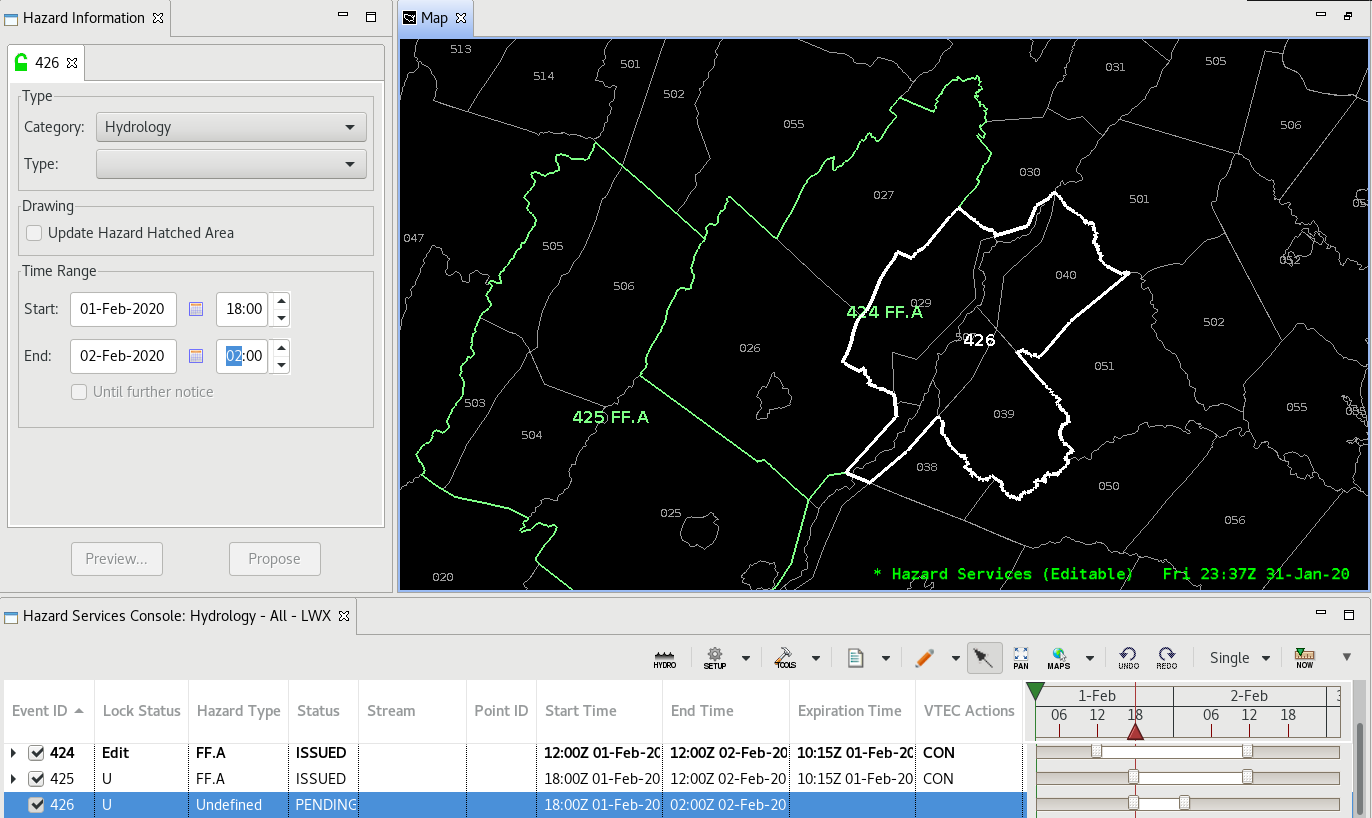
- Select the new hazard event in the console or spatial display and select FF.A for the Type. Next modify the Time Range to be different, like reducing the end time earlier.
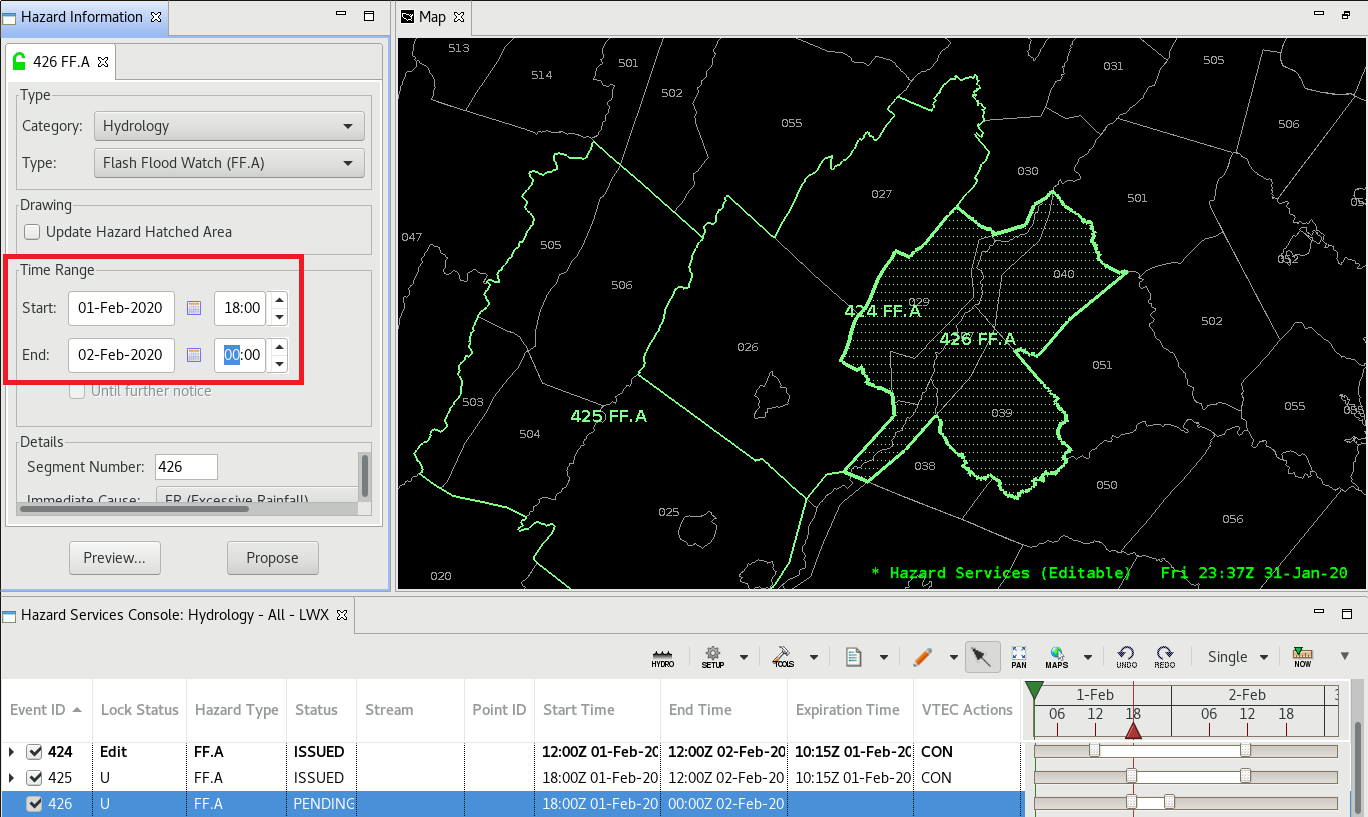
- Click the Preview button in the HID. You should see segments for the initial FF.A (e.g. 424), the extended area (e.g. 425), and the initial zones with changed times (e.g. 426). The newly modified segment will be an EXB while the other segments will be a CON.

- Enter Basis Bullet information for each segment and click the Issue All button to issue an FF.A for all three segment.
- Jobsheet complete! So to recap:
- Right click on zones next to a selected watch to add them to a single hazard event when you want to assign one time to all segments.
- Adjust the time in the HID for a hazard event to create an extension in time (EXT).
- When you want to control the time differently for different segments in a watch, you need to approach it with the intent to create multiple hazard events, so you can adjust the time differently in the HID for each hazard event.
- To add segments to a watch and assign them different times, just create a new hazard event of the same hazard type and enter a different Time Range in the HID.
- To modify the time of segments in a watch differently, you need to split the hazard event into two. The way to do this is to remove zones in a watch and then create a new hazard event of the same type over the removed zones before hitting preview in the HID.