


Modifying Alerts - Hazard Services
Modifying Alerts
Purpose:
This jobsheet walks through customizing Hazard Services alerts (console or popup) for product expiration.Tasks:
HazardAlertsConfig.py has one of the more complex dictionary structures in Hazard Services. It is recommended that you learn more about incremental overrides using the incremental override documentation and keep this document handy as you work through other overrides in Hazard Services.
- In the Localization Perspective, navigate to the Alerts sub-directory under the Hazard Services folder.
- Double click on the BASE version of HazardAlertsConfig.py to identify the structure of the file. Leave this open for reference.
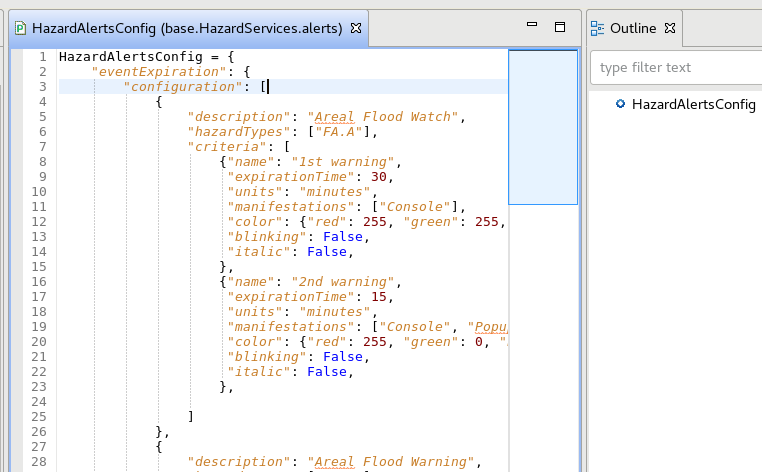
- [BACKGROUND INFO] This file consists of a HazardAlertsConfig dictionary (dictionary contents go in { } brackets). The only sub-dictionary is "eventExpiration" (the only supported alert type at the moment). Within "eventExpiration" is a single key called "configuration" which is a list (list contents go in [ ] brackets). This list's contents will be a new set of dictionaries for each alert you wish to override, each with a description key identifying its purpose.
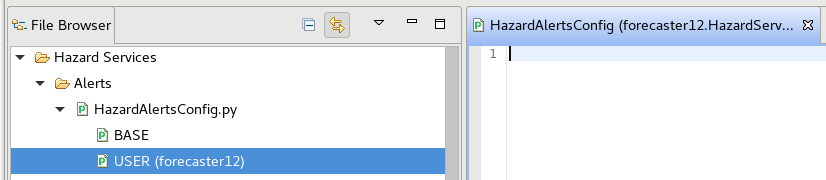
- Create a user override version if none exists:
- If there is only a BASE version: right click on BASE and select Create Override File, then select User.
- If there is another version (e.g. SITE) you wish to use: right click on that file and select Copy To, then select User.
- Double click on the User version of HazardAlertsConfig.py to open it for editing.
- Copy the namespace below and paste it into the HazardAlertsConfig.py USER override. In addition to the two main dictionaries in BASE, there is a new addition of a control string "_override_by_key_description" which instructs HazSvcs to use any subsequent "description" keys (like "Areal Flood Watch" in the image in step 2) to search the base file for matching alerts, and if found to override those alerts with the specifications that follow.
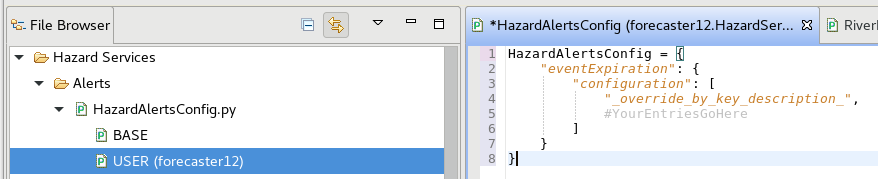
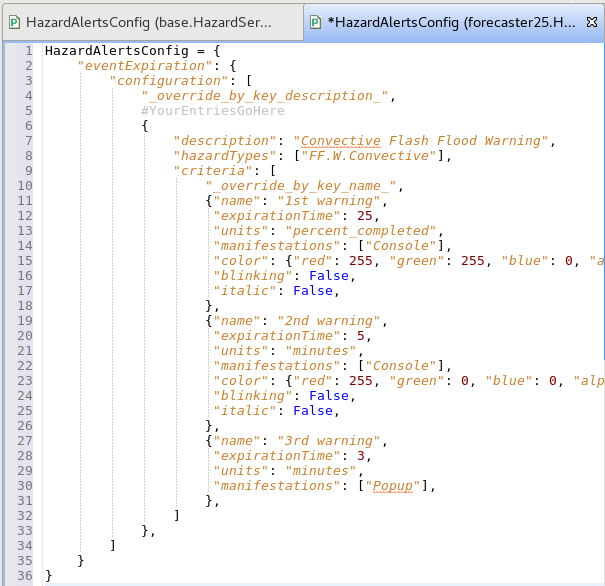
HazardAlertsConfig = { "eventExpiration": { "configuration": [ "_override_by_key_description_", #YourEntriesGoHere ] } } - Here is what the resulting USER override looks like in the Localization perspective:
- In the BASE HazardAlertsConfig.py, scroll or use CTRL-F to find the FF.W.Convective hazard.
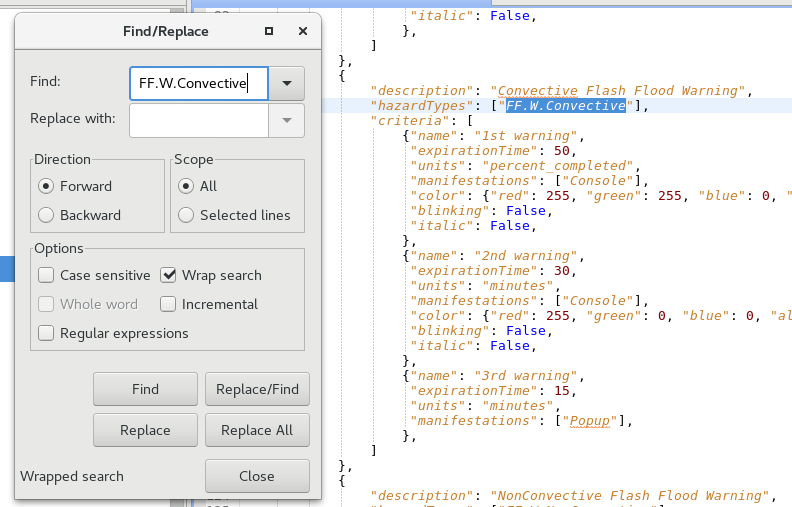
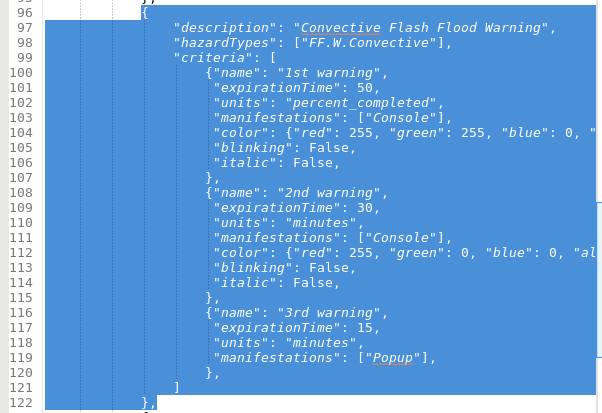
- Select the dictionary containing the FF.W.Convective hazardTypes by clicking and dragging from (and including) the opening "{" bracket that precedes "description" to (and including) the first closing "}" bracket which is at the same indentation as the opening "{".
- Indentation is central in Python for delineating blocks of related code. By matching indentation for the opening and closing { } marks, you're grabbing the start and end of one whole block of code, in this case the entire contents of the dictionary
- Indentation is central in Python for delineating blocks of related code. By matching indentation for the opening and closing { } marks, you're grabbing the start and end of one whole block of code, in this case the entire contents of the dictionary
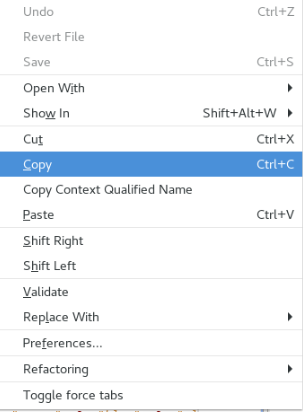
- Copy the selected contents by right-clicking and selecting "Copy" from the pop-up menu, or by hitting Ctrl-C on your keyboard.
- Switch back to the HazardAlertsConfig.py USER override.
Click on the end of the commented line which says "#YourEntriesGoHere" and hit "ENTER" to go to the next line (notice how the proper indentation is preserved).
Paste the contents of your clipboard by right-clicking and selecting "Paste" from the pop-up menu or by using Ctrl-V on your keyboard.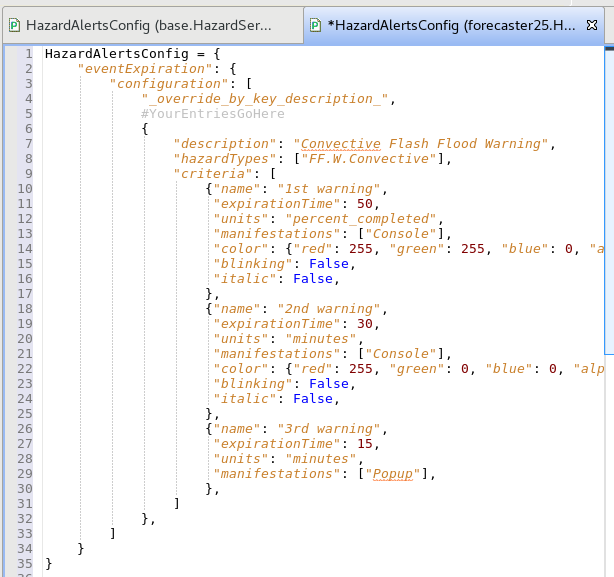
- NOTE: Since the HazardAlertsConfig.py override is one of the more complicated overrides, each piece of information about each of the three alerts was included in the user override for clarity. Overriding in this way is NOT RECOMMENDED. It is recommended to only override exactly what needs to be changed. For this case, you CAN (and in many cases, should) only override the specific key:value pairs that need to be changed, since this file supports incremental overrides. Test this out for yourself, and verify that the alerts work the same way!
- Click on the end of the line which says "criteria": [ and hit Enter to go to the next line.
- On the empty line, type or copy-paste the following entry into your file:
"_override_by_key_name_",Be sure to include the comma at the end.- What This Does: Much like "_override _by_key_description_" earlier, this new control string tells HazSvcs to expect subsequent dictionaries with a key "name", and to use that key value (which describes the specific alert, and might for example be "1st warning" or "2nd warning" and so on) to match the exact alert in the base file that it's supposed to override.

- What This Does: Much like "_override _by_key_description_" earlier, this new control string tells HazSvcs to expect subsequent dictionaries with a key "name", and to use that key value (which describes the specific alert, and might for example be "1st warning" or "2nd warning" and so on) to match the exact alert in the base file that it's supposed to override.
- [Background on what can be changed]
- Timing of the alert: The "expirationTime" and "units" fields work together to specify the timing of the alert.
- When "units" is set to "minutes" or "hours" the "expirationTime" field can be a positive integer that represents how much time before product expiration to trigger the alert.
- When "units" is set to "percent_completed" the "expirationTime" field can be an integer between 0 and 100, and causes the alert to be triggered when the event reaches the specified percent complete between issuance and product expiration.
- Alert type: The "manifestations" field is a list (bracketed by [ ] symbols) whose valid options are "Console", "Popup", or both (these can be entered together using a comma between the values, i.e. ["Console", "Popup"] ). The Console option causes text to be formatted as specified by the color, blinking, or italic options which are discussed next. The "Popup" option simply displays a popup notification, and doesn't require the formatting options.
- Console formatting appearance: Whenever "Console" is an alert manifestation type (see previous item), formatting options should be chosen. An example with all three choices is shown below, with: color set to red and opaque (for opacity, alpha 0 is transparent, and 255 is opaque); blinking set to True (options: True or False); and italic set to False (options: True or False)
"color": {"red": 255, "green": 0, "blue": 0, "alpha": 255}, "blinking": True, "italic": False, - Add a new alert: You can add a new alert by adding another dictionary to the "criteria": [ list (see dictionary containing "1st warning" in image below).
- Timing of the alert: The "expirationTime" and "units" fields work together to specify the timing of the alert.
- To practice changing the settings we will set some values to small values. In the "1st warning" change "expirationTime" from 50 to 25 to change the text color to yellow 25% of the way through the warning.
In the "2nd warning" change "expirationTime" from 30 to 5 to trigger the text to change to red at 5 minutes before expiration.
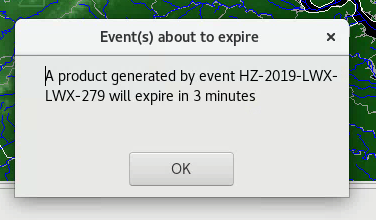
In the "3rd warning" change the "expirationTime" from 15 to 3 minutes to pop up a message about the warning expiring 3 minutes before expiration.
Feel free to modify other values as desired.
- REVIEW your updates. Catch punctuation or syntax mistakes now, rather than via a convoluted CAVE error. The Localization Perspective will often help you find syntax errors with a small "x" to the left of problems it finds. The most common issues to watch for are:
- Indentation: Consistency... typically, items within [ ] or { } brackets be indented one tab more than their "parent," and should match their "siblings"
- Bracketing: [ ] and { } brackets have matching opening and closing symbols
- Quote Marks: Quotations marks MATCH (don't mix single or double quotes for a single value) and have opening and closing marks around the textual values (except True/False)
- Colons/Commas: There is a colon (:) between the all "key": "value" pairs AND a comma after EVERY LINE on which a key:vale pair occurs (including after the closing } brackets which wrap up each alert entry)
- Spelling: Simple errors in how "minutes", "Console", True/False, or any other key/value is spelled will cause problems and may not get caught by the Localization Perspective validator. It's worth the effort to proofread now
- When finished, save the file by hitting Ctrl+S, or selecting Save from the File menu.
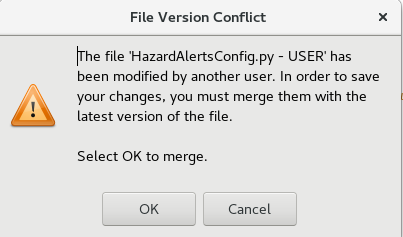
- If a "File Version Conflict" is encountered, click OK to accept merge.
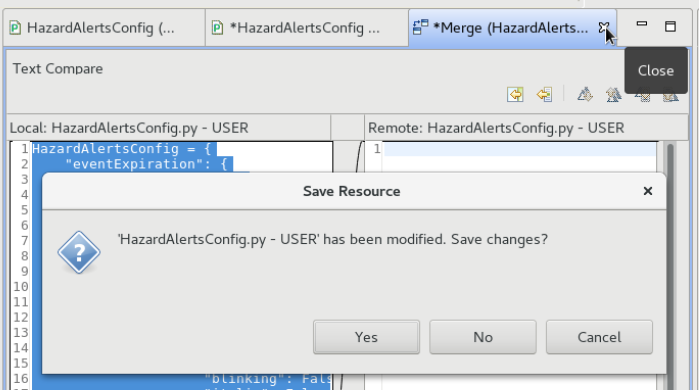
- In the two-panel "Merge" tab that opens, click on the x to close the merge tab.
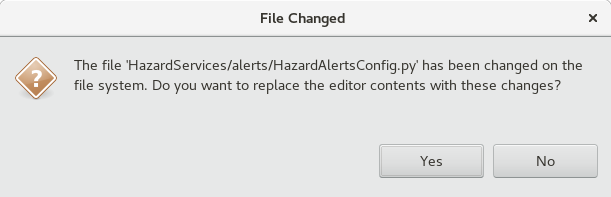
- In the two popup windows click Yes.
- This behavior will only be encountered each time a new override file that did not exist before is created and saved.
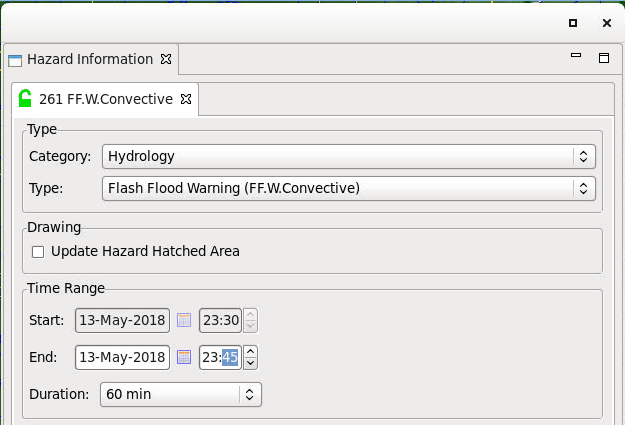
- Issue an FF.W.Convective hazard for a very short time period like 10 or 15 minutes, so you can quickly see the behavior. You will need to manually enter a suitable end time in the HID's "End Time" spinner field to accomplish this, since no duration drop-down option this short is available for the FF.W.Convective hazard. Note that in the HID you will need to put your cursor in the hour and minutes position separately in the spinner box when you use the up and down arrows.
- To speed up testing, you can jump closer to when the alert should occur by setting the CAVE clock to the minute before it will trigger (without the clock set to "freeze time"); just don't use the freeze time setting with the CAVE clock as it results in problems with displaying the time in the Time to Expiration column.
- Notice your text will turn yellow when you reach 25% of the way through the warning duration. The text will turn red 5 minutes prior to the warning expiring, and an event popup message will appear 3 minutes prior to the warning expiring. Sometimes during short-duration warnings the red text triggers too quickly. The new settings should trigger aside from that if that does happen. Note that the black box behind the yellow text automatically happens with yellow text and there is no way to control the background color of a cell using the alert settings.
- Be aware that the "Time to Expiration" column may be hidden and may need to be set to visible as a console setting.


- Be aware that the "Time to Expiration" column may be hidden and may need to be set to visible as a console setting.
- Review the alert settings for all hazard types and coordinate with your local office on what you think the most meaningful values should be for each hazard. The initial change to yellow at 50% is supposed to be a reminder to issue a follow up statement. The change to red indicates a later state of the warning. The popup is supposed to remind that the warning is about to expire.
- Task Complete!