


Megawidgets to Product Parts (Part 2) - Hazard Services
Megawidgets to Product Parts (Part 2)
Purpose:
Take the checkbox you created from the Megawidgets 101 jobsheet and apply it to the product.Tasks:
Step 1: Print Product Dictionary Contents
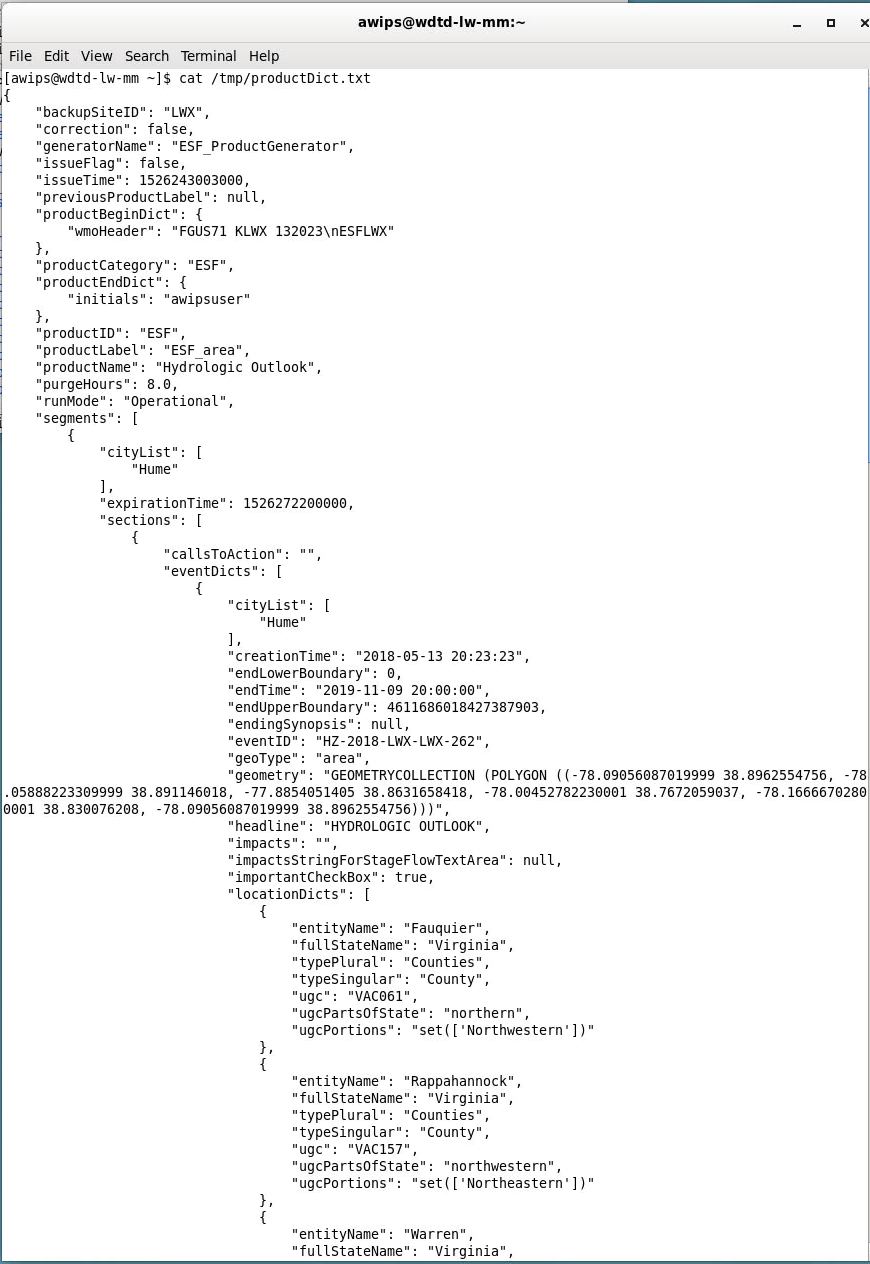
You should have set up the method that allows you to view the product dictionary in a previous jobsheet (Setting up the Product Part Debugger). First, let's go ahead and print out the product dictionary for a Hydrologic Outlook (HY.O) product, since this is where we previously created our new checkbox.
- Create a hazard in your Hydro or D2D perspective, and set it to Hydrologic Outlook or HY.O.
- NOTE: In the details section you should see a checkbox which was added to this HID in a previous jobsheet (if not, reference the Megawidgets 101 Jobsheet to add this checkbox).
- Hit the "Preview" button to generate the product editor.
- Open a terminal window from your desktop (right click on the desktop and click "Open Terminal").
- Run the following command in your terminal window, which will print out the contents of the file that stores the product dictionary:
cat /tmp/productDict.txt
Step 2: Locate Product Formatter
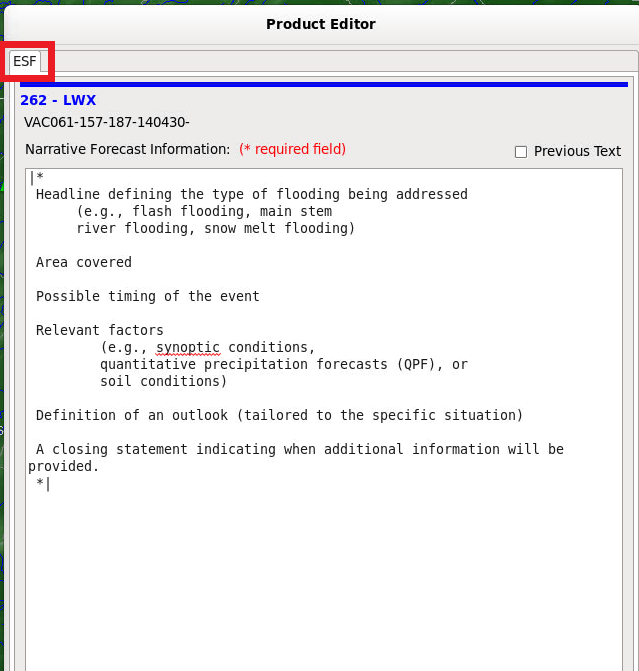
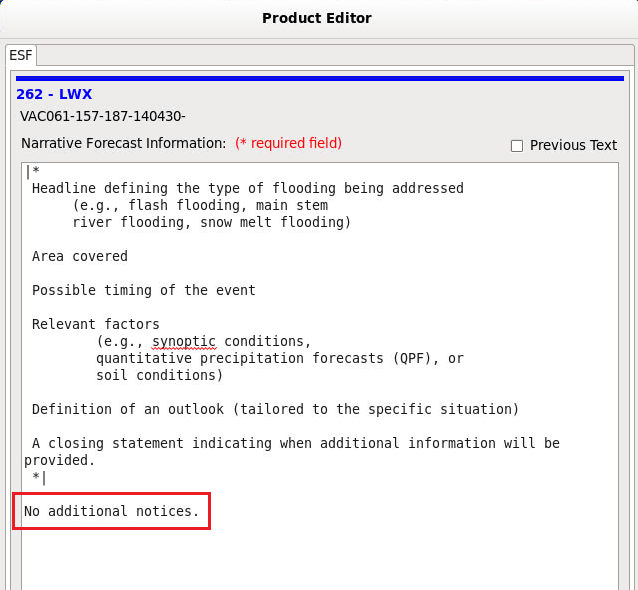
- When you are viewing a product editor, the tab at the top of the product can be helpful in determining which product formatter you will need to look at in the localization. In the Product Editor for HY.O you can see the tab labeled "ESF", which tells us to look for "ESF" in the product formatters list in the localization.
- In the Localization perspective, open the Product Formats folder under Hazard Services. This is always the best place to start when trying to understand how a product is built.
- Look for "Legacy_ESF_Formatter.py" and open the Base file for reference. Create a User override for this file.
- In the Base version, you will see a handful of methods that define a very simple product for HY.O, making this an easy hazard type to work with. One of these methods is getNarrative, which is the method that holds the text for the "Narrative Forecast Information" section of the product, as you can see in the product editor. Copy this method into your User override for Legacy_ESF_Formatter.py.
Step 3: Implement Checkbox from HID into Product
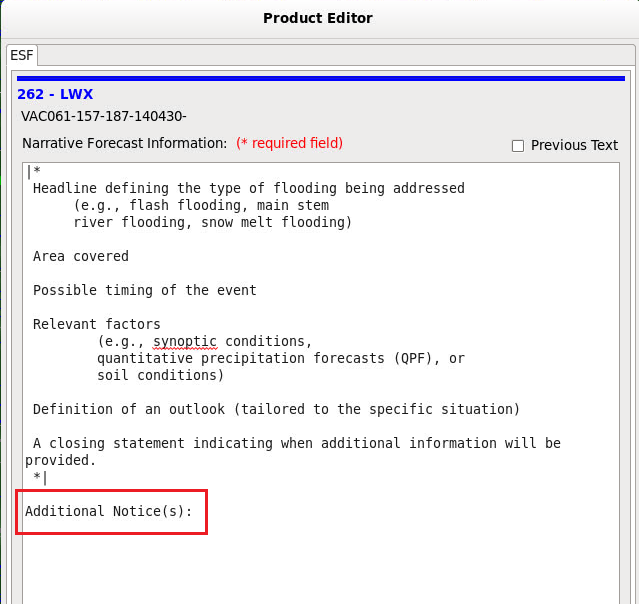
Let's put some text into the HY.O product based on whether or not the checkbox is "True" (checked) or "False" (unchecked). We will put this text just below the existing narrative information text, as shown here:
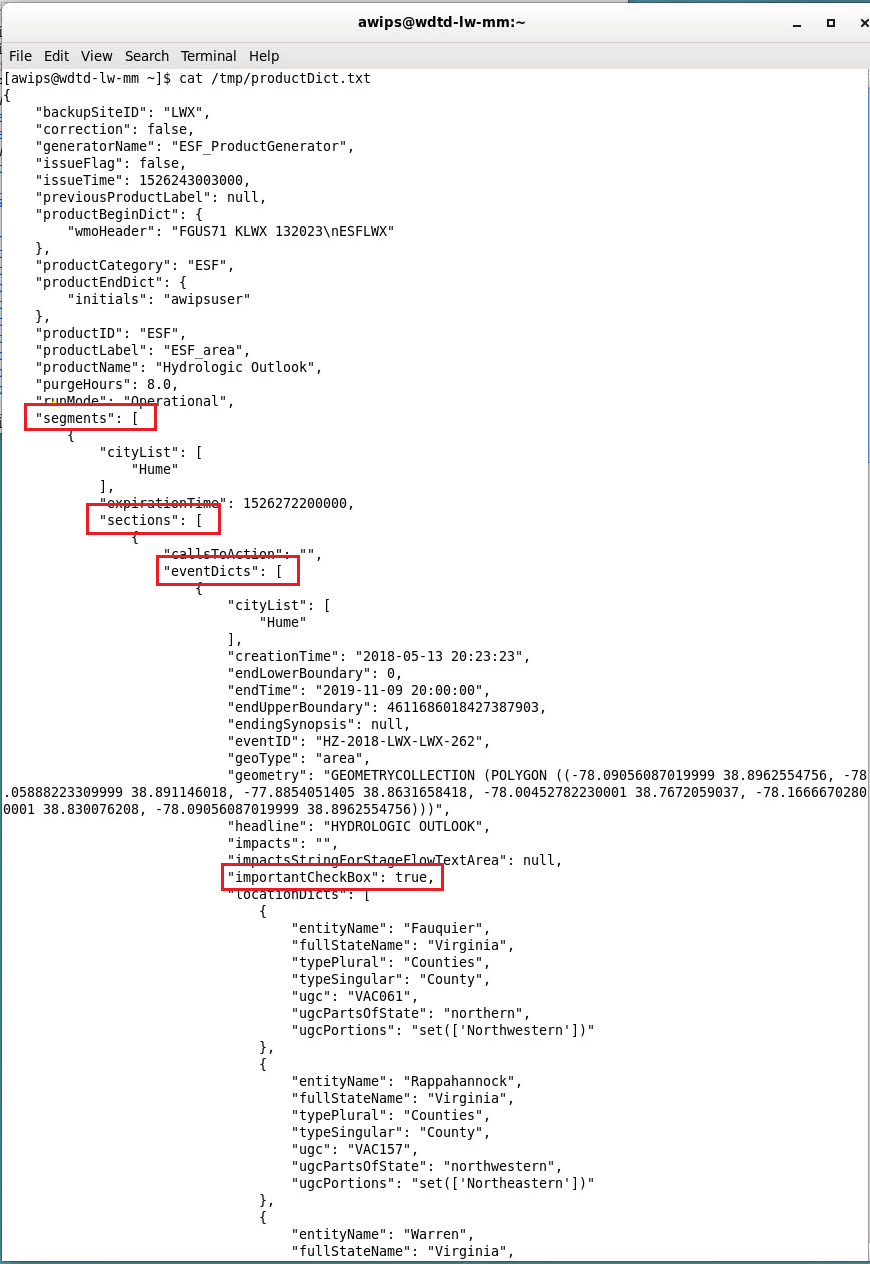
You will notice many methods have access to "productDict" or "sectionDict", which are listed as arguments in the method definition. This means that within the method, you can call lists or dictionaries that exist within the product or section dictionary. This fact is what allows us to access the checkbox megawidget, because any megawidgets defined in the HID will be available through an event dictionary, which is inside a section dictionary, which is inside a segment dictionary, which is inside the product dictionary (see section 1.4.3.2 of the focal point guide). Take a look at the Product Dictionary again to see this structure:
- In your User override of Legacy_ESF_Formatter.py, add the highlighted line just below the method definition, as shown here:
    def getNarrative(self, sectionDict):

        checkboxValue = sectionDict['eventDicts'][0]['importantCheckBox'] #this will be true or false
        if checkboxValue == True:
            notice = "Additional Notice(s): "
        else:
            notice = "No additional notices."

        narrative = '''|*
- The variable "checkboxValue" will be True if the checkbox is checked in the HID when Preview is clicked, and False if the checkbox is unchecked in the HID.
- Additionally, add " + notice " to the end of the narrative, as highlighted below, to add the text based on the checkbox. (The "\n\n" is added to create blank lines between the end of the provided narrative and the new "notice" line.)
    A closing statement indicating when additional information will be provided.
    *|\n\n''' + notice
- Save the override file, return to D2D or Hydro perspective to test the new functionality.
- Create or open a HY.O hazard type, and press "Preview" again to load the Product Editor.
- Note that now you will see a statement regarding notices at the bottom of the "Narrative Forecast Information" section, which will either allow the user to add information regarding notices, or state that there are no additional notices.
- That's it!
Note: Keep in mind that the HY.O product is simple and therefore the override needed was just an override of the "Legacy_ESF_Formatter.py" file. In many cases, you may find that section parts are called from "SectionLevelMethods.py" or "SegmentLevelMethods.py" which are stored in the Utilities folder.