Polygon Tools and Geometry Actions - Hazard Services
Drawing Polygons and Geometry Actions
Purpose:
This jobsheet will guide forecasters on how to use the updated geometry actions and polygon drawing tools available in Version 4 of Hazard Services.Tasks:
AT-A-GLANCE:
-
What? Drawing tools and actions were available in Version 3 of Hazard Services to craft hydro hazard areas. However, Version 4 has revamped the existing tools/actions and added new tools for forecasters to create and edit polygons. The pencil tool in Version 3 has been changed to the Draw Polygon feature and a new separate Geometry actions tab has been added to the Console.
Part 1: Drawing a draft polygon with the Draw Polygon feature
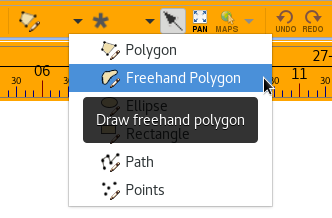
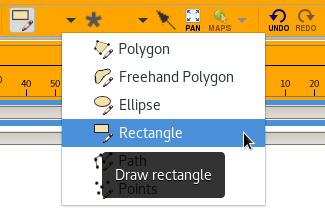
The Draw Polygon feature in Version 4 of Hazard Services is used to make hazard polygon areas. There are currently four active tools to choose from: the Polygon Tool, the Freehand Polygon Tool, the Ellipse Tool, and the Rectangle Tool. The Path and Points Tools are also visible, but these are non-operational for now.
A) Using the Draw Polygon Feature
-
This section of the jobsheet will focus on the actions of drawing a polygon with the Polygon and Freehand Polygon drawing features. Start by opening up Hazard Services by clicking the icon at the top of D2D with the H and raincloud.

-
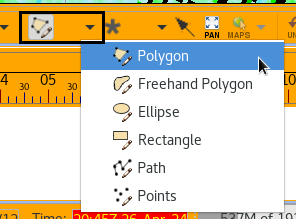
The Console and HID will appear. The Drawing and Actions Tools are located in the Console. The Drawing Tools have the icon with a polygon and pencil on it. Clicking on this icon will immediately put you in polygon drawing mode. The arrow next to the icon is a dropdown menu with all the available options. Selecting an option will change the icon to the last-used Drawing Tool option. Go ahead and select the first option from this dropdown menu which is the Polygon Tool.
-
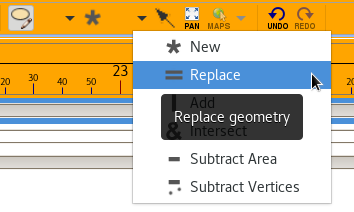
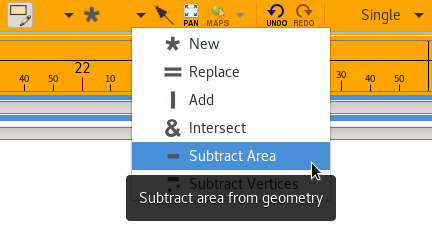
The next step in the process is to select the geometry action from the menu to the right of the Drawing Tools menu. If there are no highlighted hazard events in the Hazard Services Console, the only action option is New geometry.

-
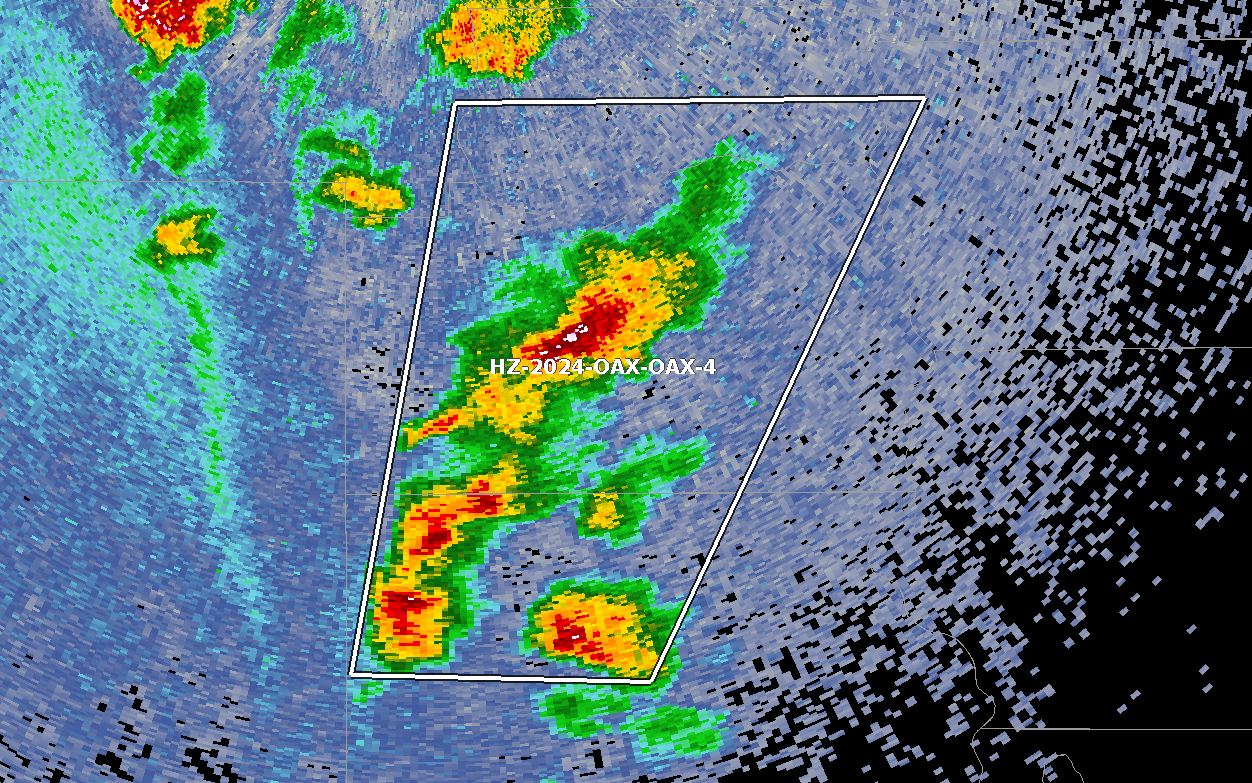
In D2D we will practice first creating a simple polygon on the map. Preferably there is radar data with a hazard loaded in the practice instance of AWIPS for you to draw the polygon with; however, a blank map is fine. Lift click on D2D to start your first vertex of the polygon.
-
You must make at least three vertices for a polygon, so continue to left click on the map to create your polygon. Right click where you want your last vertex to finish the polygon.
-
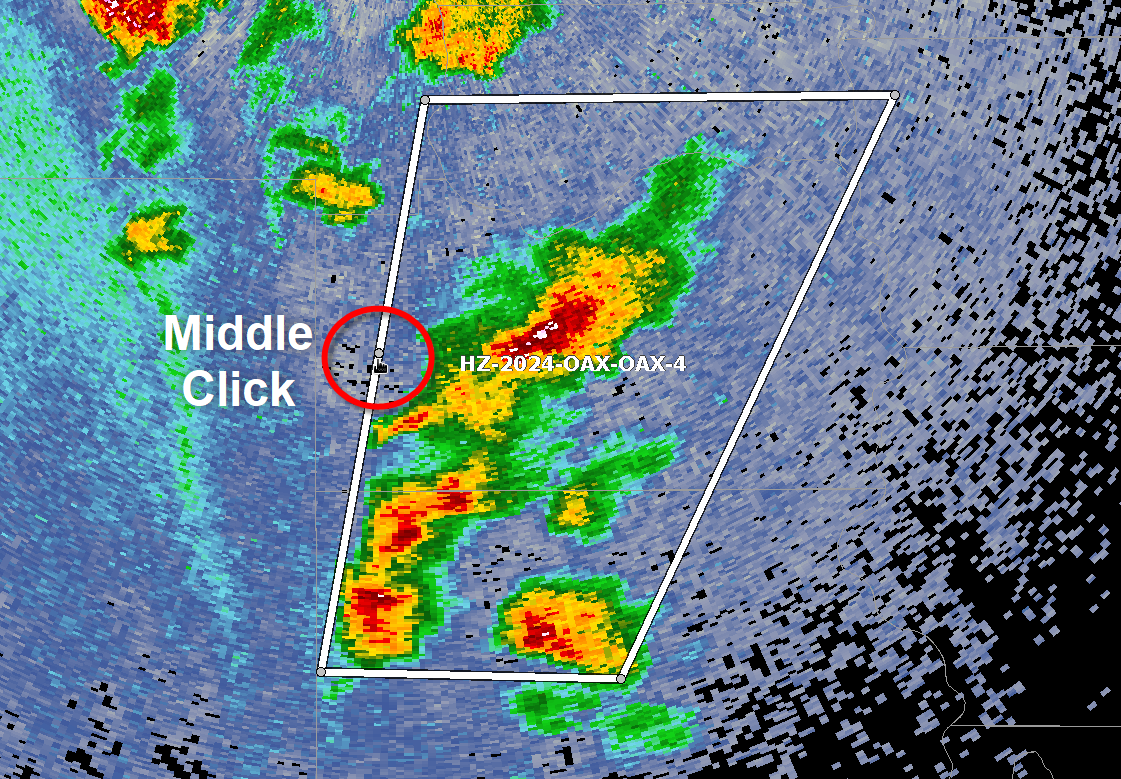
We will want to practice adding or subtracting a vertex of the draft polygon. To add a vertex, click on the middle mouse button or the scroll wheel on one of the edges of your polygon. This will create a new vertex and you may drag and drop to move it with a left click.
-
To delete a vertex, simply middle click on a vertex.
-
In the HID, under Category select Short Fuse, and under Type select Special Weather Statement (SP.S.Polygon). Be sure to click Update hazard hatched area to preview the polygon when adjusted with your site’s exclusion fractions.
NOTE: Hazard events that require a storm track to generate polygons can not be generated with the Drawing Tools. The metadata of these events are heavily dependent on the track. -
Since this was just practice with the Polygon Tool, delete it by right clicking the pending hazard in the Console and selecting Delete This.
B) Using the Draw Freehand Polygon Tool
-
Open up Hazard Service if you have not done so already and go to the D2D perspective.
-
Within the Console, and in the Polygon Drawing Tools dropdown menu, there is an option for the Freehand Polygon Tool. This option should be the second one down, with the icon of a freeform polygon and pencil.
-
Select the Freehand Polygon Tool from the menu. To use it, click and hold the left mouse button on the D2D display to start drawing a polygon form. Once you have created a shape you want, release the held left click to finish drawing.
-
In the HID, under Category select Short Fuse, and for Type select Special Weather Statement (SP.S.Polygon). Select a hazard level in the Details.
-
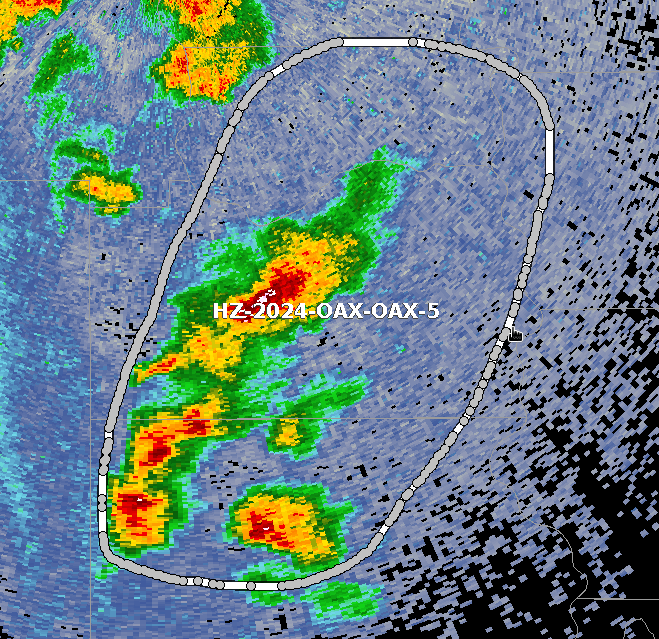
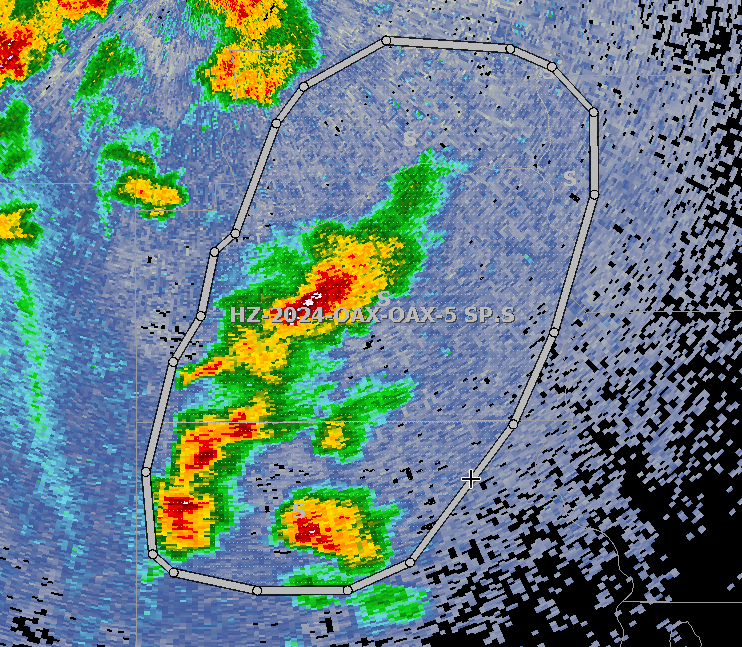
If your freehand polygon has more than 20 vertices (and with this tool it almost always will), simplification of the shape is required. Therefore, it’s important to select the Update hazard hatched area radial button in the HID to preview the simplified geometry. You may then drag and drop the vertices to edit the simplified polygon shape.
-
As was the case in the polygon drawing section, this was just practice with the Freehand Polygon Tool, so right click the pending hazard in the Console and select Delete This to clear the polygon hazard.
Part 2: Editing Hazard Event Polygons
The Geometry Action Tools allow forecasters to more easily edit warning polygons. There are still limitations to editing polygons. You are not able to expand the area of a short-fused warning polygon. The number vertices a convective warning polygon may have is still capped at twenty. Otherwise, you have the freedom to craft a polygon shape to suite your warning needs.
Editing Issued Hazard Polygons
In this section we will get some practice editing an issued polygon.
-
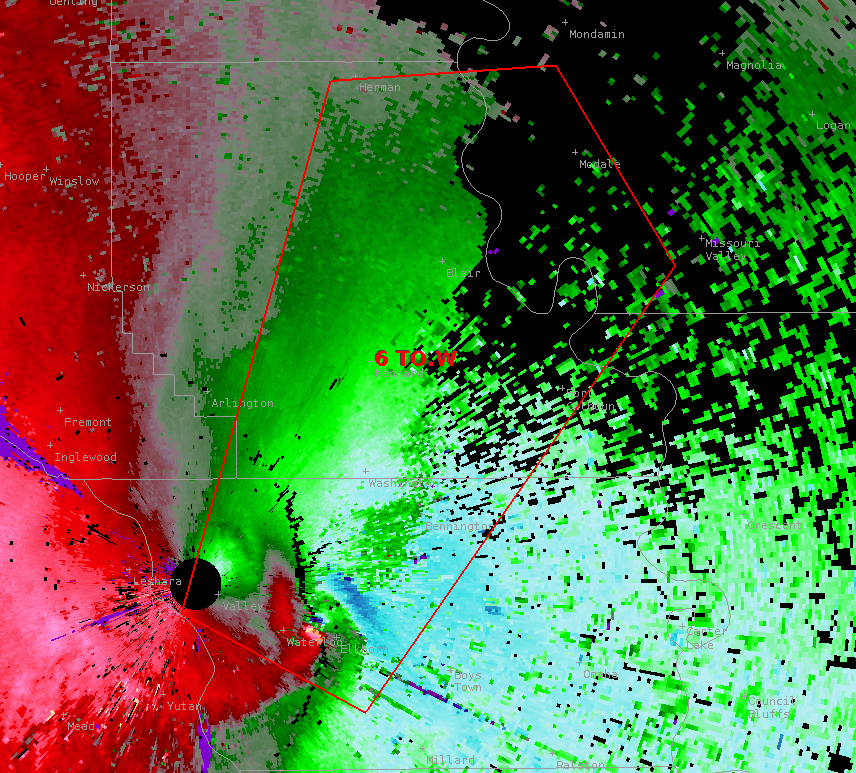
If you have not done so, create a new short-fused convective hazard event (SV.W or TO.W) by clicking the red tornado and H icon to start the Hazard Services Storm Track Tool.

-
Enter in the hazard details in the HID, click Preview, and select Issue (1) after previewing the product text to issue the warning. We should now have a warning polygon we can practice with the remaining polygon editing actions.
A) Replace Geometry Action with the Ellipse Tool
-
Select the hazard event in your Console before using the Replace Geometry Action in D2D. We can pair this practice with the Ellipse Tool located in the Drawing Tool dropdown menu.

Once you have the Ellipse Tool selected, move over to the Drawing Action menu, located just to the right of the Drawing Tools in the Console ribbon, and select the Replace Geometry Action.
-
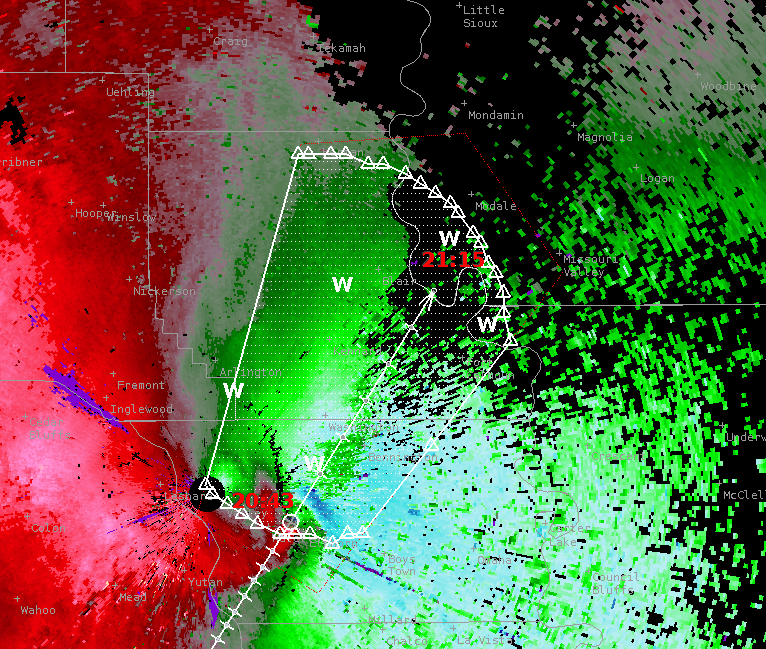
On your hazard event polygon left click and drag your ellipse to overlap part of the area of the warning.
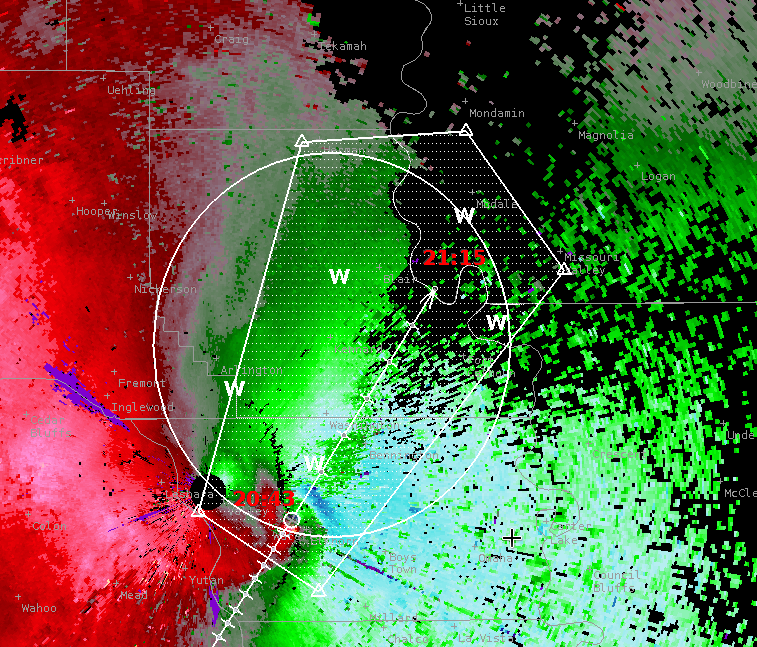
Let go of your left click. The new warning polygon area should then just be the area of the original polygon that was underneath the ellipse you drew.
Remember to select Update hazard hatched area in the HID to preview how the simplified polygon will appear. -
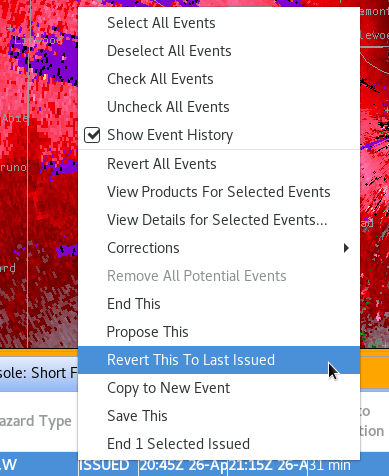
To revert the action right click on the hazard event in the Console and select Revert This To Last Issued.
-
Keep this polygon area, we will use it as practice for Part B.
B) Subtract area from Geometry Action with the Rectangle Tool
-
First highlight the previously created hazard event in Part A.
-
In the Drawing Tool dropdown menu select the Rectangle icon.
From the drawing action menu select the Subtract Area icon.
-
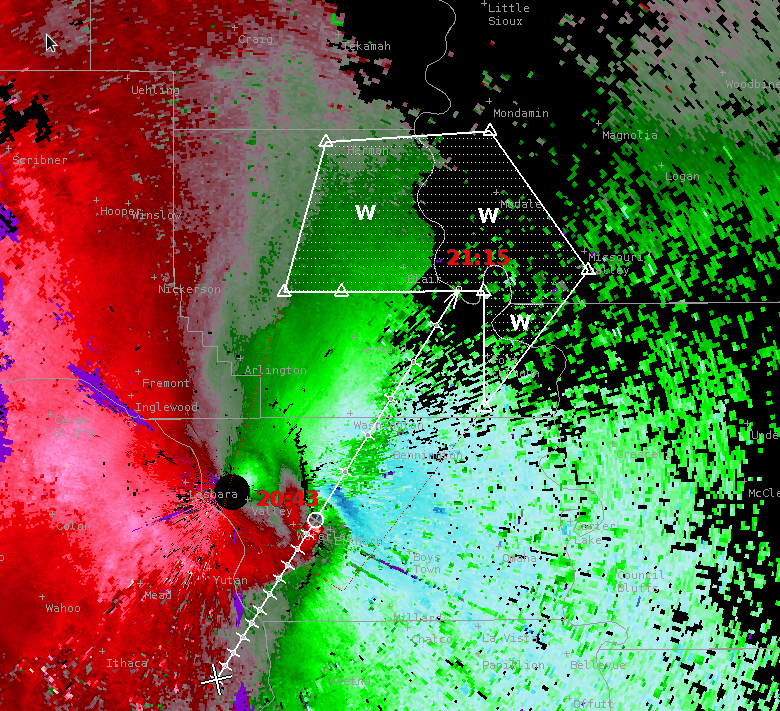
On your hazard event polygon, left click and drag your rectangle to overlap part of the area of the warning.
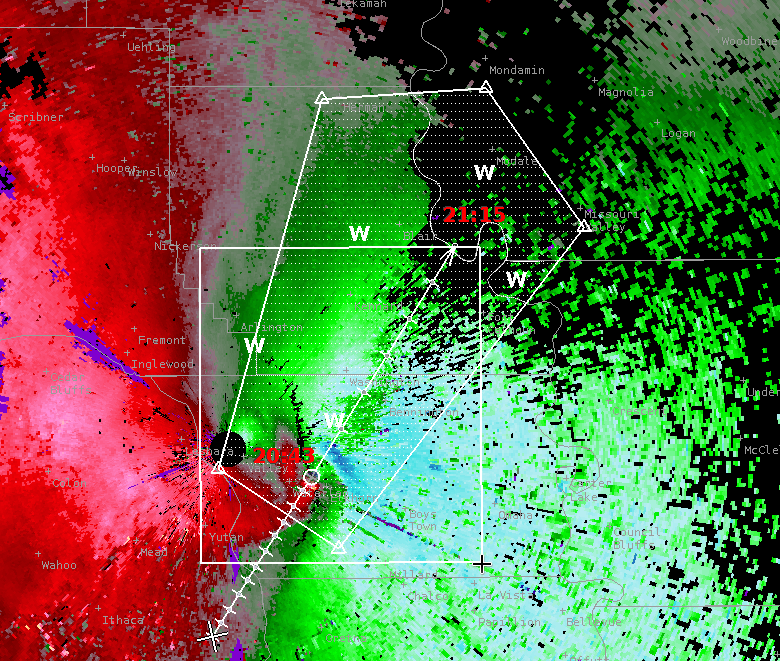
Let go of your left click. The new warning polygon area should be the original polygon area excluding the area underneath the rectangle you drew.
-
We are going to leave the area subtracted for now to continue with Part C practice.
C) Add to Area Action
-
With the subtracted polygon from Part B, we are going to re-add some of the polygon area. Remember to have the hazard event highlighted in the Console before continuing.
-
In the Drawing Tools dropdown select the Freehand Polygon Tool.
-
From the Drawing Action menu select the Add to Geometry icon.

-
We will add back some of the area we subtracted from the polygon in Part B. Left click and drag to freehand draw an area overlapping part of the original polygon.

Let go of the left click when finished with freehand drawing. The polygon will fill back in with the area underneath the freehand polygon that was within the original polygon area.
-
Remember to select Update hazard hatched area in the HID to preview how the simplified polygon will appear with site localization settings applied.
-
Keep this polygon area; we will use it as practice for Part D.
D) Intersect with Geometry Action
-
With the polygon from Part C, we will crop the polygon area with the Intersect With Geometry Action. Remember to have the hazard event highlighted in the Console before continuing.
-
In the Drawing Tool dropdown menu select the Rectangle Tool.
-
From the Drawing Action menu select the Intersect With Geometry icon.

-
This tool is meant to crop area of the polygon with the drawing tool and another polygon. In this case the Rectangle Tool will limit the polygon to the area under the rectangle. Left click and intersect the area of the hazard event polygon.

Only the overlapping areas should remain when you release the held left click.
Remember to select Update hazard hatched area in the HID to preview how the simplified polygon will appear with site localization settings applied. -
Keep this polygon area; we will use it as practice for Part E.
E) Subtract vertices from geometry action practice
-
With the polygon from the Part D practice, we will be removing vertices of a polygon with the Drawing Tools. Remember to have the hazard event highlighted in the Console before continuing.
-
We will be using the Rectangle Tool and pair it with the Subtract Vertices Action from the Drawing Action dropdown menu.

-
In D2D left click and drag to create a rectangle area that includes some of the vertices from your polygon.
When you let go of the left click, the vertices under the rectangle area will be subtracted from the warning polygon.