


20.2.3 Hydro Changes - Hazard Services
20.2.3 Hazard Services Hydro Changes Jobsheet
Purpose:
In this jobsheet you will test out the new Hazard Services hydro capability introduced with 20.2.3.Tasks:
The following hydro variances are covered in this jobsheet:
- CTA changes
- Consolidated rainfall in FFW/Expected Rainfall Rate/IBW Impact Statement
- Human reports new flooding event type
- FA.W River Name entry box moved
NOTES:
- This jobsheet requires the 20.2.3 version of Hazard Services.
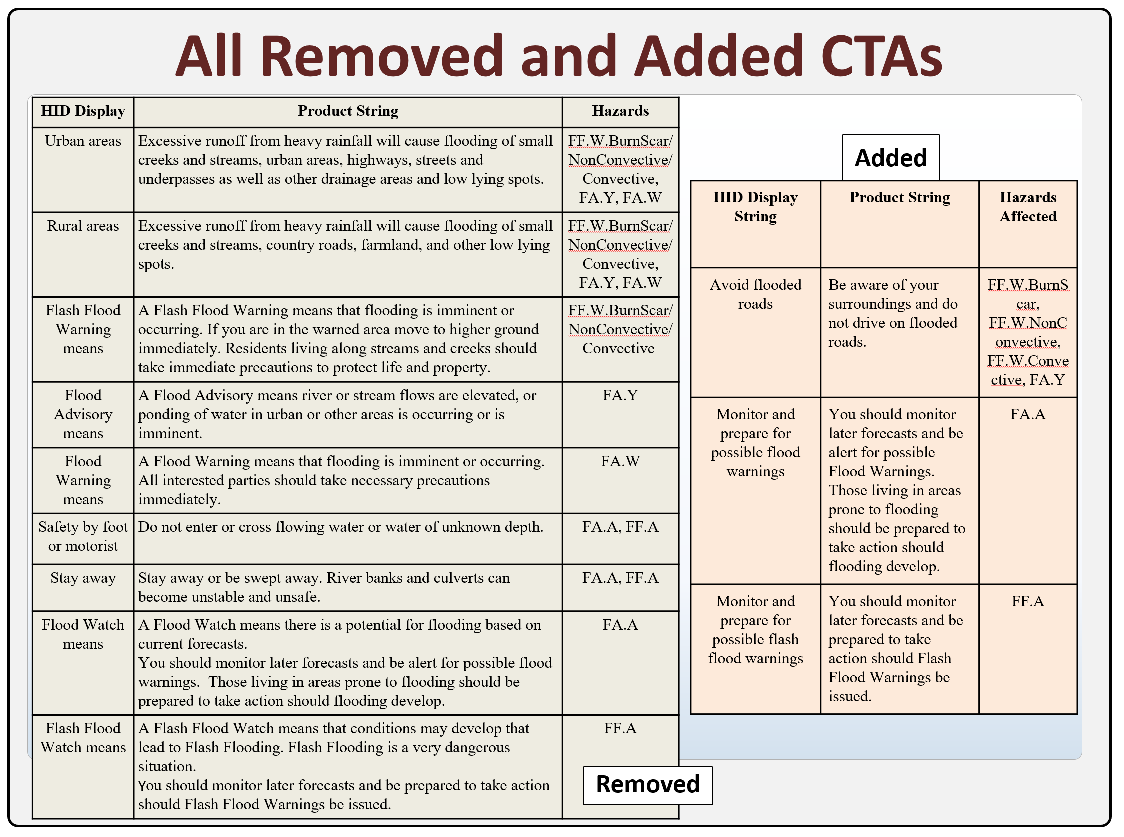
1. CTA Changes
- This section will create a polygon and change the Hazard Type in the HID to view the CTA changes in FF.W.Burnscar, FF.W.NonConvective, FF.W.Convective, FA.Y, FA.W, FA.A, and FF.A.
- On WFO scale, load Hazard Services by clicking on the yellow H button in CAVE.
- Load the Hydrology All setting by clicking on the Setup icon on the Hazard Services console and selecting the Load Settings menu and Hydrology_All and clicking the Load button.
- Draw a polygon by clicking on the pencil icon in the Hazard Services console and selecting Draw Polygon. Left click on the desired vertices in the spatial display and right click to complete the polygon and load the HID.
- Under the Type: menu cycle through each Hazard to inspect the changes to the CTAs (click Preview to view text with new CTAs):
- FF.W.BurnScar, FF.W.Convective, FF.W.NonConvective,
- Added: Avoid flooded roads
- Removed: Urban areas, Rural areas, Flash Flood Warning means
- FA.Y
- Added: Avoid flooded roads
- Removed: Urban areas, Rural areas, Flood Advisory means
- FA.W
- Removed: Urban areas, Rural areas, Flood Warning means
- FA.A
- Added: Monitor and prepare for possible flood warnings
- FF.A
- Added: Monitor and prepare for possible flash flood warnings
- Summary of CTAs Added
- Avoid flooded roads (FF.W.Burscar/NonConvective/Convective, FA.Y)
- Monitor and prepare for possible flood warnings (FA.A)
- Monitor and prepare for possible flash flood warnings (FF.A)
- Summary of CTAs Removed
- Urban areas (FF.W.BurnScar, FF.W.NonConvective, FF.W.Convective, FA.Y, FA.W)
- Rural areas (FF.W.BurnScar, FF.W.NonConvective, FF.W.Convective, FA.Y, FA.W)
- Flash Flood Warning means (FF.W.BurnScar, FF.W.NonConvective, FF.W.Convective)
- Flood warning means (FA.W)
- Safety by foot or motorist (FA.A, FF.A)
- Stay away (FA.A, FF.A)
- Flood Watch means (FA.A)
- Flash Flood Watch means (FF.A)
- FF.W.BurnScar, FF.W.Convective, FF.W.NonConvective,
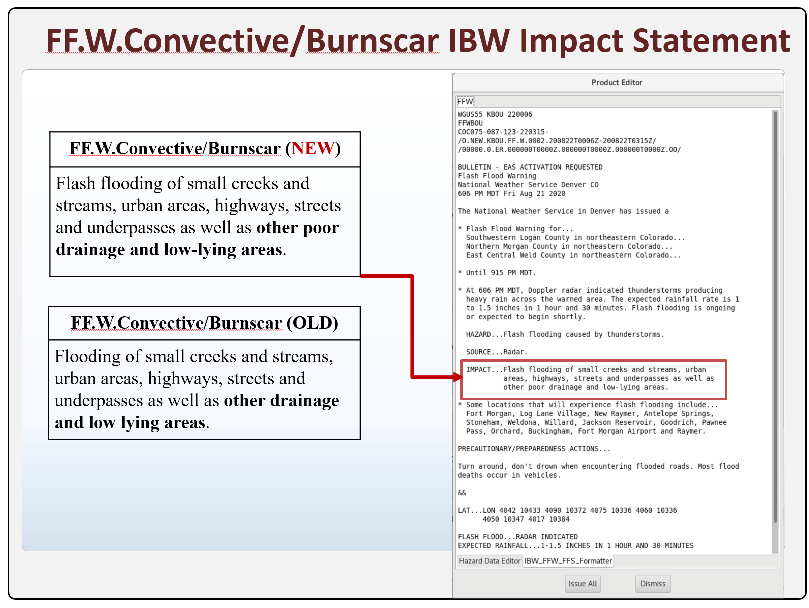
2. Consolidated Rainfall in FFW/Expected Rainfall Rate/IBW Impact Statement
- This section will start to create a flash flood warning in order to check out the consolidated rainfall entry in the HID. It assumes you have loaded Hazard Services as in the previous section.
- Start creating a flash flood warning (see steps 2-5 in section 1) and in the HID note the following rainfall entry widgets are next to each other:
- Rain so far
- Expected Rainfall Rate (note the name for this has changed from Amount/Duration Expected)
- Additional Rainfall
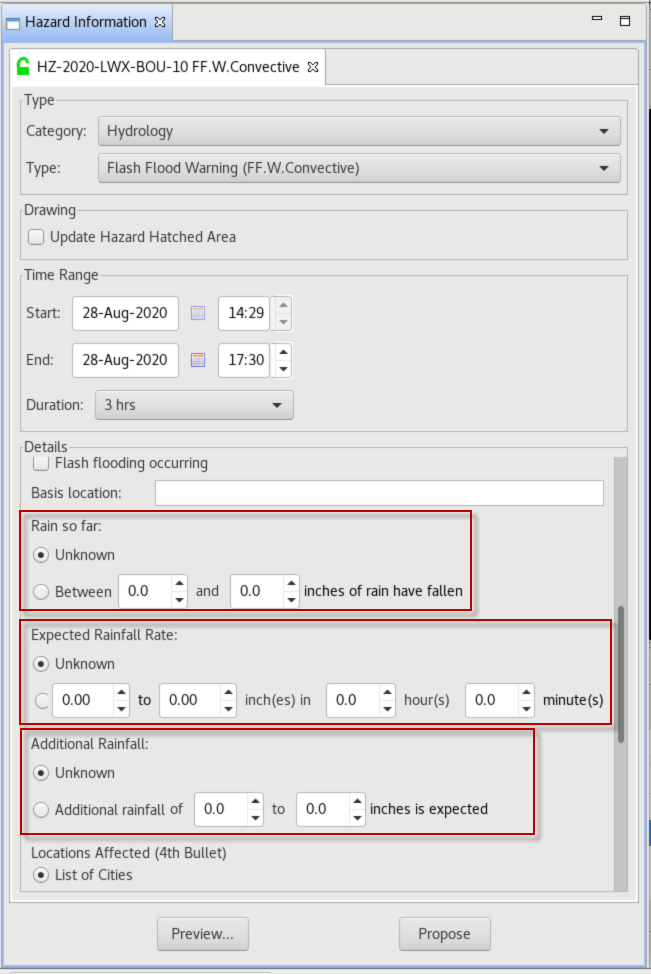
- Configure amounts in each of the three rainfall widgets and click the Preview button and the IBW_FFW_FFS_Formatter tab to inspect the text consolidation:

- Note the IBW IMPACT statement new text.
3. Human Reports New Flooding Event Type
- This section will start to create a flash flood warning in order to check out the consolidated rainfall entry in the HID. It assumes you have loaded Hazard Services as in section 1.
- Start creating a flash flood warning (see steps 2-5 in section 1), select a human report type (e.g. Trained spotters reported), and in the HID select Flooding under the Event type pull-down menu.
- Note that the Flash flooding occurring checkbox has been moved to just below the Event type
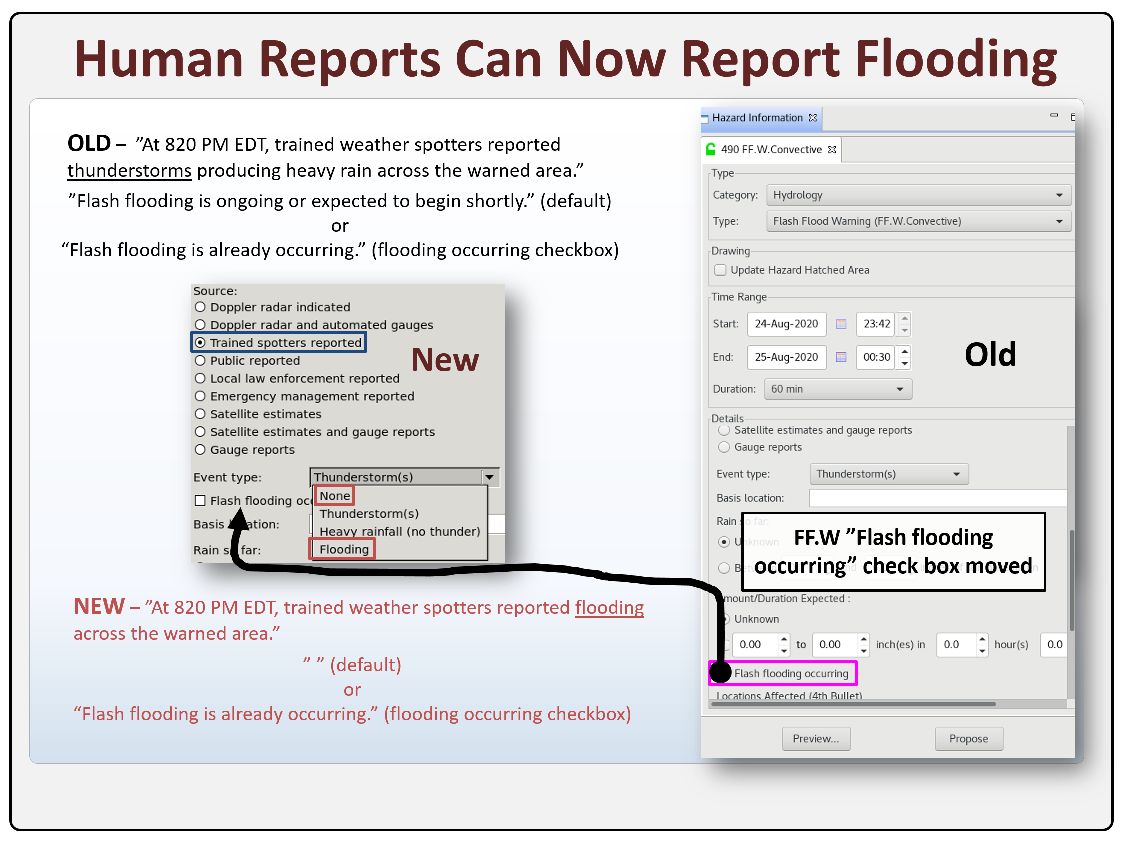
- Note that the Flash flooding occurring checkbox has been moved to just below the Event type
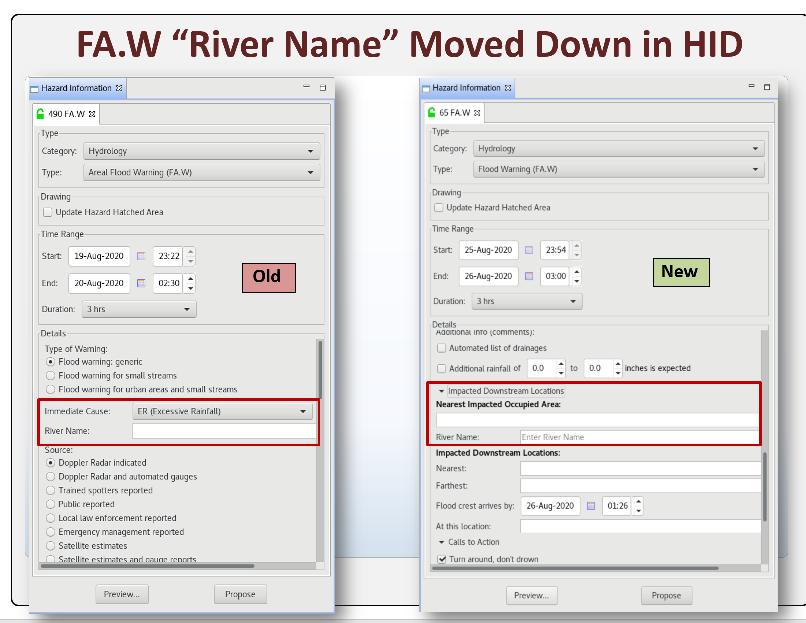
4. Flood Warning (FA.W) River Name Widget Moved
- This section will start to create an flood warning in order to check out the consolidated rainfall entry in the HID. It assumes you have loaded Hazard Services as in section 1.
- Start creating a flood warning (see steps 2-5 in section 1) and in the HID click on the Impacted Downstream Locations pulldown to view the new position of the River Name widget just below the Nearest Impacted Occopied Area: text box.