Purpose:
This jobsheet covers how to enable radar virtual volumes in the new 23.4.2 Cross Sections. It's best to test this capability with a severe weather case, or loaded in radar data.
Tasks:
- If continuing from the previous section with a 3 panel still loaded, skip to step 7.
- Open your desired radar menu and scroll to Cross Sections. Load a 3 Panel Combo Reflectivity.
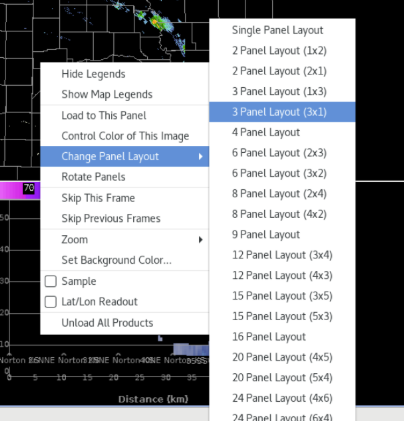
- Right click and hold and Change Panel to 3x1.
- Zoom in to a storm in the left all-tilts panel, and tilt up and down using the keyboard arrows until you find a feature you wish to generate a cross section on.
- Right click on the two points you want to use to draw a baseline from left to right (A on the left, A’ on the right. If you mix these up, the cross section will show up backwards).
***NOTE: The cross section panel will update after about 7 seconds. The CAVE status bar in the lower right will say “Awaiting further baseline changes” until it finishes updating.
- With live updating radar data, watch a full volume scan update and note it requires 5 tilts to generate a vertical cross section.
- Under the Tools menu, load Radar Display Controls.

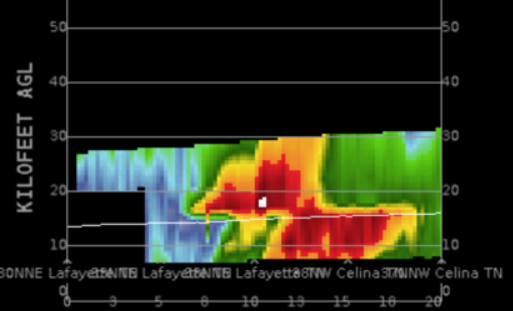
- Under the Virtual Volumes section at the bottom, select Enable Virtual Volumes and navigate to the last frame by either using the >>| end of frame button in CAVE or doing Ctrl-right keypad arrow.
- The vertical cross section will then draw a white line separating the new data (below the line) and the old data (above the line) from the previous volume scan. There will be a discontinuity between the old and new data, and it is not uncommon for this to be challenging for some forecasters to interpret. This setting is toggled off by default.
***NOTE: This has limited utility with fast moving storms.


