Creating and Editing Polls in VLab - OCLO
Creating and Editing Polls in VLab
Purpose:
This page describes the steps necessary to create and edit polls in VLab.Tasks:
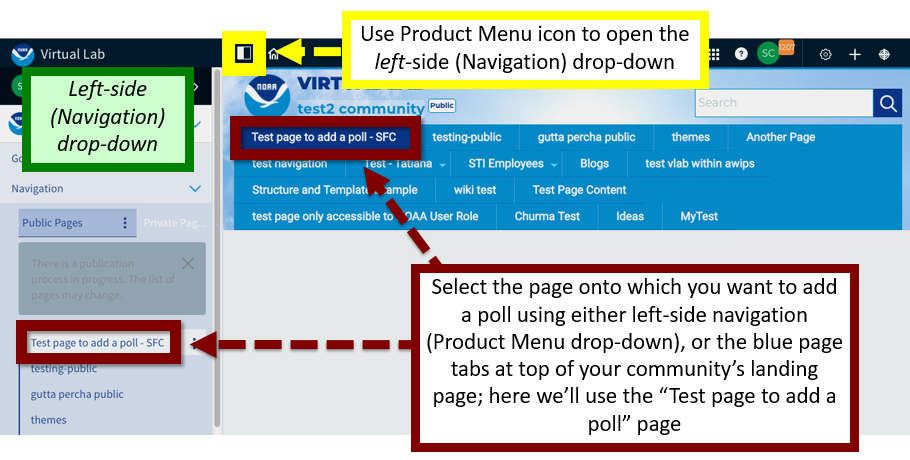
- First, display the VLab page to which you wish to add a poll.
-
You can do this by clicking the rectangular Product Menu icon to open the left-side navigation menu and selecting your page from the list that subsequently appears. Alternatively, you can simply select your page from the blue-colored page tabs at the top of your community’s landing page.
-
-
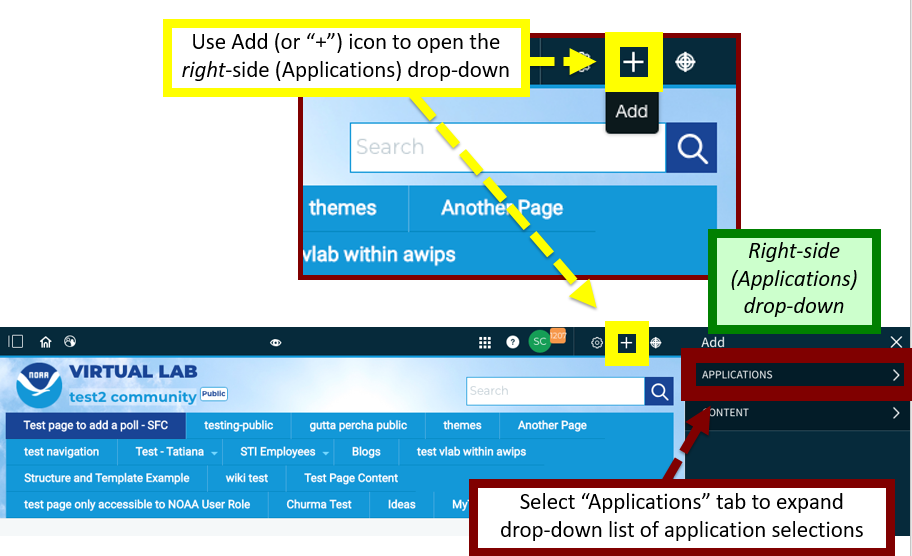
Next, click the Add (or ”+”) icon to display the right-side (Applications) drop-down menu. Select the “Applications” tab to expand the list of application selections.
-
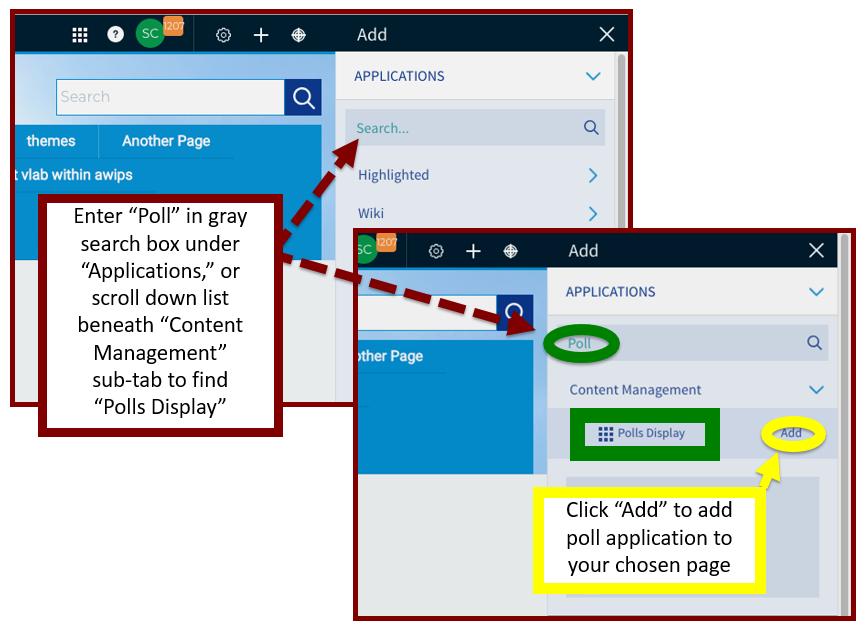
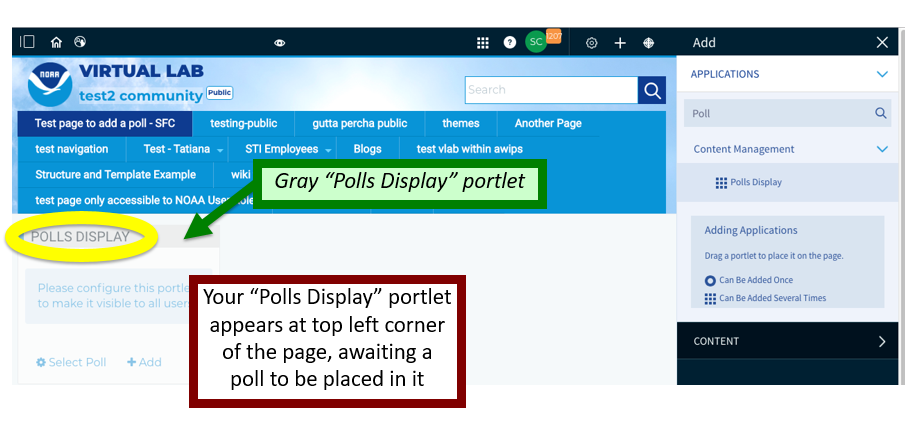
Now either enter “Poll” in the gray search bar in the right-side drop-down, or scroll down through the selections in the “Content Management” sub-tab beneath “Applications” to display the “Polls Display” tab. Click the “add” key on the right end of the “Polls Display” tab to add a poll portlet.
-
Note that the “Nine-dot” icon on the “Polls Display” tab indicates that any number of poll portlets may be added to a VLab page.
-
-
By default, your added “Polls Display” portlet will appear in the top left corner of the page; the portlet can be moved elsewhere on the page if desired. The poll is now ready for a poll to be placed in it.
-
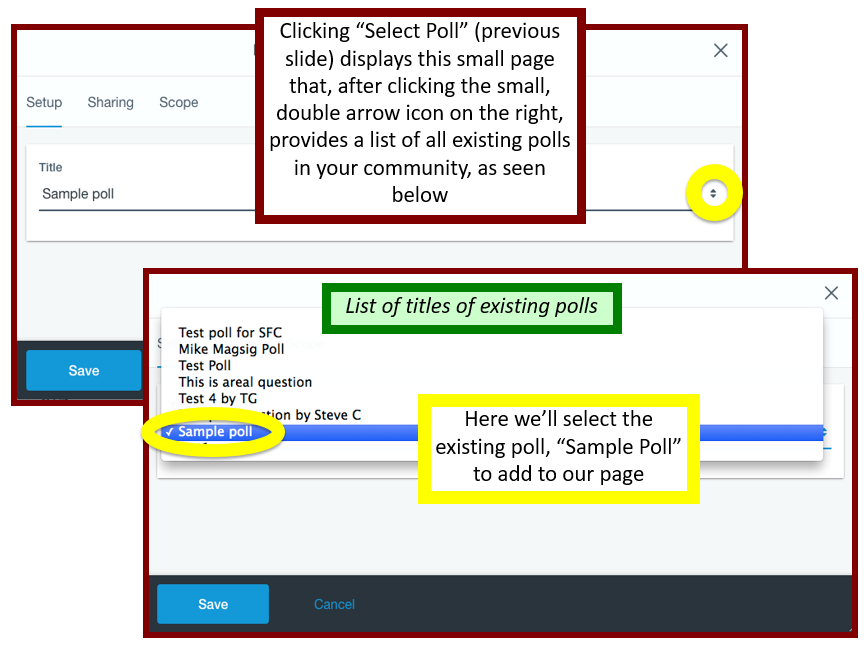
To display an existing poll in the portlet, i.e., one that already has been created, click the “Select Poll” icon in the bottom left part of the “Polls Display” box.

-
-
The page at the top of the image below appears upon clicking “Select Poll” in the “Polls Display” box. Clicking the small arrow at the right end of the “Title” line displays the list of existing community polls shown in the lower part of this image. Here we’ll select the poll titled “Sample poll” so that it will display in the recently added “Polls Display” portlet.
-
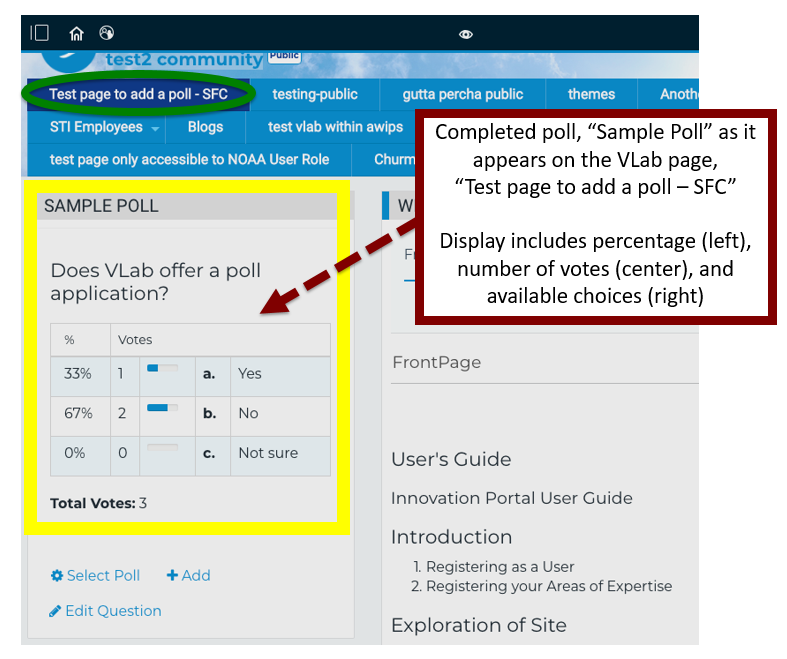
The selected existing poll, “Sample Poll,” now appears in the “Polls Display” box on the “Test page to add a poll - SFC” page. The default display includes percentage (left column), number of votes (center, with accompanying horizontal bars), and available choices (right).
-
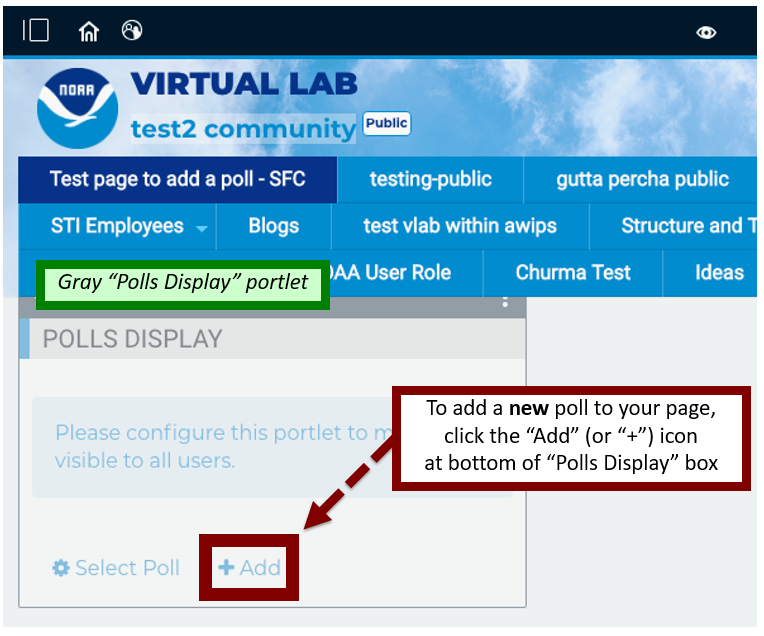
To add a completely new poll to your “Polls Display” portlet, click the “Add” (or “+”) icon instead of the “Select Poll” icon at the bottom of the “Polls Display” box.
-
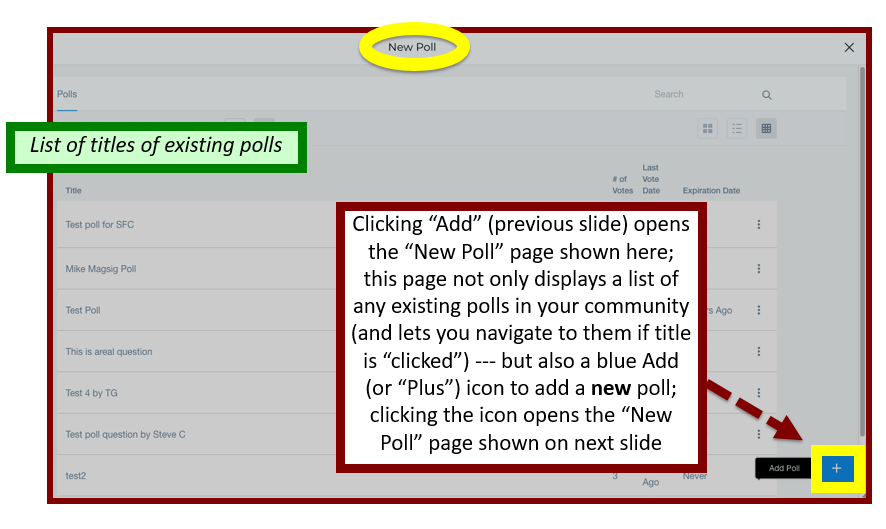
Selecting the “Add” icon in the “Polls Display” portlet box opens this “New Poll” page. This page not only displays a list of existing polls (left side), but also includes the blue Add (or “+”) icon at the lower right that is clicked to open the “New Poll” page shown in the next image.
-
In the mean time, if you decide after all that you want to instead add an existing poll, clicking the title of one of the existing polls will add the poll to your portlet.
-
-
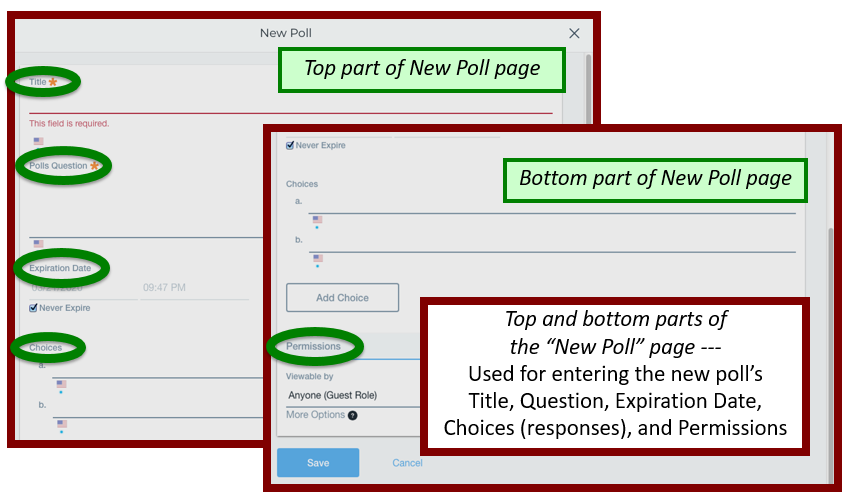
The top and bottom parts of the “New Poll” page are shown below. This page is used to enter the title, question, expiration date, choices (responses), and permissions information for your new poll.
-
Here, we have entered the required information for the new poll that we are calling “Sample poll two.” Click “Save” at the bottom of the page to save your settings.

-
The completed new poll, “Sample poll two,” as it now appears on the page “Test page to add a poll – SFC” --- awaiting votes (using the “Vote” tab).

-
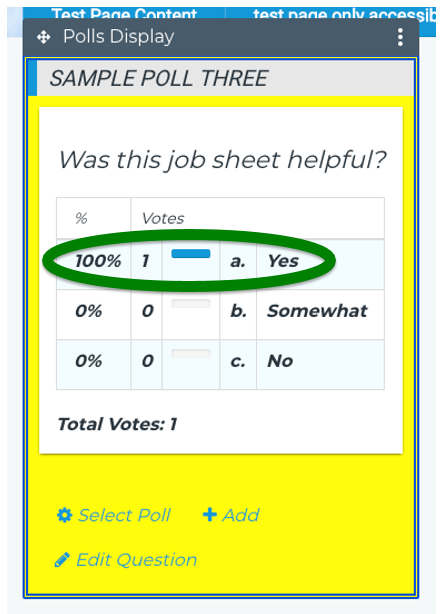
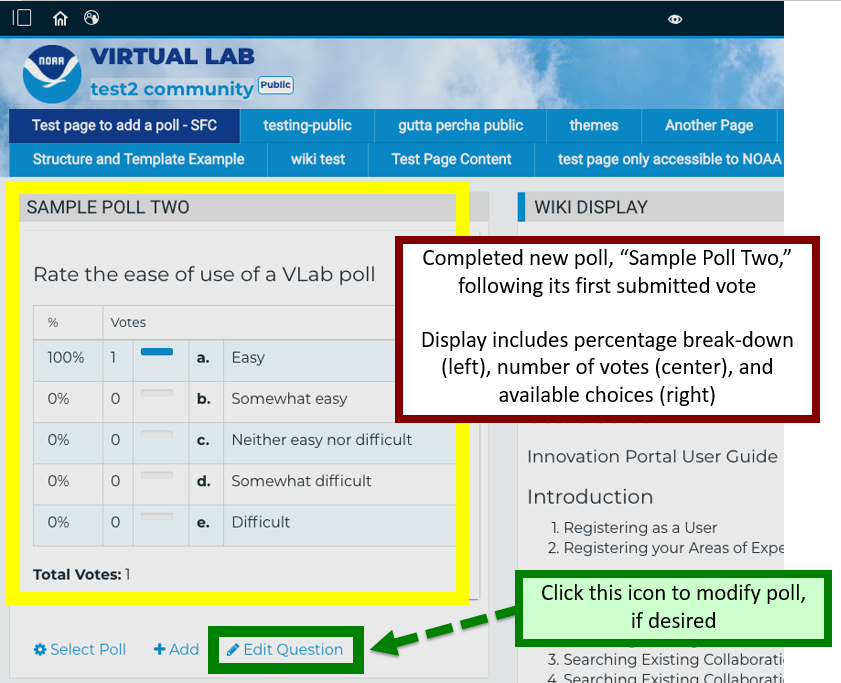
The completed poll, ”Sample poll two,” after having received its first vote. The poll can still be modified, if desired, by using the “Edit Question” icon.
-
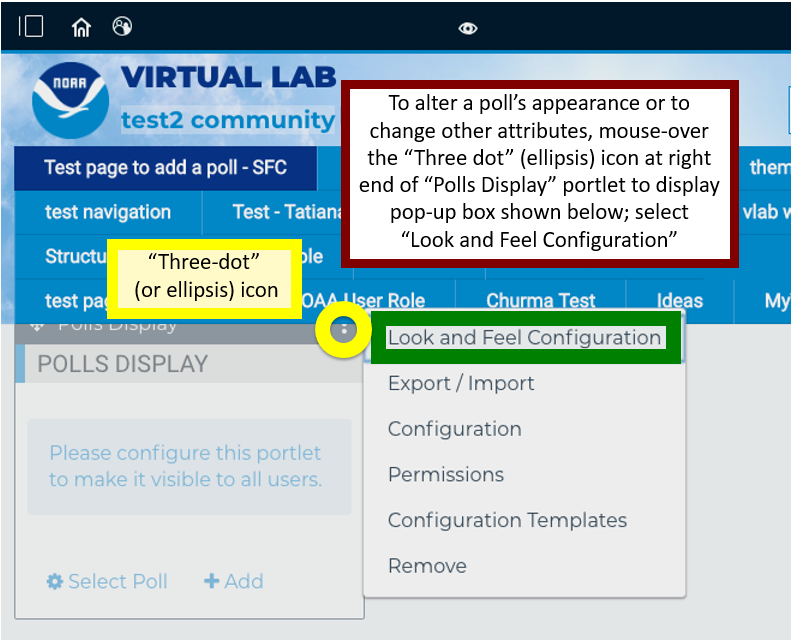
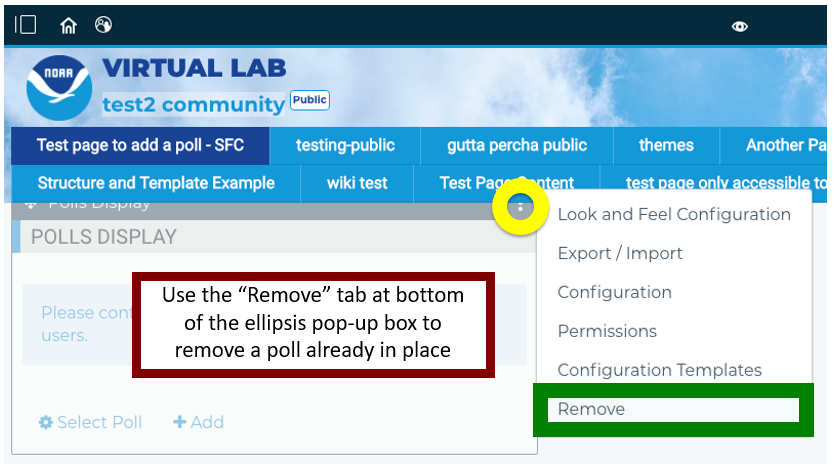
To alter a poll’s appearance on your page --- or to change other attributes --- mouse-over the ellipsis (three-dot) icon on the right end of the “Polls Display” portlet. This displays the pop-up box shown here. Select “Look and Feel Configuration.”
-
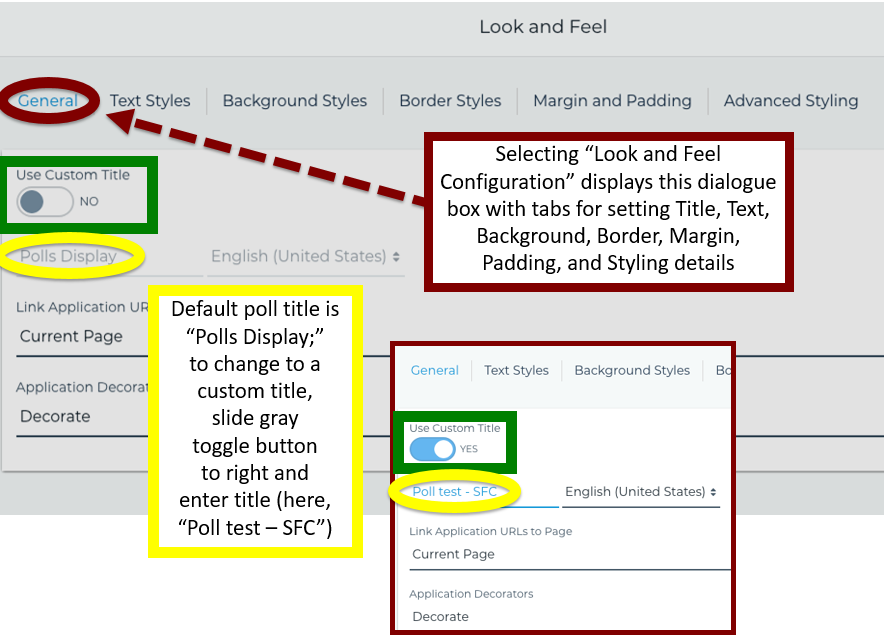
Selecting “Look and Feel Configuration” displays this dialogue box with tabs across the top for setting title (under “General”), text, background, border, margin, padding, and styling details. Here we have selected the “General” tab that is used main for changing title attributes. The default poll title is “Polls Display;” slide the gray toggle button beneath “Use Custom Title” to enter a different title. Here we have entered “Poll test – SFC.”
-
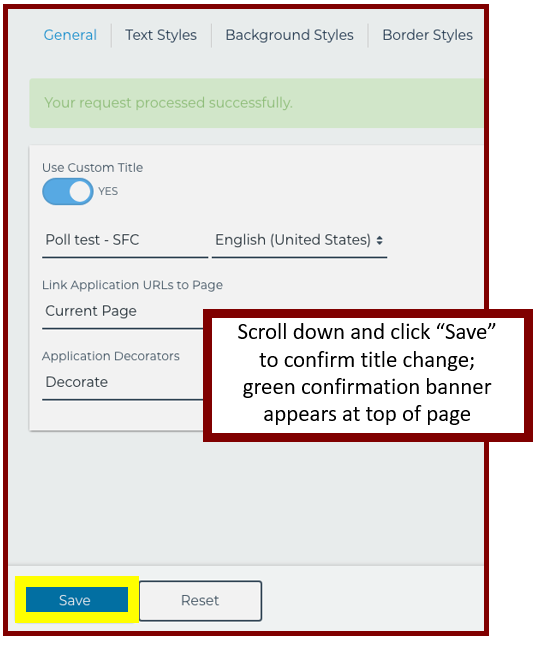
Scroll down to click “Save” to save your edits; a green confirmation banner appears when your entries have been saved.
-
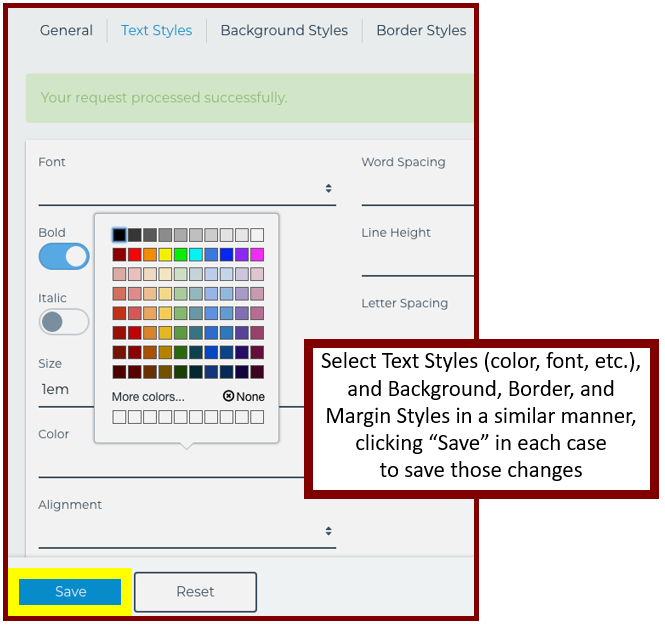
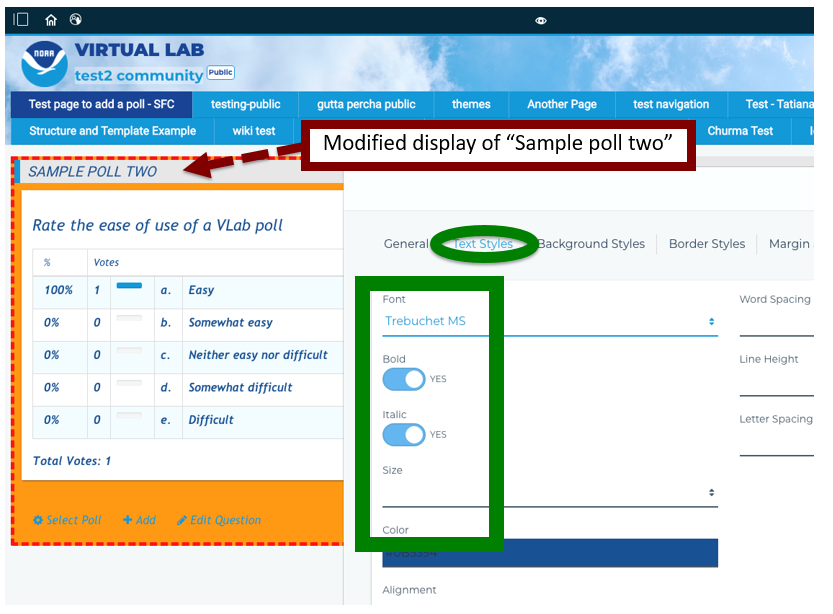
In a similar manner, use the “Text Styles,” “Background styles,” and “Border Styles” tabs, etc., to change those attributes from their default settings. You must click the “Save” tab (at the bottom of the page) in each case to save your changes.
-
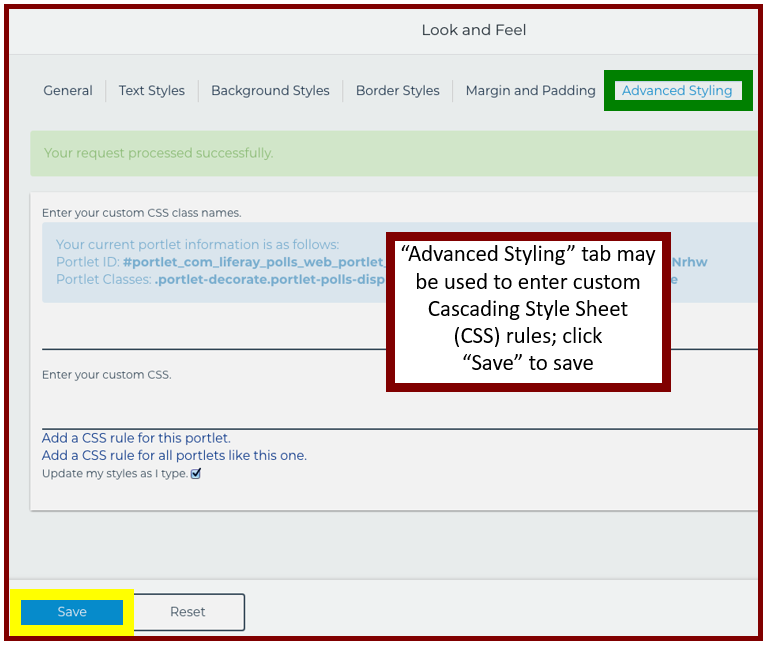
The “Advanced styling” tab is used to enter custom Cascading Style Sheet (CSS) rules.
-
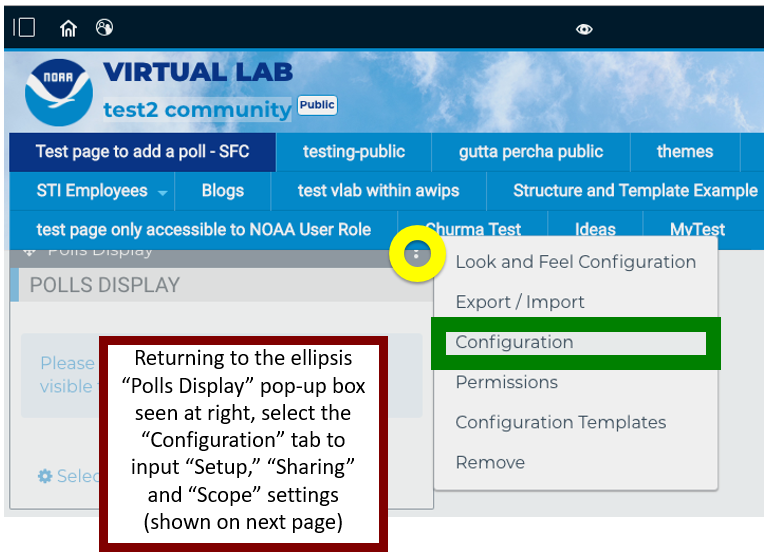
Returning to the “Polls Display” ellipsis pop-up box, select the “Configuration” tab to input “Setup,” “Sharing,” and “Scope” attributes.
-
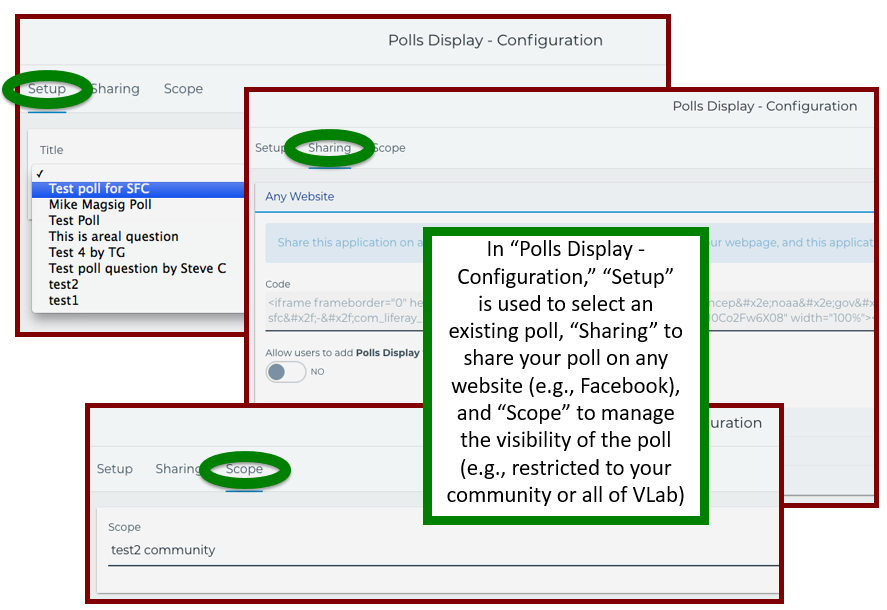
In “Polls Display - Configuration,” “Setup” is used to select an existing poll, “Sharing” to share your poll on any website (e.g., Facebook), and “Scope” to manage the visibility of the poll (e.g., restricted to your community or all of VLab).
-
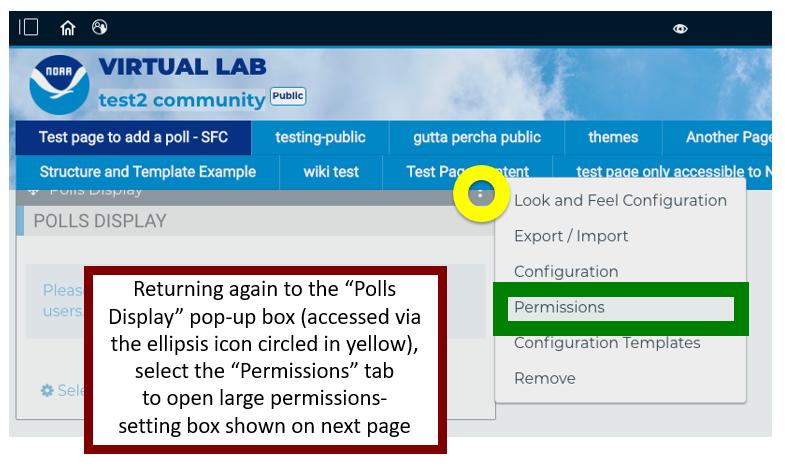
Clicking the “Permissions” tab in the “Polls Display” pop-up box displays the permissions-setting page shown in the next image.
-
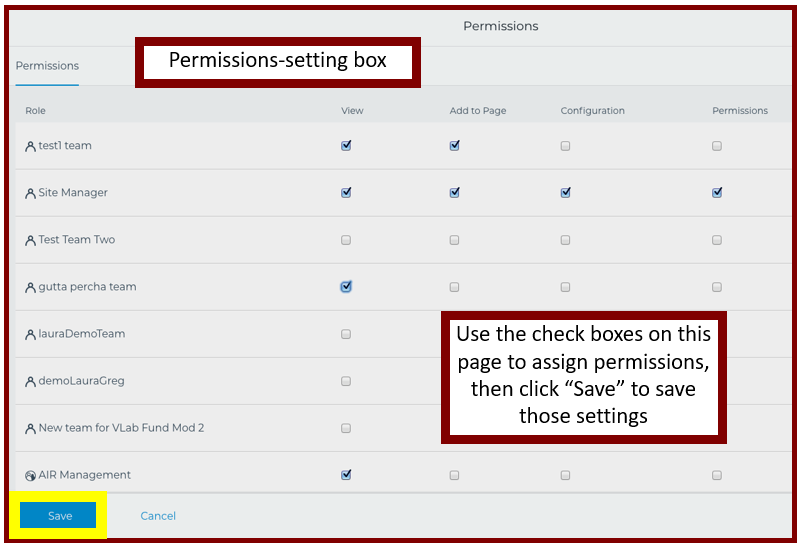
Permissions are assigned by selecting the appropriate check boxes, as seen here. Click “Save” (scroll to the bottom of the page) to save those permissions.
-
The “Remove” tab in the “Polls Display” pop-up box provides a handy way to remove a poll. A warning box (not shown) appears after you have selected “Remove,” asking you to confirm the request before it is executed.
-
Here is an example for the same poll created earlier, but after alterations to text, border, and margin attributes were made. The right-side pop-up shows that the text font has been changed to “Trebuchet MS,” and that both the “bold” and “italic” options have been selected. The poll’s border and background color also were changed using the tabs to the right of “Text styles.”
-
You have completed this job sheet on adding and modifying VLab polls. We hope you have found it to be helpful!