


FFmpeg Jobsheet - OCLO
Recording the Desktop With FFmpeg
Purpose:
To record your desktop.Tasks:
Command Line Instructions
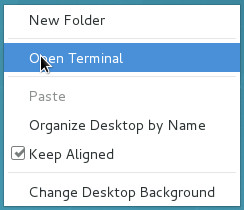
- Right click on the desktop background and select Open Terminal.
- In the Terminal, select the text in yellow and paste it into the shell window by clicking on the middle mouse wheel:
To record left 19" monitor:
ffmpeg -video_size 1280x1024 -framerate 25 -f x11grab -i :0.0,150 -f pulse -ac 2 -i default -strict -2 videoTest.mp4
To record middle 27" monitor:
ffmpeg -video_size 2560x1440 -framerate 25 -f x11grab -i :0.0+1280,0 -f pulse -ac 2 -i default -strict -2 videoTest.mp4
To record right 27" monitor:
ffmpeg -video_size 2560x1440 -framerate 25 -f x11grab -i :0.0+3840,0 -f pulse -ac 2 -i default -strict -2 videoTest.mp4
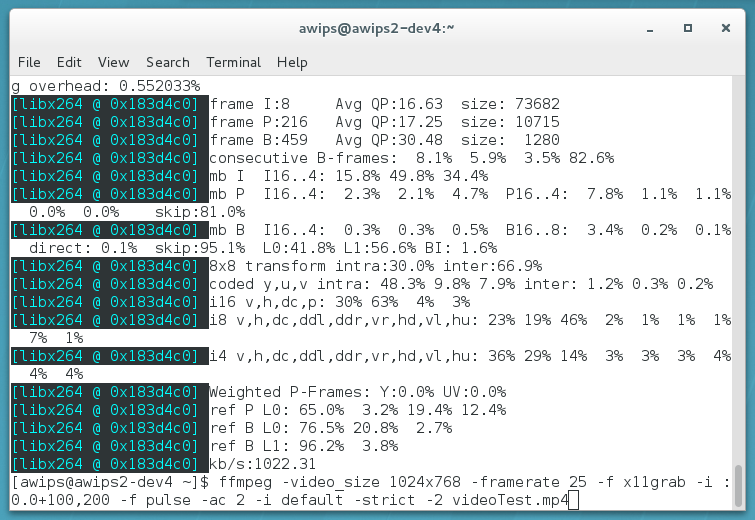
- You will see the terminal get populated with moving lines of text. This is normal.
- Move the mouse around the desktop, opening and closing applications. Also, if you have a microphone plugged in, record yourself talking while you're recording the desktop.
- Left click back in the Terminal and press 'q' on the keyboard to stop the recording process. Allow 30 seconds for the video to finish rendering.
- The default video player in AWIPS has been unable to play videos captured by FFmpeg by double clicking on the video file using the Linux file explorer. You can play the video in AWIPS using the program, ffplay, by opening a shell window and running the command, ffplay, with the full path to the file (e.g. ffplay /home/awips/video1.mp4 or ffplay video1.mp4 if you are in the same folder). Use 'p' on the keyboard to pause the video and to resume. User controls for this application are limited.
- To configure the default video player to use ffplay, so you can launch the videos from the Linux file explorer, have your ITO set this up using the instructions provided HERE.
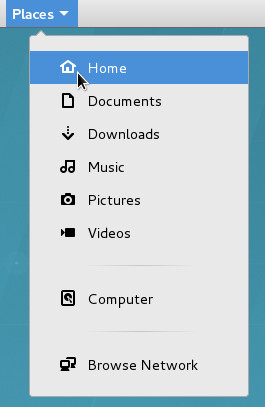
- From the Places menu, select Home.
- Double click on your recorded video. The video will launch using ffplay. Use 'p' on the keyboard to pause the video and to resume.
- From the Places menu, select Home.
- For longer videos, you may want to consider resizing the video to create a smaller file for use in social media. By default you're recording in 2K (2560x1440) resolution when you run the commands in Step 2 of this jobsheet. That is the maximum resolution of the 27" monitors. In the Terminal, select the text in yellow and paste it into the shell window by clicking on the middle mouse wheel:
1920x1080
ffmpeg -i videoTest.mp4 -vf scale=1920:1080 -strict -2 videoTest1080p.mp4
1280x720
ffmpeg -i videoTest.mp4 -vf scale=1280:720 -strict -2 videoTest720p.mp4
Try each and see which video dimensions are most effective at creating a small enough file that also maintains a usable video quality.
- The .mp4 format is a standard video format that produces visually sharp and small-sized video files that can be played with the ffplay application in AWIPS. However some video players like Windows Media Player and browsers like Firefox may not play .mp4 videos by default (DirectShow-compatible MPEG-4 decoder packs and supplemental players like VLC can help). To use Windows Media Player to play videos produced by ffmpeg, you can convert your video file produced in previous steps to an .avi or .wmv format or you could manually recapture to a different file format by using a different filename extension (e.g. videoTest.avi). The .avi and .wmv formats can introduce some fuzziness in the images and file size changes, so trial and error is best to settle on what is acceptable for your needs. To convert a video, in the Terminal, select the following text in yellow and paste it into the shell window by clicking on the middle mouse wheel:
To convert from .mp4 to .avi:
ffmpeg -i videoTest.mp4 videoTest.avi
- The capture command in step 9 will result in a slight loss in video quality due to resampling and compression. Using the following command will result in a lossless video file:
To convert from .mp4 to .avi without loss in video quality:
ffmpeg -i videoTest.mp4 -qscale 0 videoTest.avi
Note: The above command comes at a cost of a considerably larger file size.
GUI Instructions
- Jake Wimberley from the GSP office has created a GUI to make it easier to use capture videos. To have your ITO create a Desktop shortcut to the run_ffmpeg.sh GUI launcher, follow the instructions HERE and then proceed on to step 2.
- Run these commands (if you saved the link to a directory other than Desktop, use that directory in place of Desktop):
./Desktop/run_ffmpeg.sh - Follow the prompts on each subsequent pop-up window.
- Enter the name for the video file.

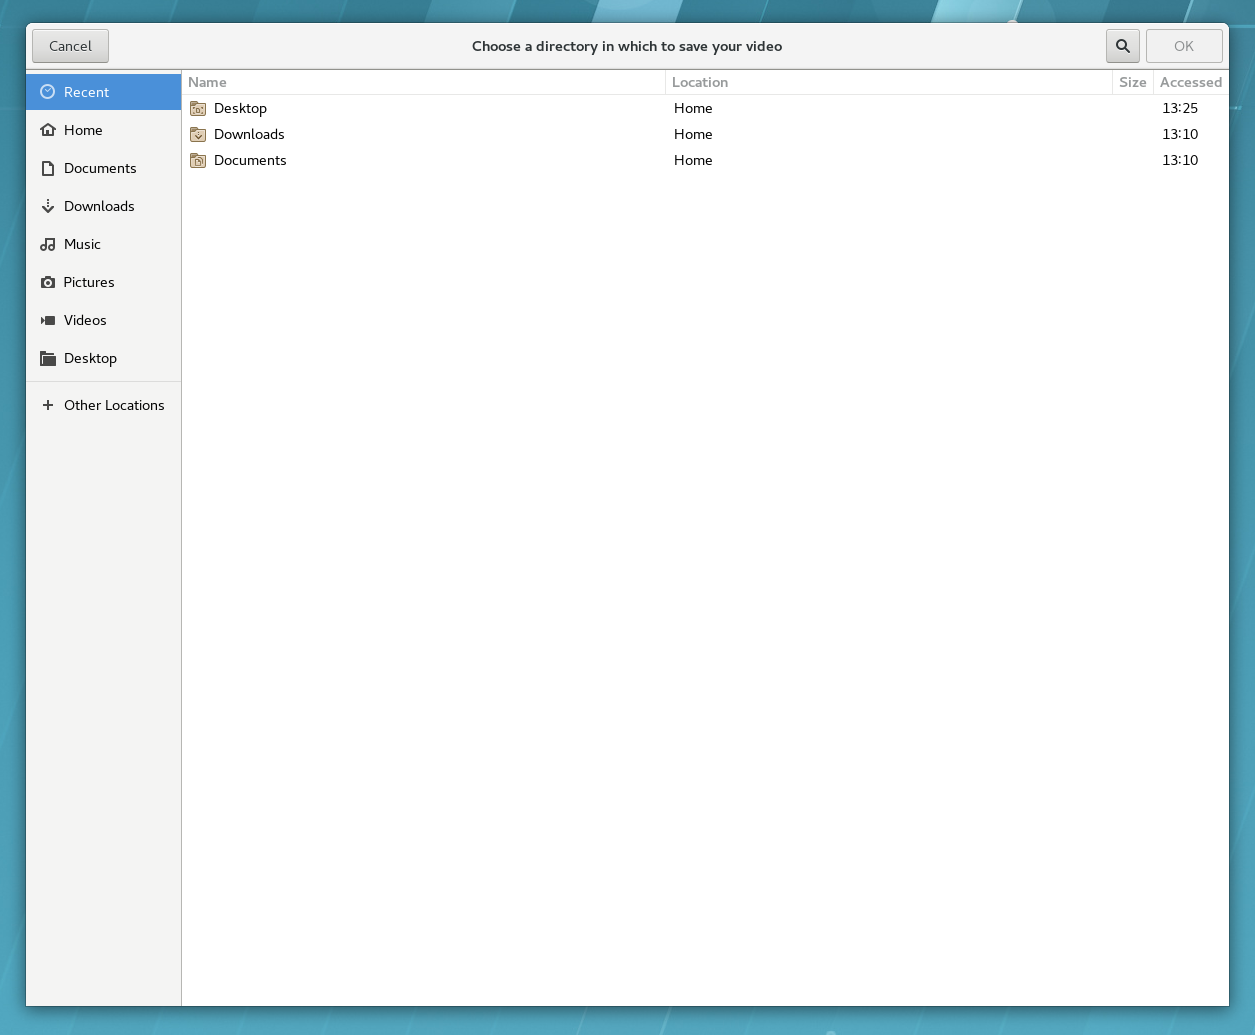
- Select a destination for the video file.
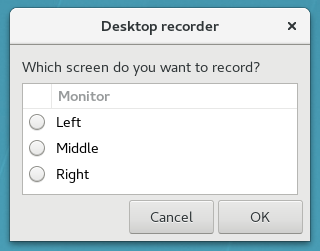
- Select which monitor you want to record.
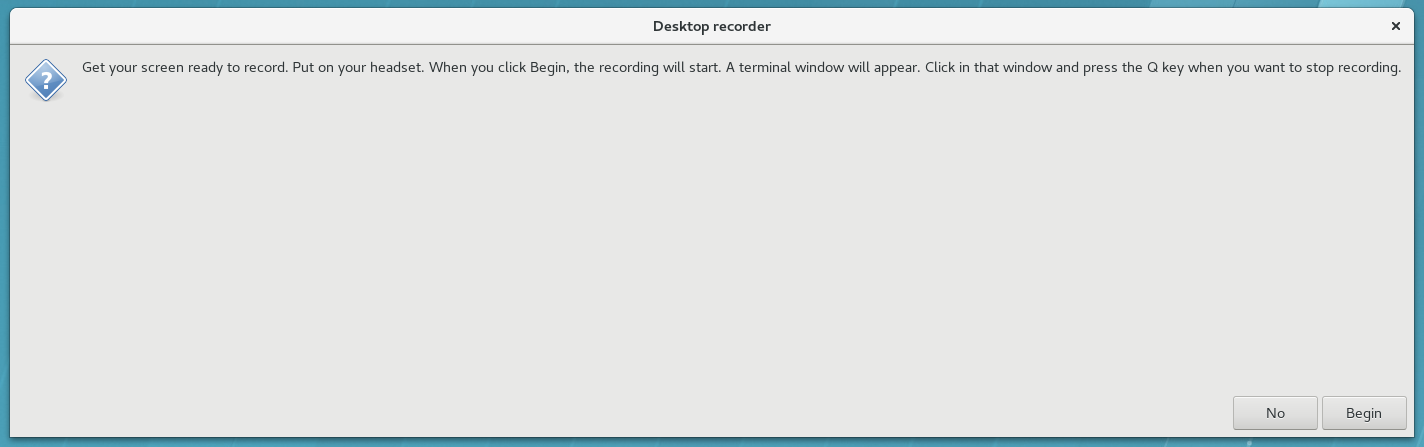
- Click Begin.
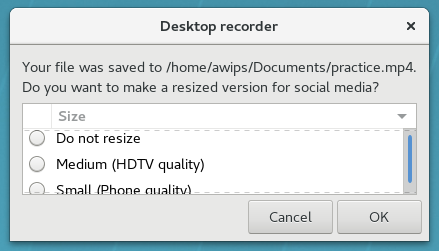
- Select whether you want to keep the original video size, or scale it down.
- From the Places menu, select Home.
- Double click on your recorded video. Your video will launch using ffplay. User controls for this application are limited. Use 'p' on the keyboard to pause the video and resume.