


Creating/Displaying Web Content - OCLO
Creating and Displaying Basic Web Content in VLab
Purpose:
This jobsheet walks through the steps necessary to create basic web content in VLab, including basic permissions checks, description, and categorization.Tasks:
Prerequisites:
- Your VLab community admin must grant you at least the "Community Content Reviewer" role to allow you to create web content in your community. For NWS field offices (WFOs, RFCs) your SOO/DOH/ITO will have community admin roles.
- After logging in to VLab, select your community by clicking on the circular "Select Community" icon (third from the left in VLab's Control Menu) to launch a "Select Community" pop-up window, and then click on the appropriate community name to go to that community's home page.
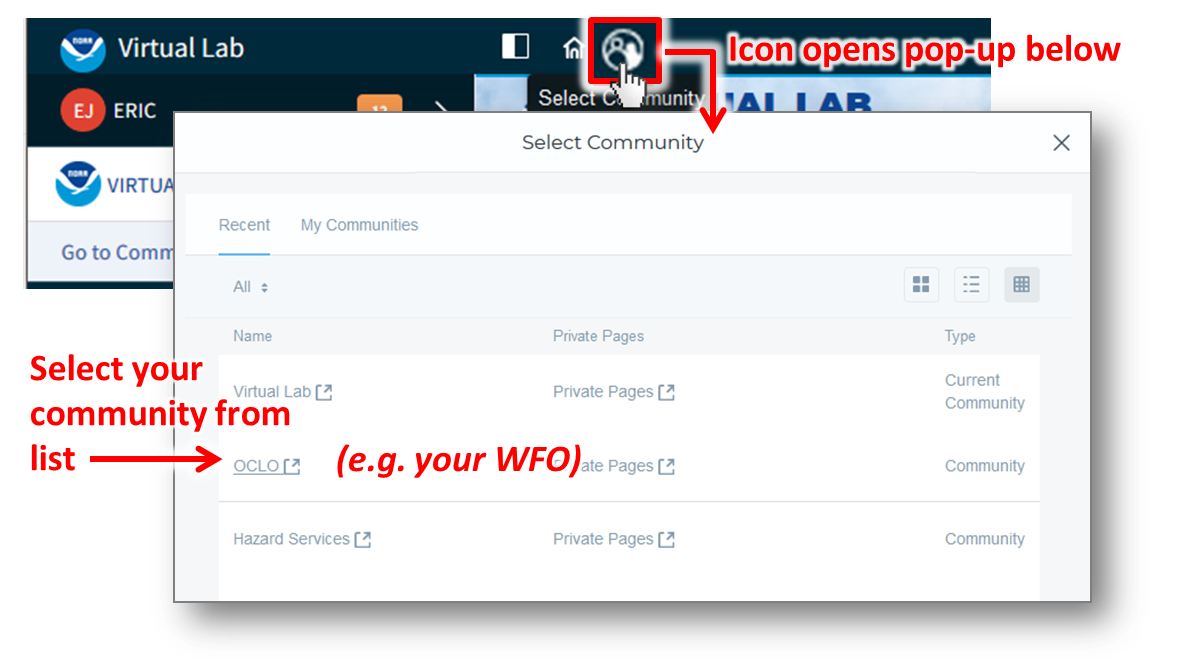
- You must have at least the "Community Content Reviewer" role in a community to proceed to any of the following steps and contribute content
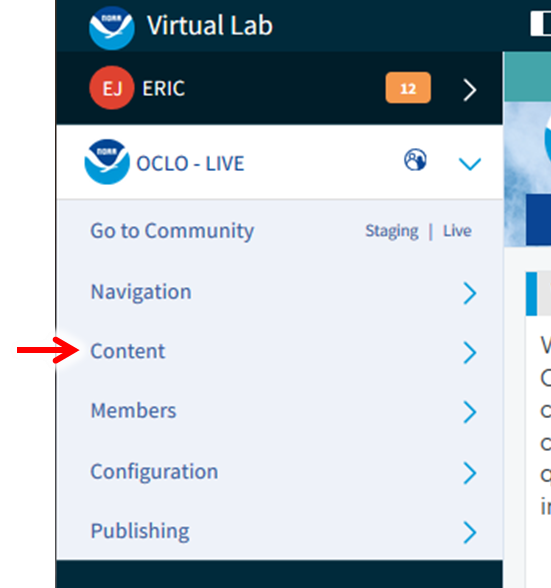
- From the left-side "Admin" menu of your community's VLab page, click on "Content" to proceed to the content administration interface.
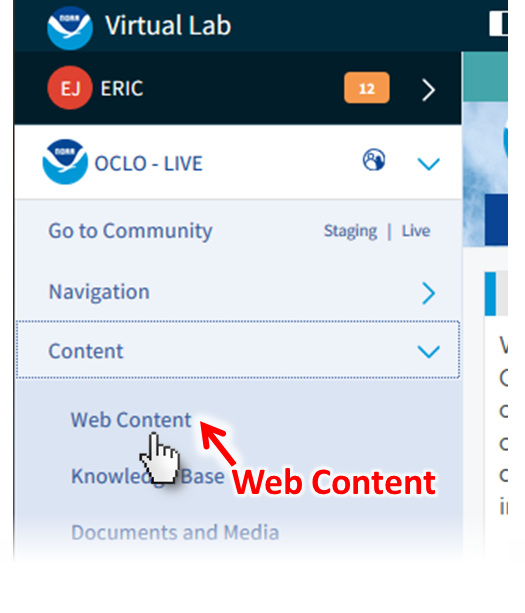
- To create web content, click on "Web Content" in the left-side menu options, which is within the expanded "Content" submenu.
- [BEST PRACTICE STEP] Use a well-organized directory structure to save your materials in. If one already exists, try to find a suitable place for your content, creating sub-directories as necessary. See extra steps at the end of this jobsheet for help with managing directories.
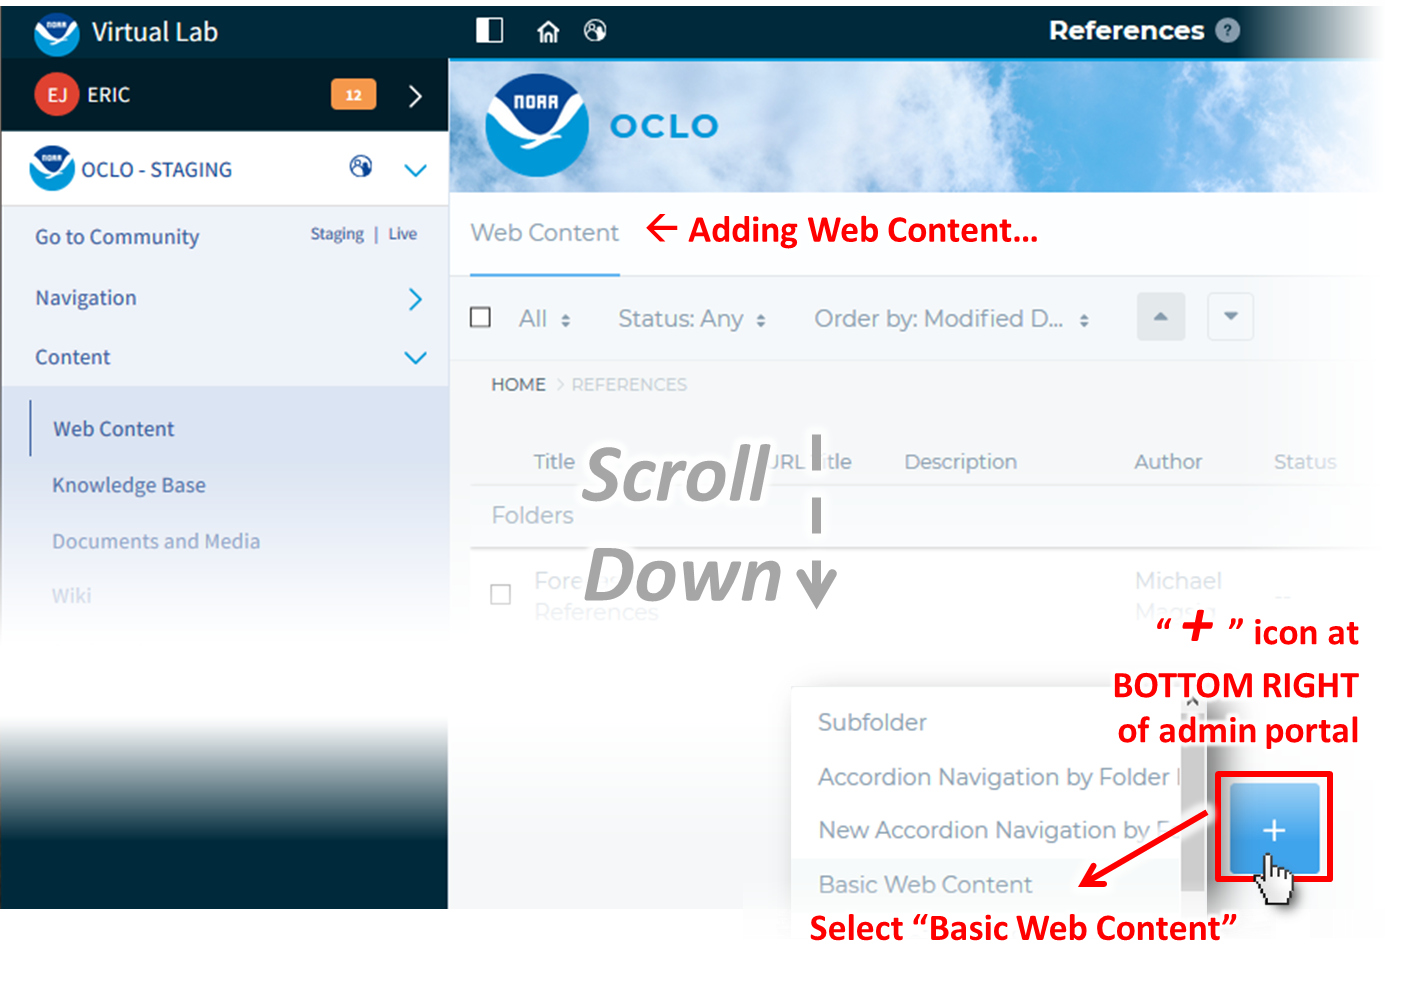
- Within the desired destination directory, scroll down to the bottom of the page to find and click the blue and white "+" button, then from the pop-up menu select "Basic Web Content" from the available options. This will open a new editor interface for Web Content.
- Enter a Title for the content, making it concise but descriptive
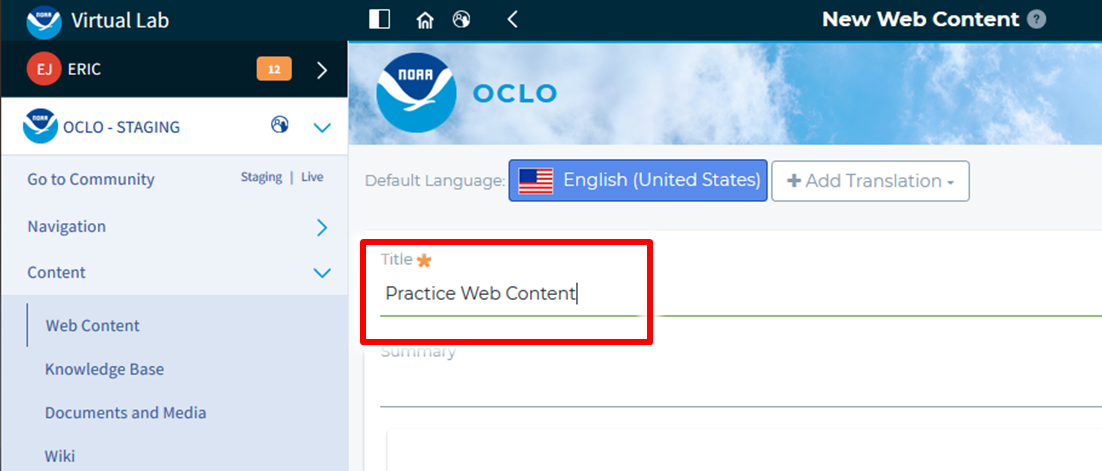
- TIP: Prefix or include in the title the type of content this is. Is it a jobsheet? A quick reference? Etc.
- TIP: Use spaces between words in the title, instead of special characters like an underscore or no spaces. This enhances readability and allows searches to better query keywords in the title
- Enter content using the content editor tools, following the below steps for a basic demonstration of the capabilities:
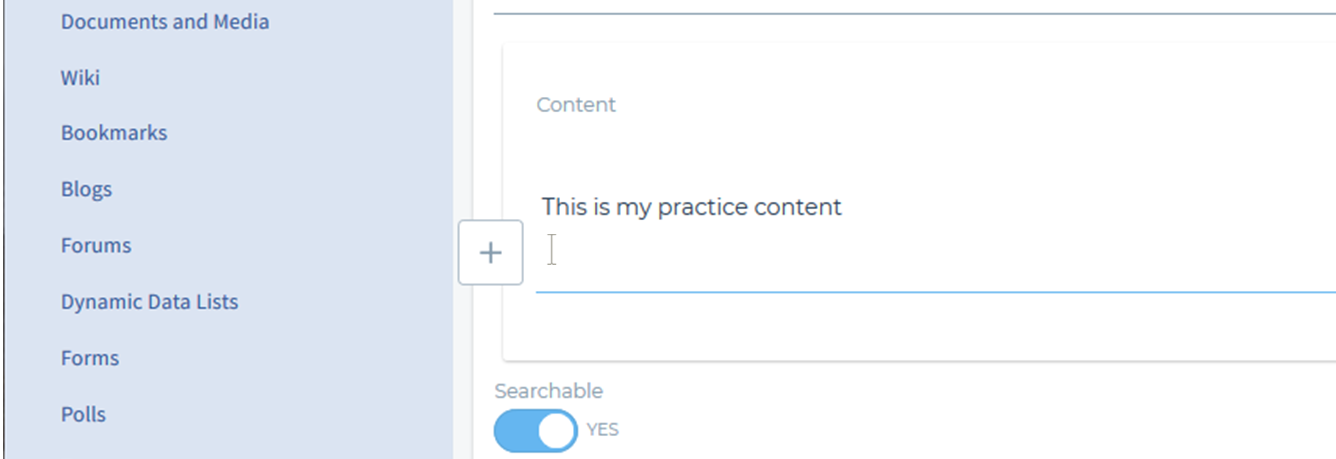
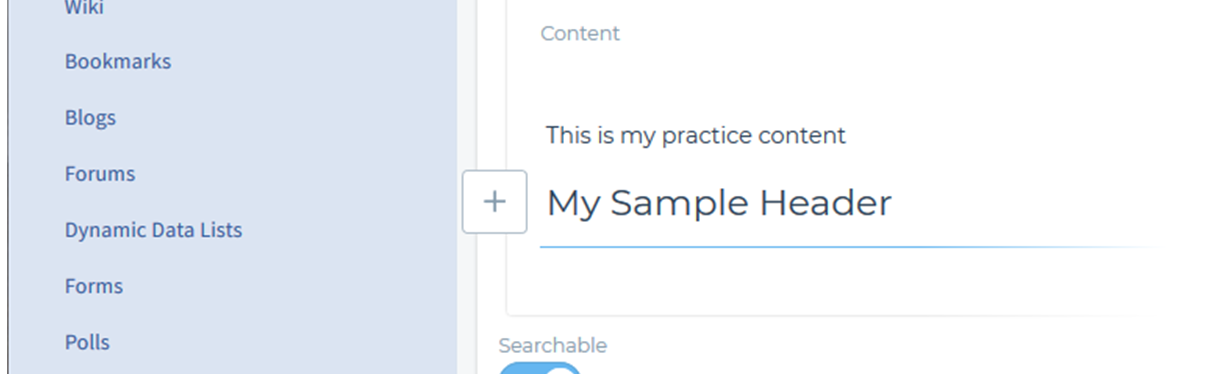
- Click inside the white space of the "Content" editor and type "This is my practice content" and hit ENTER on your keyboard to go to a new line
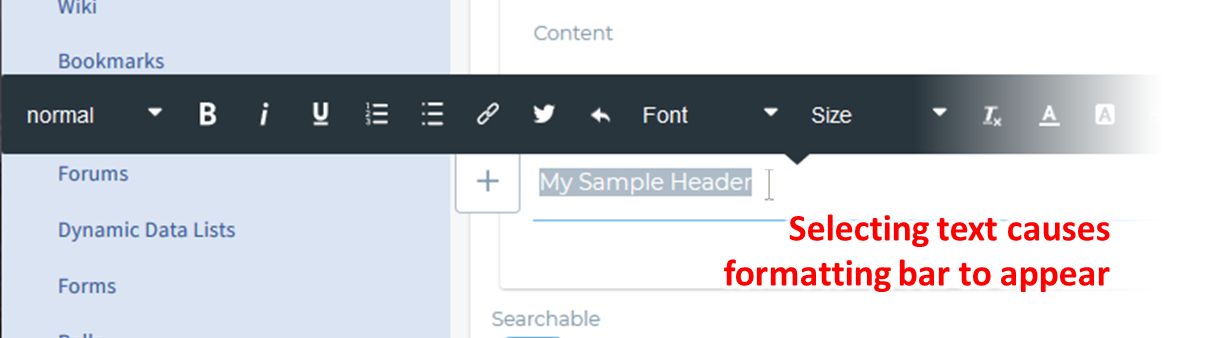
- While on the next line, type "My Sample Header", then hit ENTER on your keyboard to go to a new line. Then select the entire line of text you just typed by either left-clicking and dragging over it with your cursor, or triple-clicking on the line. Notice that a black formatting bar pops up when you have selected text.
- From the formatting pop-up, click on the far-left drop-down menu, labeled "normal", which controls the text "Style", then select "Heading 1" from the list.
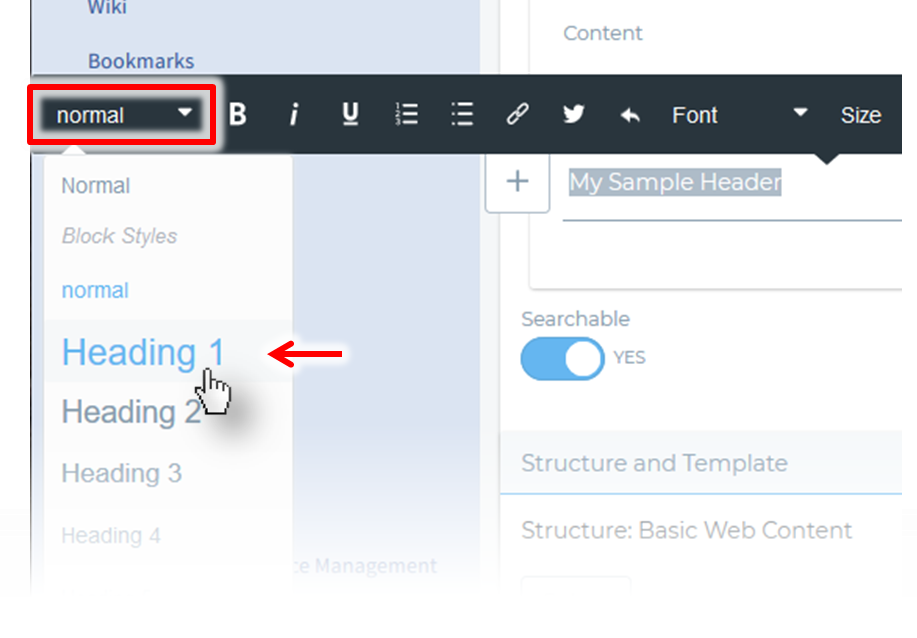
- Notice your text is now formatted as a header.
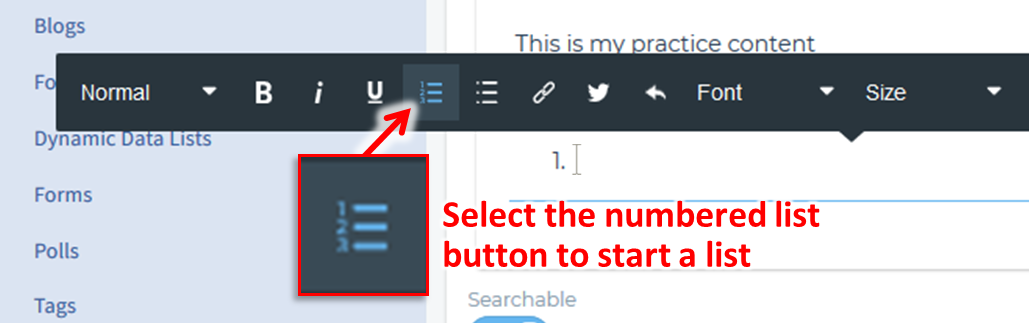
- Hit ENTER to create a new line and start creating some text in the line. Then select the new text in the line to make the formatting bar appear, and click on the button for numbered lists as shown below. One potential workflow to start a blank list is: 1) enter a space in the line using the space bar, 2) then triple clicking on the line to trigger the formatting bar (blank line with no text or spaces cannot be selected in this editor), and 3) select the numbered list button.
- Type "First Step", then hit ENTER on your keyboard, and type "Second Step". Observe that the text you typed is formatted as a numbered list.

NOTE: It is also easy to make a bulleted list using the button just to the right of the numbered lists button - At the end of last line in the numbered list hit ENTER twice to deactivate the numbered list.
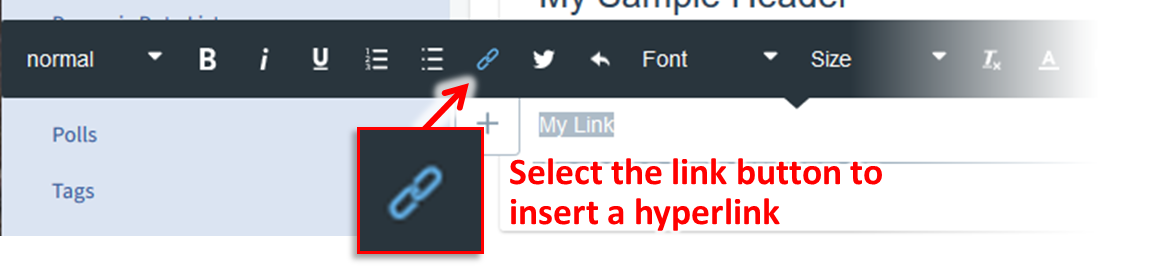
- The following steps practice creating a hyperlink. To start, type "My Link" in the content editor, use your mouse to select the "My Link" text, then click on the "Link" button in the formatting bar, shown below:
- In the pop-up interface for link management which appears, click on the far-right Folder button to browse for files on VLab.
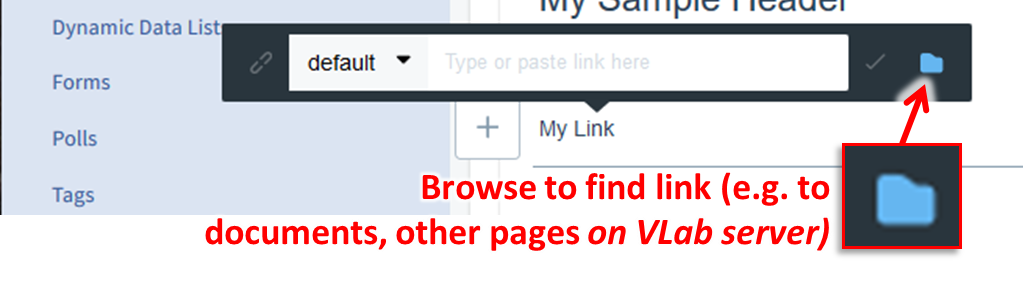
NOTE: You may also manually enter a URL (e.g. http://www.weather.gov) in this GUI and skip the browser interface. Be aware however that ONLY references to content residing in VLab can be accessed from the AWIPS workstations - In the "Select Item" window which appears after clicking "browse"...
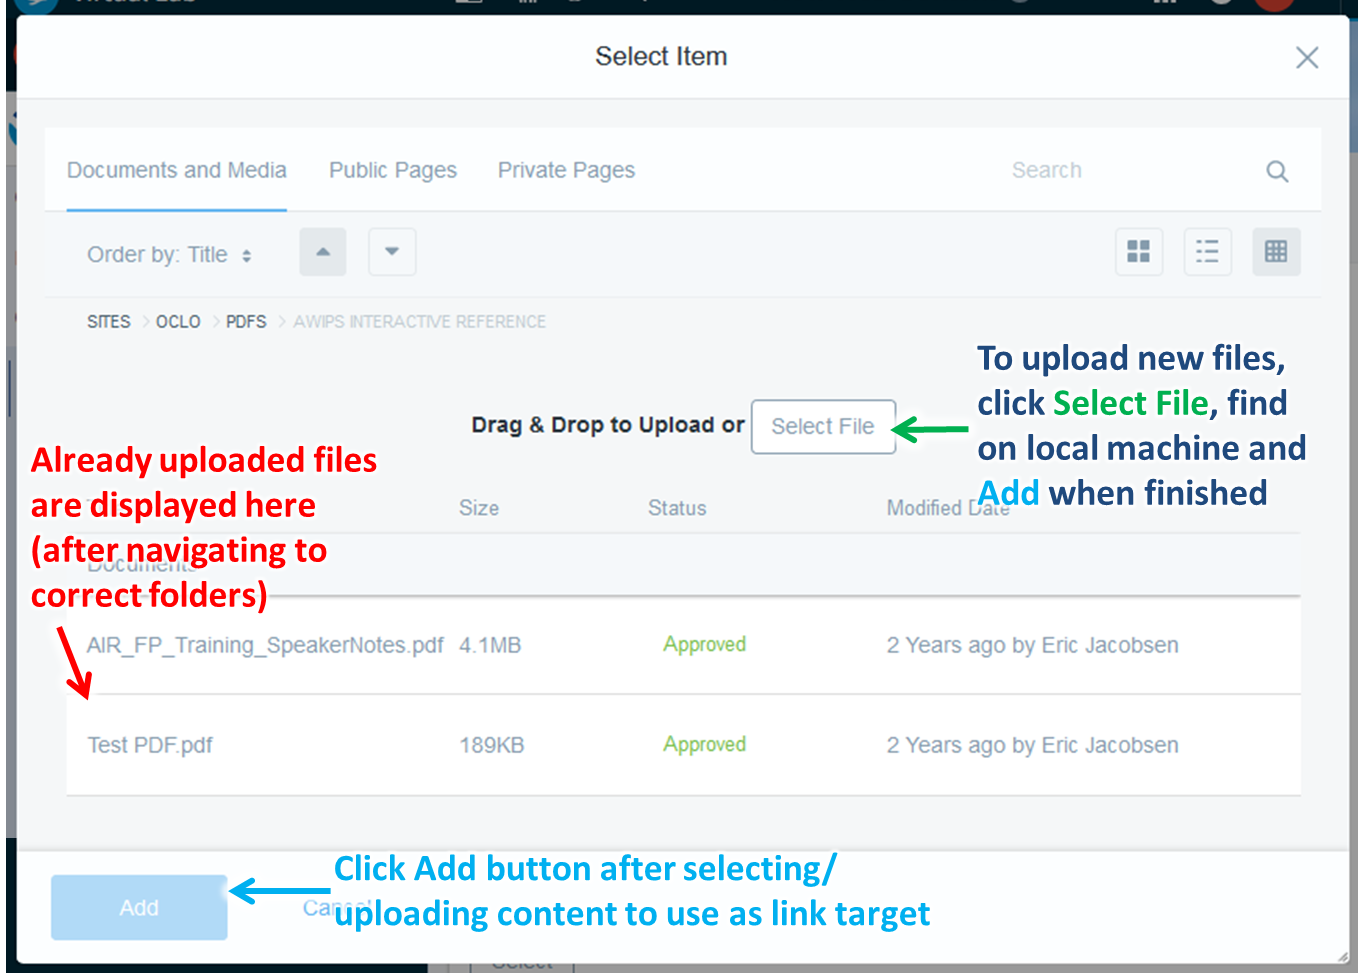
- IF your file has already been uploaded to Documents and Media (for example, you might use the test document which was uploaded in the jobsheet on uploading documents to VLab), you may select "Documents and Media" or one of the "Pages" buttons from the top menu to link to each resource type, respectively. Then use the browser window to navigate to the page/document you want, and click on it. Then click on the "Add" button.
CAUTION: Be sure to verify with the content owner that the linked content has sufficient permissions to be viewable by your guests - IF you need to upload a file, first navigate to the desired upload folder in the popup window and then click on the "Select File" button near the top of the window. Use the File Upload browser to select your local file and click "Open". Wait for the upload to complete, and then when your file preview (if available) appears in the "Select Item" window click "Add" at the bottom-left of the window to link to it. Note if you do not first navigate to a folder for uploading, the files are added to your Documents and Media root folder.
- IF your file has already been uploaded to Documents and Media (for example, you might use the test document which was uploaded in the jobsheet on uploading documents to VLab), you may select "Documents and Media" or one of the "Pages" buttons from the top menu to link to each resource type, respectively. Then use the browser window to navigate to the page/document you want, and click on it. Then click on the "Add" button.
- Once you've clicked "Add" in the previous "Select Item" interface for hyperlinks, your link now appears in your content as blue text.

- Click on your link so that the formatting bar appears, then click on the "default" drop-down to the left of the URL. This lists some very basic controls for altering the behavior of the link, such as whether it should open in a new tab (use "_blank" if so). If you alter any settings for the link, use the checkmark button (to the right of the URL) to save these changes, otherwise click outside the menu to escape it.

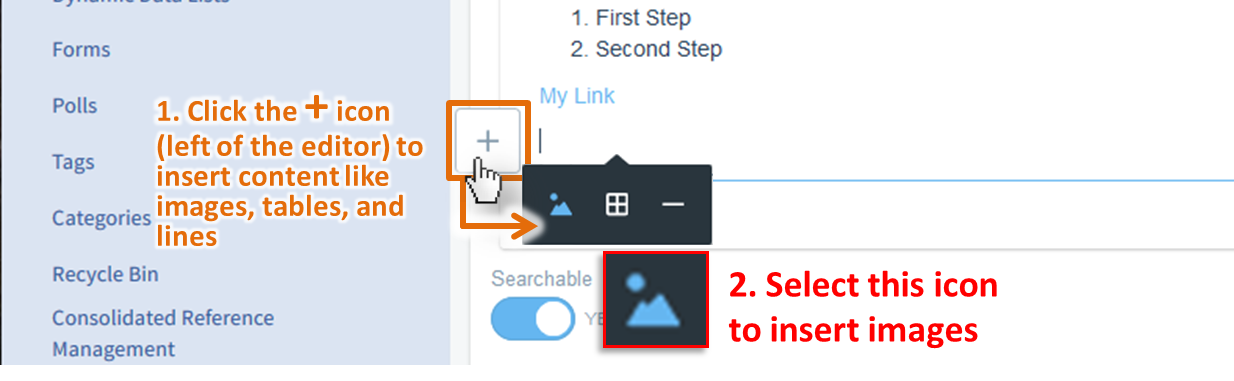
- The next several steps practice inserting an image. On a new line (hit ENTER to go to the next line), locate and click on the floating "+" button at the left edge of the content editor from your cursor position (a white box with gray outline) which allows content like images, tables, and lines to be inserted. Then, in the small floating control menu which appears, click on the far-left "Insert Image" icon to insert an image.
- In the "Select File" window which appears...
- IF your image has already been uploaded to Documents and Media, use the browser window to navigate to the image you want, and click on it to preview, then click Add (lower left) to insert that image.
CAUTION: Be sure to verify with the content owner that the linked content has sufficient permissions to be viewable by your guests - IF you need to upload one, click on the "Select File" button near the top of the window, use the File Upload browser to select your local image and click "Open", wait for the upload to complete, and then when your image preview (if available) appears in the "Select File" window click "Add" at the bottom-left of the window to link to it.
- IF your image has already been uploaded to Documents and Media, use the browser window to navigate to the image you want, and click on it to preview, then click Add (lower left) to insert that image.
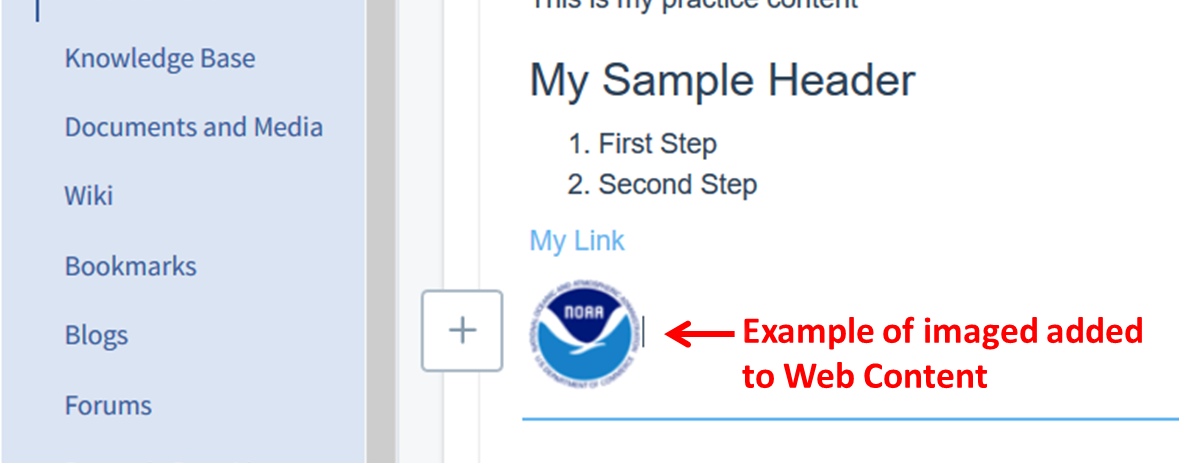
- Once you've clicked "Add" in the previous "Select File" interface for adding images, your image should now appear in your content.
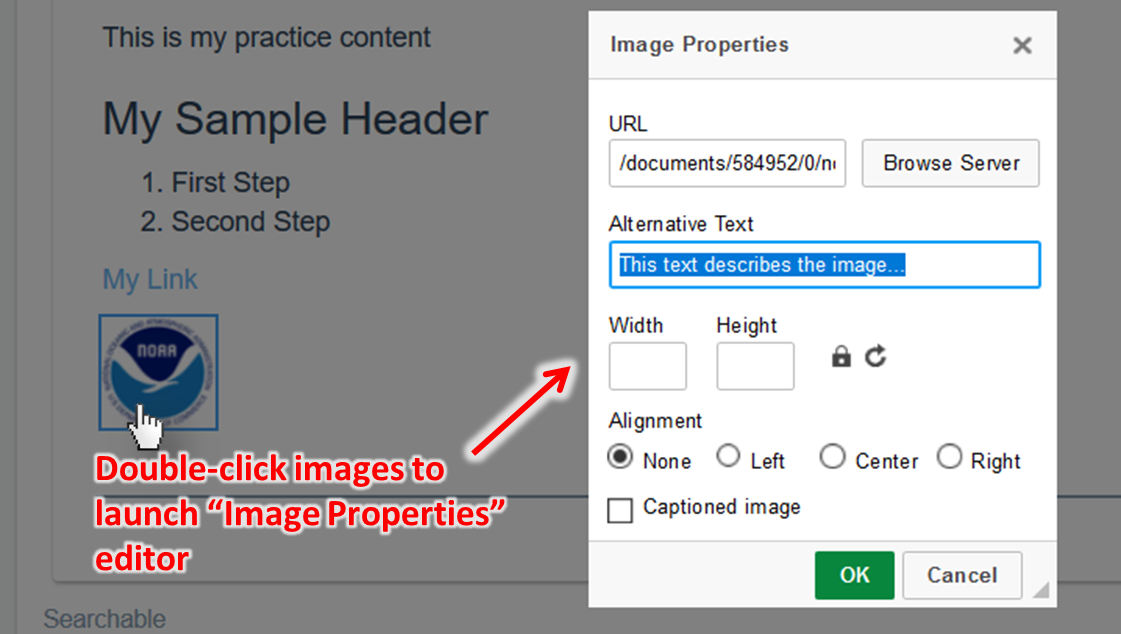
- To access further controls over your image, double click on the image in your content to launch the "Image Properties" editor. This provides access to setting alternate text (to support web accessibility, and as a stand-in for when the image cannot be displayed), image size or alignment, and more. Specifying the image dimensions is one frequently used option, and it only affects the size of the image displayed on the screen and not the raw file dimensions. Click "OK" to close the "Image Properties" window after making any desired changes.
- Click inside the white space of the "Content" editor and type "This is my practice content" and hit ENTER on your keyboard to go to a new line
- After following the above steps to insert sample content, click on the "Code View" button at the top-right of the content editor window as shown below. To locate this button, you may need to scroll to the top of your content and click there for it to appear
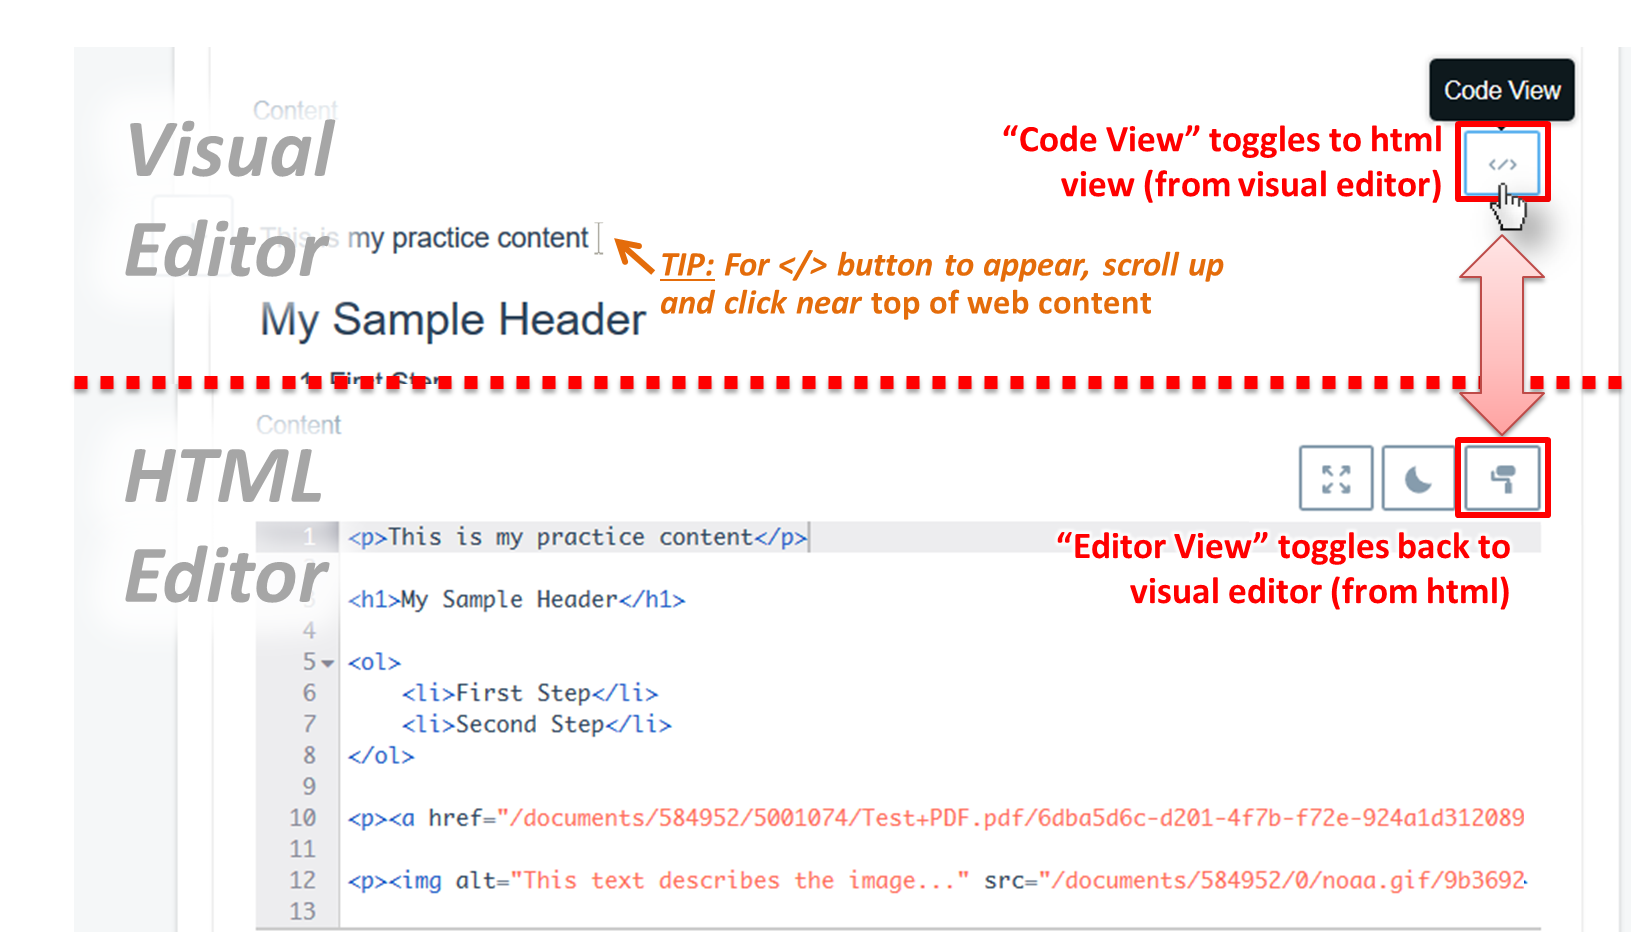
- This step is merely to illustrate that an alternative HTML editor can be used (for those who prefer it) to create content. The "What You See Is What You Get" (WYSIWYG) visual editor used in previous steps is only one way of editing content, although likely preferable for most people
- Click on the "Editor View" button (the paint roller icon at the top-right of the html source view) to toggle code view off and return to the default content editor view (the WYSIWYG)
- Near the top of the page, below where you entered the title for your web content, enter a Summary for the document, making it concise but descriptive. The summary will be searchable in the VLab search and will be returned as the description field in AWIPS Interactive Reference (AIR) queries.

- TIP: Provide more information here about the document type and purpose than your title could, to help users who are browsing content for the material they need
- TIP: Limit to a few sentences, for readability
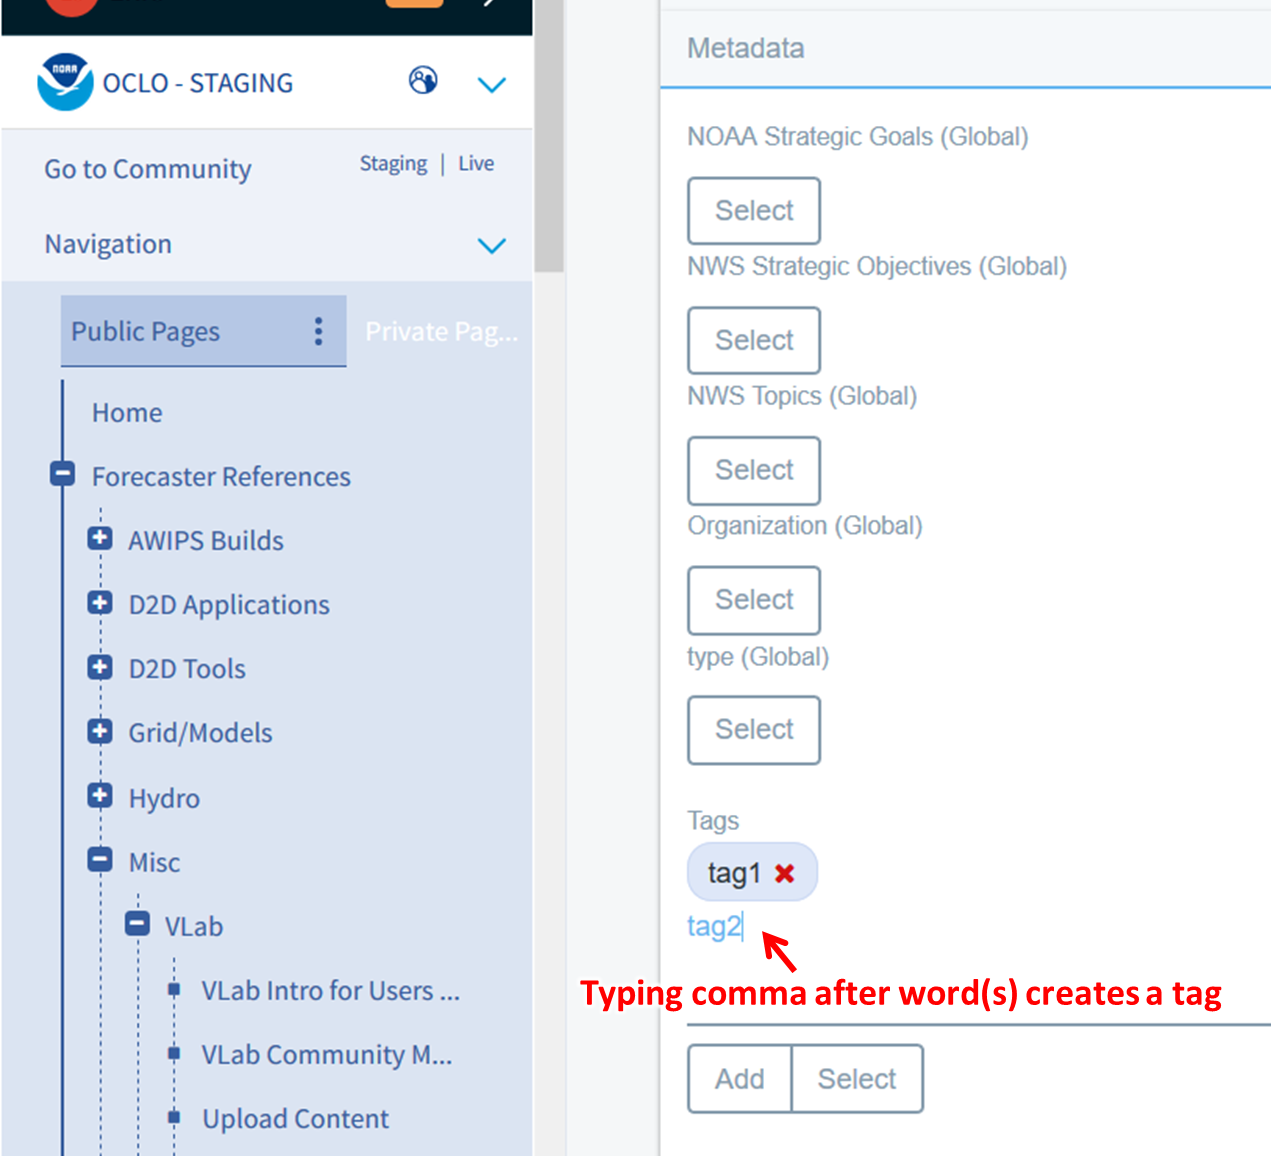
- Further down the page (below your web content editor) you'll see a "Metadata" section. In this section, add Tags for your document, to provide useful hooks for searches to use. To do so, manually type words or word combinations in the "Tags" text field, using commas to separate one tag from another. You may also click the "Select" button to see and choose from tags that others have used
- TIP: Use the shortest, adequately specific tag set possible. If a single one-word tag is specific to your reference, that is the ideal. Otherwise, try to use a two or three word single tag of adjacent keywords to define your product instead. Tag management is a primary driver of VLab searches and also is crucial for those who register content for use with AIR.
- TIP: Use the shortest, adequately specific tag set possible. If a single one-word tag is specific to your reference, that is the ideal. Otherwise, try to use a two or three word single tag of adjacent keywords to define your product instead. Tag management is a primary driver of VLab searches and also is crucial for those who register content for use with AIR.
- At the bottom of the page for creating new web content, you'll see a "Permissions" section. Set the permissions on your content by clicking the drop-down menu under "Viewable by" and making a selection, depending on your desired visibility:
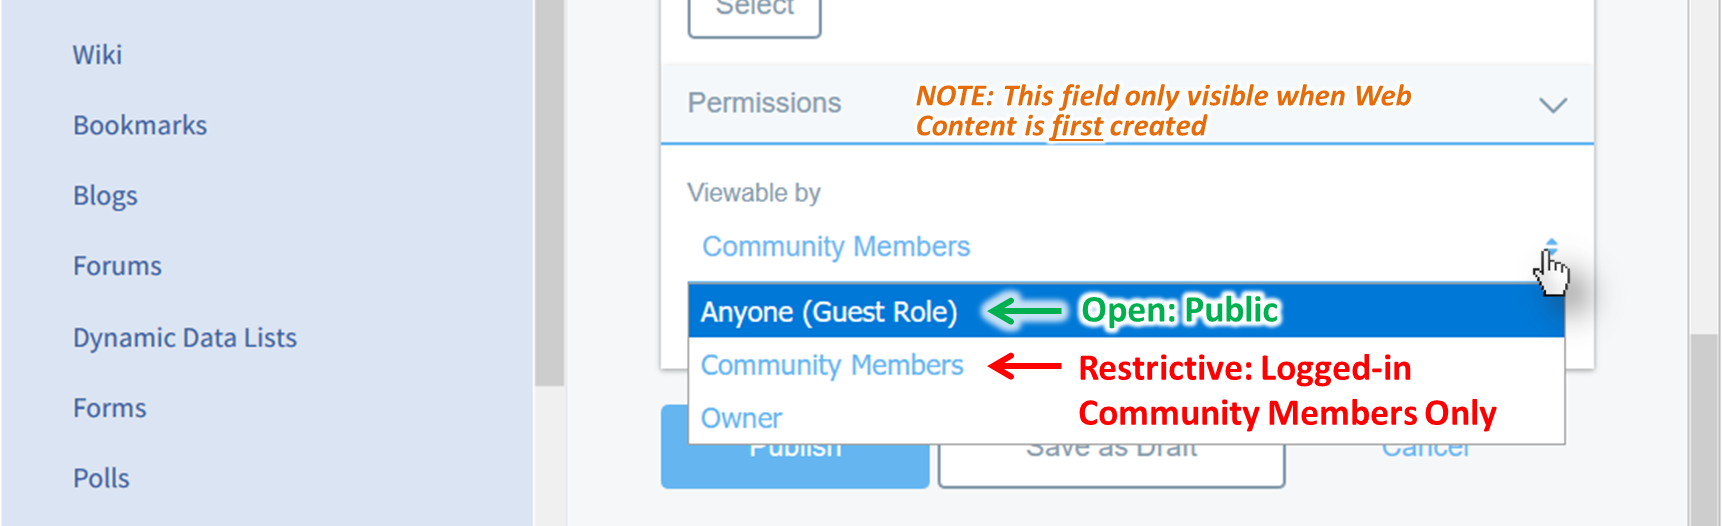
- For public visibility (no restrictions, no login required) select "Anyone (Guest Role)"
- For community access only (requires being LOGGED IN) select "Community Members"
- NOTE FOR EDITING PERMISSIONS: The above "Viewable by" drop-down is only available when first creating new content. To adjust permissions later, navigate to the folder containing your web content in the Web Content administration interface, click on the ellipsis to the far right of your web content, then select "Permissions". Then, in the popup window edit the checkboxes under "View" corresponding to your desired restrictiveness, as seen in the graphic below.

- Click "Publish" to save your changes and publish your document
- [NO ACTION REQUIRED] Note that, after publishing, you can edit and access other controls for your document (e.g. permissions) by clicking on the vertical ellipsis button to the right of your content in the "Web Content" list.
- [NO ACTION REQUIRED] Important note about the web content you've created: Though based on html, web content are not standalone web-pages, which means that you cannot pass out a link to it without additionally configuring a VLab "page" in your community to display it.
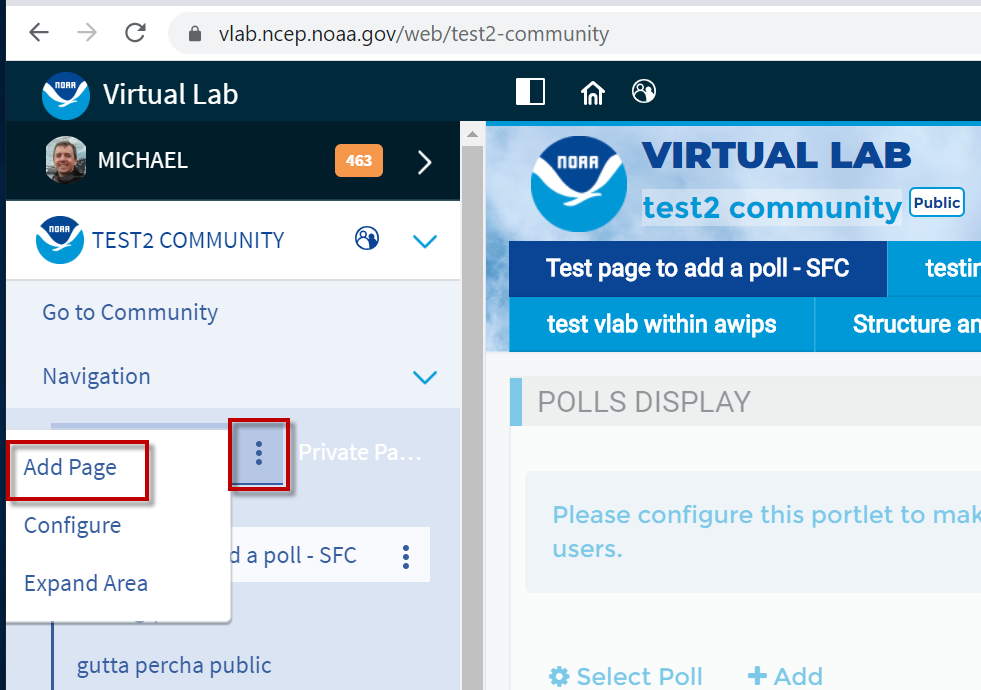
- Next let's add the content to a public page. As a side note, public pages will have web in their paths like vlab.noaa.gov/web/oclo and private pages will have group in their paths like vlab.noaa.gov/group/oclo. Click on the Navigation menu in the upper left part of your VLab community page and the Public Pages button. You could also add this content to your Private Pages by clicking on the Private Pages button (note only Public Pages can be viewable without requiring login).
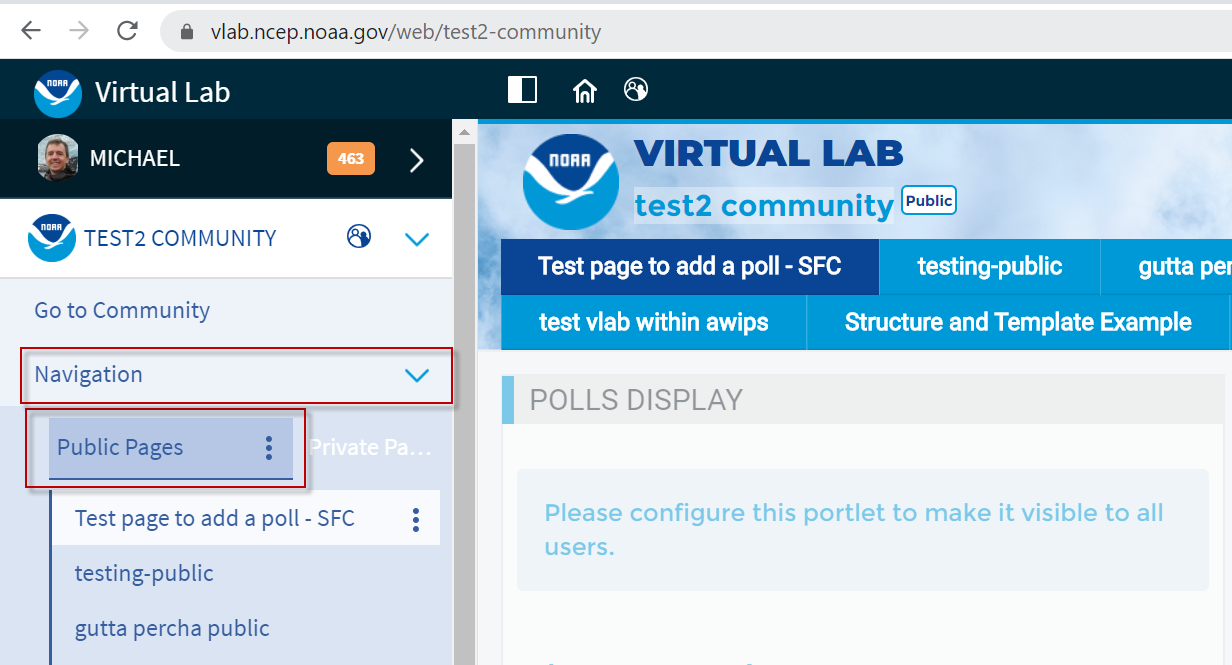
- Click on the 3-dot ellipsis to the right of Public Pages and select Add Page.
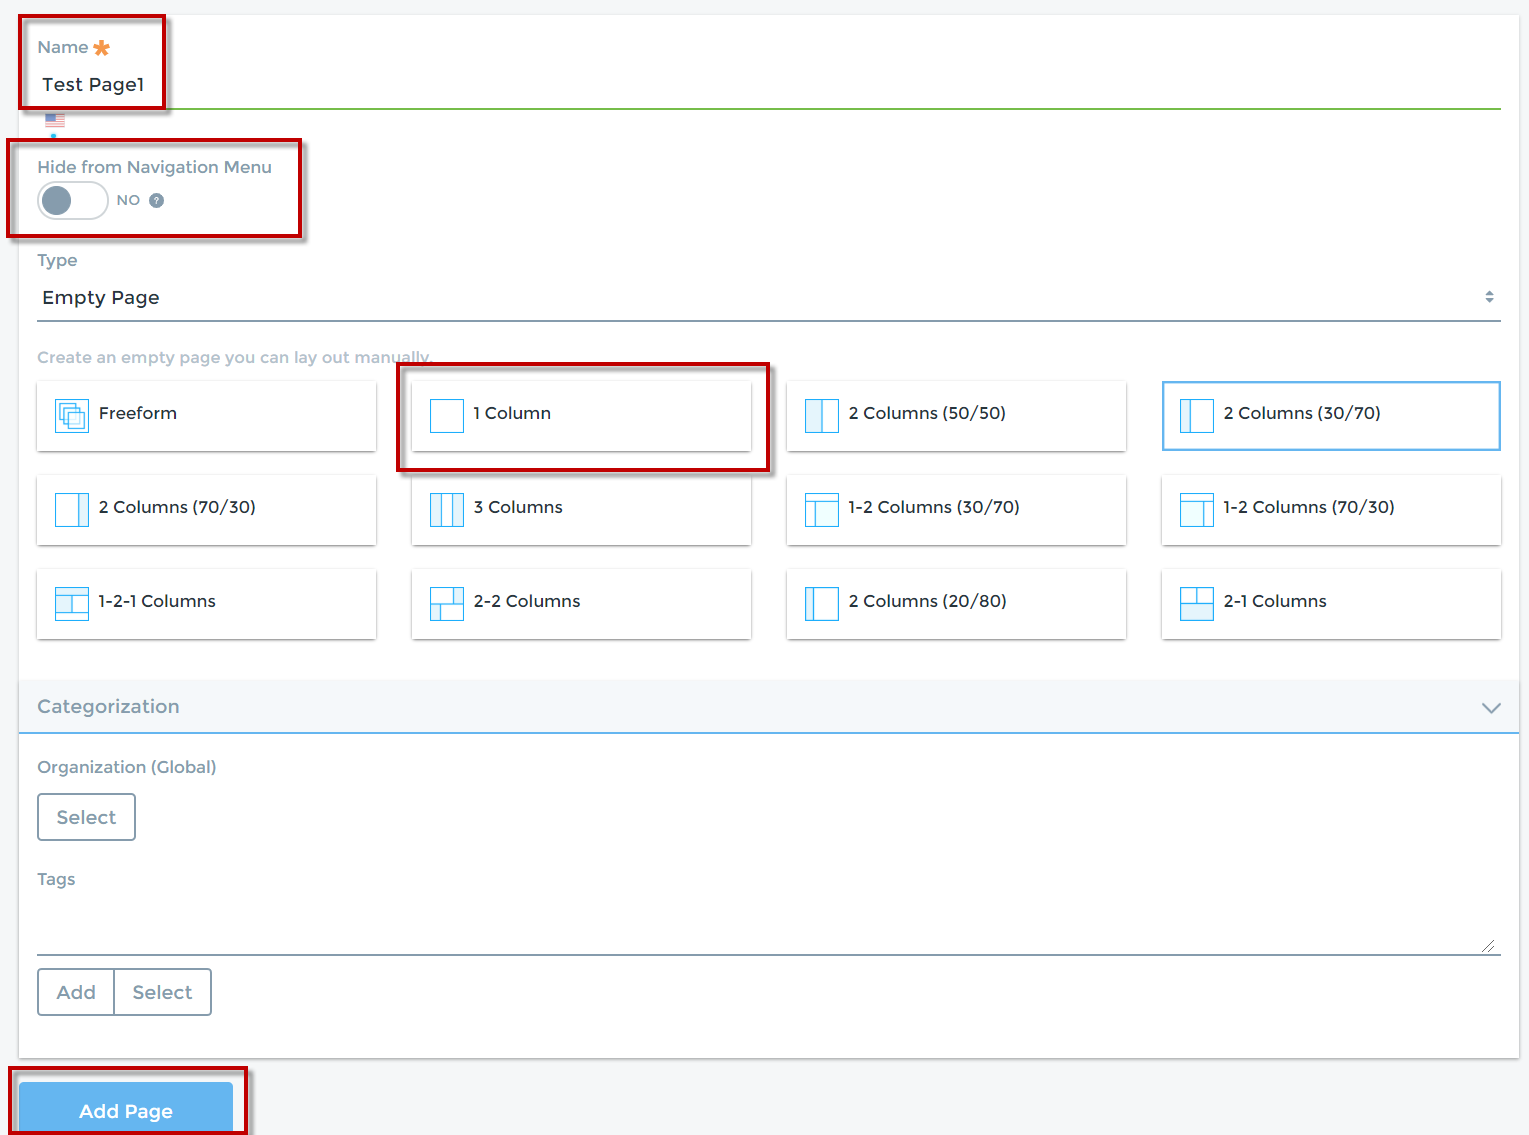
- Next type in "Test Page1" for the Name, ensure "No" is selected under Hide from Navigation Menu, click on the "1 Column" layout, and click on the "Add Page" button.
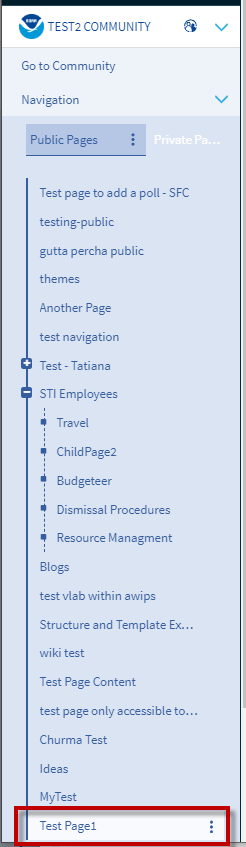
- Your Test Page 1 page should have been added to the bottom of your community. It may take a few minutes for the new page name to be reflected on the menus at the top of your community.
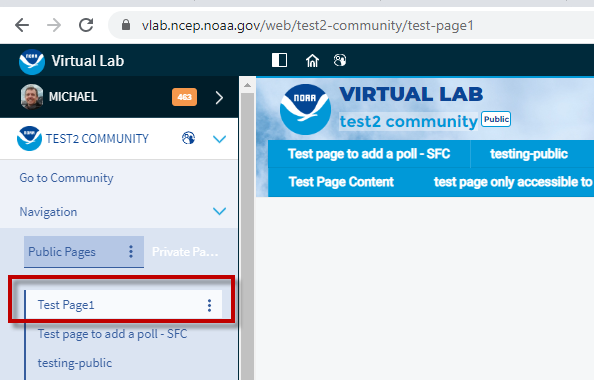
- Now left click on the Test Page1 and drag it to the top of the Navigation menu and release it at the top:
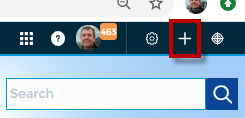
- To add content to the page, click on the "+" icon in the upper right of the page.
- Under the CONTENT pullout menu in the upper right, identify the "Practice Web Content" which should be high in the Recent list. Drag and drop the "Practice Web Content" from the right side onto the top of the blank "Test Page1" page. You may want to click on the APPLICATIONS menu in the upper right Add menu to view lots of other things you can add to your page (e.g. in Collaboration a calendar, blogs, or forums). We are just going to focus on adding the previously created web content.

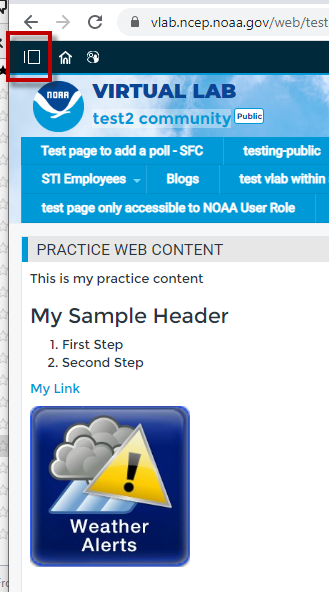
- Your Practice Web Content should be displaying on the page. Click on the menu icon to view the Navigation menu on the left:
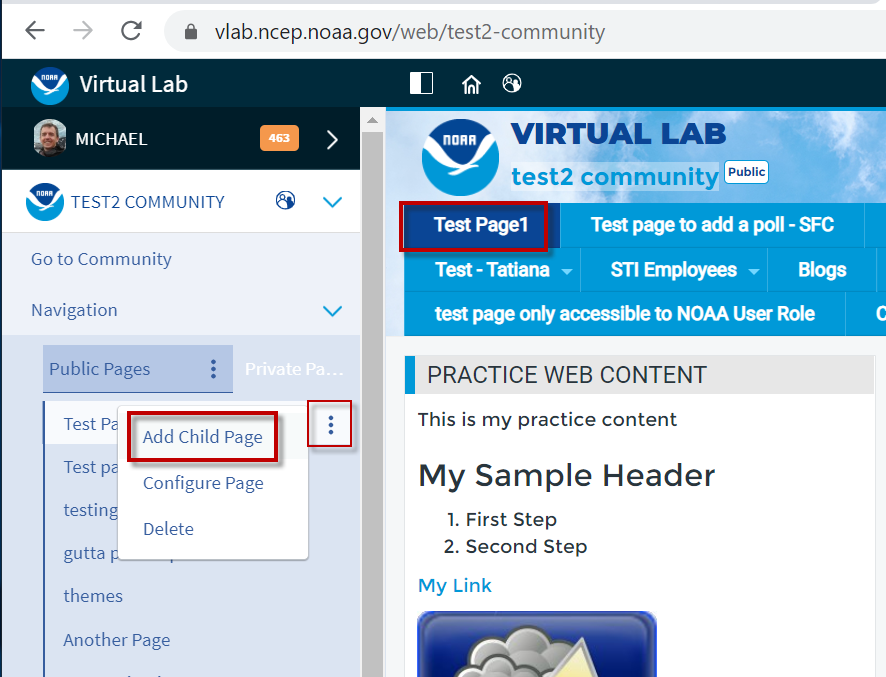
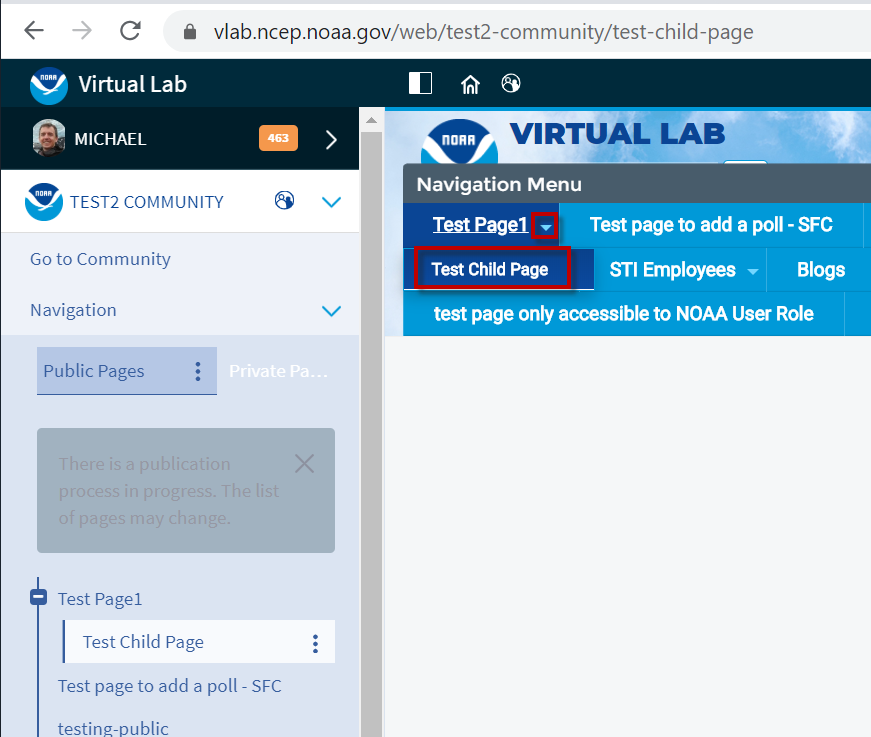
- Next let's add a child page to your Test Page1. Note that your Test Page1 menu has been moved to the upper left of your menu at the top of your community. Also note it can take a few minutes for the page saving to trigger the menus to change on your community. Under the Navigation menu on the left, click on the 3-dot ellipsis to the right of the Test Page1 page and select Add Child Page.
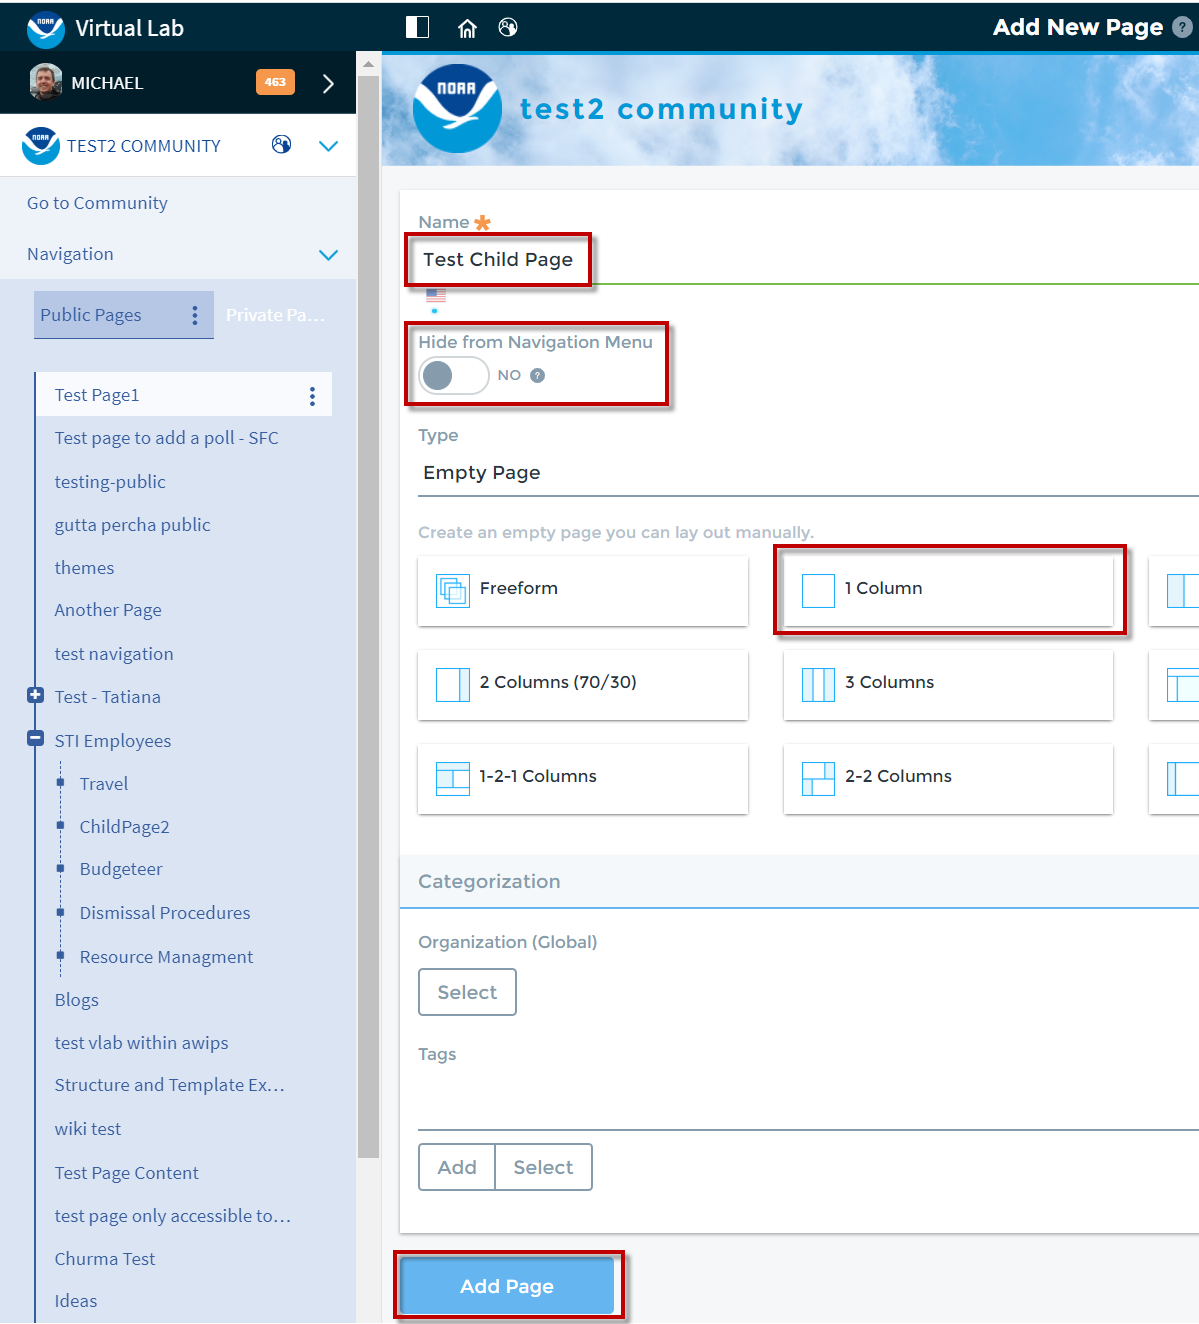
- Enter "Test Child Page" for the Name, "No" under Hide from Navigation Menu, select 1 Column layout, and click Add Page.
- Notice that the child page is now accessible by a pullout menu under the parent page. You can add content to this page using the previous steps 21 and 22.
- Jobsheet Complete! This jobsheet has stepped through creating web content and then adding it to a portlet on a page. The menu at the top of the community is displayed with the page name as its label if you have chosen to not hide the page from your menu. If you configure the page to hide it from the menu, the URL will still work. You can put web content in multiple portlets on one page or multiple pages. As you change your native web content, those changes are reflected on all the pages that content is displayable on.
Supplemental Instructions for Managing Directories
It is best practice to place your content within a well-organized directory structure. These tips below explain basic actions related to managing directories in VLab in the "Content" administration interface:
- To create a directory:
- Click the floating blue "+" button at the lower right of the of the "Web Content" administration interface, then select "Folder" (or "subfolder")
- Enter a name (required) and description (optional) for your folder, and click "Save"
- Proceed to steps for verifying permissions on your directory
- To set permissions on a directory:
- Click on the vertical ellipsis button to the right of a given directory and select "Permissions"
- Verify permissions - for example, to set guest viewable, scroll down to find "Guest" in the "Role" column, and in the "View" column (second from right), ensure the box is checked. Note that for content viewable in the AWIPS Interactive Reference, the directory permissions are NOT as important as the actual content permissions.
- To delete a directory:
- Click on the vertical ellipsis button to the right of a given directory and select "Move to the Recycle Bin"
- Navigating directories:
- To view a directory's contents, simply click on the directory
- To return to a parent directory, click on the desired directory in the navigation "bread-crumb" above the folder's contents list