


Uploading a PDF to VLab - OCLO
Default Jobsheet Viewer
Purpose:
This jobsheet walks through the steps necessary to upload a PDF to VLab, including basic permissions checks, description, and categorization. Note that the steps are fundamentally the same for uploading image type references or other files.Tasks:
(TIP) Use a PDF or document of your own for this activity, or click here to download a sample PDF to use instead.
Prerequisites:
- Your VLab community admin must grant you at least the "Community Content Reviewer" role to allow you to upload documents to your community. For NWS field offices (WFOs, RFCs) your SOO/DOH/ITO will have community admin roles.
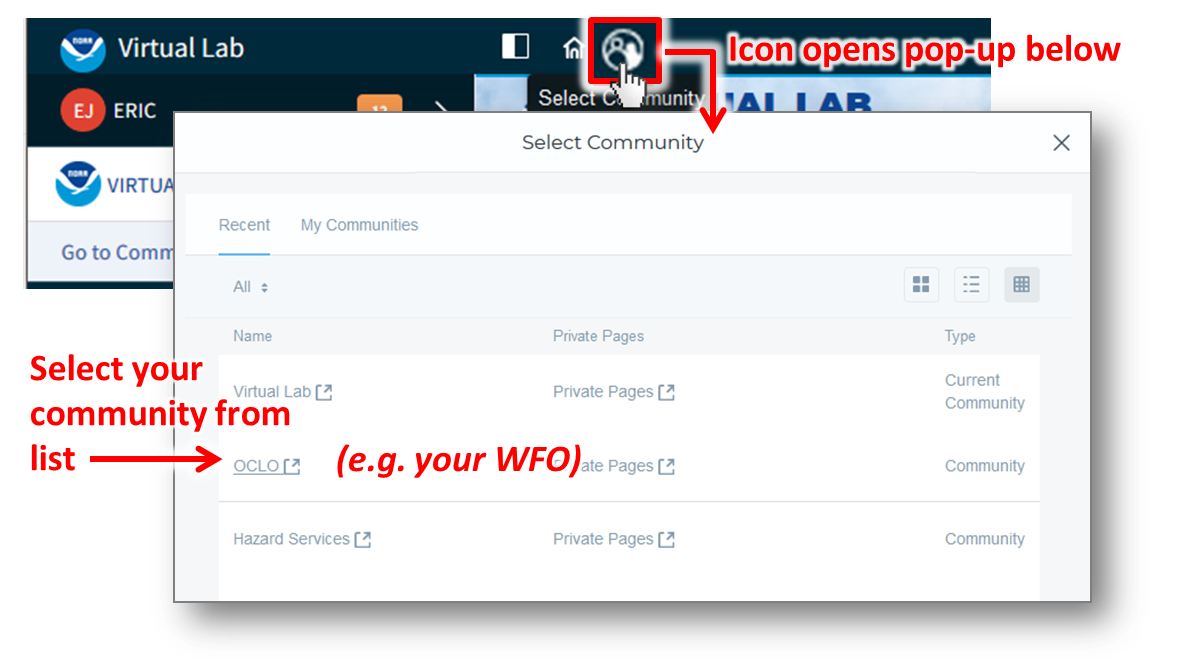
- After logging in to VLab, select your community by clicking on the circular "Select Community" icon (third from the left in VLab's Control Menu) to launch a "Select Community" pop-up window, and then click on the appropriate community name to go to that community's home page.
- You must have at least the "Community Content Reviewer" role in a community to proceed to any of the following steps and contribute content
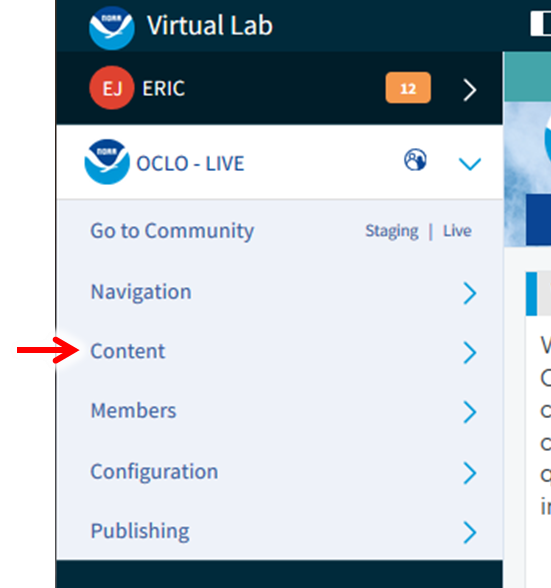
- From the left-side "Admin" menu of your community's VLab page, click on "Content" to proceed to the content administration interface.
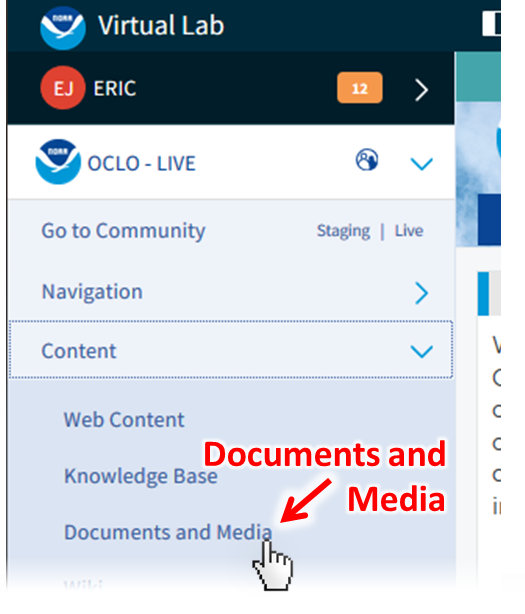
- To upload documents such as a PDF, click on "Documents and Media" in the left-side menu options, which is within the expanded "Content" submenu
- [BEST PRACTICE STEP] Use a well-organized directory structure to save your materials in. If one already exists, try to find a suitable place for your content, creating subdirectories as necessary. See extra steps at the end of this jobsheet for help with managing directories.
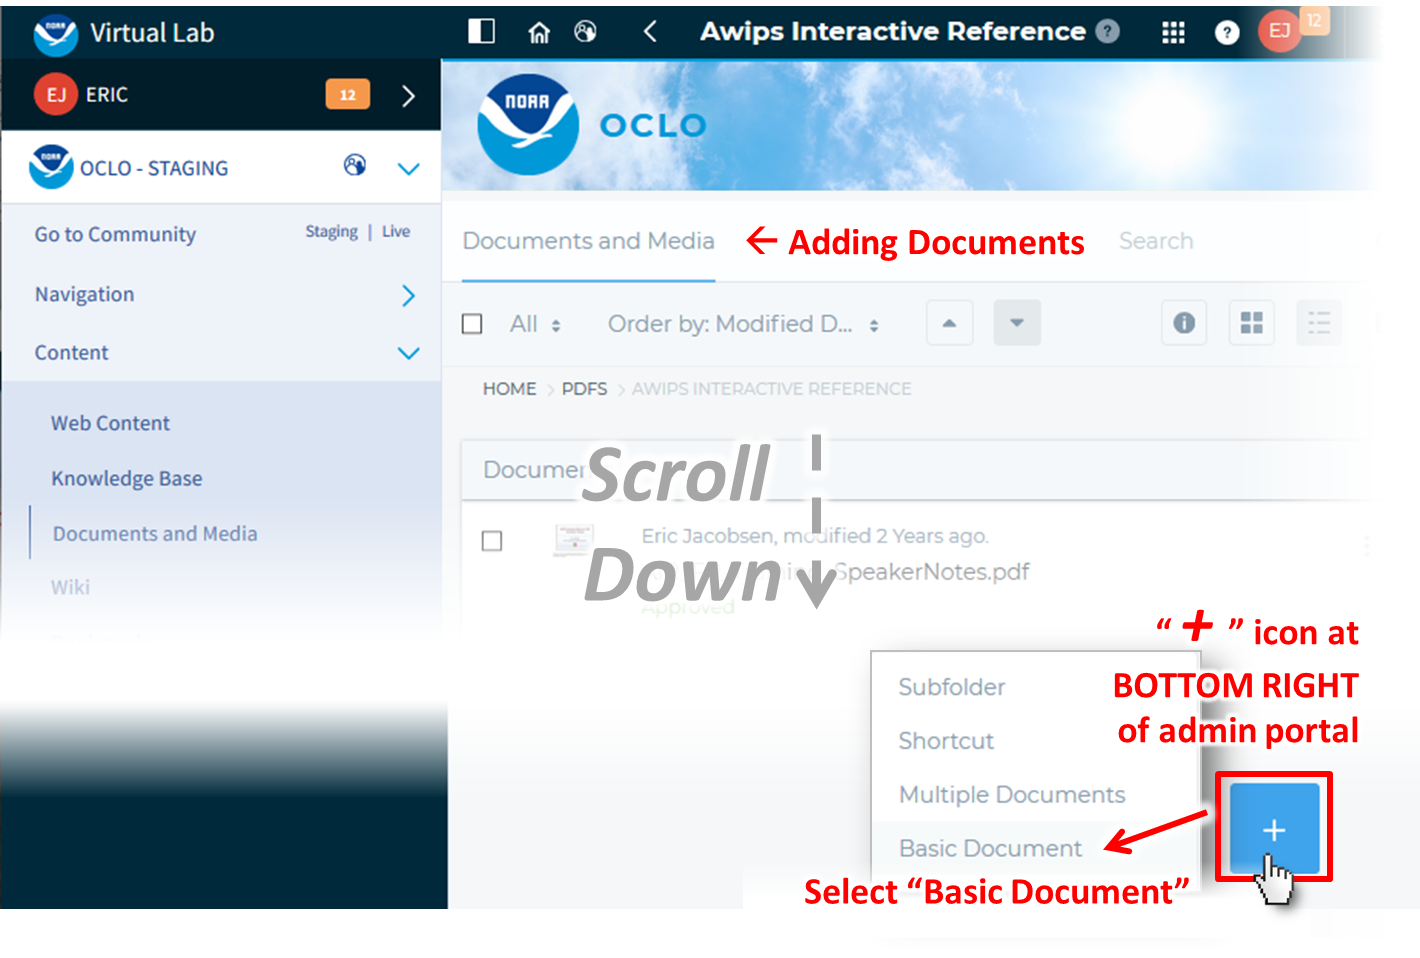
- Within the desired destination directory, scroll down to the bottom of the page to find and click the blue and white "+" button, then from the pop-up menu select "Basic Web Content" from the available options. This will open a new editor interface for Web Content.
- Within the desired destination directory, click the "Add" drop-down menu near the top of the "Documents and Media" display, and select "Basic Document"
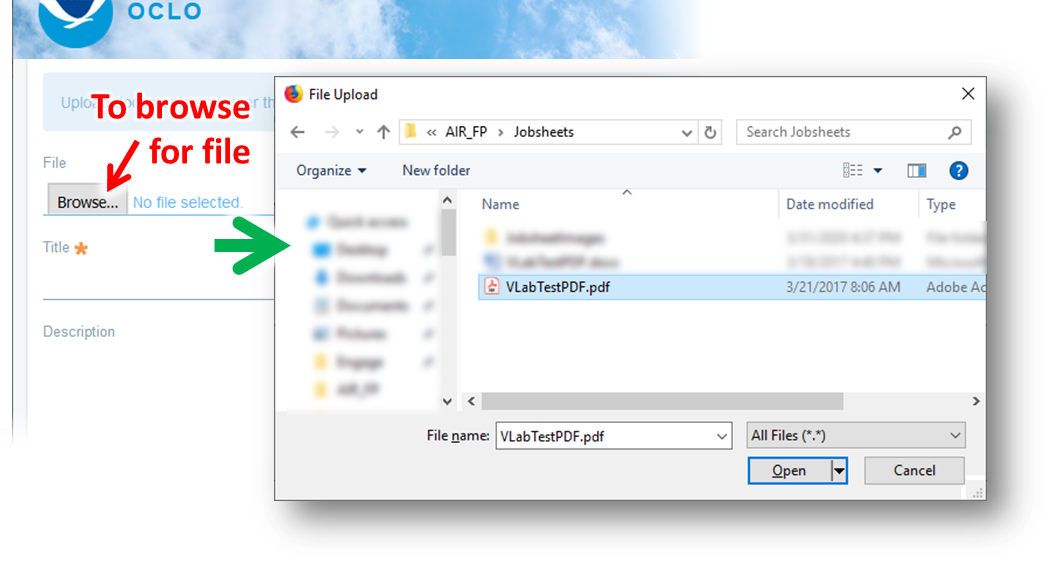
- In the "New Document" upload interface, click the "Browse" button to open a file selection GUI, browse to find your file, then double-click on your file (or single-click it and click the "Open" button) to select it. Your document title should appear in green text next to the "Browse" button
- Enter a Title for the document, making it concise but descriptive
- TIP: Prefix or include in the title the type of document this is. Is it a jobsheet? A quick reference? Etc.
- TIP: Use spaces between words in the title, instead of special characters like an underscore or no spaces. This enhances readability and allows AIR to better query keywords in the title
- Enter a Description for the document, again making it concise but descriptive
- TIP: Provide more information here about the document type and purpose than your title could, to help users who are browsing content for the material they need
- TIP: Limit to a few sentences, for readability
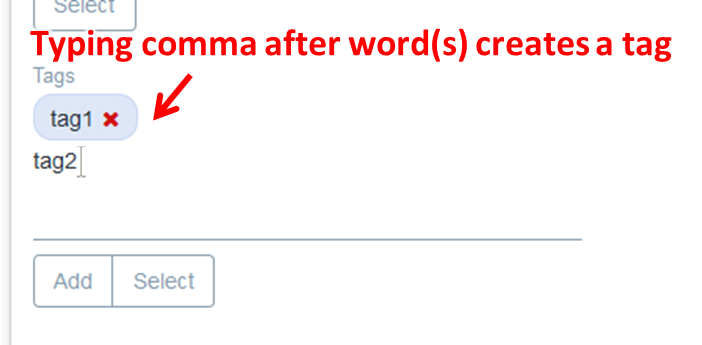
- Add Tags for your document, to provide useful hooks for searches to use. To do so, manually type words or word combinations in the text field, using commas to separate one tag from another. You may also click the "Select" button to see and choose from tags that others have used
- TIP: Use the shortest, adequately specific tag set possible. If a single one-word tag is specific to your reference, that is the ideal. Otherwise, try to use a two or three word single tag of adjacent keywords to define your product instead. More on effective use of tags is presented in a different VLab jobsheet. Tag management is a crucial piece of helping AIR to find the appropriate references while minimizing irrelevant search results
- Set the permissions on your content by clicking the drop-down menu under "Viewable by" and making a selection, depending on your desired visibility in AIR:
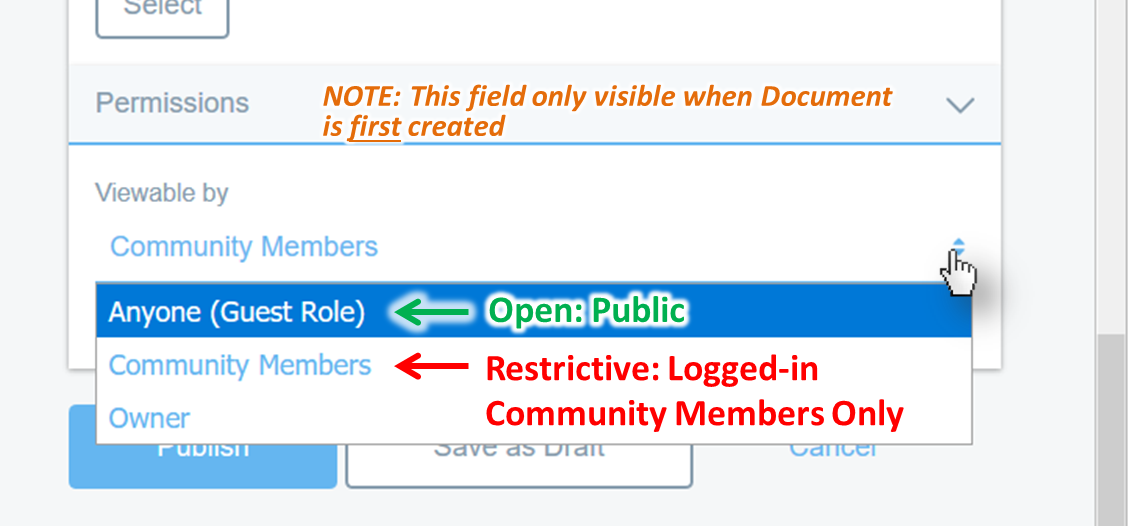
- For public visibility (no restrictions, no login required) select "Anyone (Guest Role)"
- For community access only (and this requires being LOGGED IN before AIR will even show the reference in results) select "Community Members"
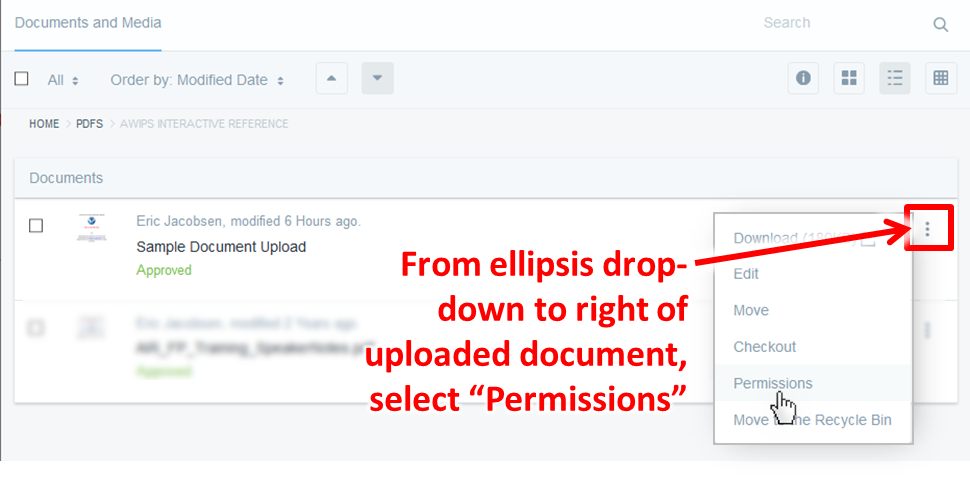
- NOTE FOR EDITING PERMISSIONS: The above "Viewable by" drop-down is only available when first creating new documents and media. To adjust permissions later, navigate to the folder containing your document in the Documents and Media administration interface, click on the ellipsis to the far right of your document, then select "Permissions". Then, in the popup window edit the checkboxes under "View" corresponding to your desired restrictiveness, as seen in the graphic below.

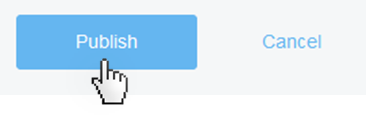
- Click "Publish" to save your changes and publish your document
- [NO ACTION REQUIRED] Note that, after publishing, you can edit and access other controls for your document (e.g. permissions) by clicking on the vertical ellipsis icon at the far right of the row for your document in the "Documents and Media" administration list, as demonstrated in the image below for accessing "permissions."
- Jobsheet Complete!
Supplemental Instructions for Managing Directories
It is best practice to place your content within a well-organized directory structure. These tips below explain basic actions related to managing directories in VLab in the "Content" administration interface:
- To create a directory:
- Click the floating blue "+" button at the lower right of the of the "Web Content" administration interface, then select "Folder" (or "subfolder")
- Enter a name (required) and description (optional) for your folder, and click "Save"
- Proceed to steps for verifying permissions on your directory
- To set permissions on a directory:
- Click on the vertical ellipsis button to the right of a given directory and select "Permissions"
- Verify permissions - for example, to set guest viewable, scroll down to find "Guest" in the "Role" column, and in the "View" column (second from right), ensure the box is checked. Note that for content viewable in the AWIPS Interactive Reference, the directory permissions are NOT as important as the actual content permissions.
- To delete a directory:
- Click on the vertical ellipsis button to the right of a given directory and select "Move to the Recycle Bin"
- Navigating directories:
- To view a directory's contents, simply click on the directory
- To return to a parent directory, click on the desired directory in the navigation "bread-crumb" above the folder's contents list