


VLab Intro - OCLO
VLab Intro for Users
Purpose:
This jobsheet is to walk a VLab user through logging in to the VLab, identifying collaboration "Communities" and software development "Projects," joining a Community, and reviewing some of the shared NWS collaborative space in the default VLab Community Landing Page.Tasks:
Tasks:
- Log in to the VLab VLCS and explore VLab communities
- Identify existing communities, software development projects, the NOAA Projects Registry, and the shared NWS collaboration spaces
- Join a VLab community
- Log in to VLab by entering the following URL in a browser on the Internet or AWIPS: https://vlab.noaa.gov; this takes you to the VLab Sign-in Page shown below.
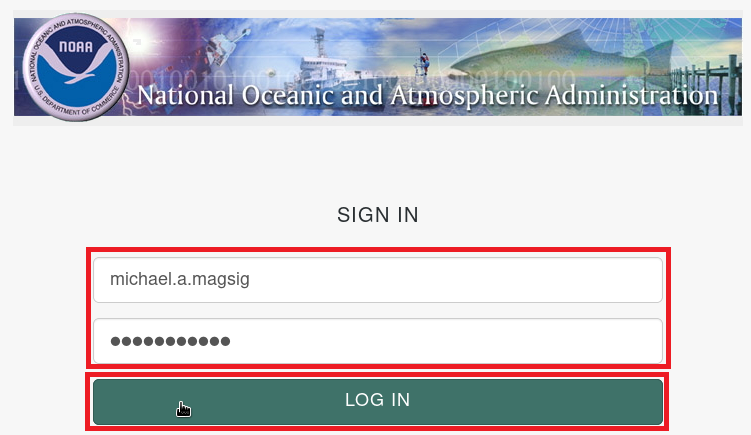
- Manually log in by clicking on the ICAM link, selecting "Accept", typing your standard NOAA LDAP username and password, followed by clicking the "Log-In" button, where username is your email address without the @noaa.gov (e.g. john.smith or john.p.smith):

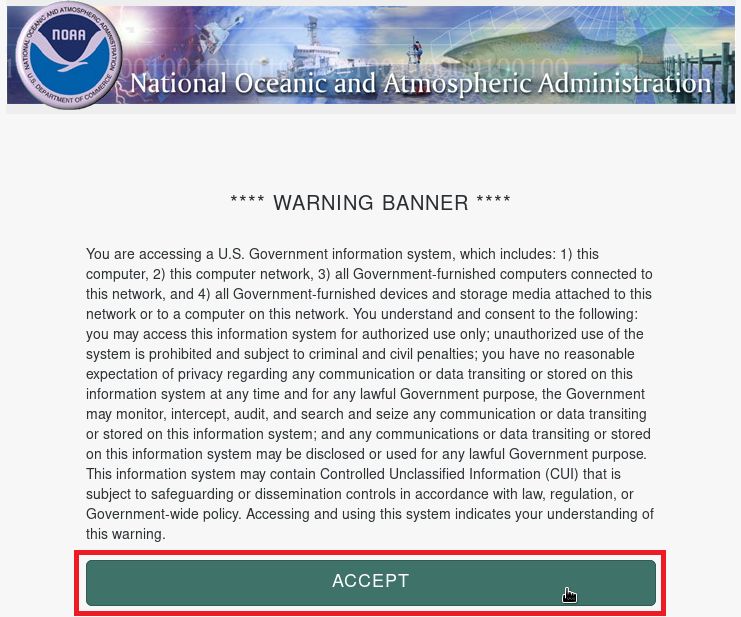
- If you are on the Internet (not AWIPS), you can log in using your NOAA Google account "Single Sign-On" by clicking on the Google link. If you are already logged in to your NOAA Google account, VLab will automatically log you in when you access the sign-in page or private content.
- (Tip) Note: You do not need to be logged in to see public content.
- (Tip) Note: You do not need to be logged in to see public content.
- Manually log in by clicking on the ICAM link, selecting "Accept", typing your standard NOAA LDAP username and password, followed by clicking the "Log-In" button, where username is your email address without the @noaa.gov (e.g. john.smith or john.p.smith):
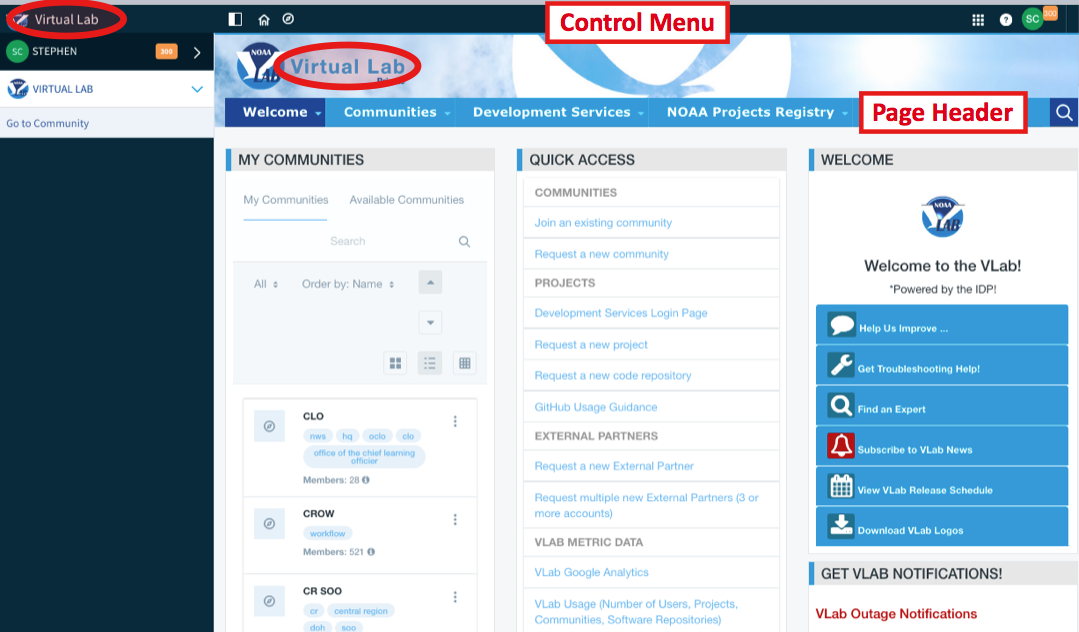
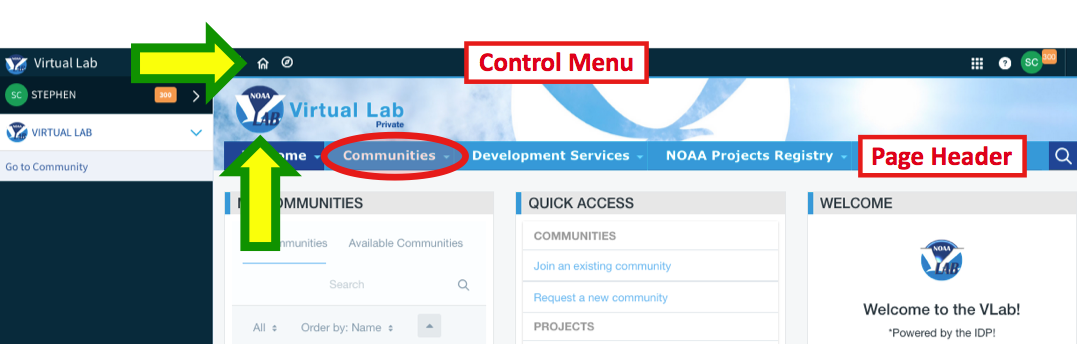
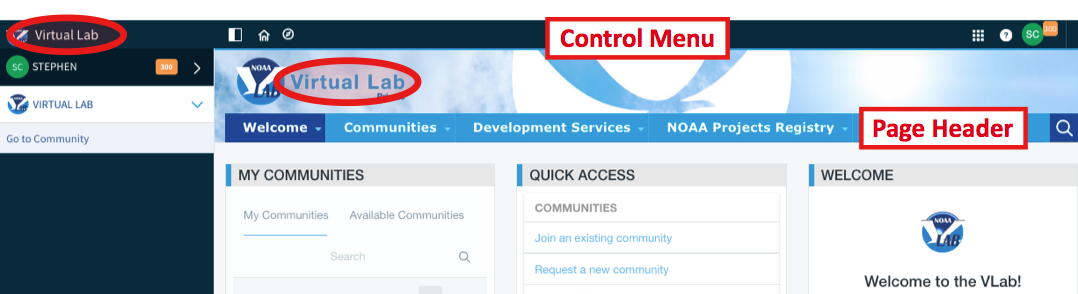
- The main VLab Landing Page is your VLCS starting point for exploring Communities, Projects, and more. Note the community name, "Virtual Lab," appears at the left end of the dark blue Control Menu bar; the community name also appears in larger font next to the large NOAA logo in the area between the Control Menu and the light blue Page Header:
- Click on the Question-mark (?) icon on the right end of the Control Menu bar to access VLab's help options. The VLab Help Desk is staffed by the VLab administration team during regular business hours (Eastern time), and may be reached via email at vlab.admin@noaa.gov.
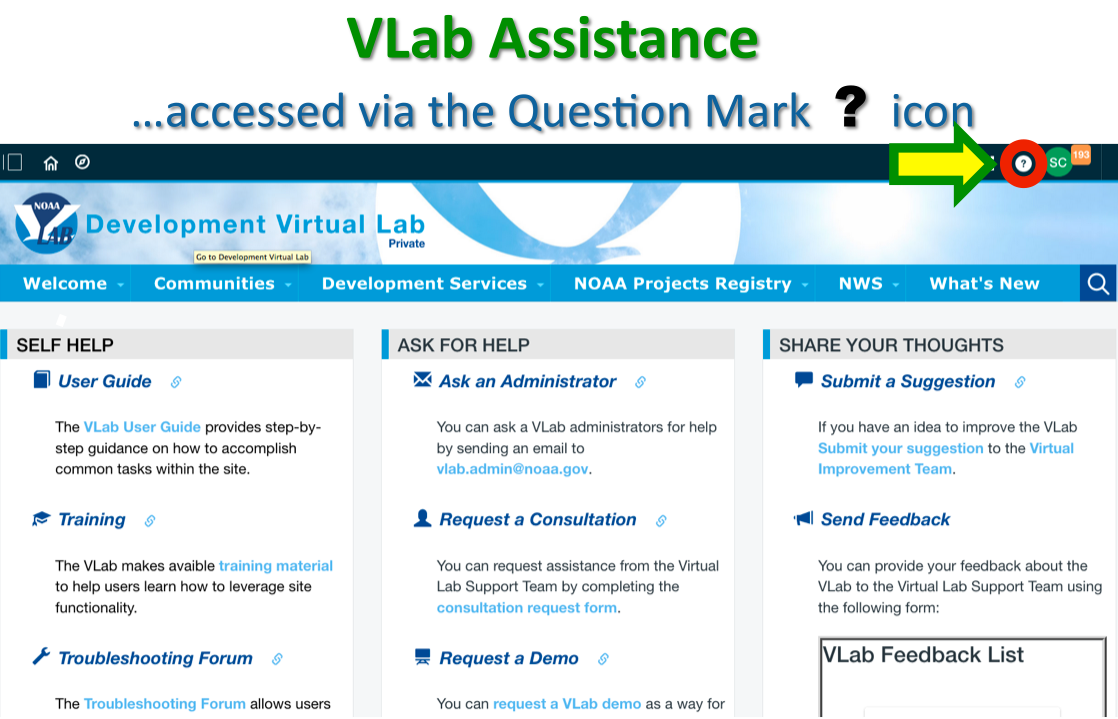
- Click on the VLab User Guide link on the help page to access the user guide. The User Guide is a good source of "how to" information for anyone working in VLab Communities.
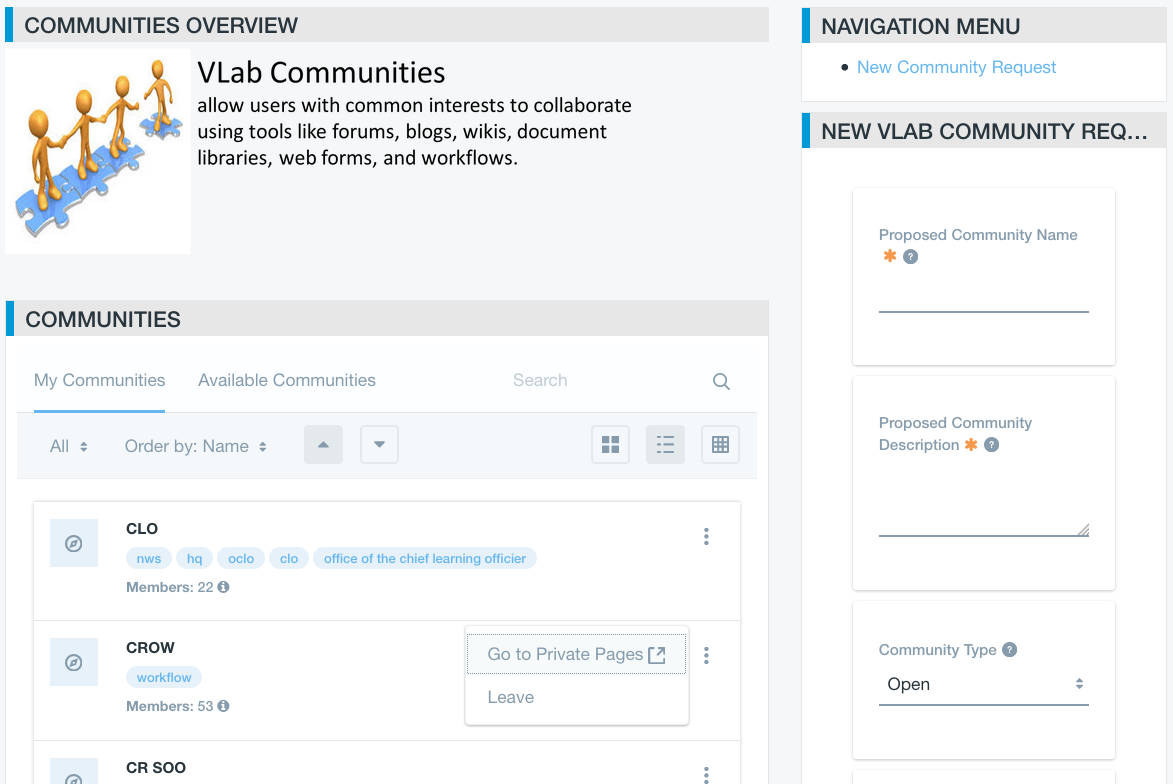
- Select "Communities" on the Page Header of the VLab Landing Page shown immediately below (red oval) to access VLab communities. Under the gray "Communities" portal, "My Communities" displays a list of those communities that you have joined as a member. In that list, click on the link to your own local or "default" VLab Community (e.g. "OUN" for the OUN WFO community). If you do not see your local VLab Community listed, contact your SOO / DOH / ITO to be added. If you are a SOO / DOH / ITO and your local Community is not in the list, contact vlab.admin@noaa.gov.

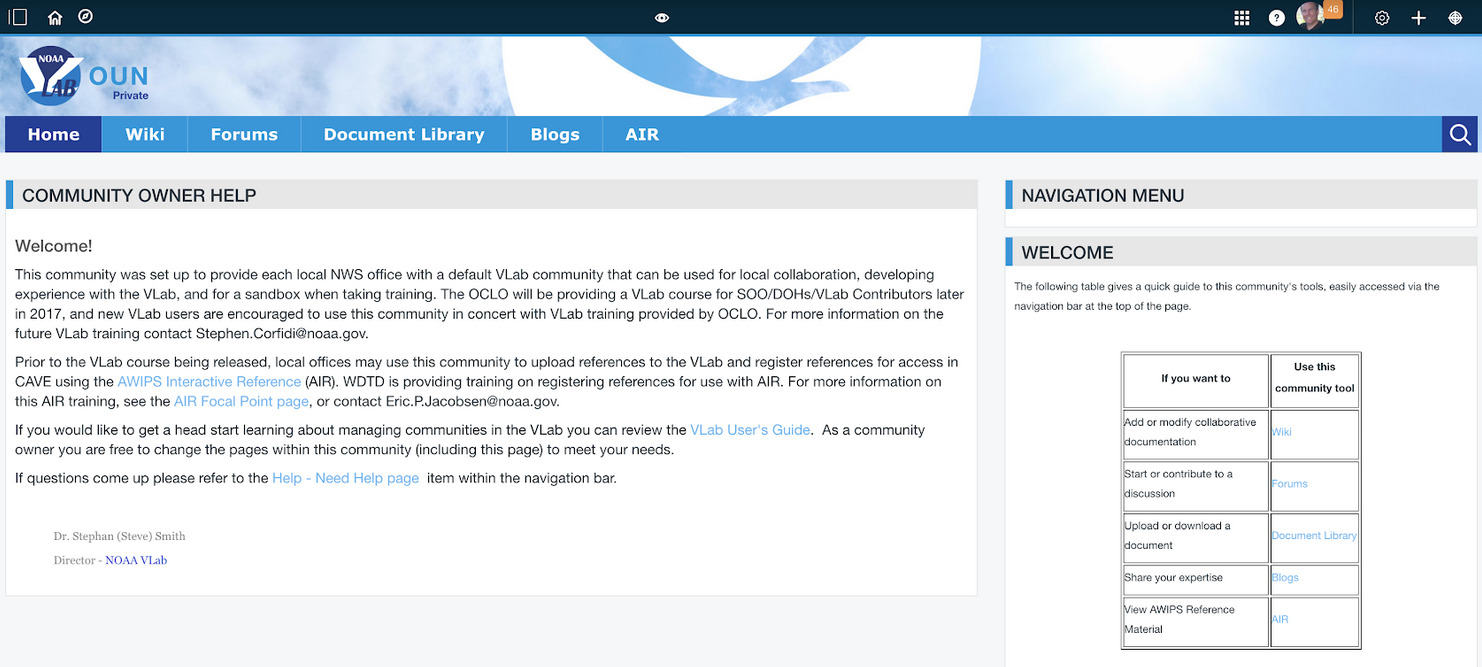
- The local community links in the "My Communities" listing take you to the local community home pages; WFO OUN's local community home page appears below. Note that the community name near the NOAA logo has changed from "Virtual Lab" to "OUN." The links go to either the public or private pages of the community. The words "Private" or "Public" appear beneath the community name; "Private" and "Public" signify the side of the community in which you are working. Clicking on the "Private" or "Public" labels will toggle you to the opposite side of the community (assuming that it exists). It is also worth noting that private community pages contain https://vlab.noaa.gov/group in their URLs, while public pages contain https://vlab.noaa.gov/web. The "group" vs. "web" URL distinction is another way to ascertain which side of the community you are viewing. The image below shows the private side of the OUN WFO Community home page; the same template used to create this page was used for all WFO / RFC local VLab community home pages.
- Click on the large NOAA logo or the "Home" logo in the upper left part of the community home page to leave the community you just entered and return to the main Virtual Lab Landing Page (note that the name "Virtual Lab" has replaced "OUN" next to the NOAA logo). Once there, click on "Communities" (red oval) on the Page Header bar:
- After selecting "Communities," under the gray "Communities" portlet, click on the "Available Communities" tab to see all the open and restricted VLab communities that are available for membership. Private communities (not to be confused with private pages) do not appear in the list. There are three viewing option buttons in the upper right part of the Communities portlet; the option shown below is the default "Descriptive" layout (middle button).
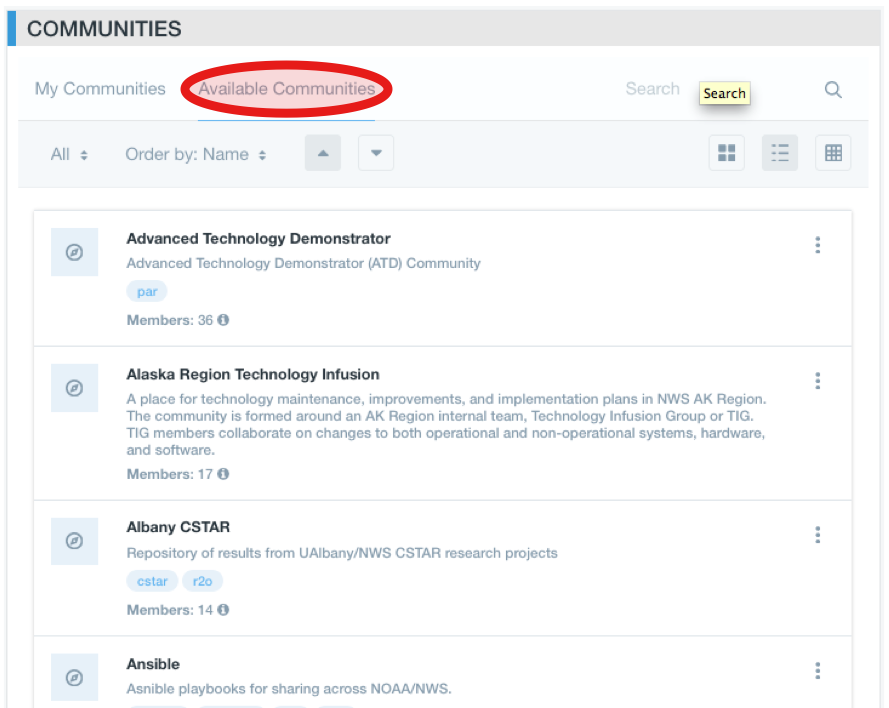
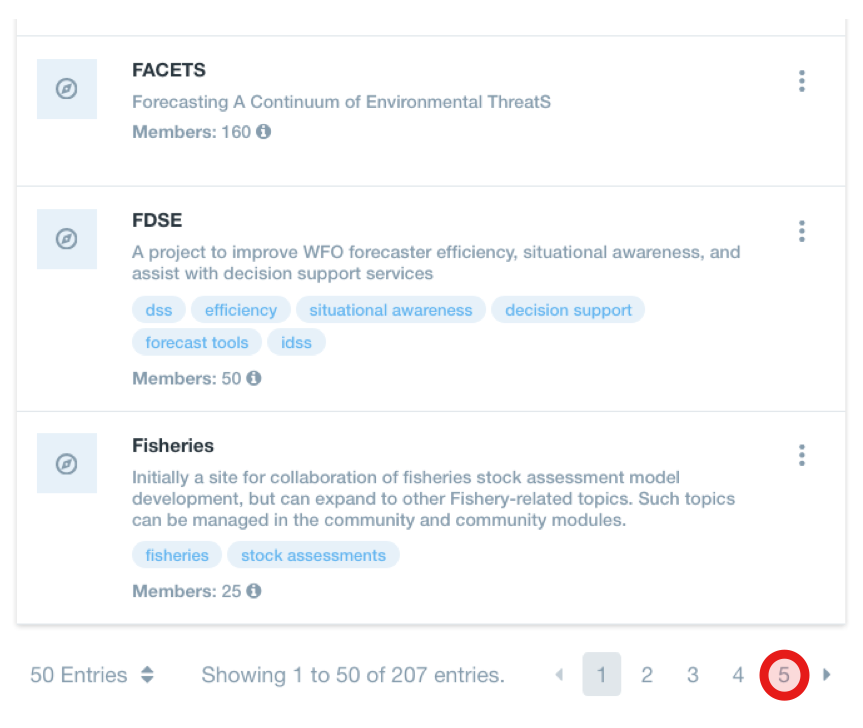
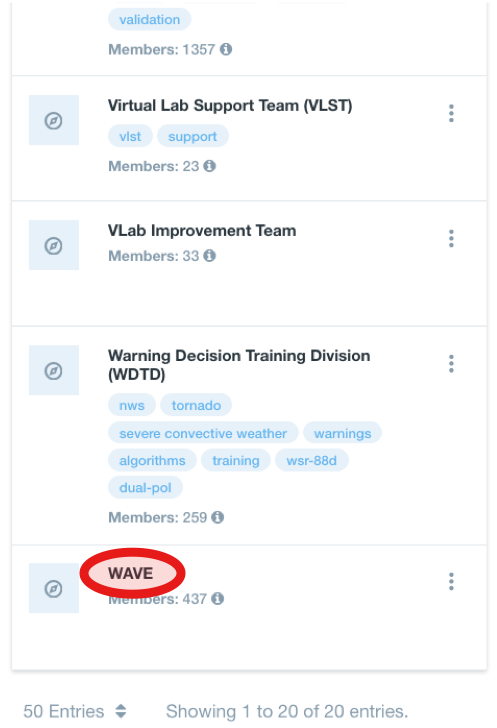
- Use the numbers at the bottom of the listing to step through all available Communities. Find the WAVE Community by selecting one of the larger numbers (e.g. "5" ). You can also search for WAVE using the search box next to the magnifying glass icon beneath the gray "Communities" portlet (see previous step):
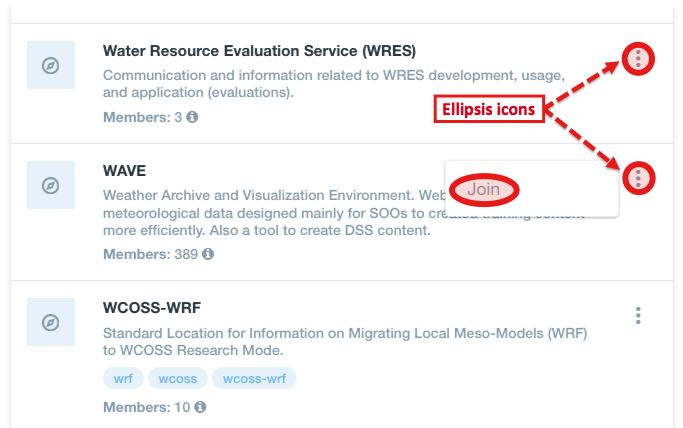
- If you have not already joined the WAVE Community, click on the "Join" link that appears when you click on the "three-dot" or ellipsis icon to the right of the WAVE listing. If you are already a WAVE member, select another Community to join. Any Community with a "Join" option that appears upon clicking the ellipsis icons is an open community --- one of which you immediately become a member upon selecting "Join." In contrast, clicking on the ellipsis icons of restricted communities reveals a "Request Membership" link; you will be notified by email regarding the status of a request to join a restricted community.
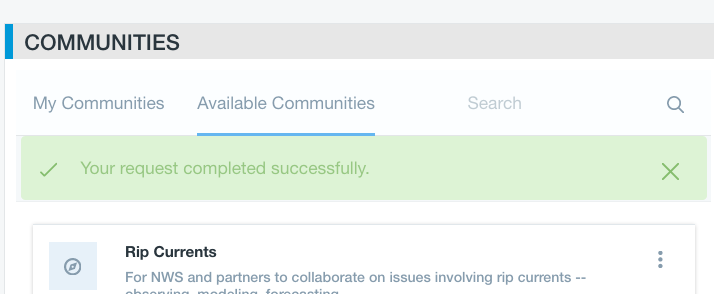
- After joining the WAVE Community, a "Your request completed successfully" banner will appear beneath the gray "Communities" portlet as shown below. Once you have joined a community, the option that appears when you click on the ellipsis icon next to the community name in the "Available Communities" listing changes to "Leave;" this option enables you to easily cancel your membership.
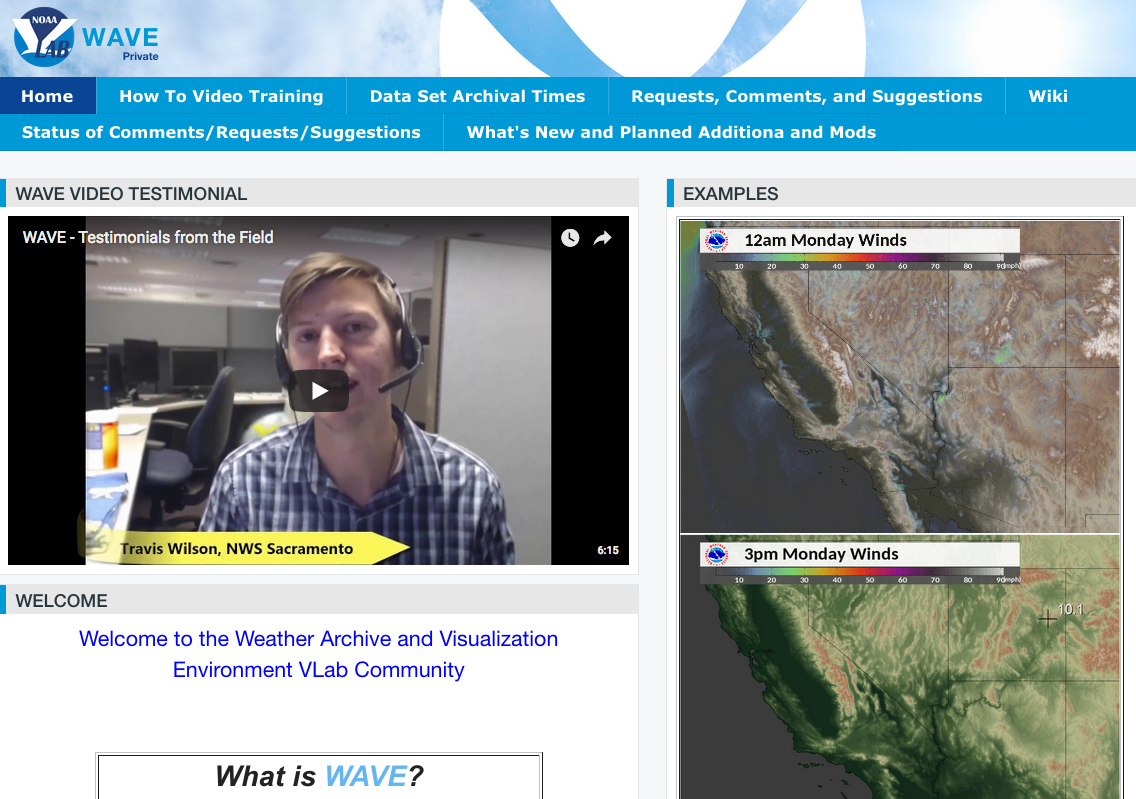
- To access the WAVE community via your "My Communities" listing, click on the "My Communities" tab to the left of the search tool (see previous image), and scroll down the list until you find the community's name. (You can also save time by selecting the small down-triangle icon to the right of "Order by: Name (Descending)" near the top of the My Communities portlet (see step 8)). Clicking on the "WAVE" link in the "My Communities" listing provides access to the WAVE Community home page.
- The WAVE Community home page has a YouTube video displayed in the upper left part of the page. Remember that the Youtube videos on this site are available only if you have connected to VLab through the Internet; the videos are not available when accessing VLab from AWIPS because AWIPS does not have Internet access.
- Click on the NOAA or "Home" logos in the upper left part of the WAVE home page to leave the WAVE Community and to return to the main Virtual Lab Landing Page (note that the name "Virtual Lab" has replaced "WAVE" as the community name next to the NOAA logos):
- Now click on the "Development Services" tab to explore VLab Projects (for software development and issue tracking) that are visible to the community side of VLab:
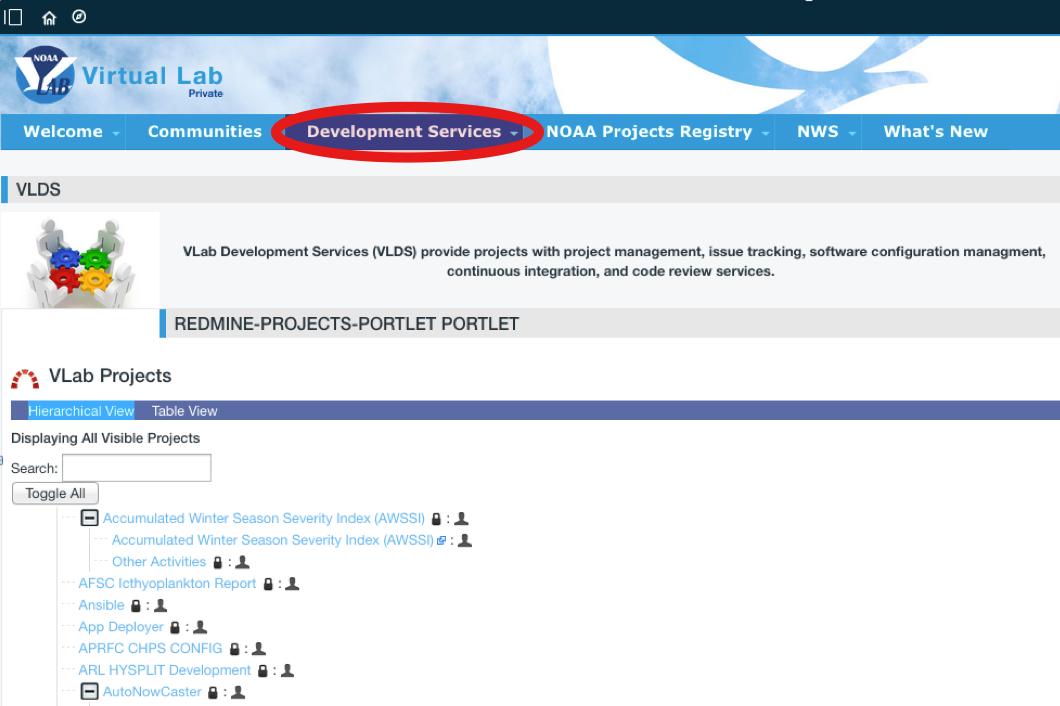
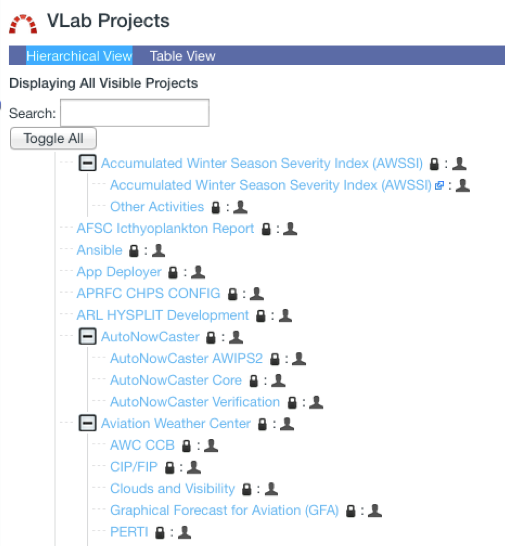
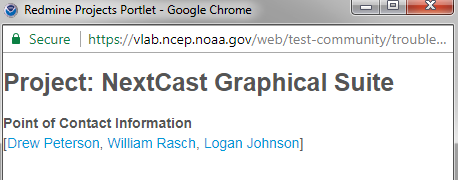
- In the Hierarchical listing of VLab projects, scroll down the page to find the NextCast Graphical Suite. (Note: You can click on the "-" icons to collapse large groups of Projects). Hover the mouse over the project's name (middle image below), and then click on the "Person" icon to identify the project's points of contact (last image below). If you want to join the project, contact the individuals listed.

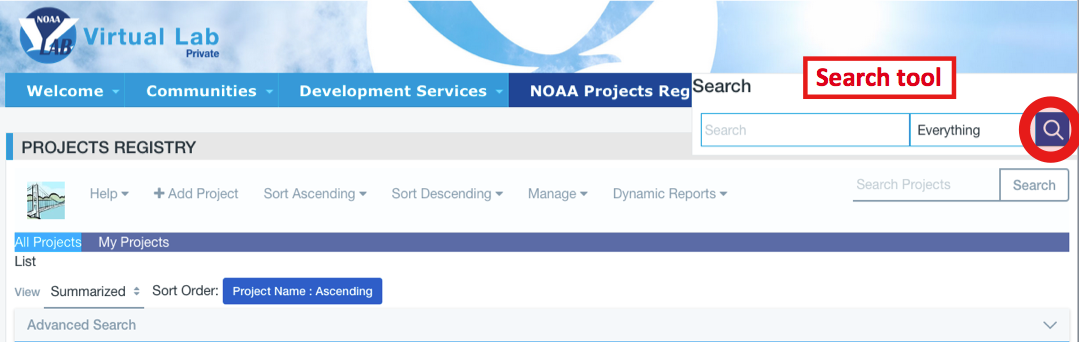
- Farther right on the VLab Landing Page Product Header, click on the NOAA Projects Registry drop-down menu to explore the portlet used to collect, store, and maintain information on NOAA Research and Development (R&D) projects:

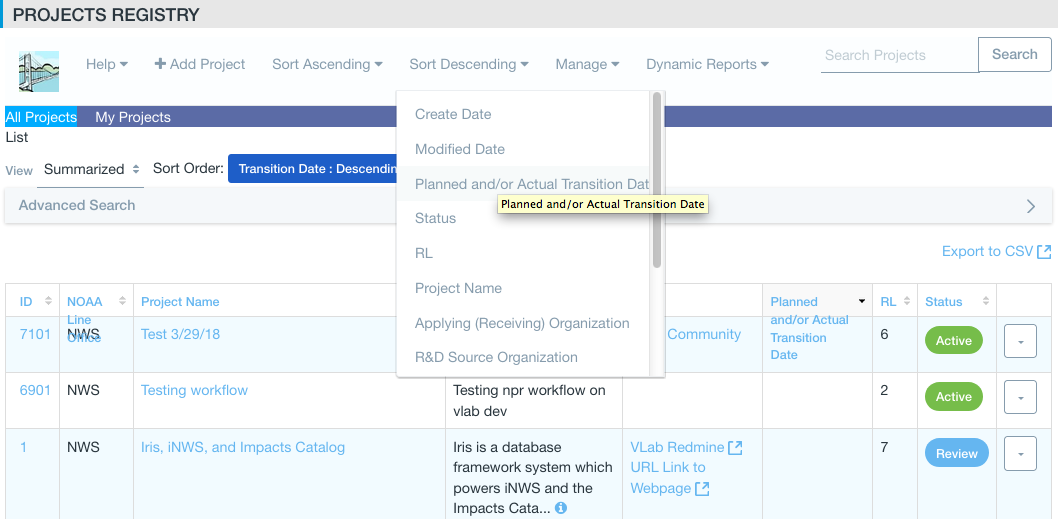
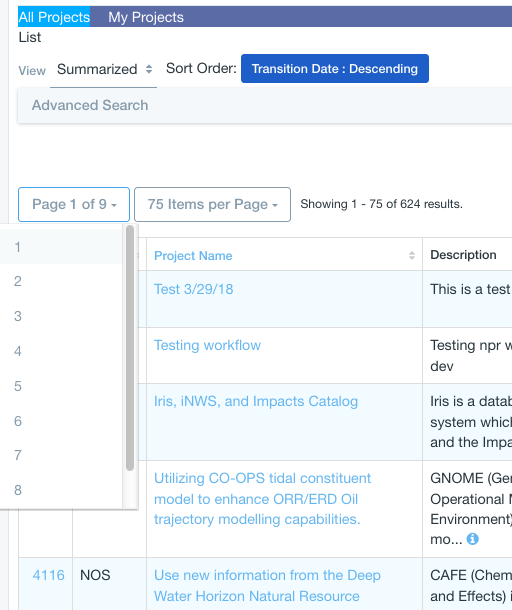
- Using the menu at the top of the page, you can sort through the Projects Registry using different criteria. For example, click on "Sort Descending," then select "Planned and/or Actual Transition Date" to see how to organize the results by more recent calendar date (there are some projects in the list that no longer are active).
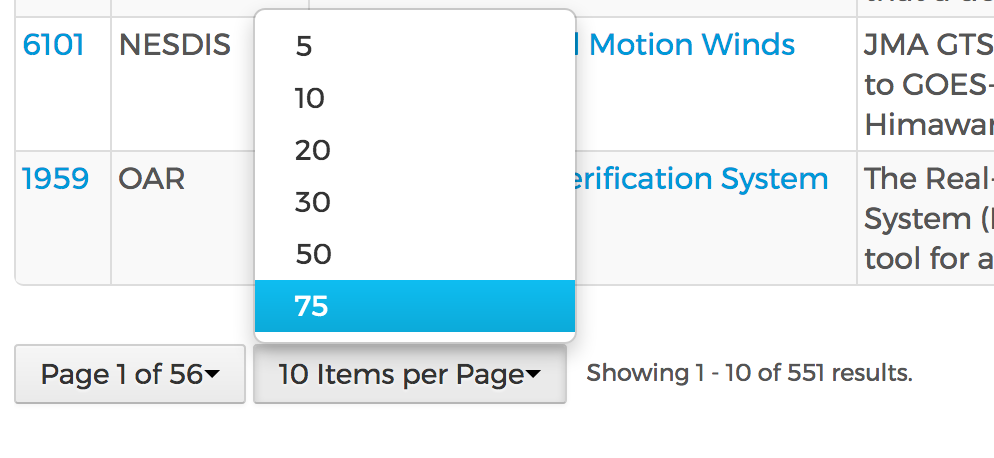
- To show more results on one page, navigate to the bottom of the page and click on "10 Items per Page." Then select "75." The page display controls will now appear at both the top and bottom of the page.
- Click on the page controls to step through the different pages of results (e.g. "Page 1 of 9," then select "5.") To identify a particular project, it is easiest to use the search tool next to the white "Search" button in the Projects Registry portlet ("Search Projects" appears in that search button's text box; see second image below). Alternatively, you may use the "Advanced Search" option by clicking on "Advanced Search" near the top of the Projects Registry listing if the page is collapsed (see first image below). For example, to learn about the NWS's FACETS initiative, enter "FACETS" as the Project Name.
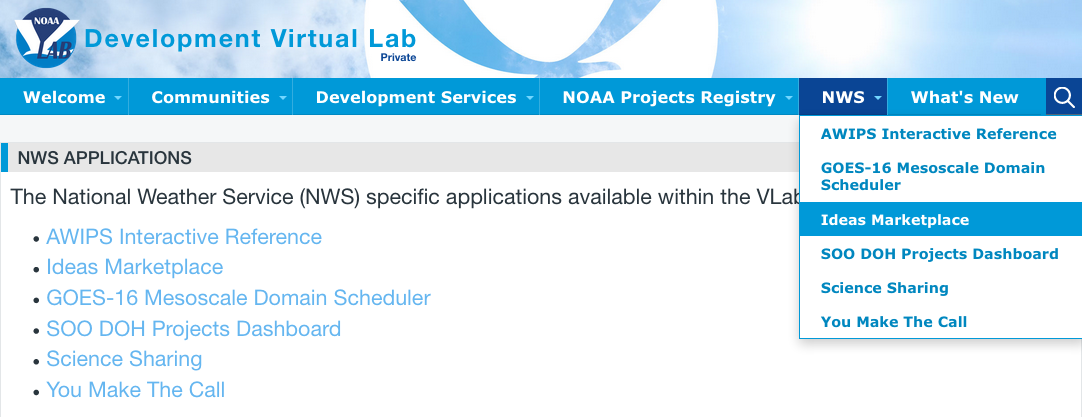
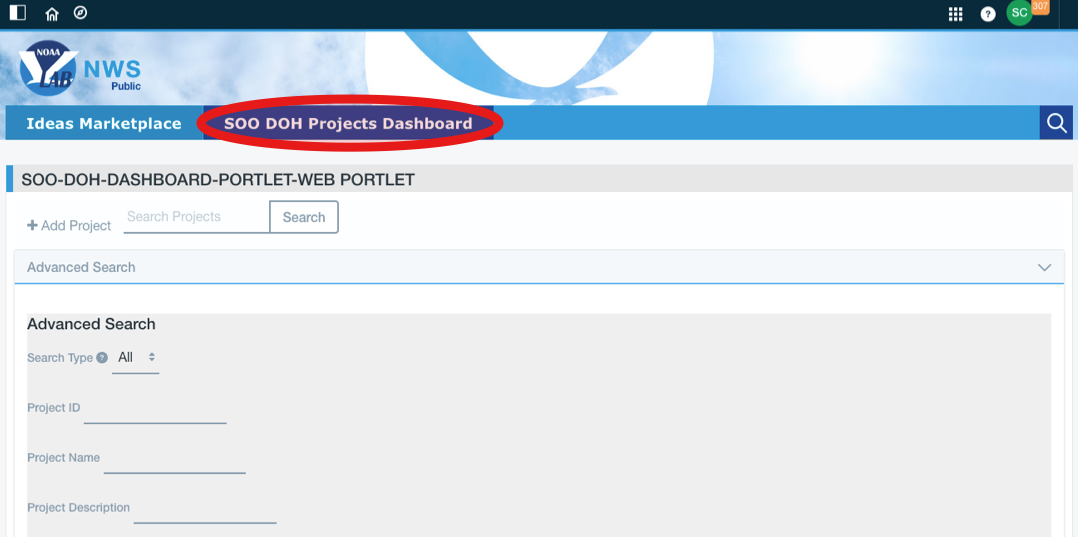
- Next, hover over the "NWS" pull-down menu on the light blue Page Header bar, and select "Ideas Marketplace." This site, shown in the second image below, is for new ideas to be proposed, shared, and discussed in an environment open to all NWS employees.
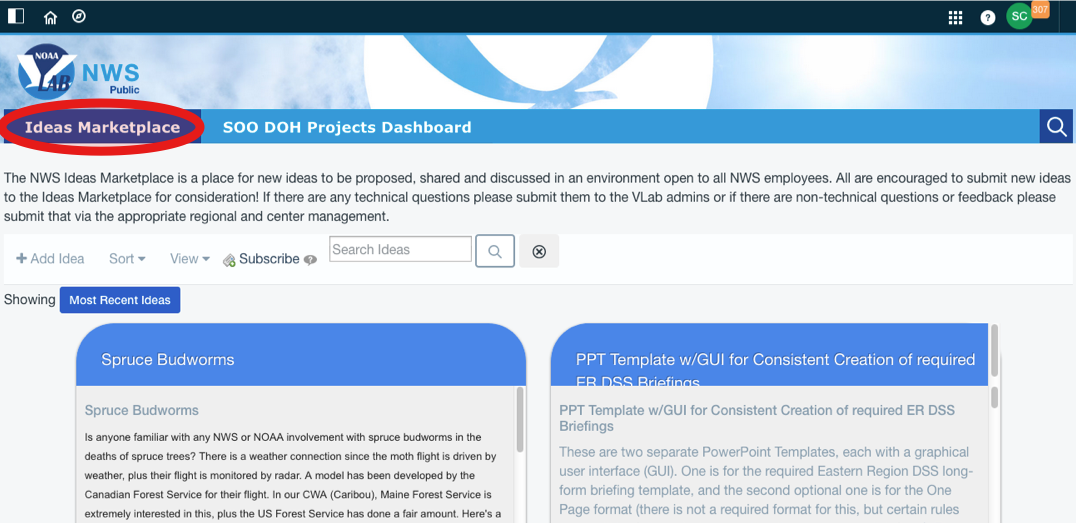
- At the top of the current page, click on the SOO DOH Projects Dashboard tab next to Ideas Marketplace to review active and inactive SOO projects. Alternatively, you could use the NWS drop-down menu on the Product Header bar (see image 1 in step 21) to load the page. The top part of the page, shown in the image immediately below, has a search tool. Below the search tool is the actual list of projects; the top part of this list is shown in the second image.
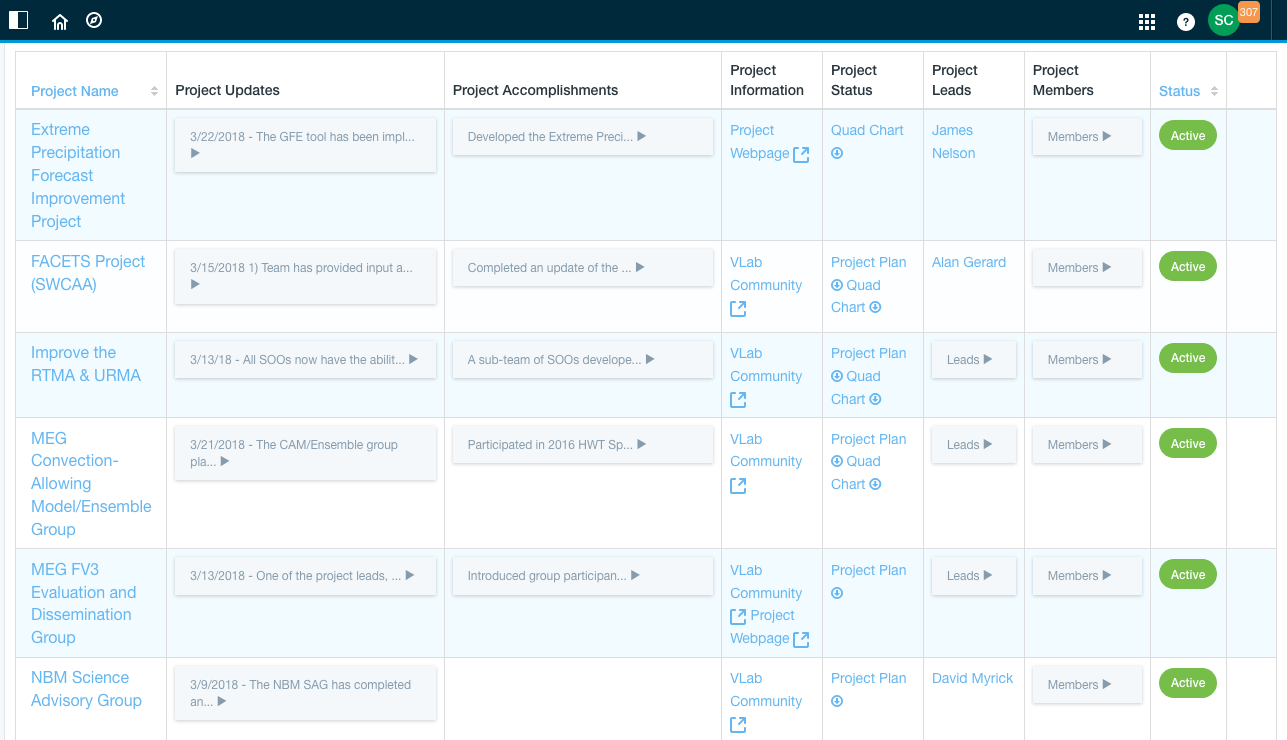
- Scroll down the projects listing to the Probabilistic Rainfall and Snowfall Services Project, then click on the entry to obtain information about the project.

- Click on your name in the upper left corner of the page (you may need to click on the rectangular Product Menu icon (just left of the "Home" icon) in the upper left part of the page to expand the left navigation). Next, click "My Account" and "Account Settings." Here you can manage and modify personal account information. You also can upload a photo of yourself that members of your communities will see when they select your profile. Click on the "Change" button near the center of the page (below the "person" icon), and then upload a photo less than 300K in size. When finished, click "Save."


- Sign out of the VLab when you are finished working by clicking on your name in the top left part of the page (below the dark blue "Control Menu" bar), and selecting "Sign Out:"

- You are now finished with this job sheet.