Purpose:
This jobsheet reviews launching NSHARP from the Tools menu which features a GUI for clicking on a map to select the sounding to load (10-15min).
Tasks:
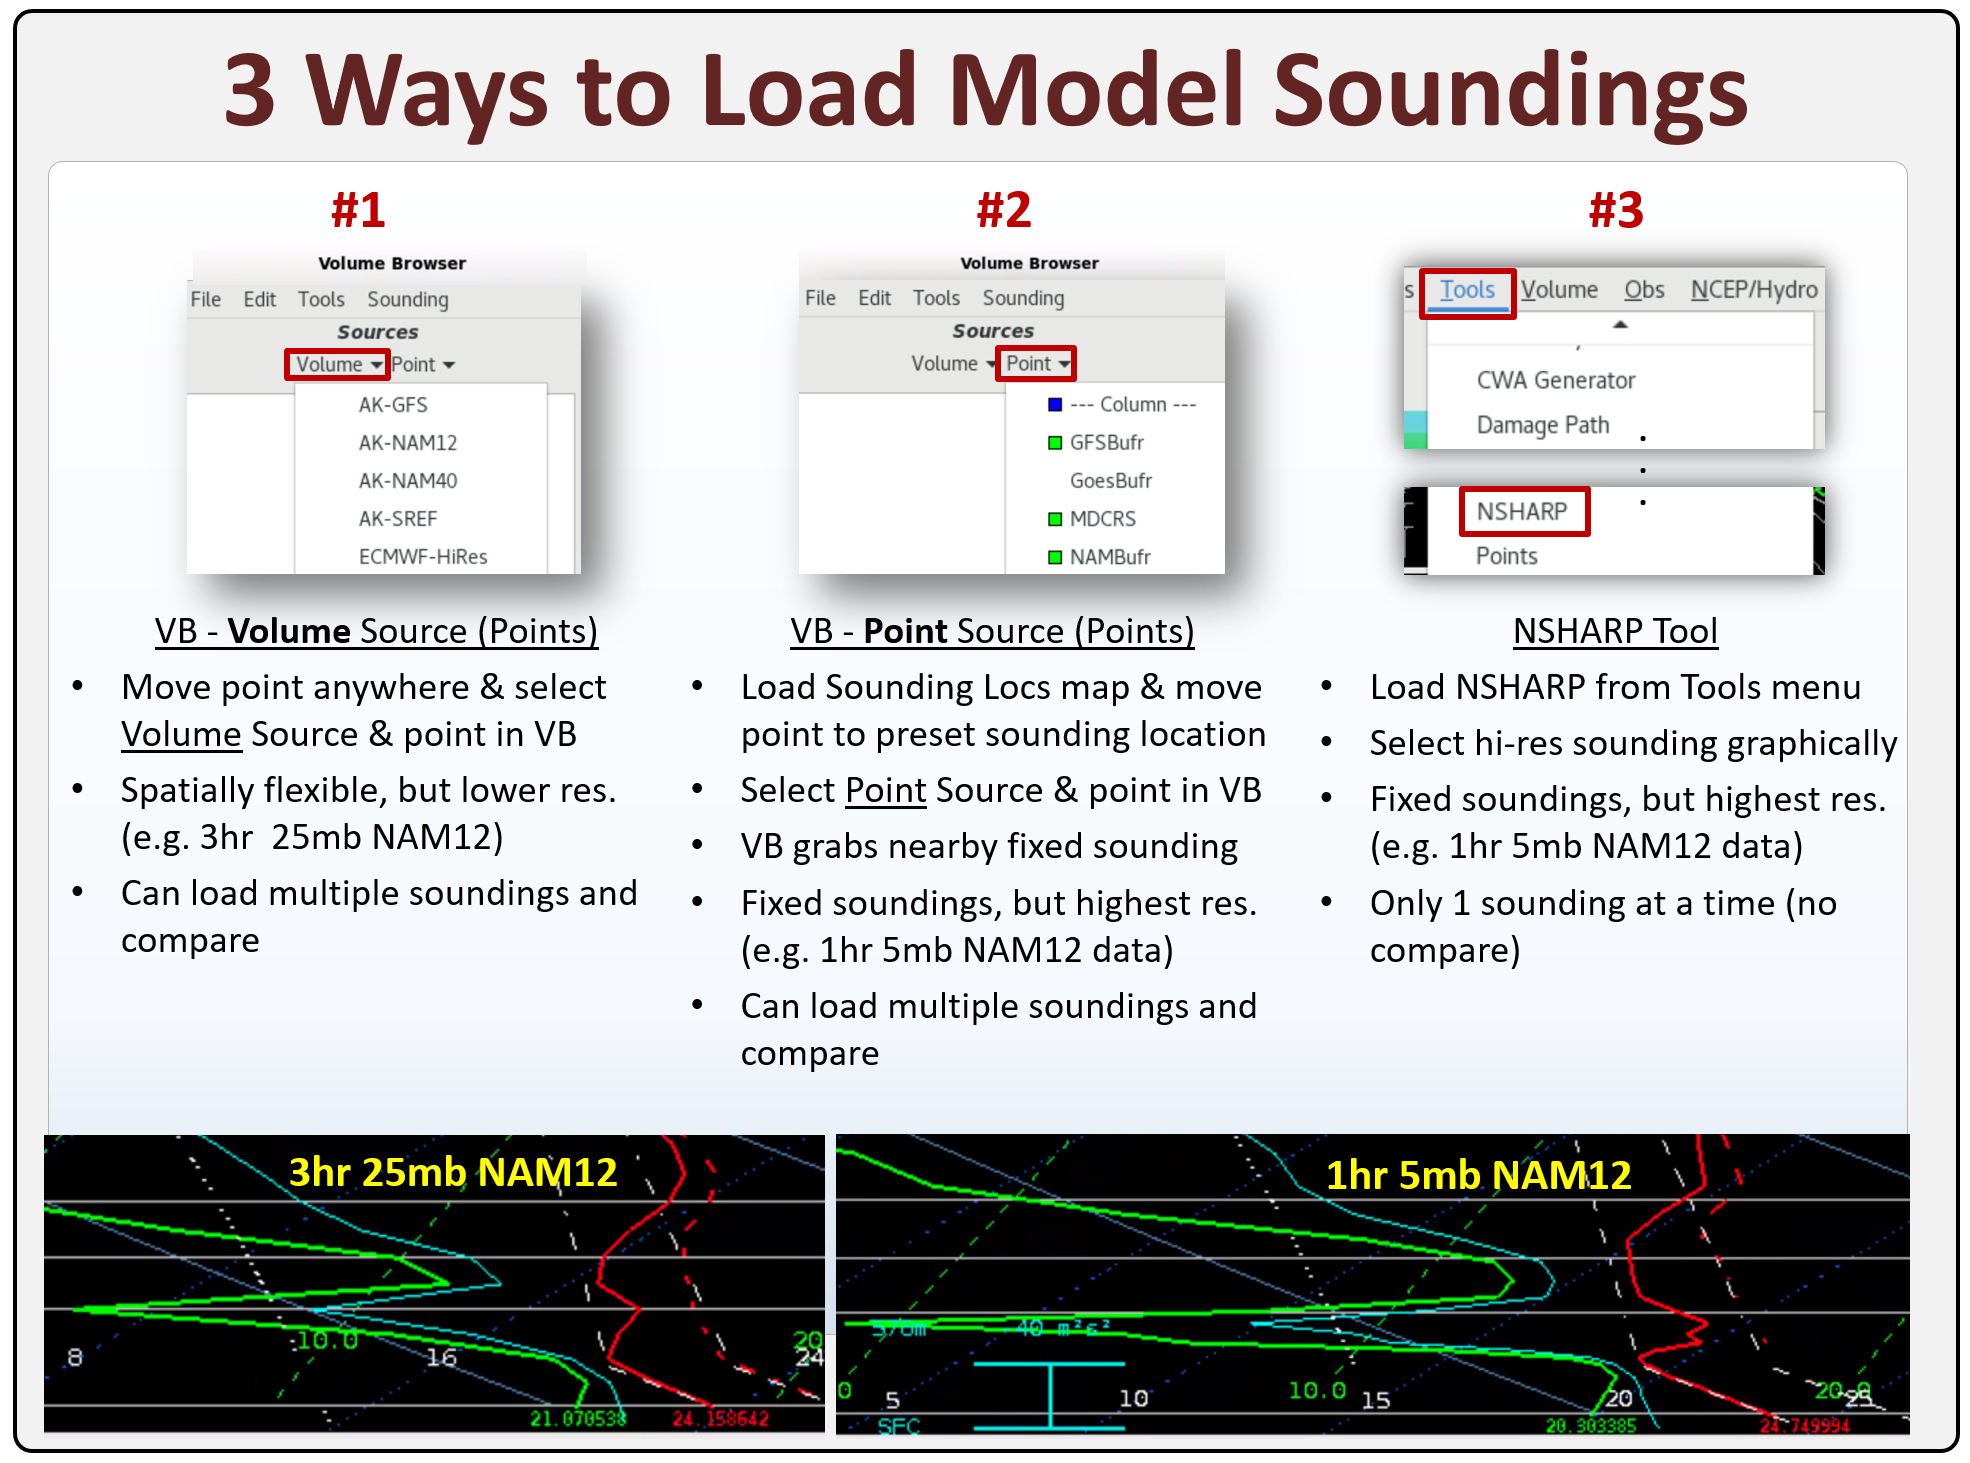
- In 21.4.1, when NSHARP is loaded from the Tools menu, it contains a new graphical point and click chooser for loading observed soundings and hi-res point forecast soundings. Observed soundings can still be launched from the D2D Upper Air menu and model soundings can be loaded from the Volume Browser (VB). Model soundings can still be launched for lower resolution (e.g. 3hr 25mb vertical resolution NAM) points interpolated from the model grids or using hi-res Bufr soundings for specific forecast points. We will review each of these way to launching model soundings in this jobsheet:
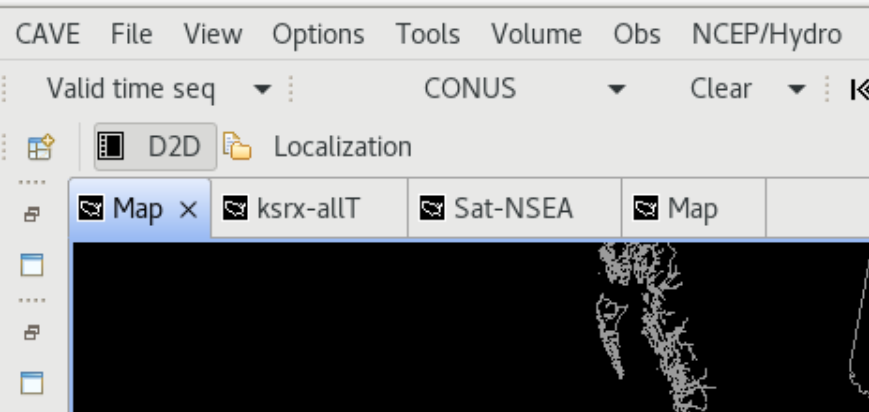
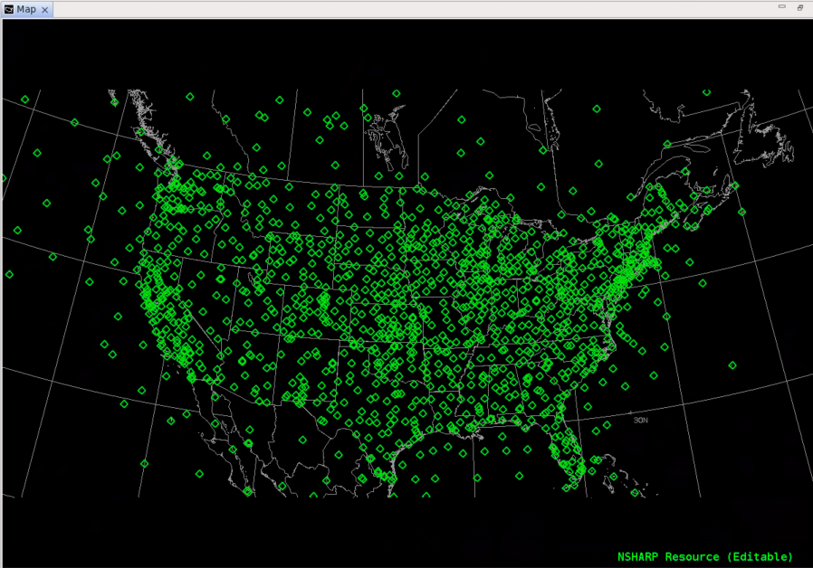
- In a blank CAVE editor, set the scale to CONUS, and move that tab to the first position in the D2D perspective if it is not already there. When NSHARP loads from the Tools menu, it is going to always use the first tab in the D2D perspective to load the graphical chooser. It is best to do this in a blank editor, because it will clear the display when loading soundings.
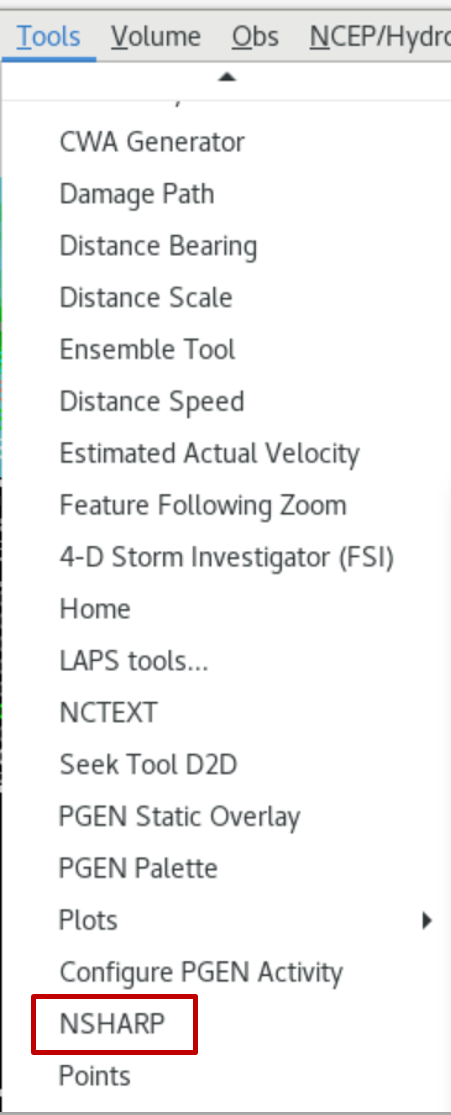
- To load an observed upper air from the graphical point chooser, click on the Tools menu and select NSHARP.
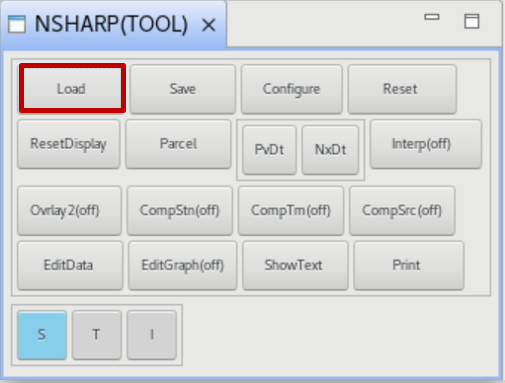
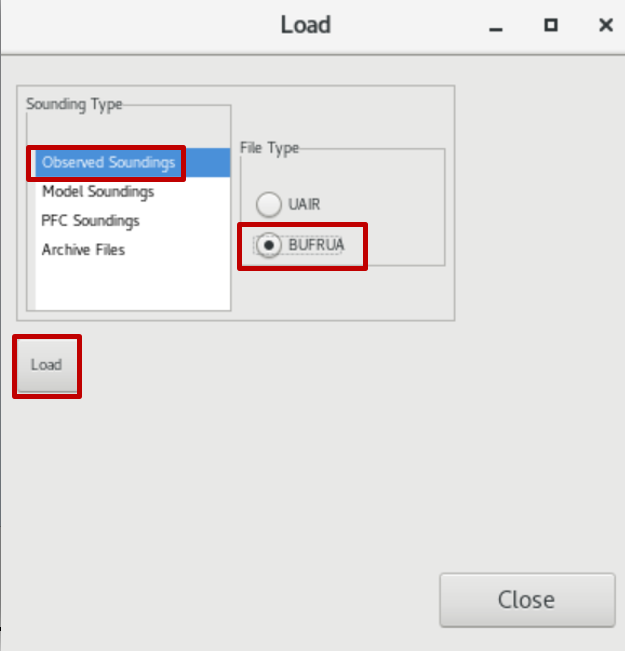
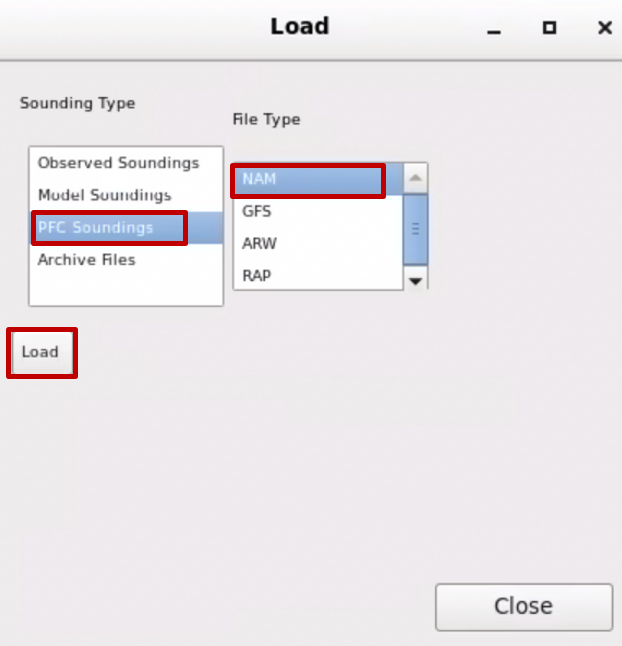
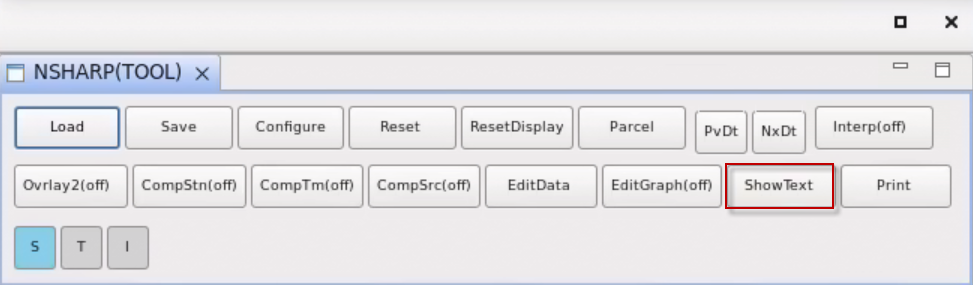
- Click on the Load button in the NSHARP(TOOL) popup. The NSHARP(TOOL) window is almost identical to the NSHARP(D2D) window when loading NSHARP from the upper air menu, only clicking on Load from NSHARP(D2D) will launch the archive file chooser instead of the Load window shown in the next step.
- Under Sounding Type select Observed Soundings. Under File Type select BUFRUA. Click Load.
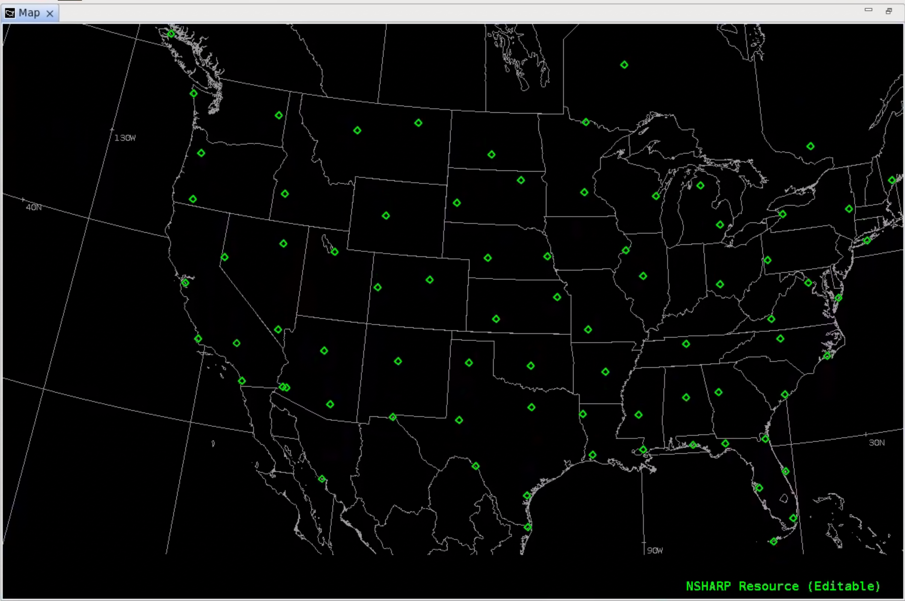
- Click on a green circle to load a RAOB.
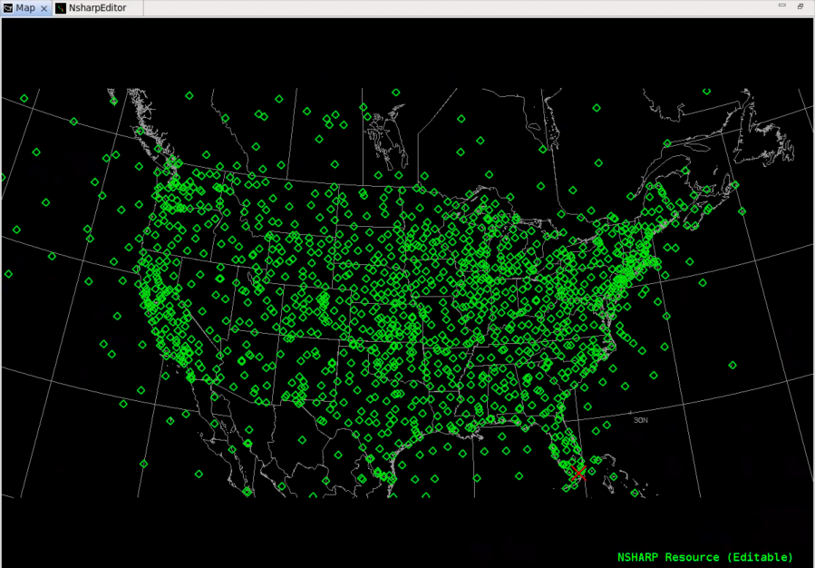
- You will see a red X when the sounding is launched (see Miami, FL below).
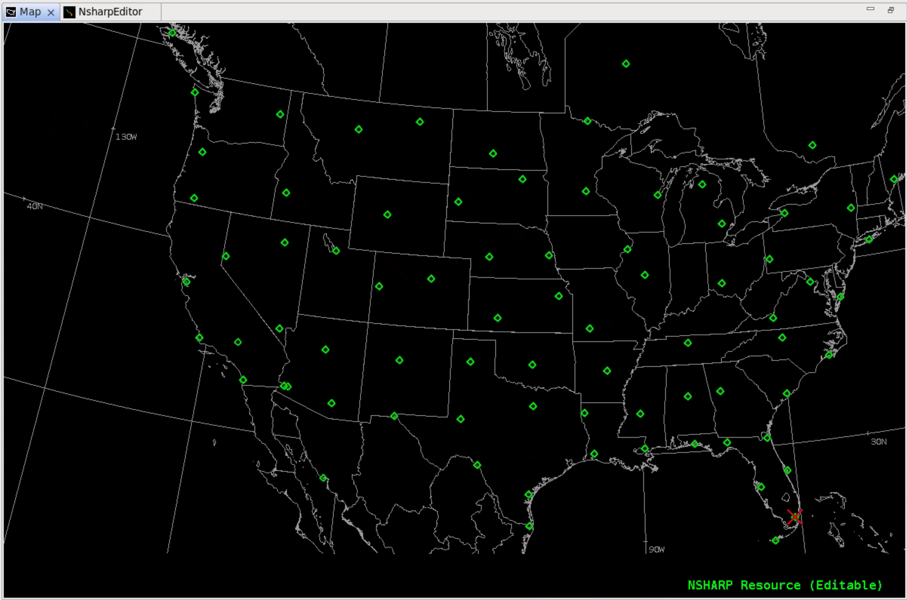
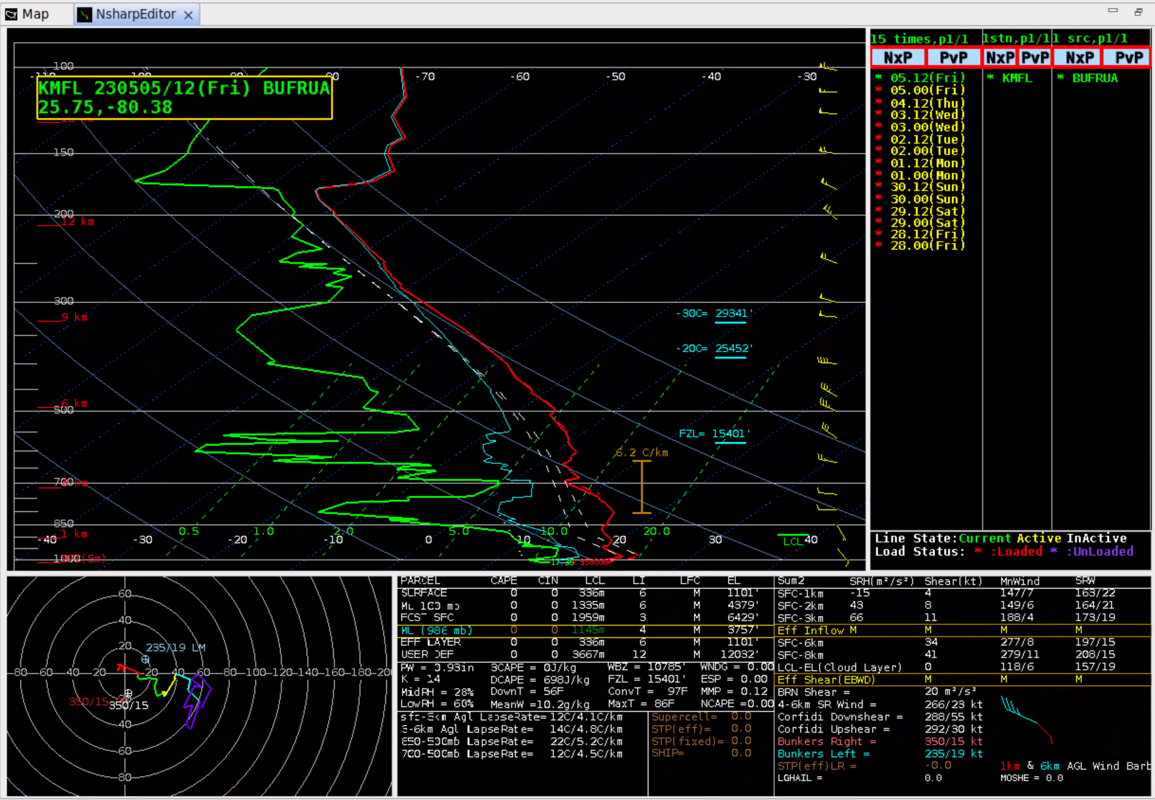
- Alternatively, you could have selected Miami, FL (KMFL) from the Upper Air-US Eastern menu in D2D.
- To load hi-res point forecast soundings, click on the Load button in the NSHARP(TOOL) popup if you still have it up from the previous steps. If you closed it you will have to load NSHARP from the Tools menu again. Note that clicking Load clears out the first pane and the previously loaded sounding.
- Under Sounding Type select PFC Soundings (for point forecast soundings). Under File Type select your desired model (e.g. NAM). Click Load. NAM and GFS are likely the only hi-res sounding available for WFOs in AWIPS.
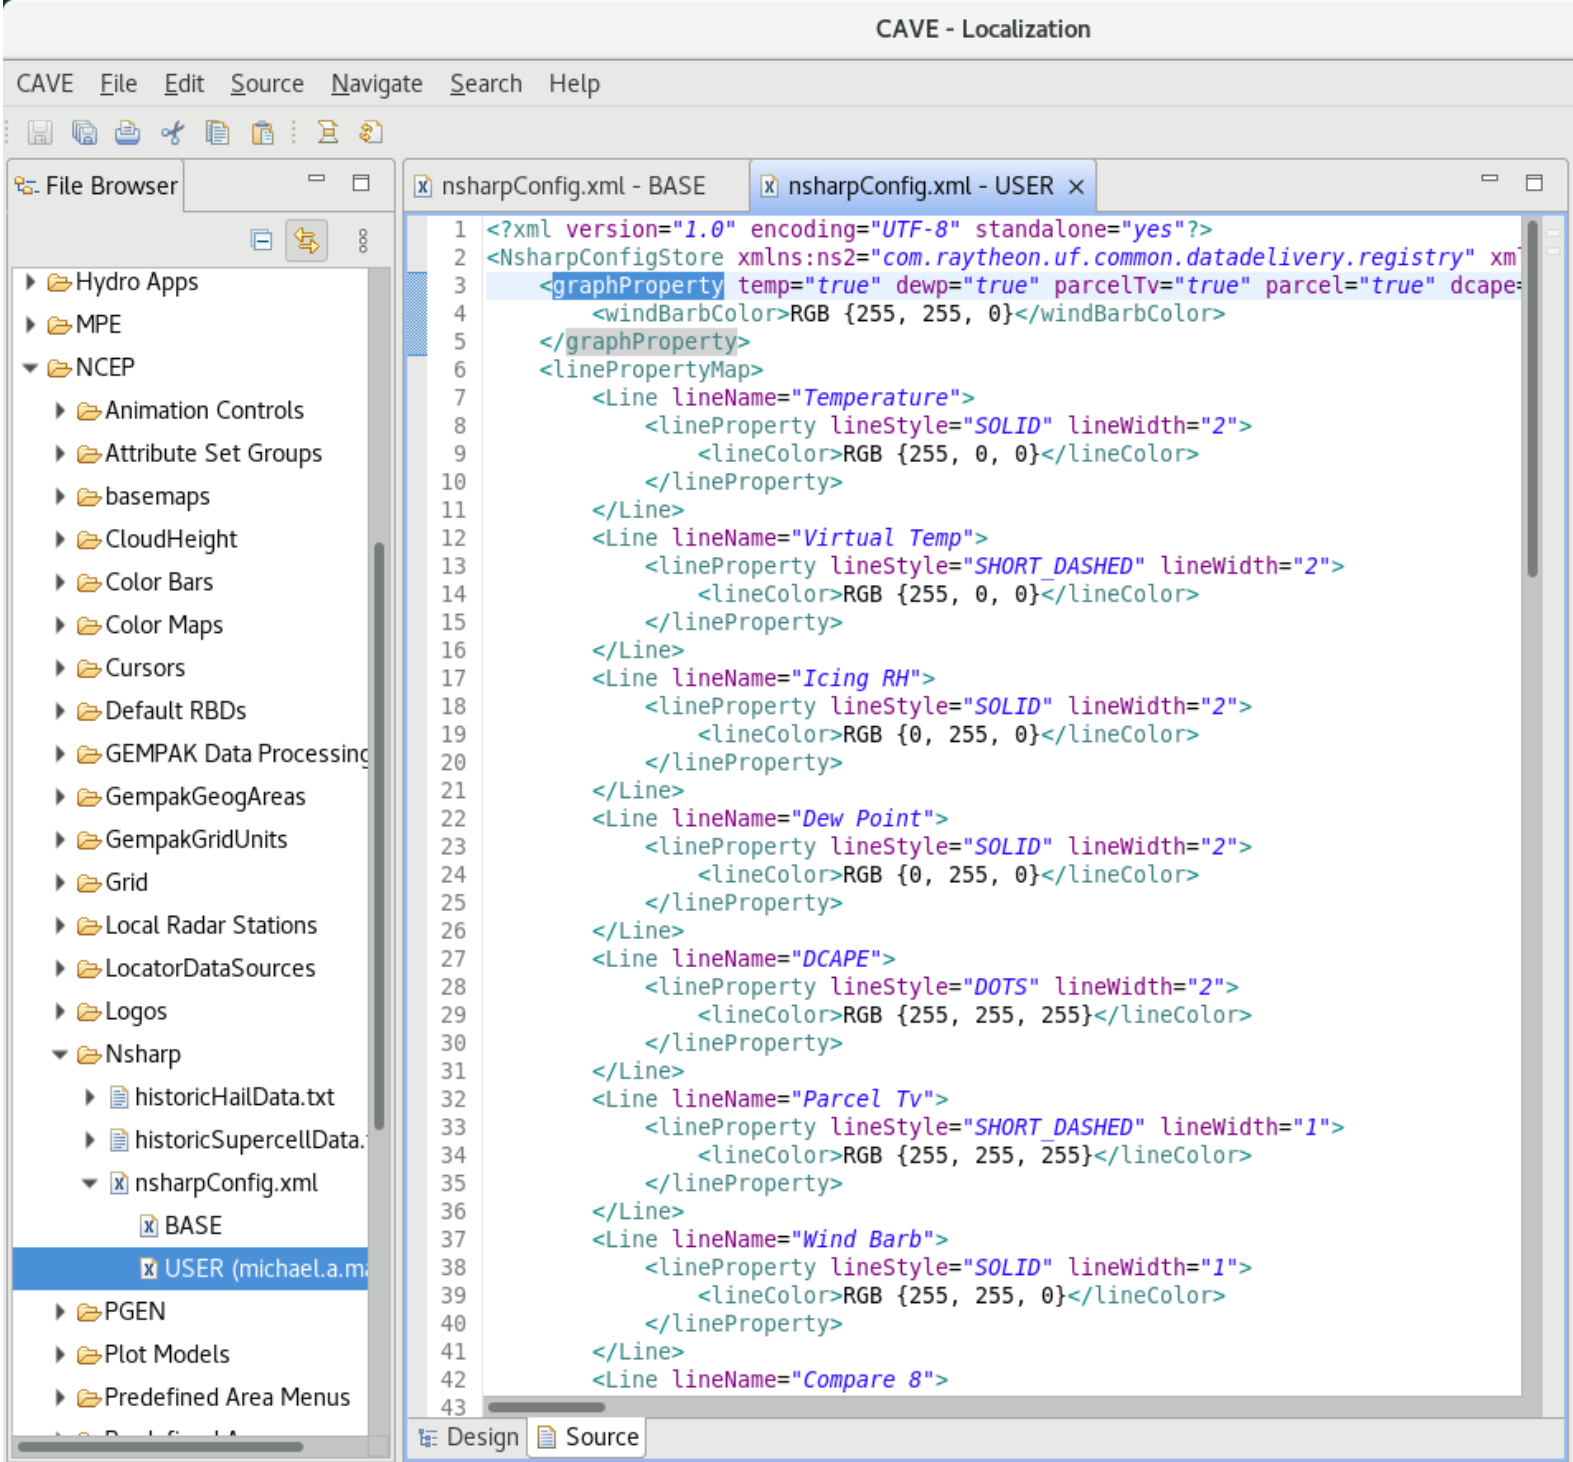
- Note: If you see an empty File Type list, then you likely have an old nsharpConfig.xml override from using the Save button in NSHARP that is preventing the pfcTypeList from being seen. Either remove the override from NCEP->Nsharp->nsharpConfig.xml in the localization perspective or insert a pfcTypeList="NAM GFS" tag in the row starting with <graphProperty if you want to keep your old settings.
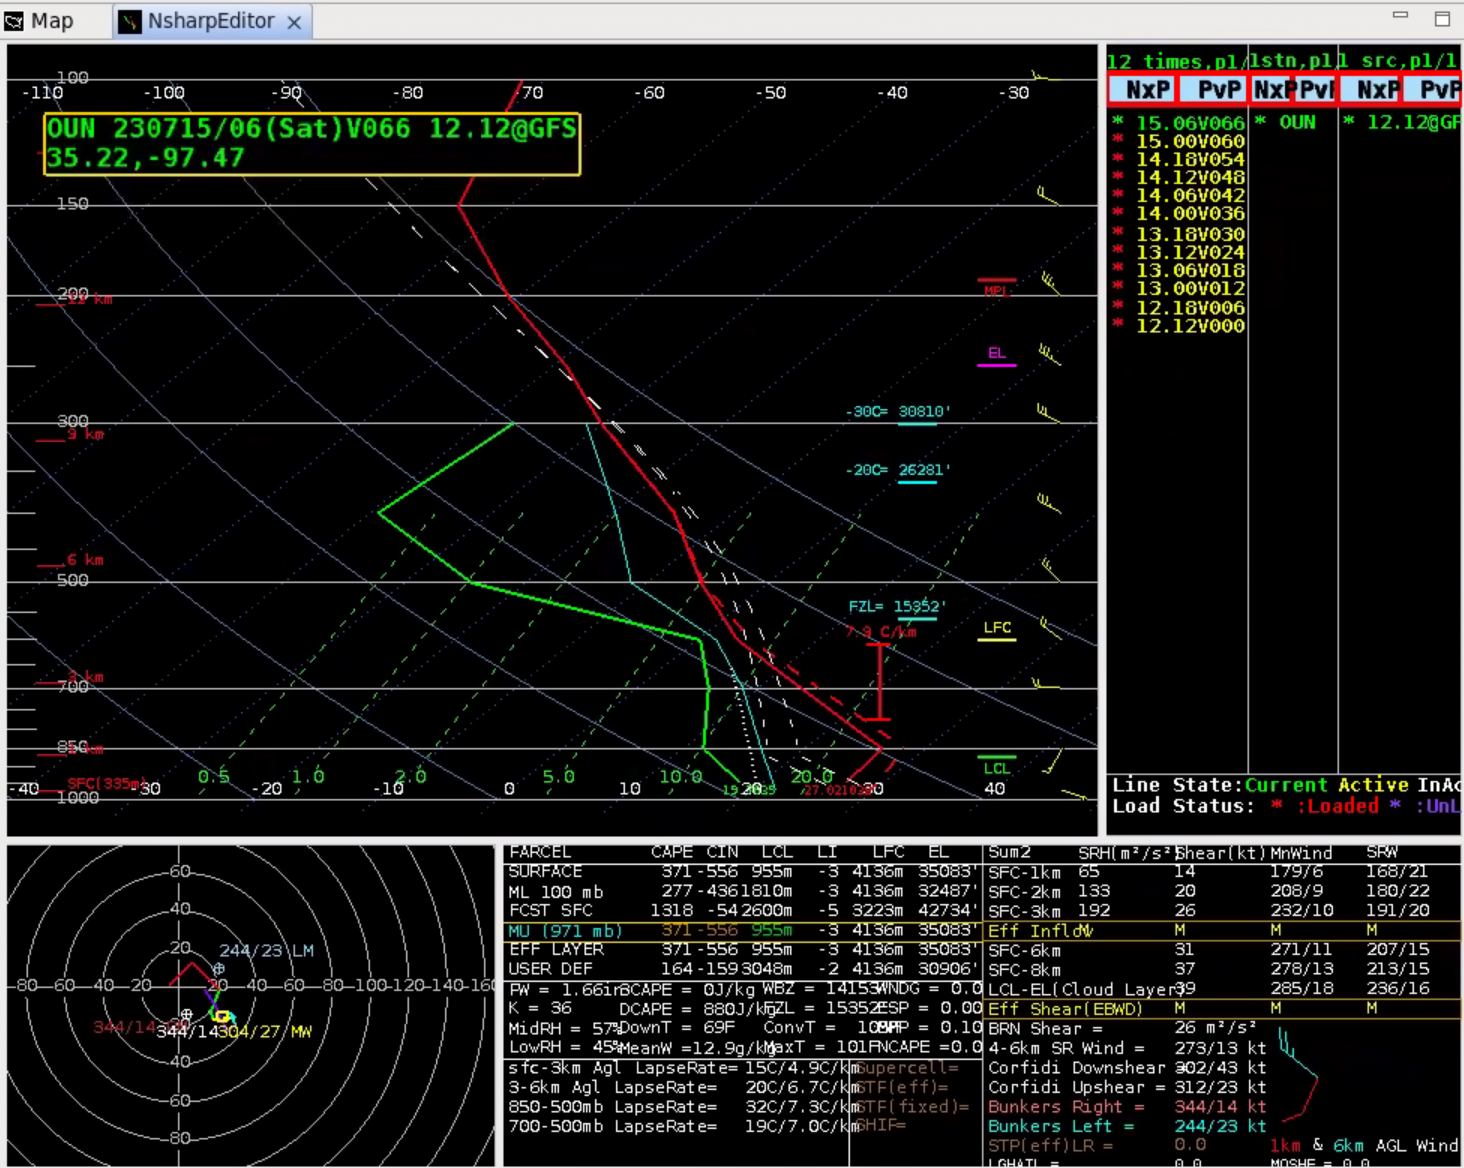
- Select a location of one of the hi-res point forecast soundings. Note the hi-res soundings are created outside of AWIPS and are shipped separately from the lower-resolution grids.
- You will see a red X when the sounding is launched (see KTMB below).
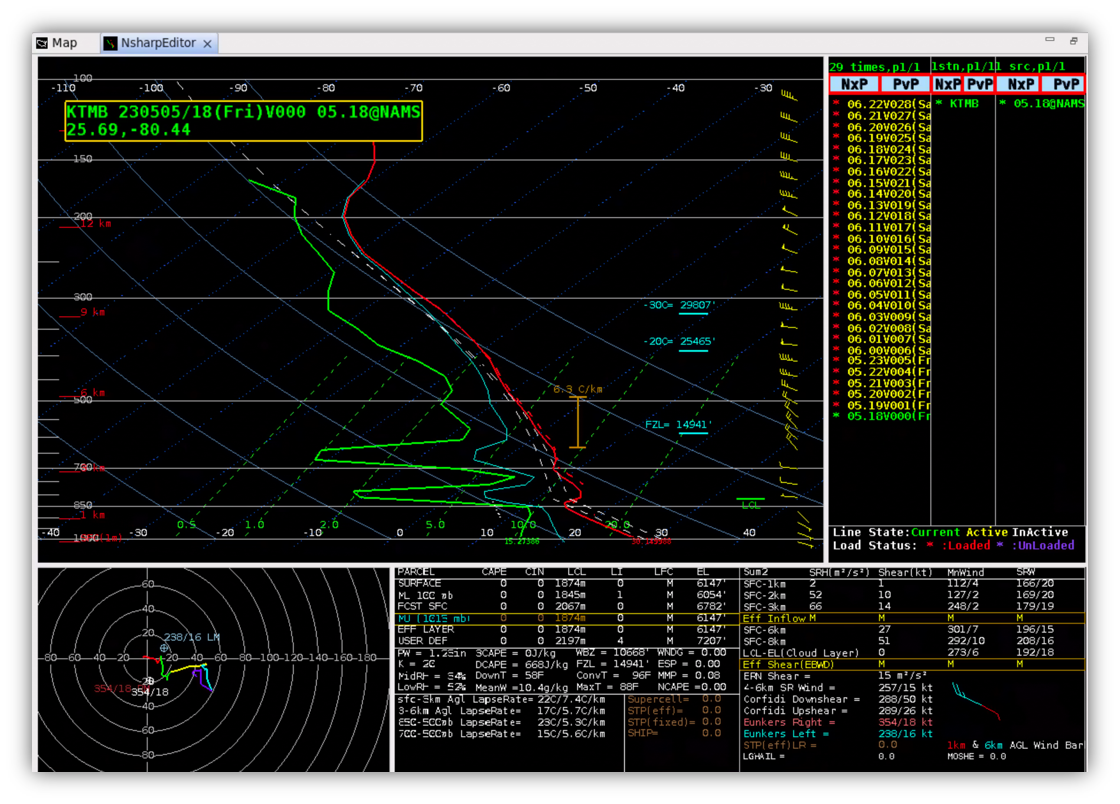
- Notice the hi-res data is hourly with high vertical resolution (5mb). The more flexible point soundings for any point using the VB are 3hr and 25mb for the NAM.
- Alternatively you could have loaded the hi-res NAM sounding file by clicking on the VB Point menu under Sources and selecting NAMBufr, followed by dragging and dropping a point close to the point forecast location. This typically requires overlaying the Sounding Locs->NAM map. The new NSHARP Tool is a more intuitive way to load point forecast soundings.
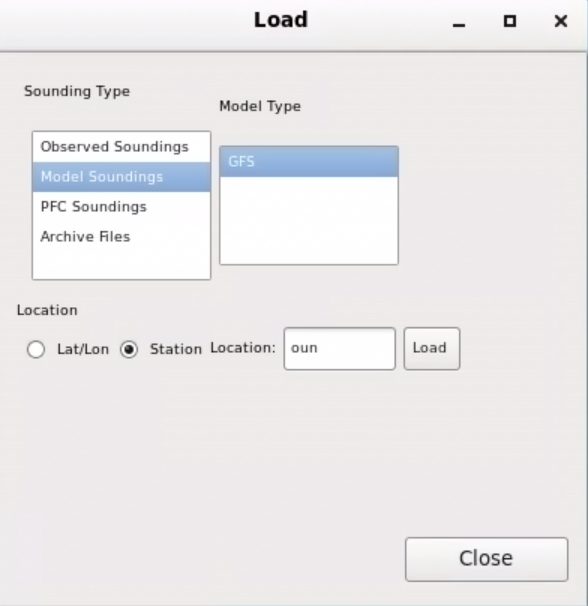
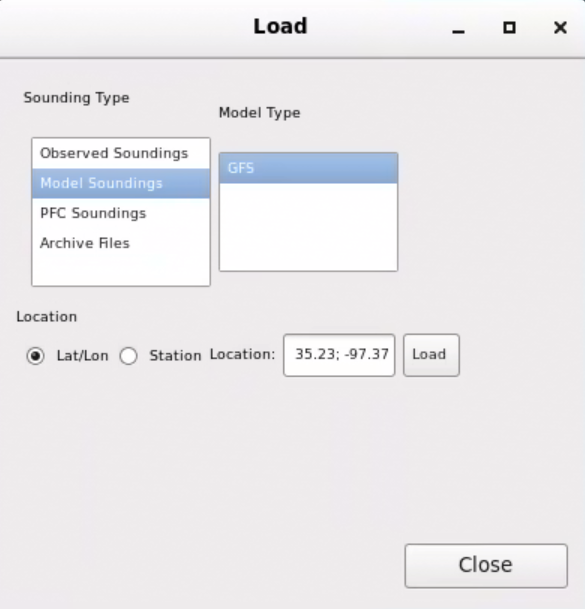
- The Load tool in the NSHARP loaded from the Tools menu also has a Model Soundings option under Sounding Type that interpolates a very low-resolution sounding to either a lat/lon or a station name entered. The resolution for WFOs is likely too low for it to be useful, but if you want to see how this works you can follow along below. The Model Type is configurable using the gribModelTypeList tag in the nsharpConfig.xml (default is "NAM ECMWF GFS UKMET"), but only the models with data available from that list will show in the Model Type box. As with PFC Soundings (in step 10), note that old user overrides can prevent the available models from being seen in the Model Types box.
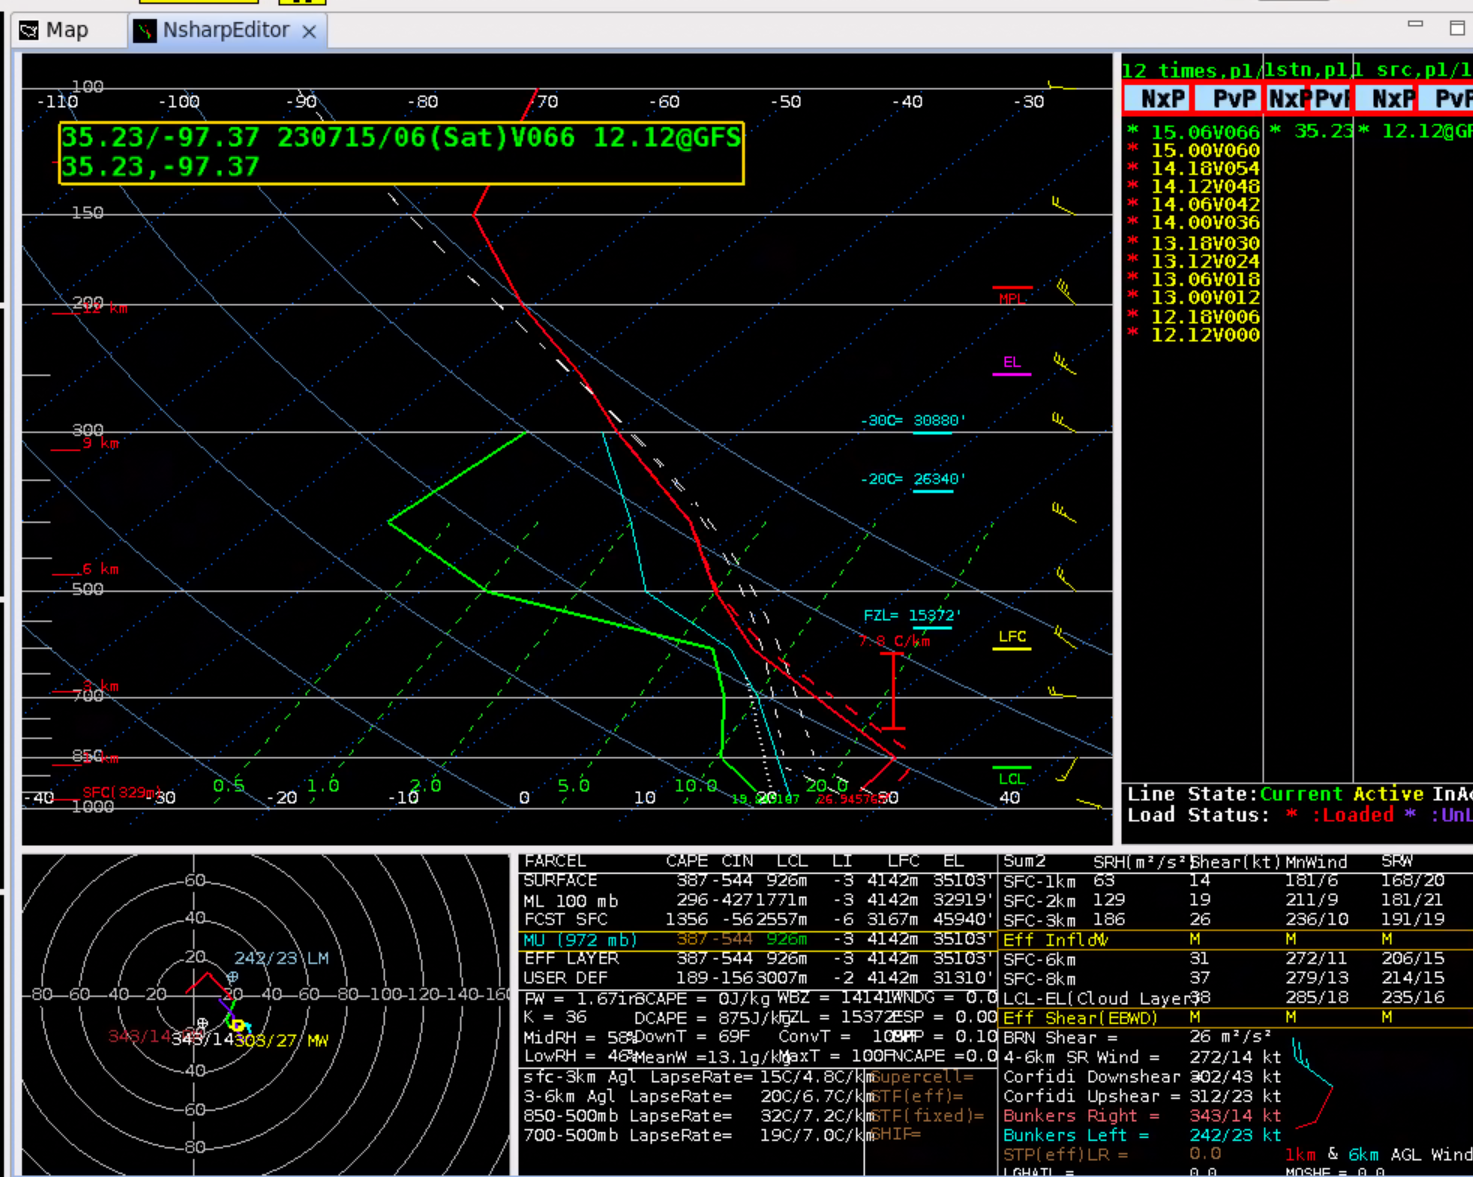
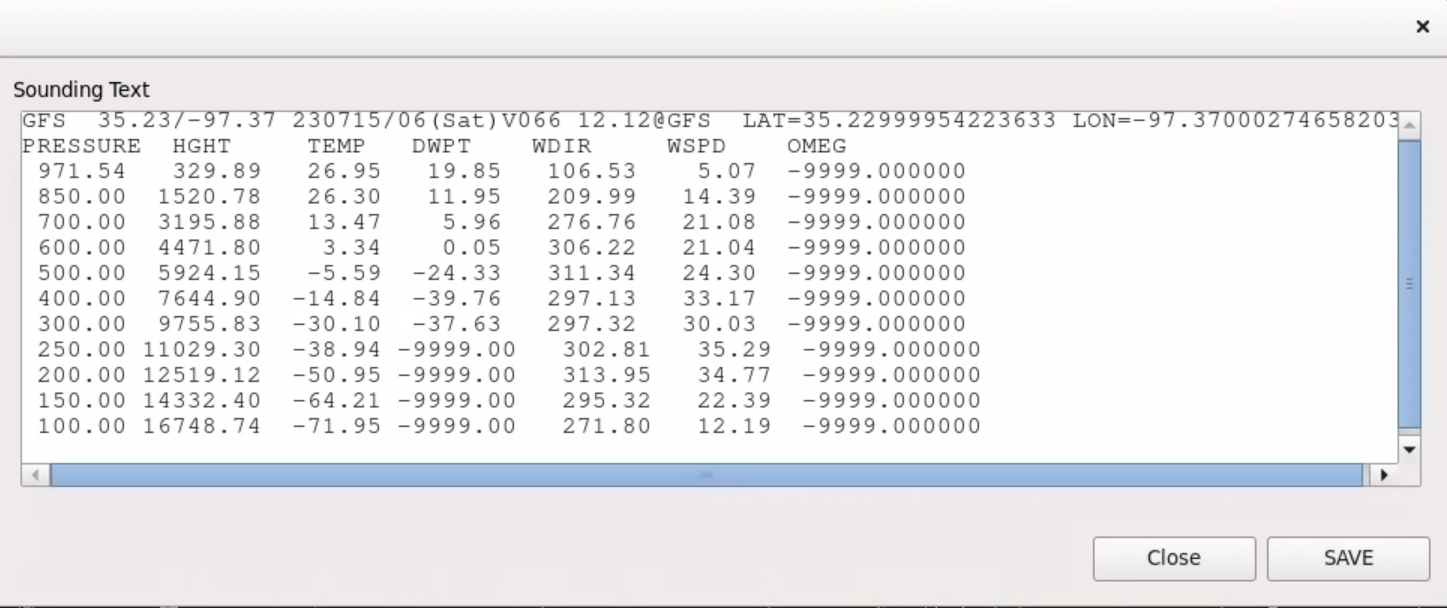
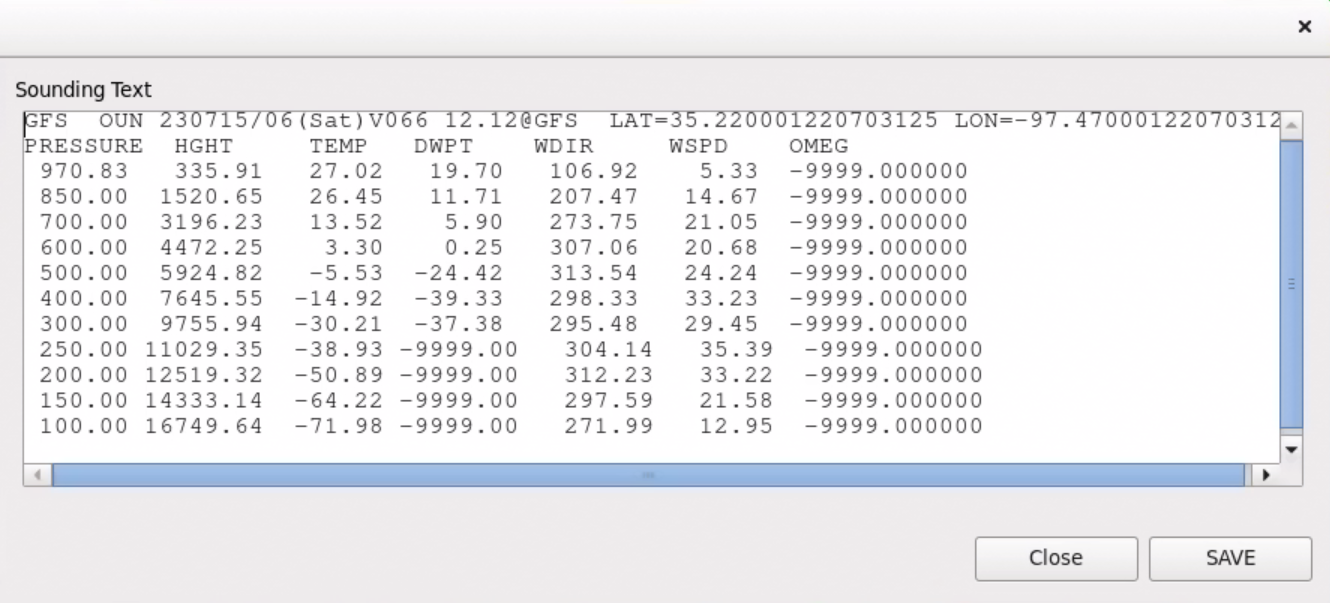
If you select Lat/Lon and click on the map, the lat/lon will fill in the box. After inputting a lat/lon or typing a Station Location when select that option, you will receive a very low-res sounding. To verify the resolution you can click on the Show Text button after loading the sounding.
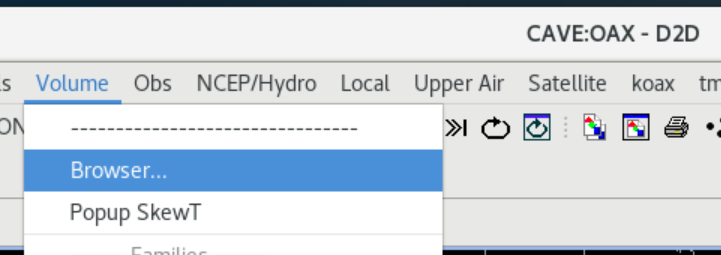
- For completeness we will review how to launch a low-resolution model sounding for a point you choose. First, load the Volume Browser from the Volume menu (image).
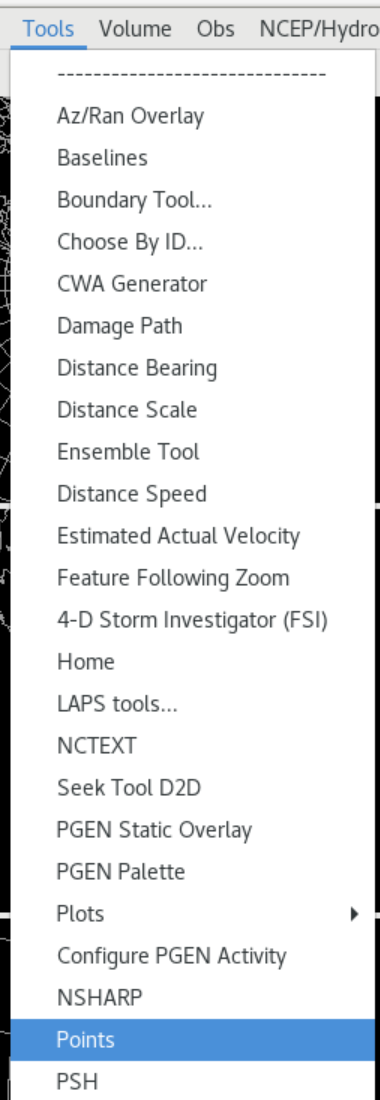
- From the Tools menu load Points (image).
- Right click on a location you want the point sounding to be generated, and it will grab one of the available points. You can also drag and drop existing points if they are on your display.
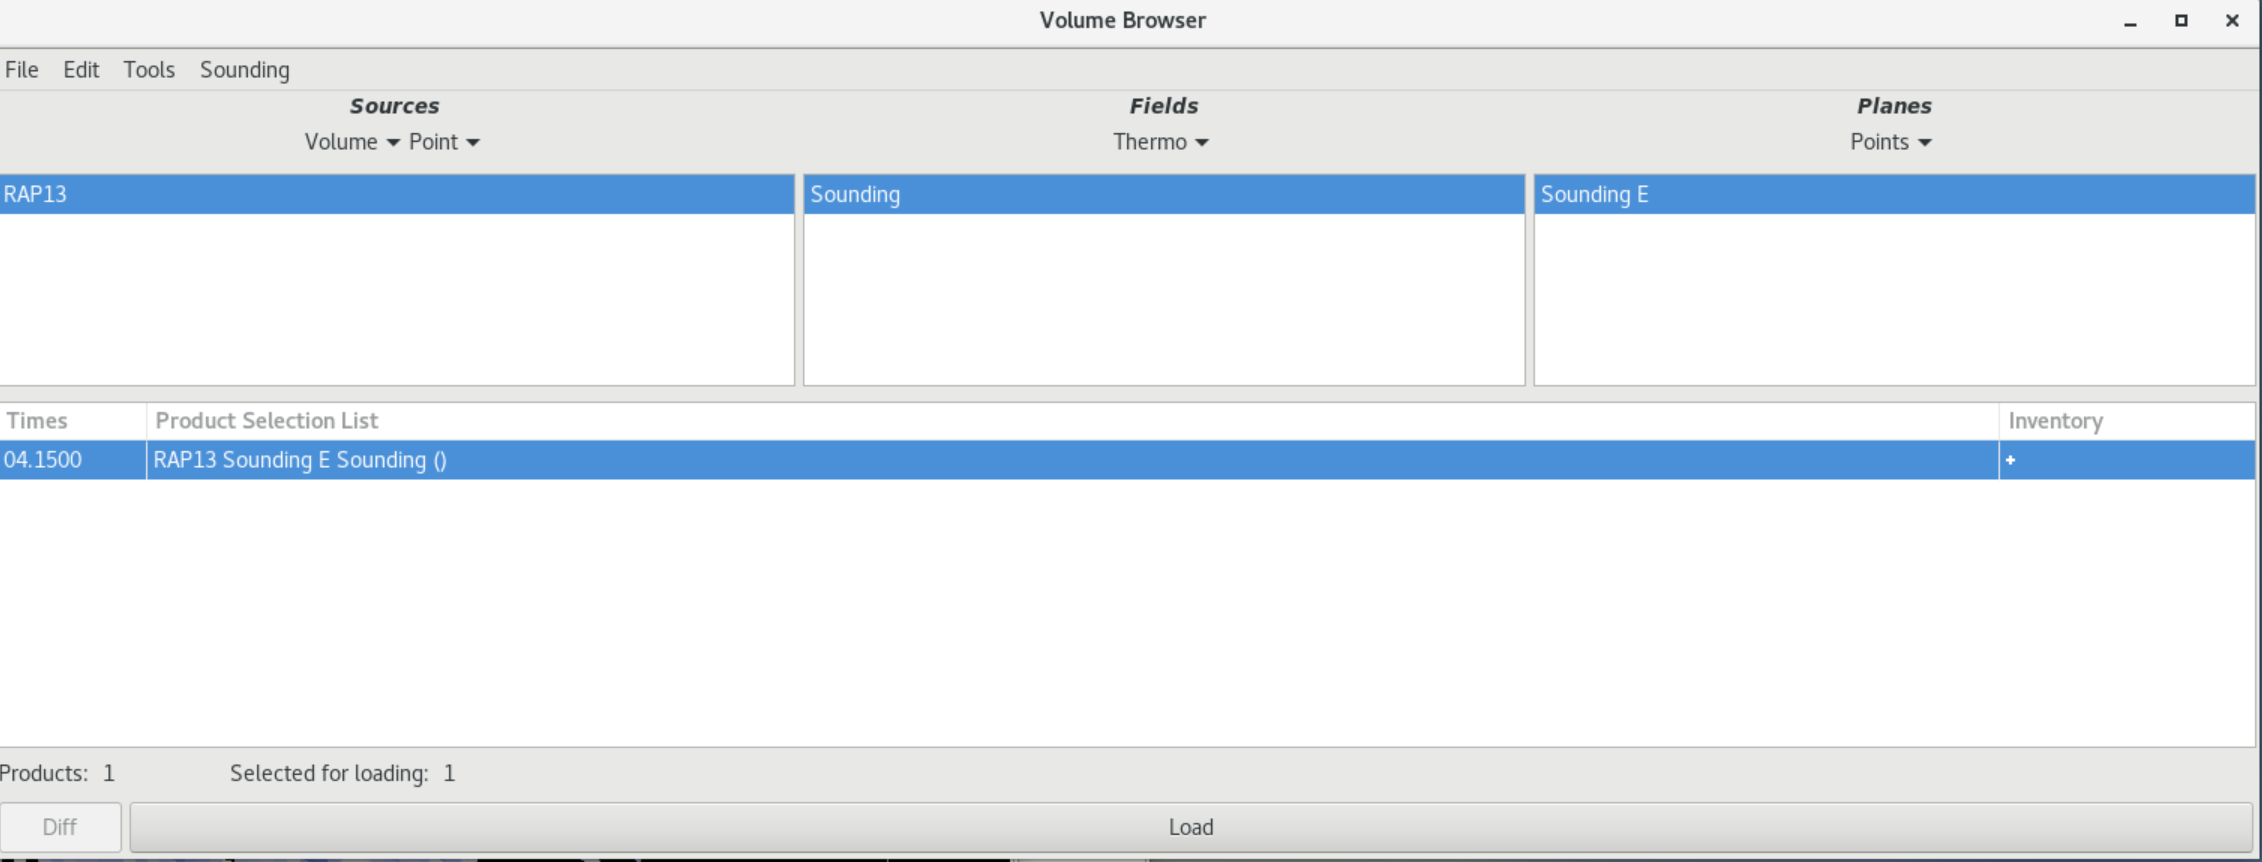
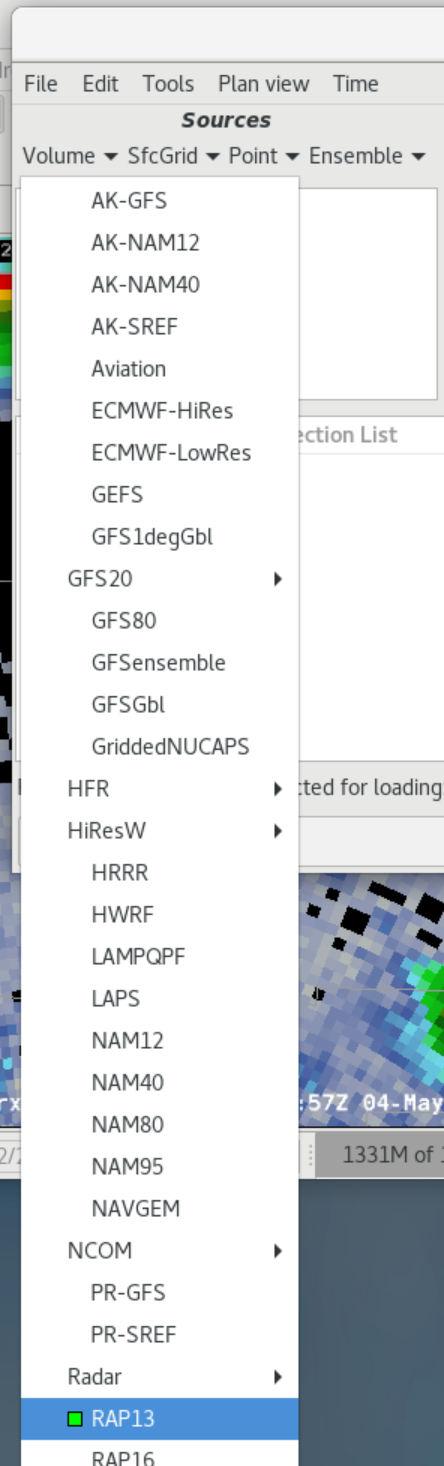
- In the VB Sources select the model you want to use to generate the sounding (e.g. RAP13; image).
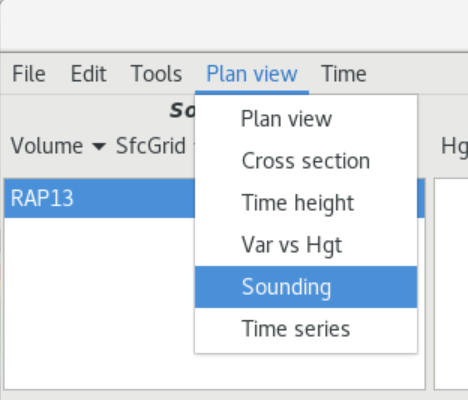
- Click on the Plan view menu and select Sounding.
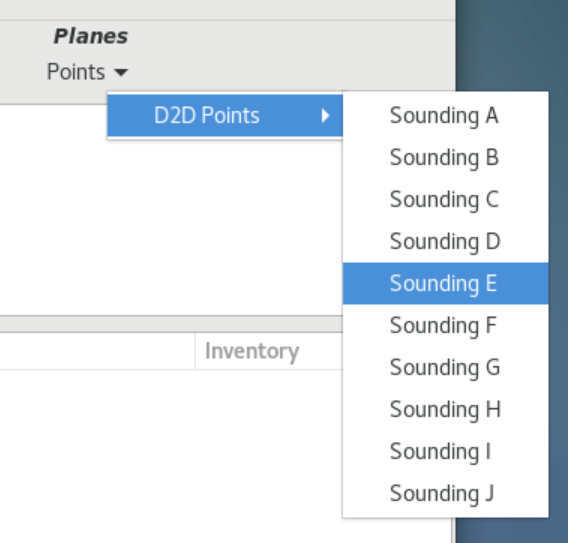
- In the VB Planes section, select the Points menu, and select the point you moved in previous steps (image).
- Click Load.
- A lower-resolution sounding will load.
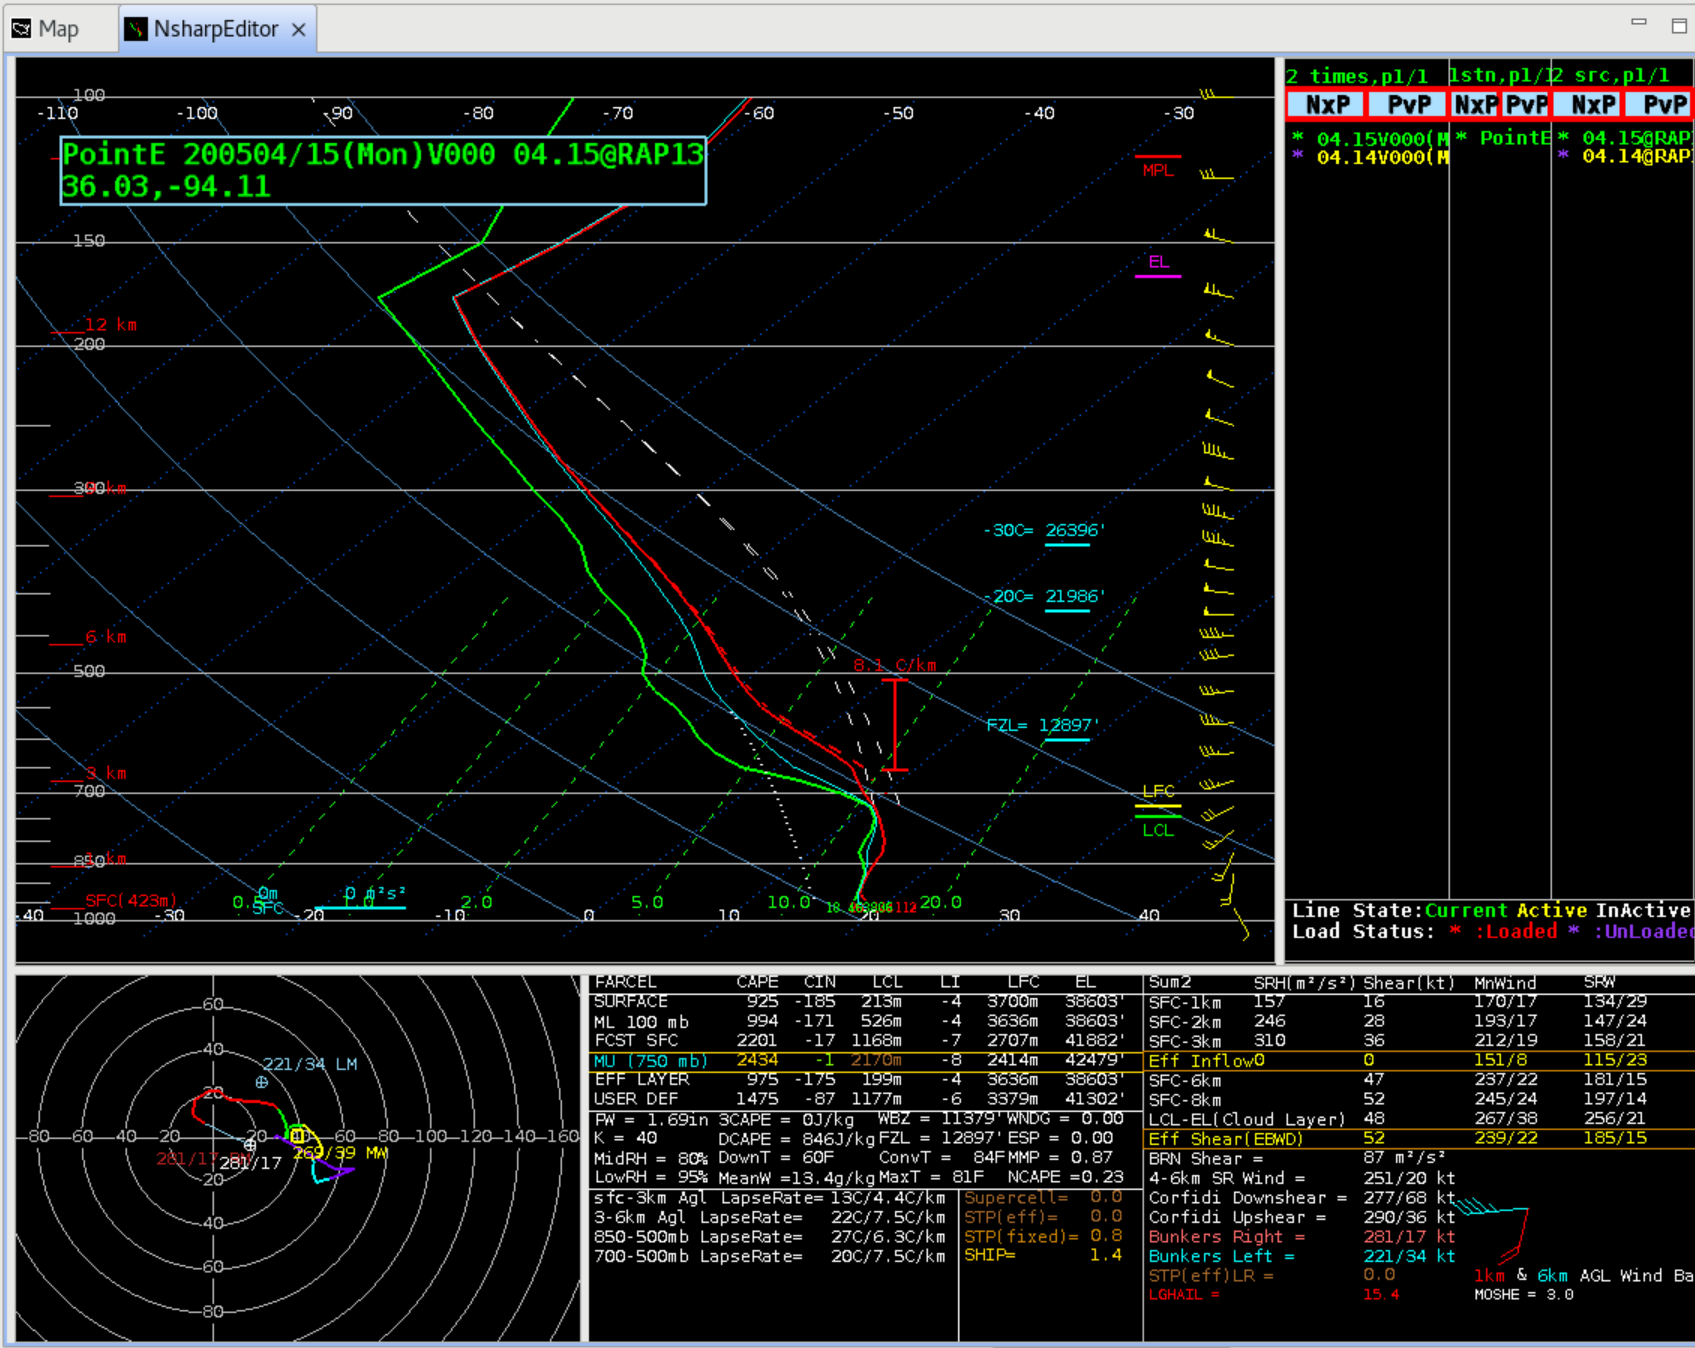
- The point soundings interpolated to the point you choose are convenient to generate and are valid for most forecast applications. The hi-res data is particularly helpful in resolving the evolution of shallow inversions and other small-scale features. Here is a side-by side comparison of low-res 3hr 25mb NAM (left) and hi-res 1hr 5mb NAM (right) model soundings:

- Summary: The NSHARP Tool from the Tools menu offers a more intuitive graphical selector for loading observed soundings and hi-res model soundings. It only works on the first tab in the D2D perspective, and it only supports one sounding at a time. It clears out the first tab contents when it loads, so it is best to use an empty editor in the first first tab position in the D2D perspective when using this.
The NSHARP popup window will be labeled NSHARP(TOOL) when loaded from the Tools menu and NSHARP(D2D) when loaded from the upper air menu or the Volume Browser. The main difference is the Load button will launch the archive file chooser from NSHARP(D2D) while the NSHARP(TOOL) loads a different load window to select the upper air or point forecast sounding graphical chooser.


