


Gamma Adjustment - OCLO
Gamma Adjustment Jobsheet
Composite Satellite Gamma Adjustment Jobsheet
Summary: This jobsheet documents how forecasters can create a multi-channel composite satellite bundle that will combine multiple satellite channels into one display where the R, G, and B gamma settings can be controlled. The instructions below contain a big-picture summary of the process and step-by step instructions.
Contact: Michael.A.Magsig@noaa.gov
-------------------------------------------------------------- Overview --------------------------------------------------------------
- Identify 3 satellite products for combining that are somewhat independent of each other.
- Load the 3 satellite products in D2D and save using the Save Editor Display.
- Download gammaDCS.xml and open in the Localization Perspective.
- Cut and paste the mapping tags for each product from your 3-satellite bundle into the gammaDCS.xml bundle in the Localization Perspective and change the numberOfFrames tag (sets default number of frames) and groupName tag (sets part of legend text).
- Save the changes and open the bundle copy using Load/Save Displays.
- Modify the gamma settings and copy into a procedure.
-------------------------------------------- Detailed Step-By-Step Instructions --------------------------------------------
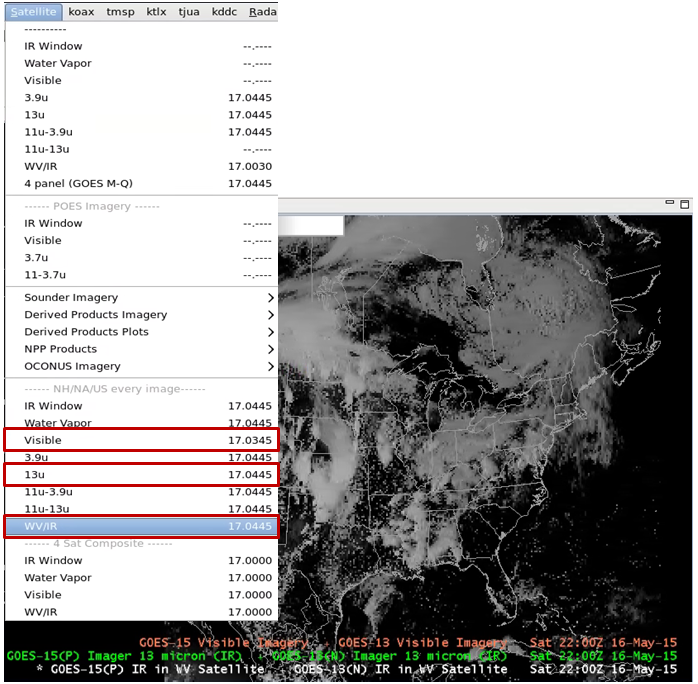
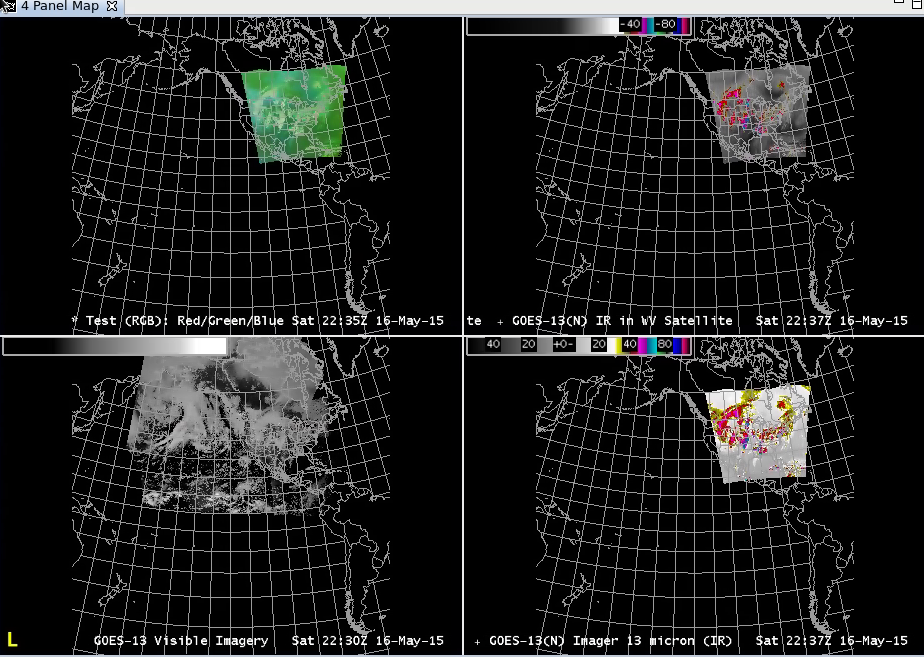
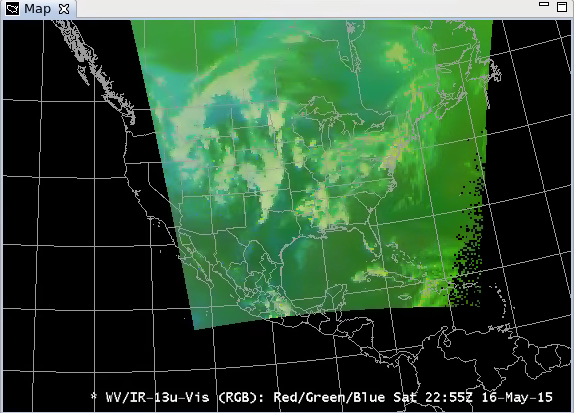
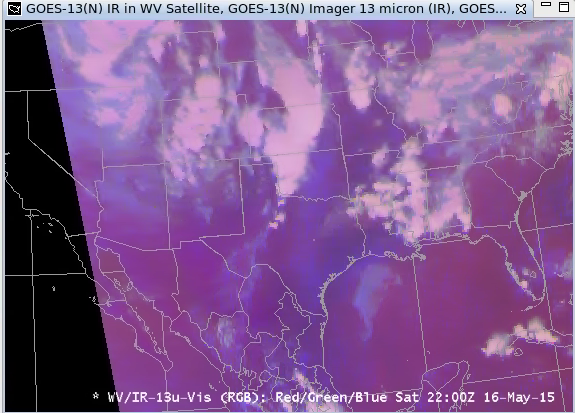
- Load 3 of your favorite satellite products that you want to combine into a composite product. While this is ideally targeted toward multi-channel Himawari data and GOES-R data, if you don’t have access to those, you can use existing GOES data. For this example we will use GOES WV/IR, 13u, and Visible data for illustration purposes (Fig 1). Some suggestions to prevent any mistakes:
- When cutting and pasting tags recognize that all tags have a beginning tag and an ending tag (e.g. <mapping> followed by </mapping>), so you will want to copy text with beginning and ending tags per the instructions.
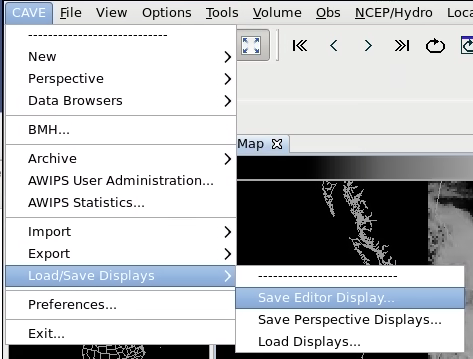
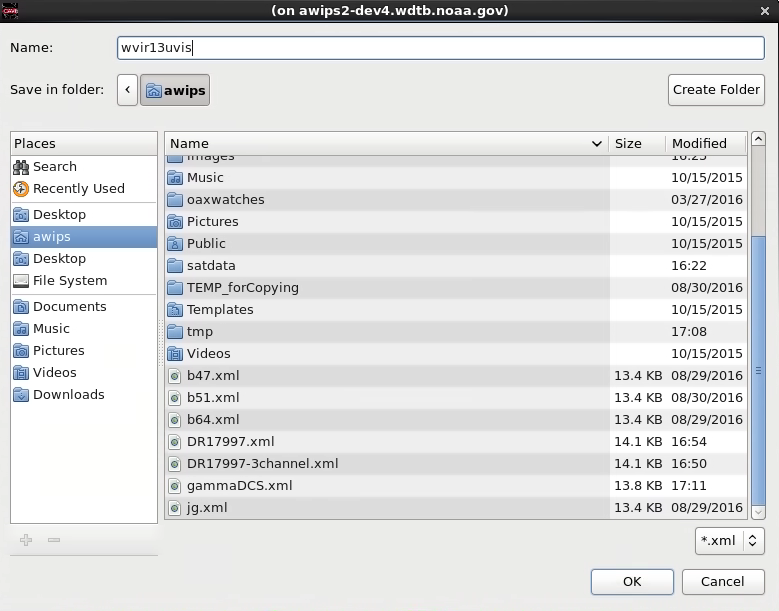
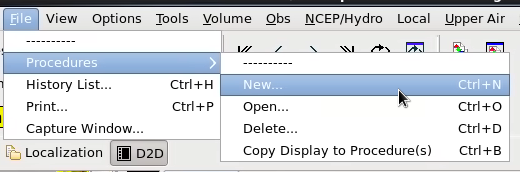
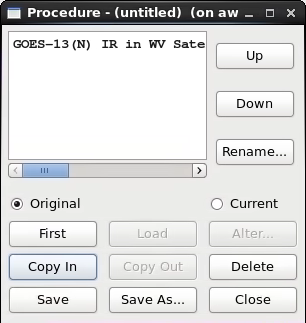
- Under the CAVE menu select the Load/Save Displays submenu and the Save Editor Display submenu. In the popup menu enter a new name for your procedure (e.g. wvir13uvis) and click OK. Note it will automatically assign a *.xml extension to the file (Fig 2, Fig 3).
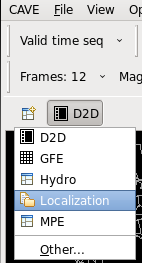
- Load the localization perspective from the open perspective bar (Fig 4).
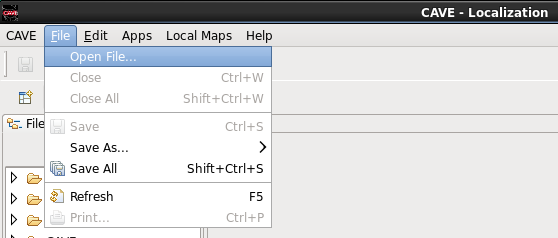
- Under the File menu in the Localization Perspective select Open File (Fig 5).
- Select the filename you entered in step #2 (e.g. wvir13uvis.xml) and click OK (Fig 6, Fig 7).
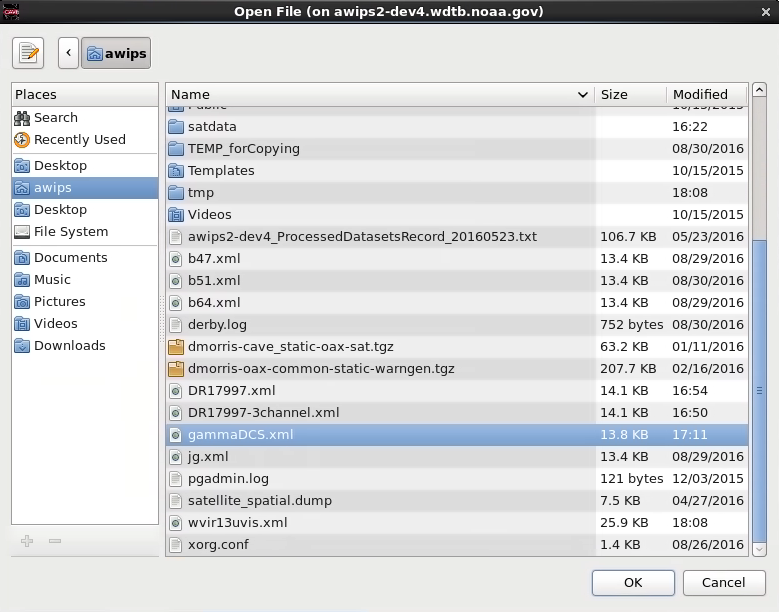
- Under the File menu in the Localization Perspective select Open File (Fig 8).
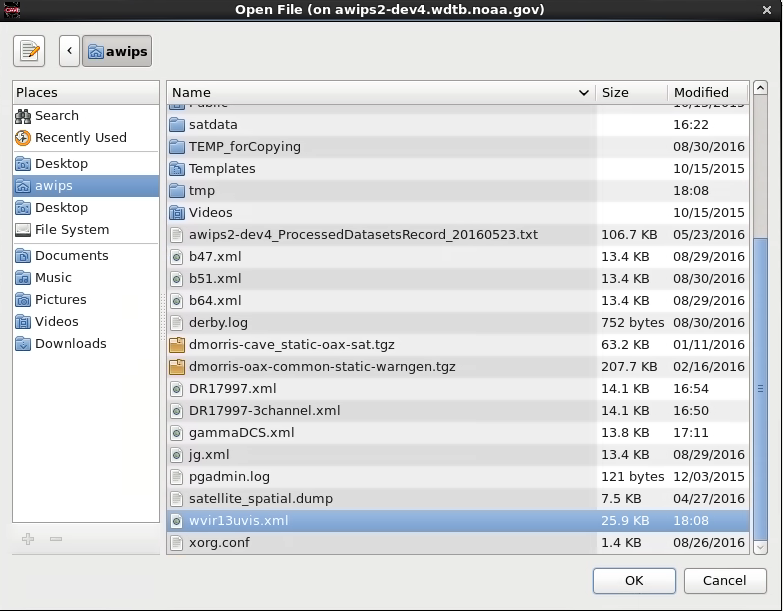
- Download the gammaDCS.xml file from the gamma adjustment VLab page, select the file, and click OK (Fig 9).
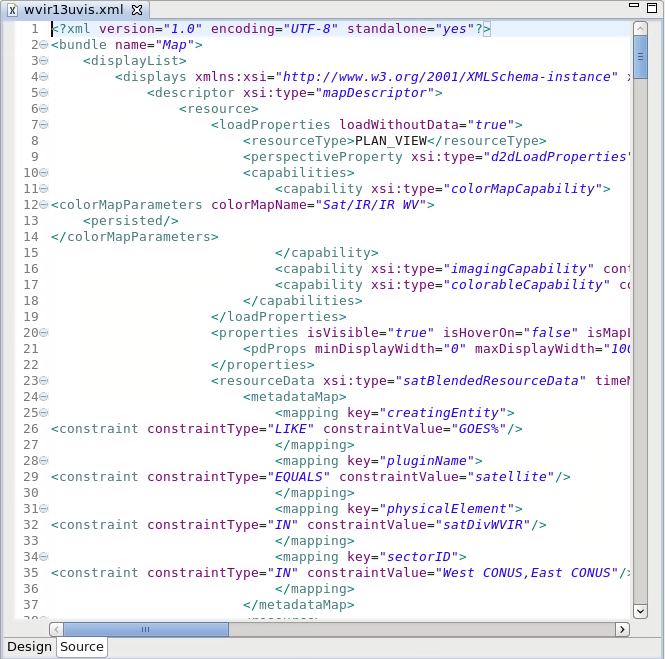
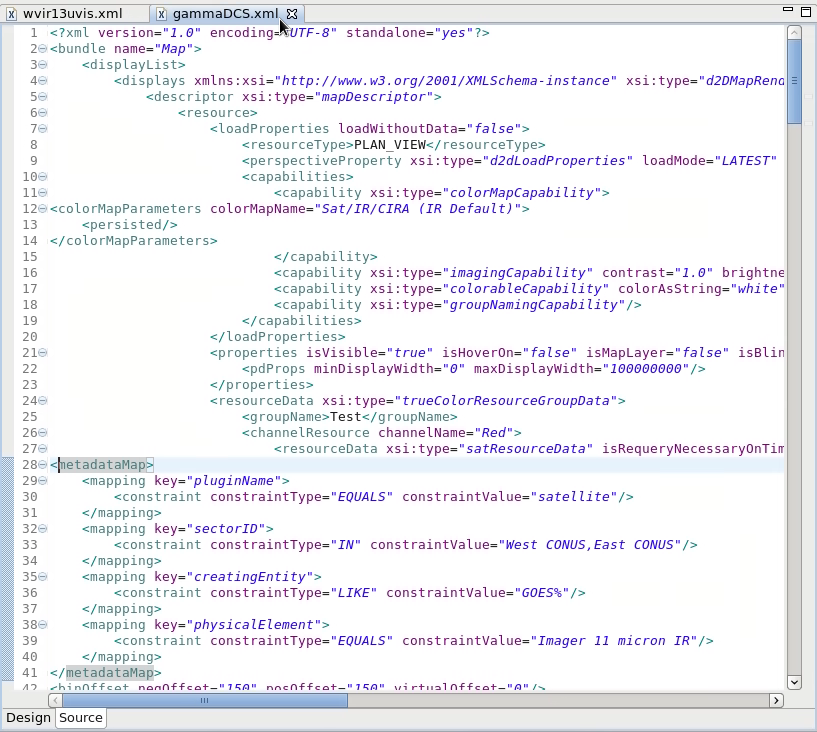
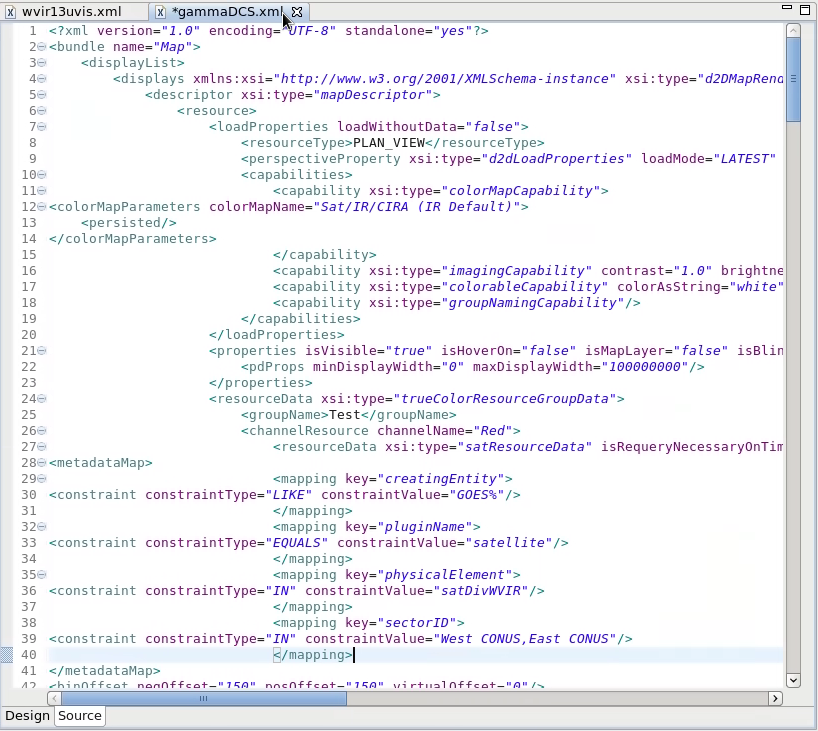
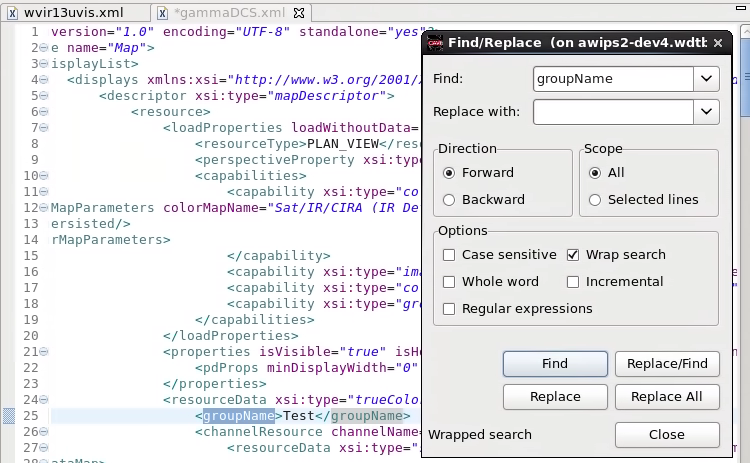
- Identify the <metadataMap> tag on line 28, and put your cursor on that that tag. Notice the beginning and ending tag will highlight grey (may need to scroll down slightly). In the next step you will be replacing the 4 mapping tags from your other bundle you saved (Fig 10).
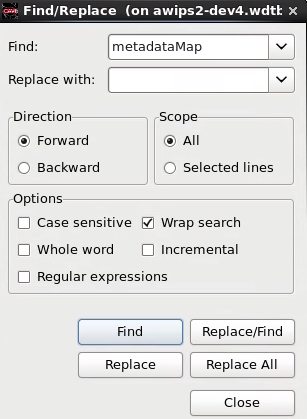
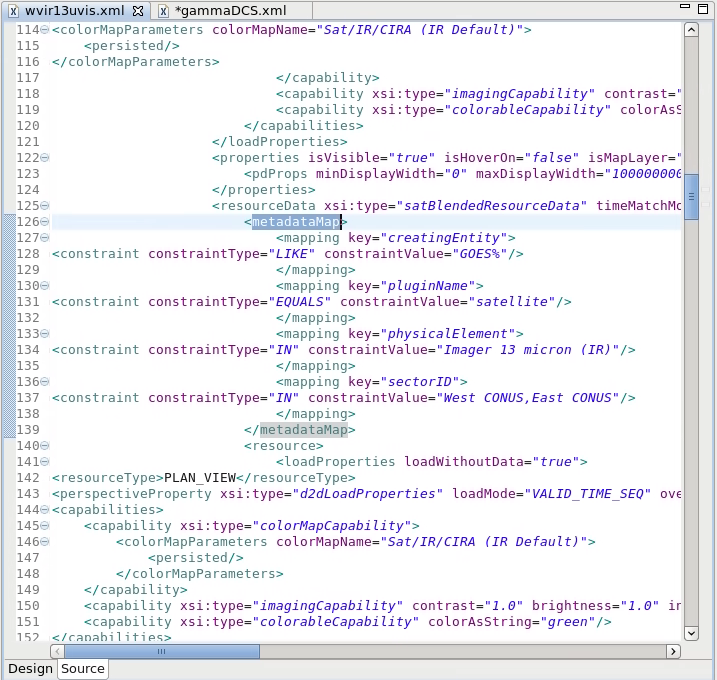
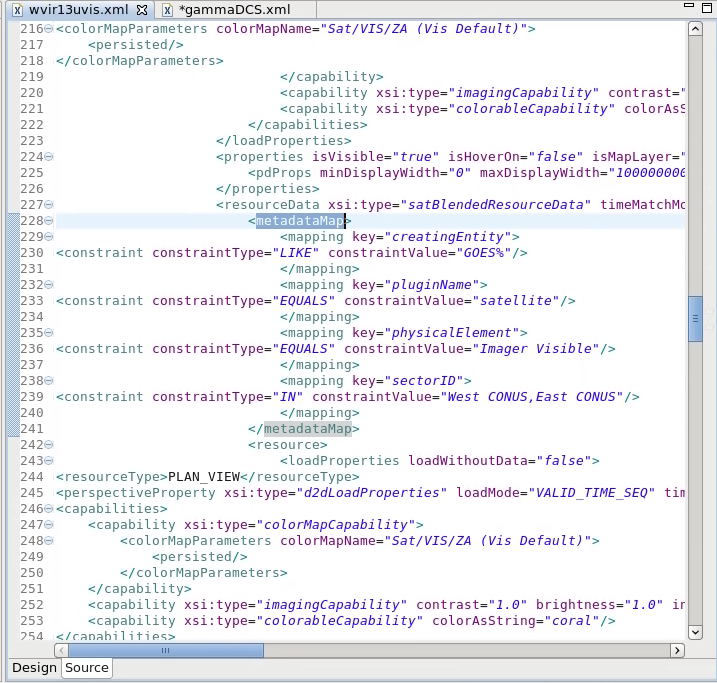
- Click on the tab for your 3 satellite product bundle (e.g. wvir13uvis.xml), and click Ctrl + f to launch the Find/Replace tool. Enter metadataMap and click the Find button. Notice the 4 <mapping> tags in the metadataMap tag and the physicalElement mapping key identifies the product (e.g. satDivWVIR is the WV/IR blend) (Fig 11, Fig 12).
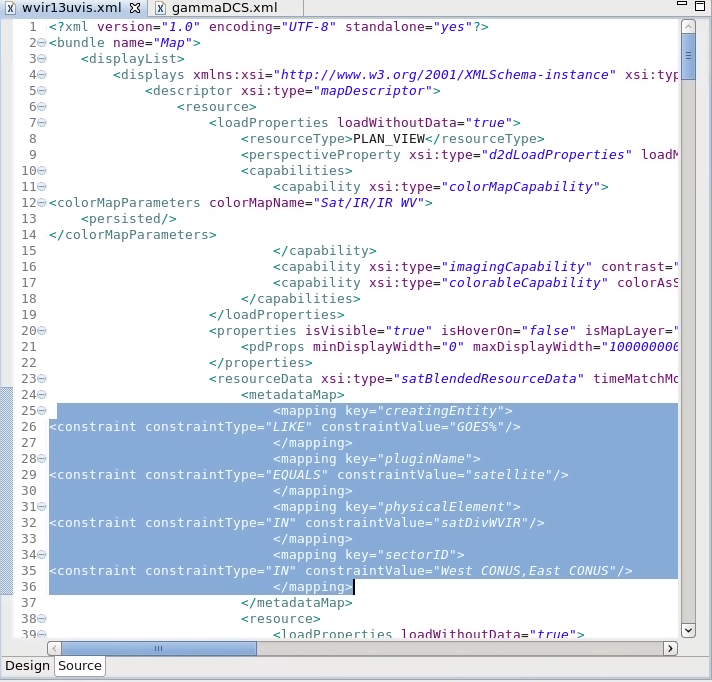
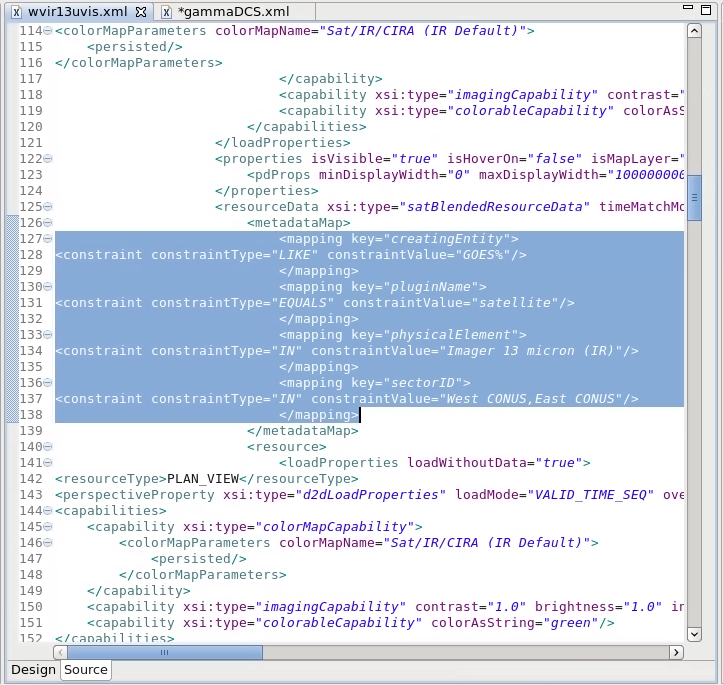
- Select the 4 <mapping> tags inside the <metadataMap> tag, and copy them into your clipboard (Ctrl + C). You should see the <metadataMap> tag above your selection and the </metadataMap> tag below your selection (Fig 13).
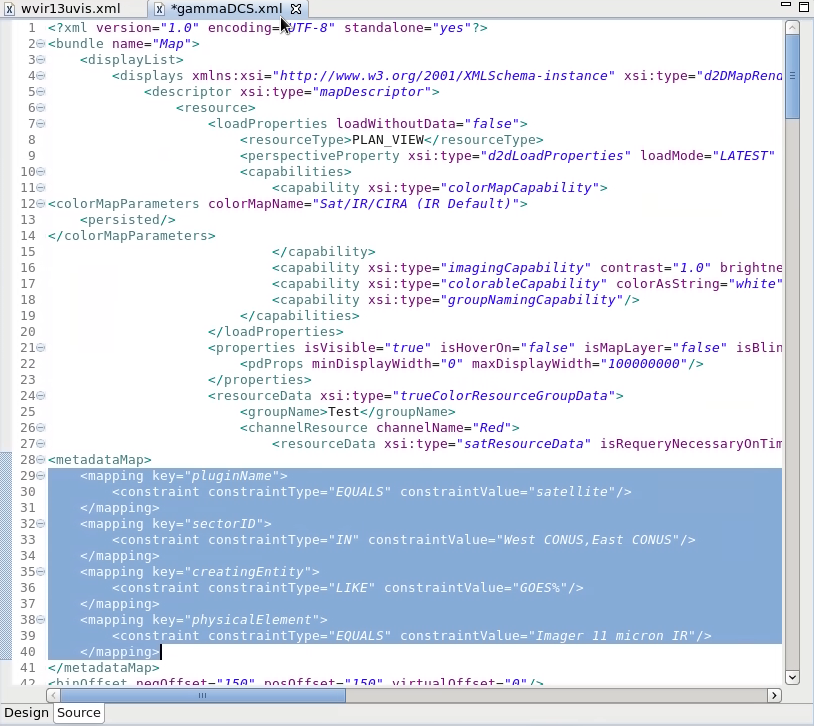
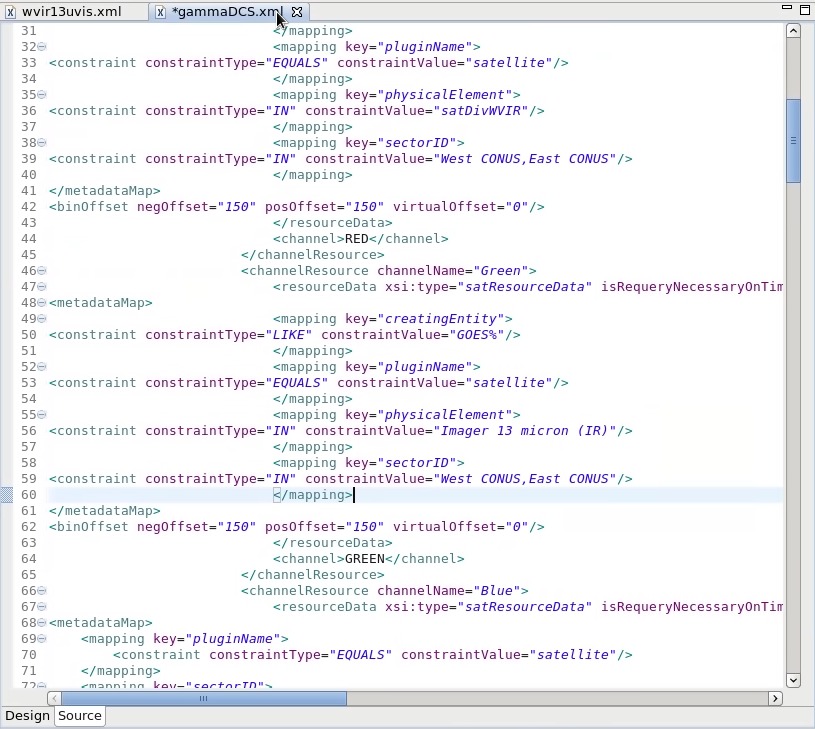
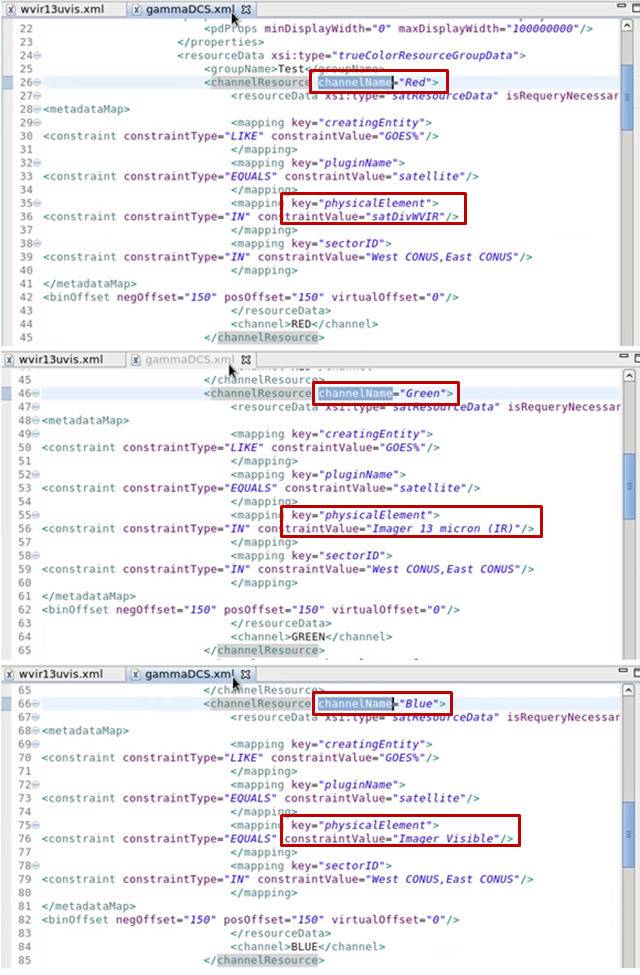
- Click on the gammaDCS.xml tab and select the 4 mapping tags to replace by left-clicking and dragging the mouse from the beginning of line 29 to the end of line 40. Then Ctrl + V to paste the new mapping tags over these lines. Notice the channelName=”Red” on line 26. You have just assigned the satDivWVIR product to the Red channelName (Fig 14, Fig 15).
- Click on your 3-product satellite bundle (e.g. wvir13uvis.xml), and find the next <metadataMap> tag using the Find tool (Ctrl + F). You will see multiple metadataMap tags for each product (“physicalElement”). Keep clicking the Find button until your physicalElement key changes to your next product (e.g. Imager 13 micron (IR)) (Fig 16).
- Select the 4 <mapping> tags inside the <metadataMap> tag, and copy them into your clipboard (Ctrl + C). You should see the <metadataMap> tag above your selection and the </metadataMap> tag below your selection (Fig 17).
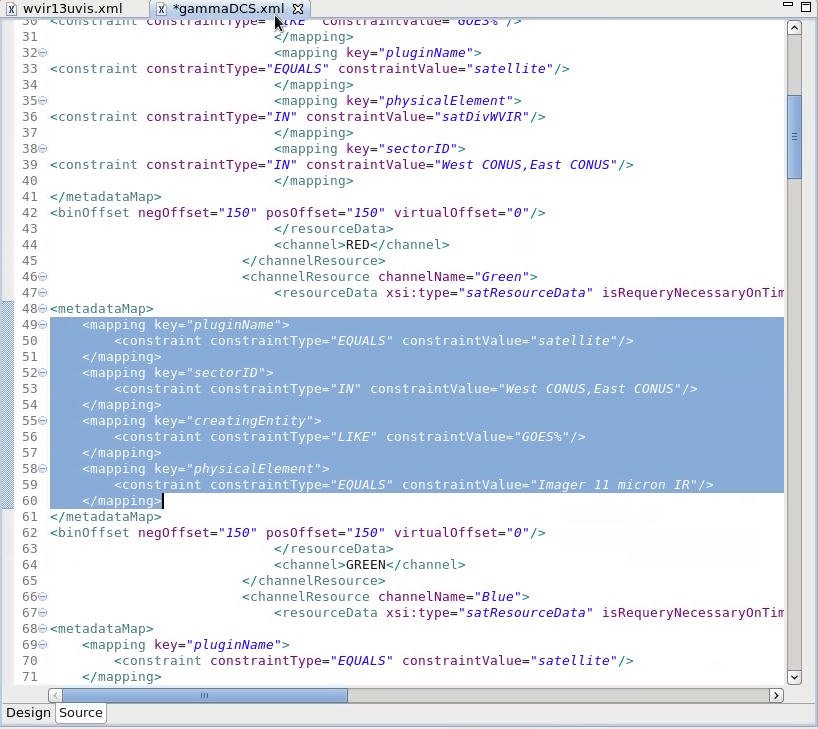
- Click on the gammaDCS.xml tab and select the 4 mapping tags by left-clicking and dragging the mouse from the beginning of line 49 to the end of line 60. Then Ctrl + V to paste the new mapping tags over these lines. Notice the channelName=”Green” on line 46. You have just assigned the Imager 11 micron IR product to the Green channelName (Fig 18, Fig 19).
- Click on your 3-product satellite bundle (e.g. wvir13uvis.xml), and find the next <metadataMap> tag using the Find tool (Ctrl + F). You will see multiple metadataMap tags for each product. Keep clicking the Find button until your physicalElement key changes to your next product (e.g. Imager Visible) (Fig 20).
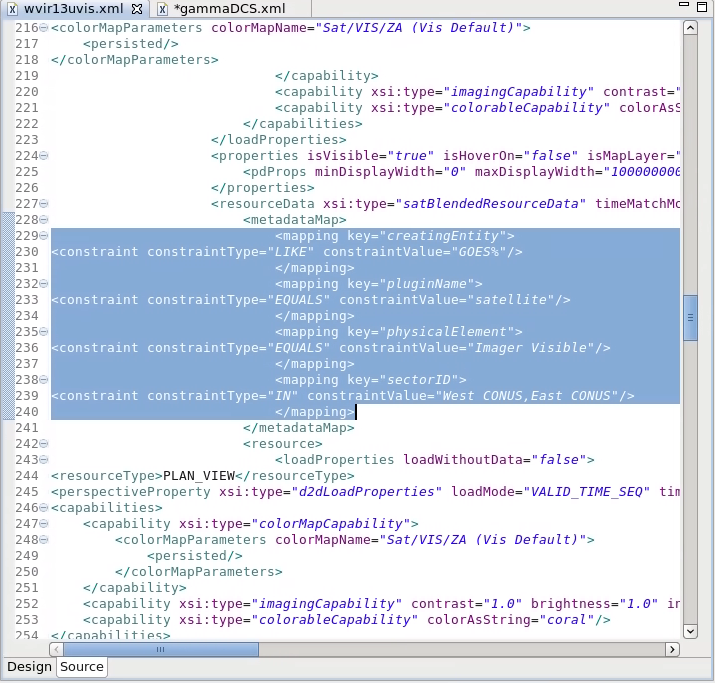
- Select the 4 <mapping> tags inside the <metadataMap> tag, and copy them into your clipboard (Ctrl + C). You should see the <metadataMap> tag above your selection and the </metadataMap> tag below your selection (Fig 21).
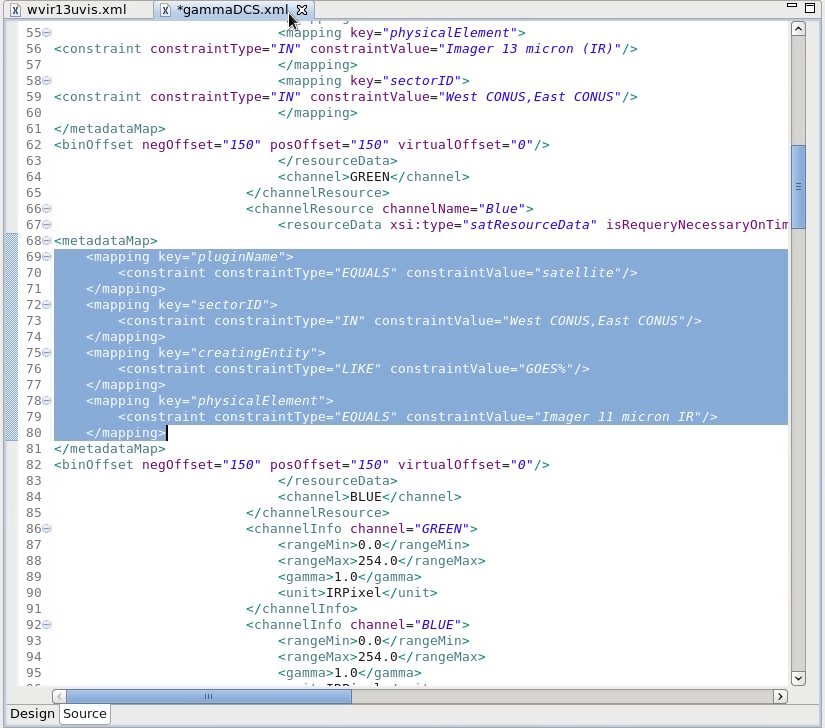
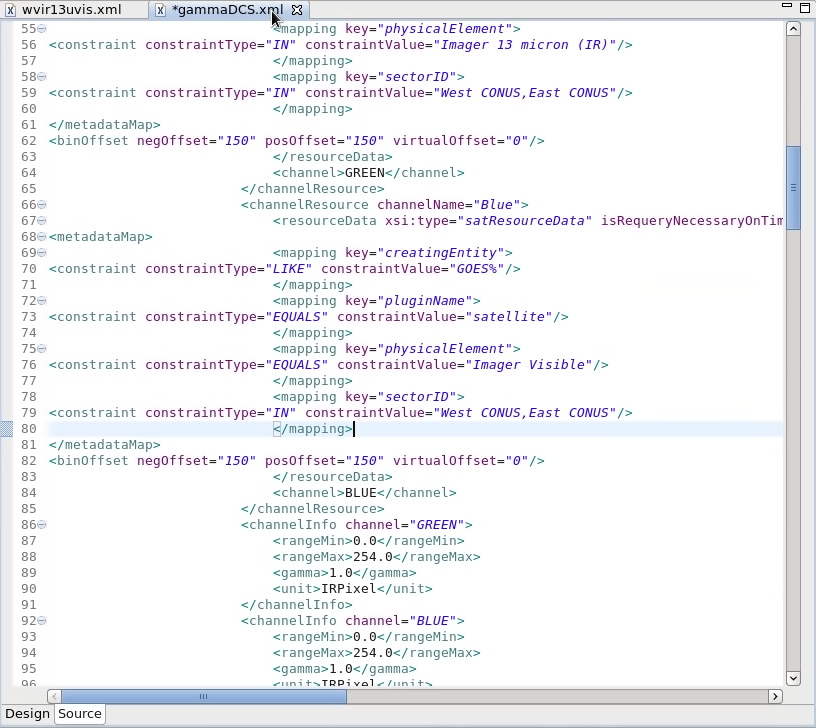
- Click on the gammaDCS.xml tab and select the 4 mapping tags by left-clicking and dragging the mouse from the beginning of line 69 to the end of line 80. Then Ctrl + V to paste the new mapping tags over these lines. Notice the channelName=”Blue” on line 66. You have just assigned the Imager Visible product to the Blue channelName (Fig 22, Fig 23).
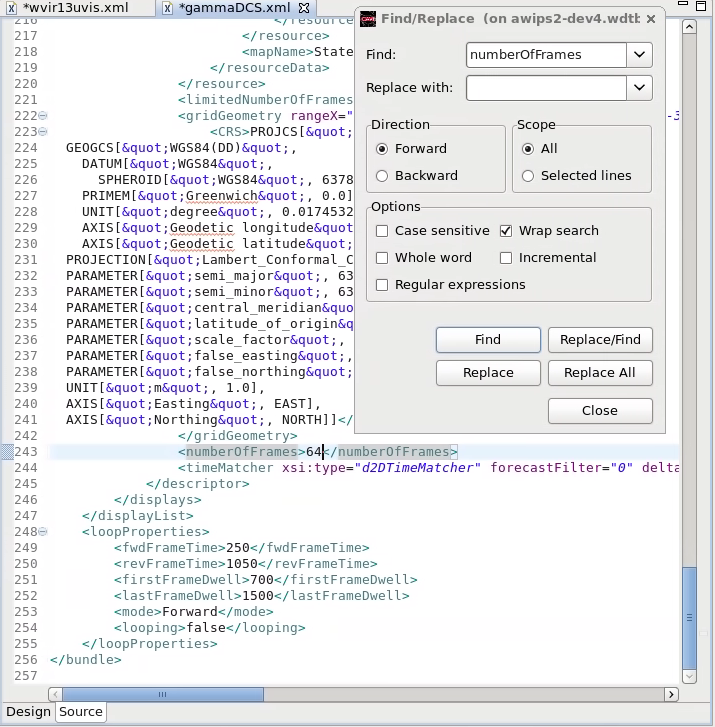
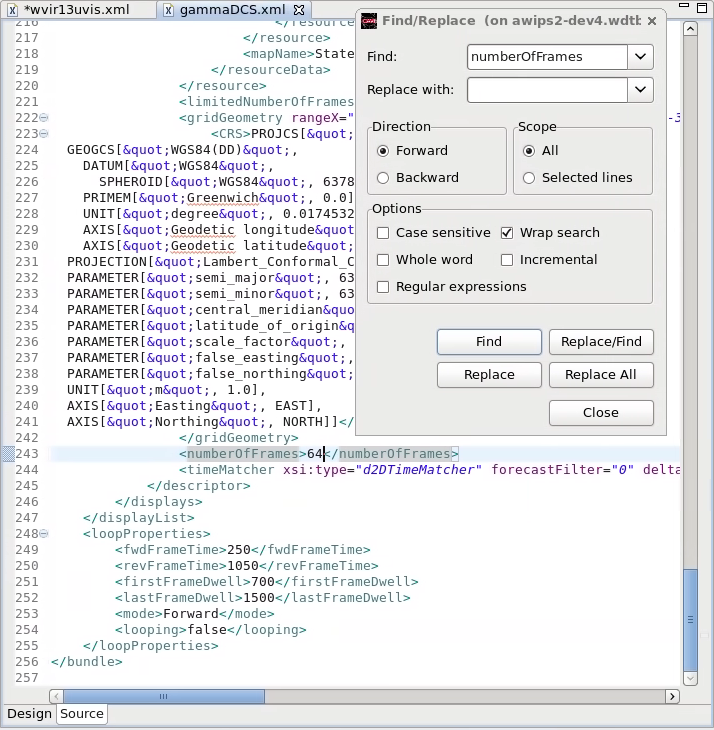
- In the Find/Replace search window, enter numberOfFrames in the search tool and increase the number of frames to allow a large number of levels and times (e.g. 64 frames) (Fig 24).
- Before saving the edits, check the channelNames to make sure that you have correctly pasted in the product mapping tags. In the Find/Replace search window, enter channelResource in the search tool and click the Find button. You should have unique physicalElement keys for each channelResource. In this example I have channelName=Red is satDivWVIR, channelName=Green is Imager 13 micron (IR), and channelName=Blue is Imager Visible (Fig 25).
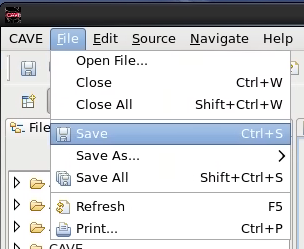
- Save the file by using Ctrl+S or select Save under the File menu in the localization perspective. You should notice the * next to your gammDCS.xml tab should disappear after saving (Fig 26, Fig 27, Fig 28).
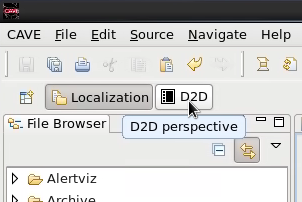
- Click on the D2D perspective button to swap from the localization perspective to the D2D perspective (Fig 29).
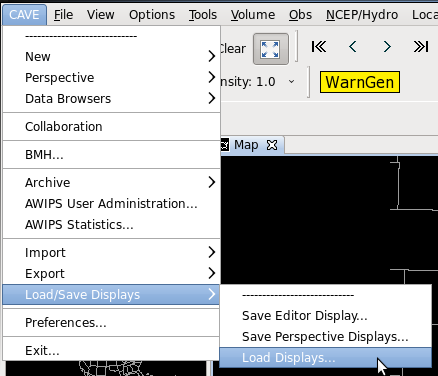
- Under the CAVE menu and Load/Save Displays, click on the Load Displays menu (Fig 30).
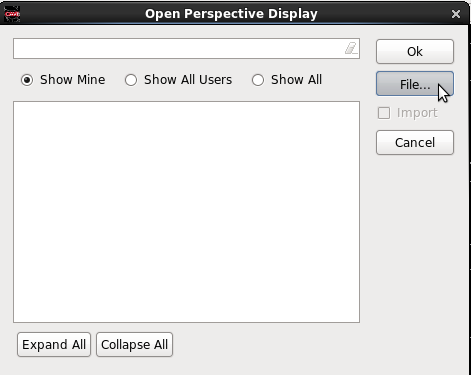
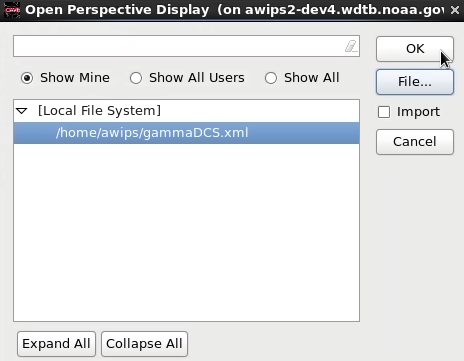
- In the Open Perspective Display, click the File…button. In the open select tool, select the name of the xml you saved in the localization perspective (e.g. gammaDCS.xml) and click OK. Then click OK in the Open Perspective Display (Fig 31, Fig 32, Fig 33).
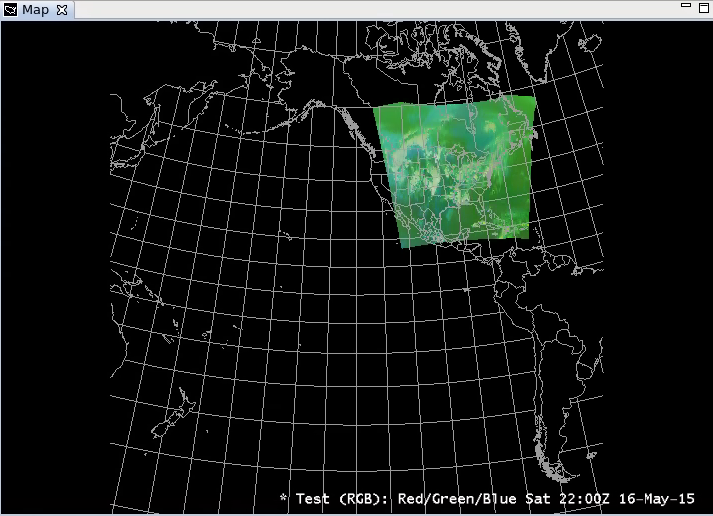
- Navigate through the combined satellite product frames using the left and right arrow keys. You may need to click on the text in the legend to toggle the image on (Fig 34).
- Note there is no color table legend in this combined product.
- Note that when a channel is unavailable for certain time periods, like visible satellite after dark, you may receive errors in Alert Viz. Once you navigate to time where there is data for all 3 products forming the combination, the errors go away.
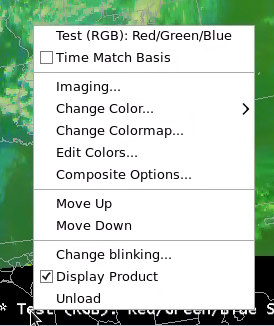
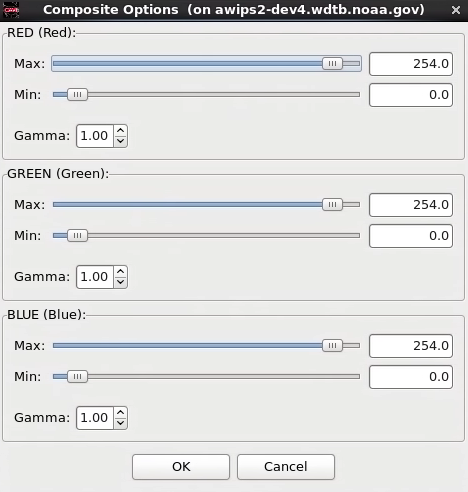
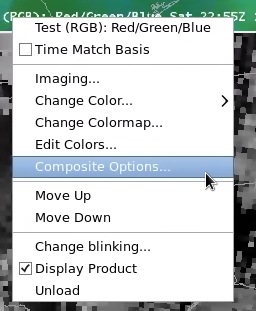
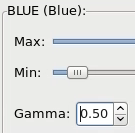
- Right click on the text legend and select Composite Options to adjust the gamma settings (Fig 35, Fig 36).
- By changing the gamma settings of the Red, Green, and Blue channelNames (recall tag names in bundle), you are bringing out contrast in each product feeding the composite. Adjusting gamma less than 1 will bring out more contrast in that product’s contribution while raising gamma above 1 will reduce contrast from that product’s contribution. Try adjusting the gamma settings and see how things change. In the next step we will step through this and compare to the original products.
- channelName=Red is satDivWVIR
- channelName=Green is Imager 13 micron (IR)
- channelName=Blue is Imager Visible
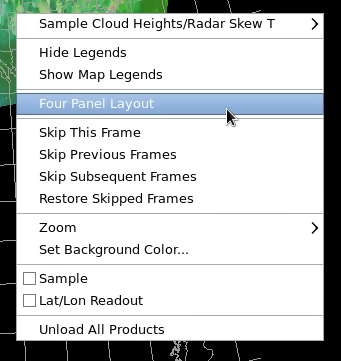
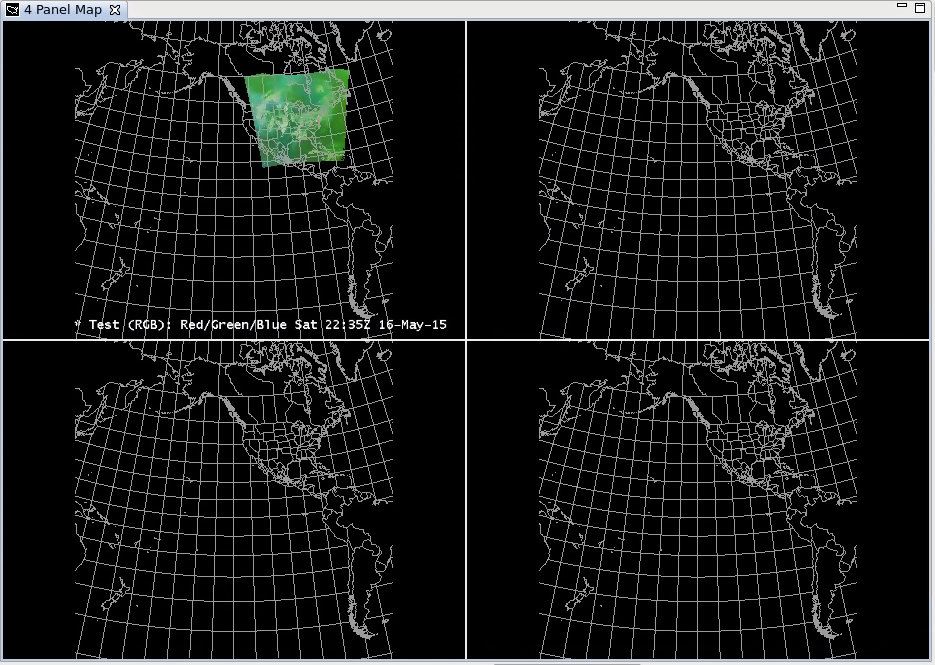
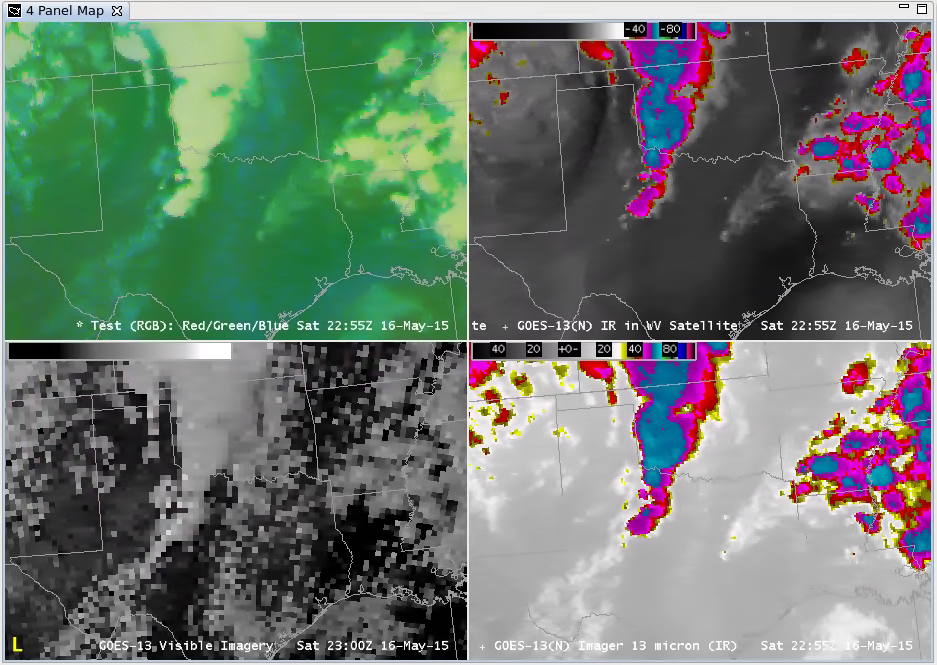
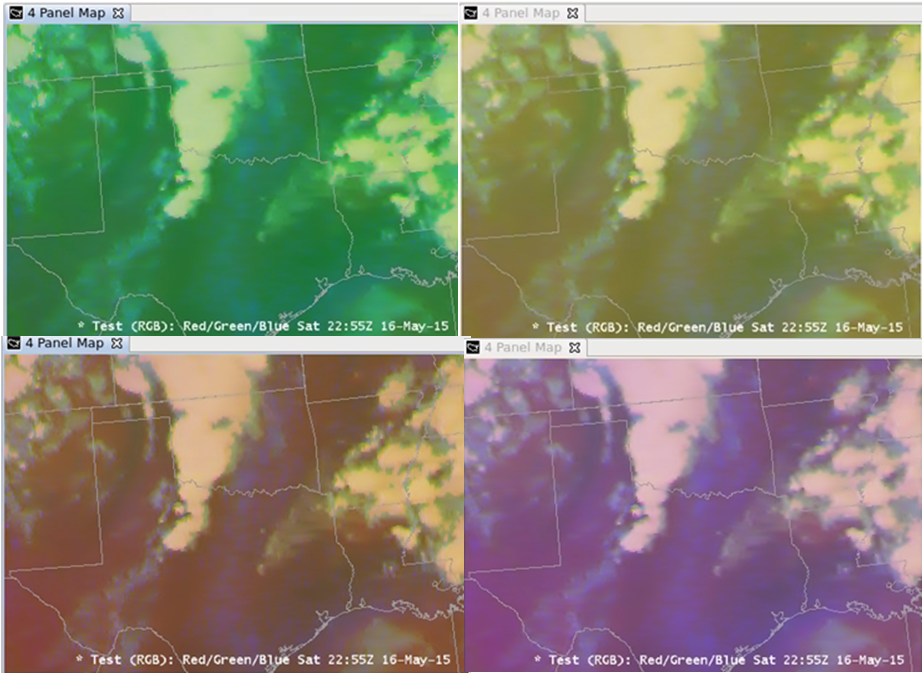
- Set gamma to 1.0 for all three channels (see figure in step 25), right click in the main editor, and select Four Panel Layout (Fig 37, Fig 38) .
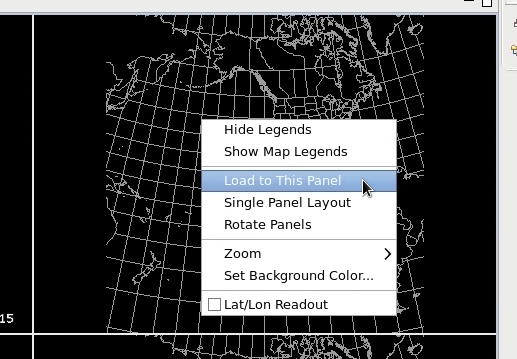
- Right click in the upper-right panel and select Load to This Panel (Fig 39).
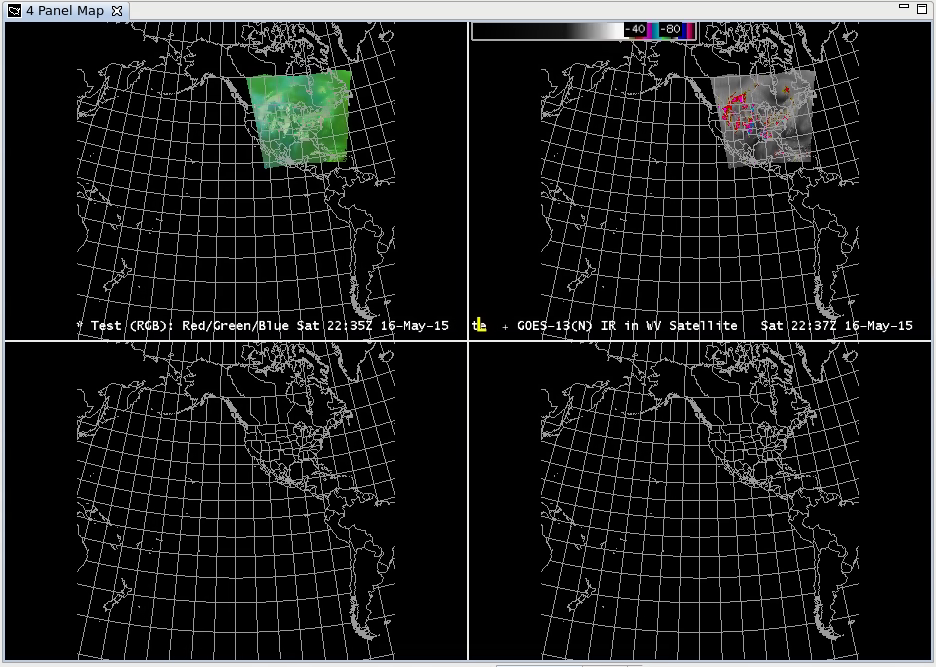
- Load the product you assigned the Red channel (e.g. WV/IR) (Fig 40).
- Right click on the lower-right panel and select Load to This Panel. Then load the product you assigned the Green channel (e.g. 13u). Right click on the lower-left panel and select Load to This Panel. Then load the product you assigned the Blue channel (e.g. Visible) (Fig 41).
- Zoom in on some interesting features to evaluate how changing the gamma settings relates to the original data (Fig 42).
- Right click on the Test product legend in the upper left panel and select Composite Options (Fig 43).
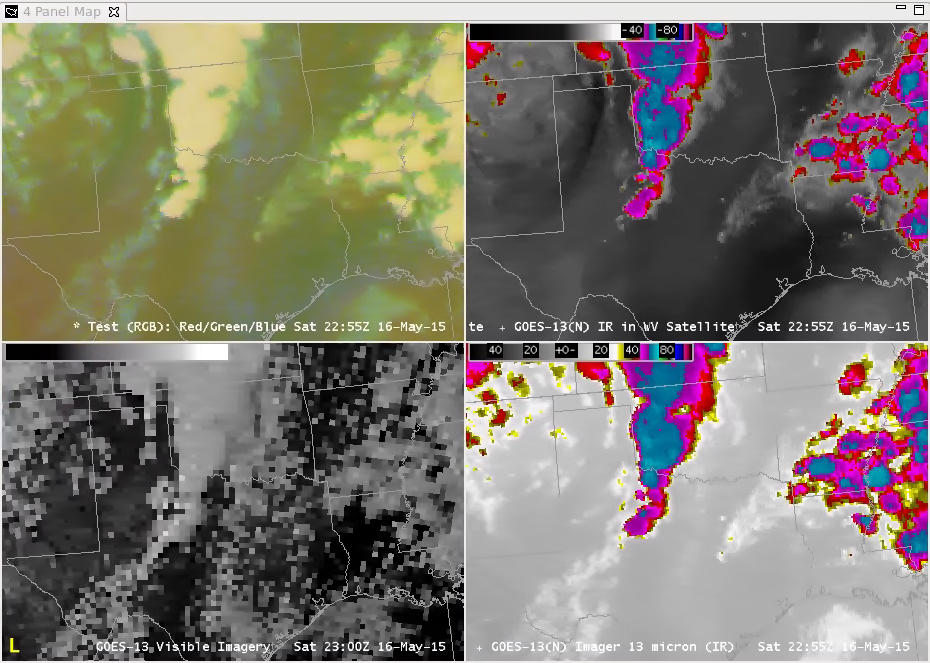
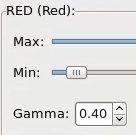
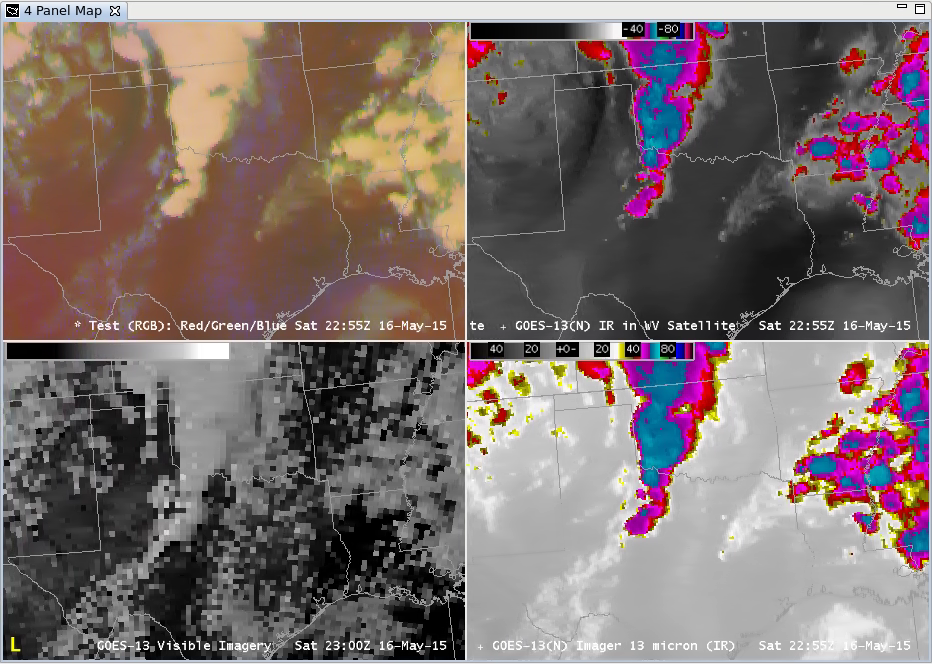
- Reduce gamma for the WV/IR “Red channel” to bring out any dry air intrusions (see the dark band in the TX panhandle in image below) (Fig 44, Fig 45).
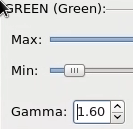
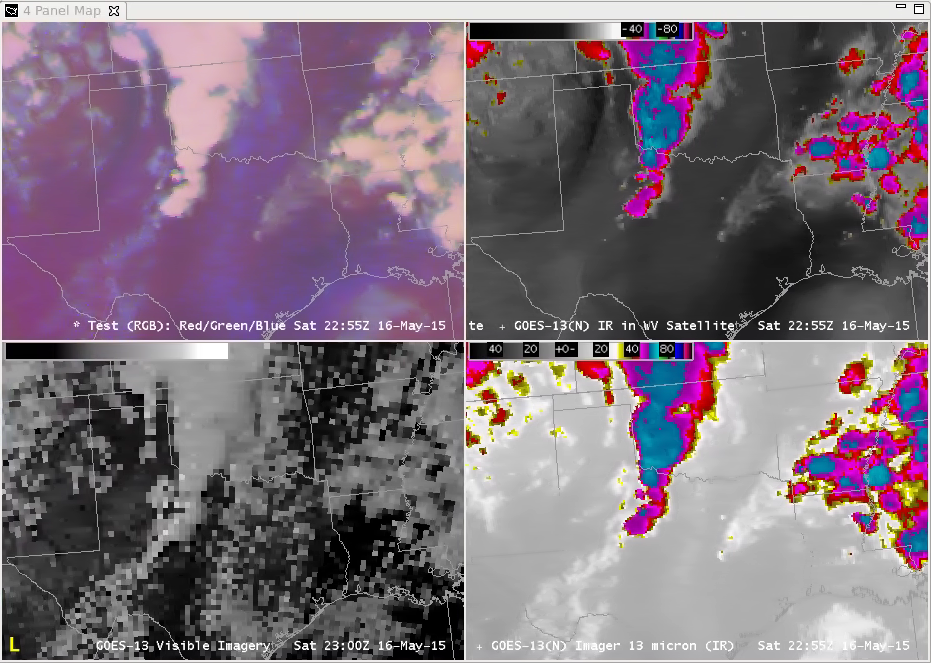
- Increase gamma for the 13u “Green channel” to decrease contrast from this component (see the change in east TX in the upper-left image below) (Fig 46, Fig 47).
- Reduce gamma for the Visible “Blue channel” to bring out low-clouds (see the cumulus in south TX in image below) (Fig 48, Fig 49).
- Here are the modifications side by side RGB 1,1,1 (upper left), 0.4, 1, 1 (upper right), 0.4,1.6,1 (lower left), and 0.4, 1.6, 0.5 (lower right) (Fig 50).
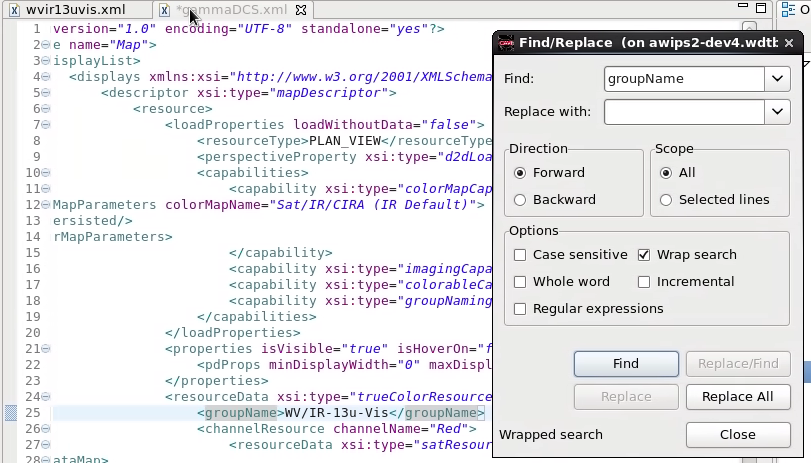
- In the gammaDCS.xml file in the localization Perspective use Find/Replace (Ctrl + f) to find the groupName tag. Replace “Test” with what you want to label the product (e.g. WV/IR-13u-Vis) (Fig 51, Fig 52).
- Repeat steps 20-23 to save the file, change to the D2D Perspective, and Load the gammDCS.xml bundle. Note the change in label from Test to WV/IR-13u-Vis (Fig 53).
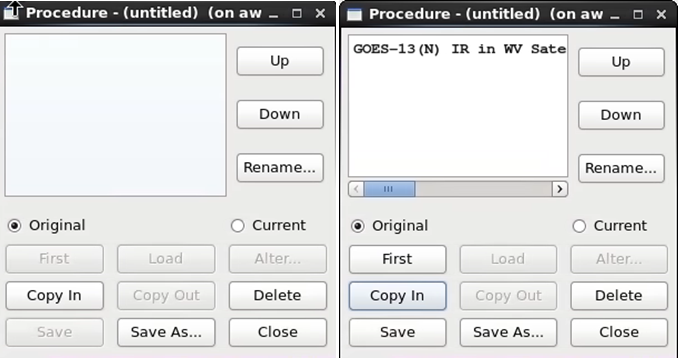
- Adjust the gamma settings (right click on text legend), and open a procedure (e.g. File-> Procedures-> New) to save the bundle.
- Note you may want to change the scale menu from Pacific to another scale in CAVE before saving (Fig 54).
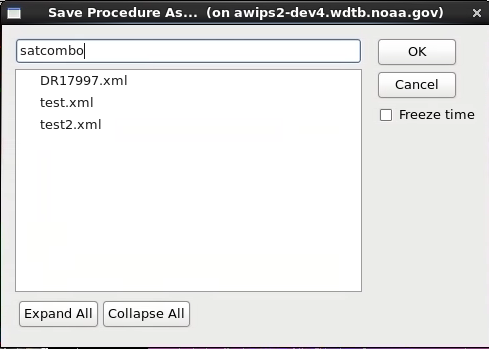
- Click the Copy In button and then the Save button. In the popup window provide a name (e.g. satcombo) (Fig 55, Fig 56).
- Clear a pane and load the bundle from the procedure window by double clicking on the bundle name (Fig 57, Fig 58).
- These instructions were designed to illustrate the basic approach of how to build your own satellite combination product and how adjusting the gamma settings changes the contrast in the input product contributions. There is an art to combining satellite channels in meaningful ways, and future training on GOES-R will explore how to leverage the capabilities for improved displays.