Purpose:
This jobsheet steps through how to create a team and assign permissions to folders, web content, and pages to allow the team to work within their own space in a community.
Tasks:
Prerequisites:
- This jobsheet requires the community management jobsheet to have been taken.
- You should be logged in to your VLab community.
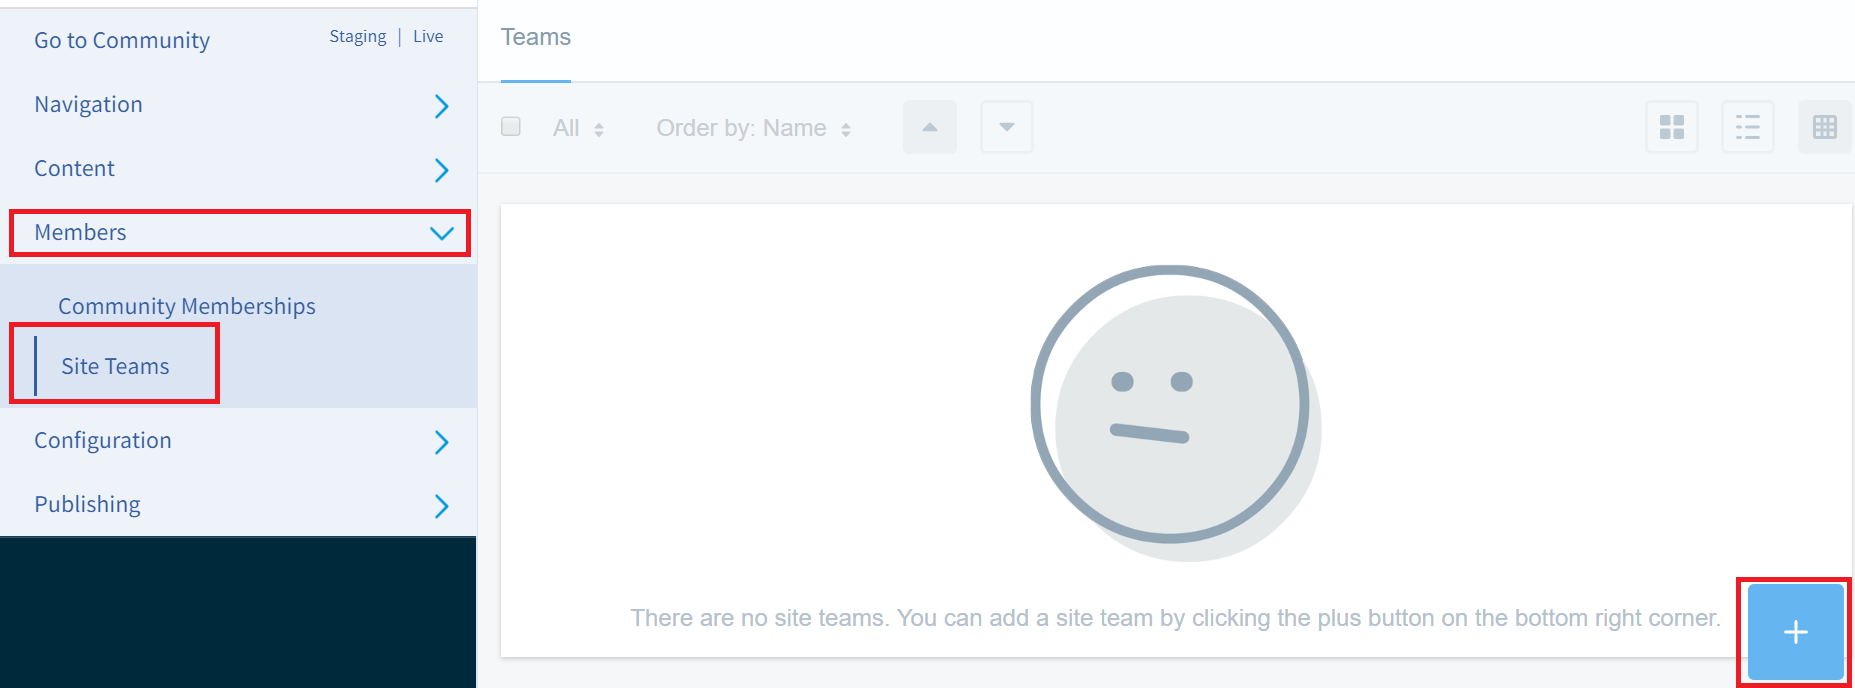
- After entering your local community, access the Members tab and Site Teams submenu on the left-side navigation (note the left navigation is toggled with the menu icon on the top bar of the community). Then click on the plus icon on the bottom-right of the page.
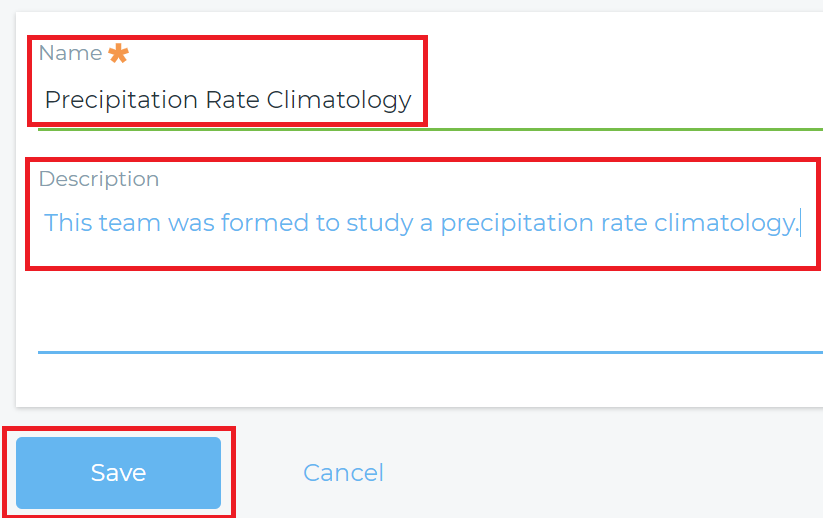
- In the popup window enter the Name of your group and Description. Click the Save button.
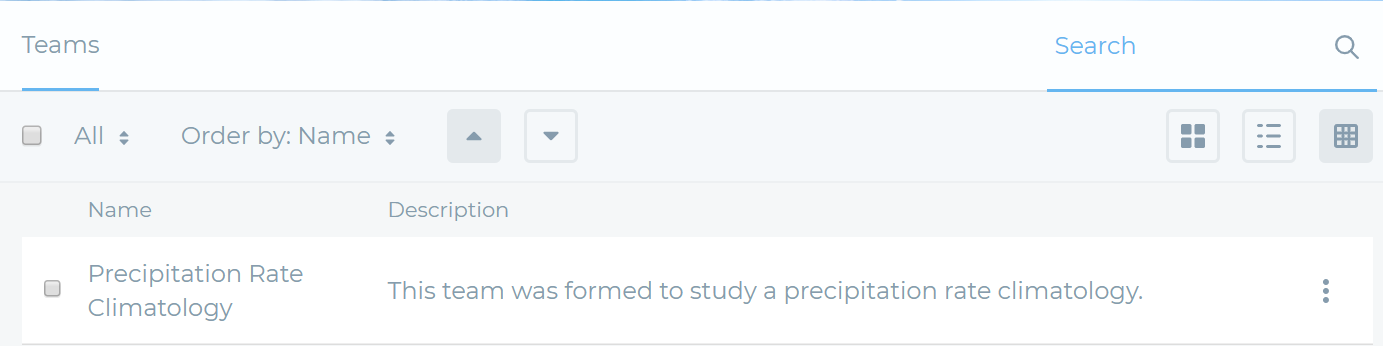
- Your team should listed.
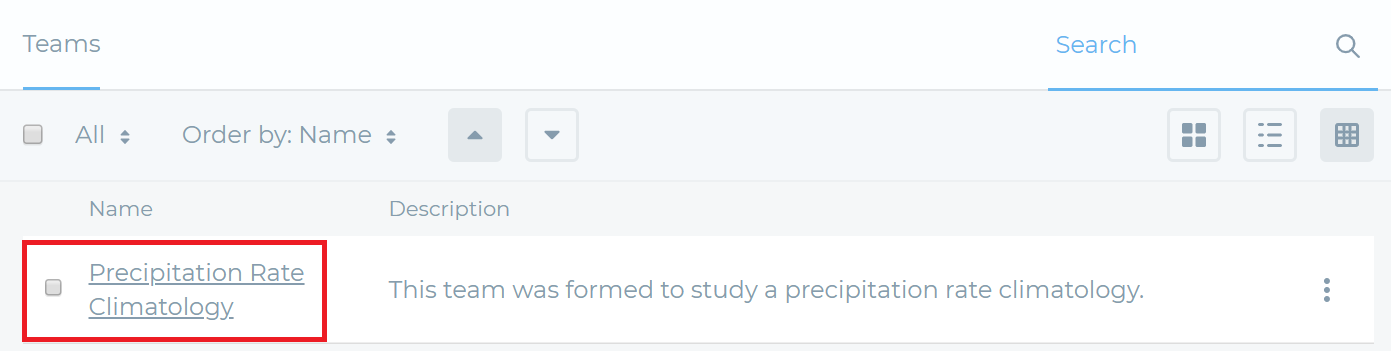
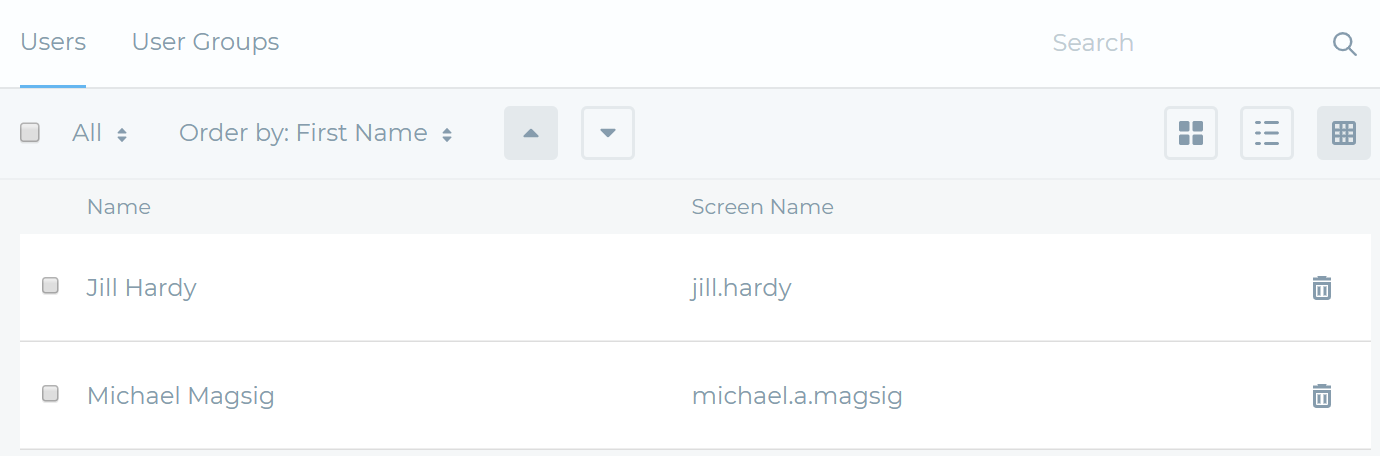
- Click on the Name of your team to enter users.
- Click on the plus icon to be able to add users.

- Select members to add to your group. Click the Add button.

- The names should show up in your group.
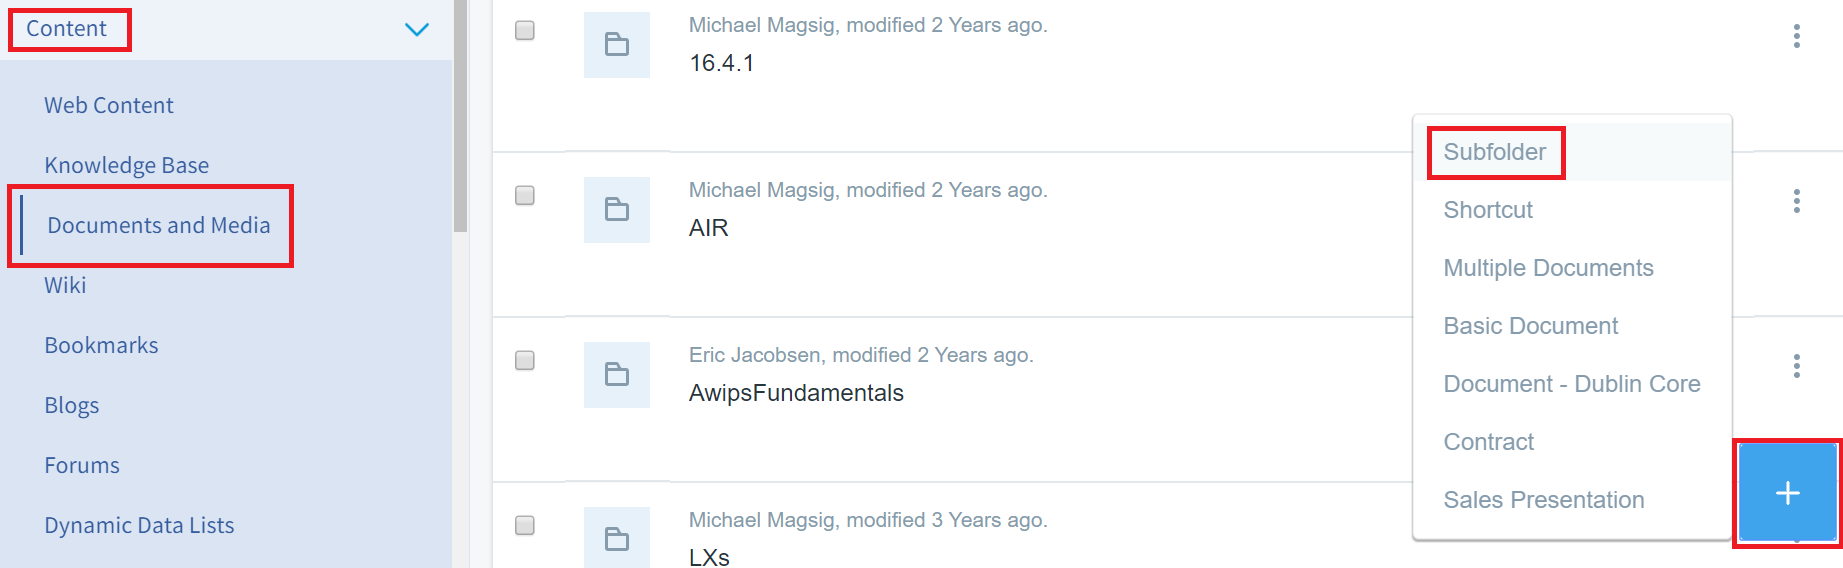
- Next we will create a folder to assign to the group. Under the Content left-navigation menu select Documents and Media. Navigate to the folder where you would like to create a subfolder and click on the plus icon to select "Folder" or "Subfolder".
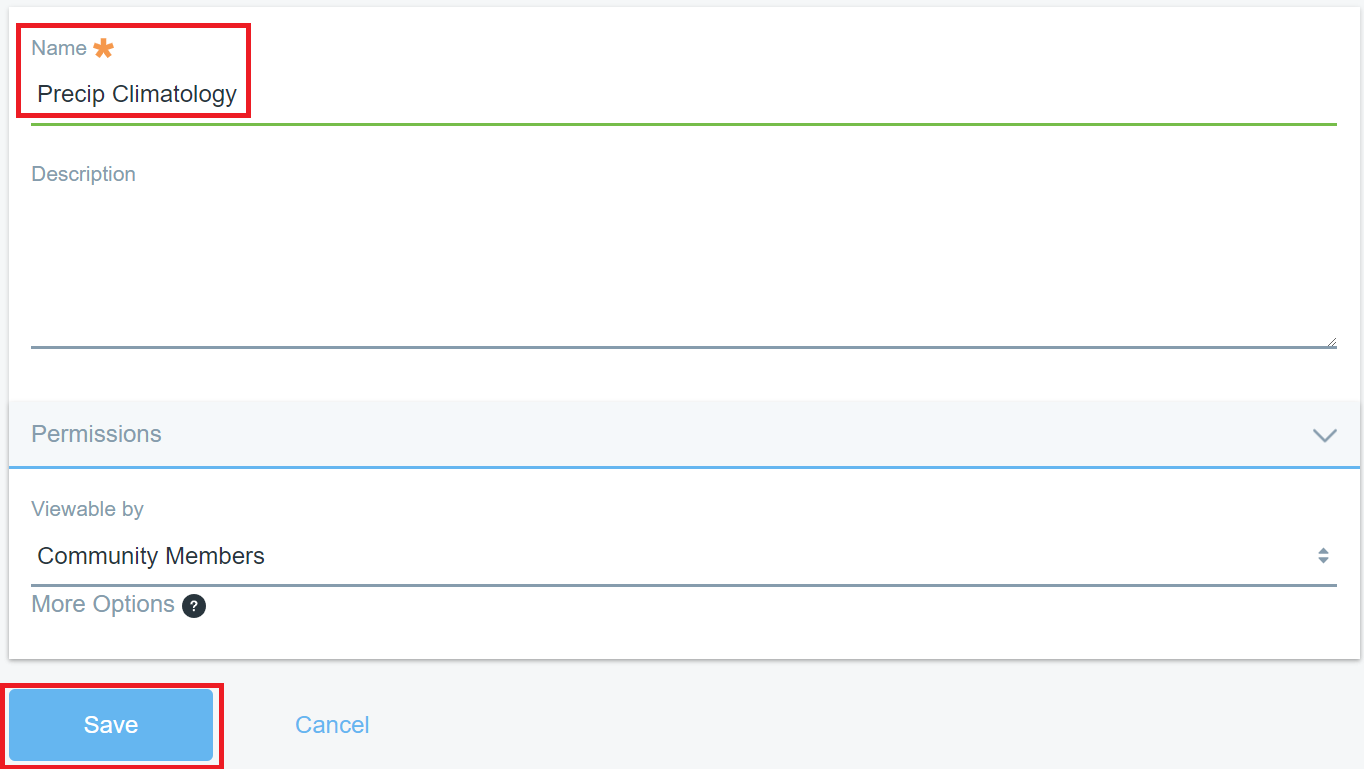
- Enter Name for your team's folder. Click the Save button.
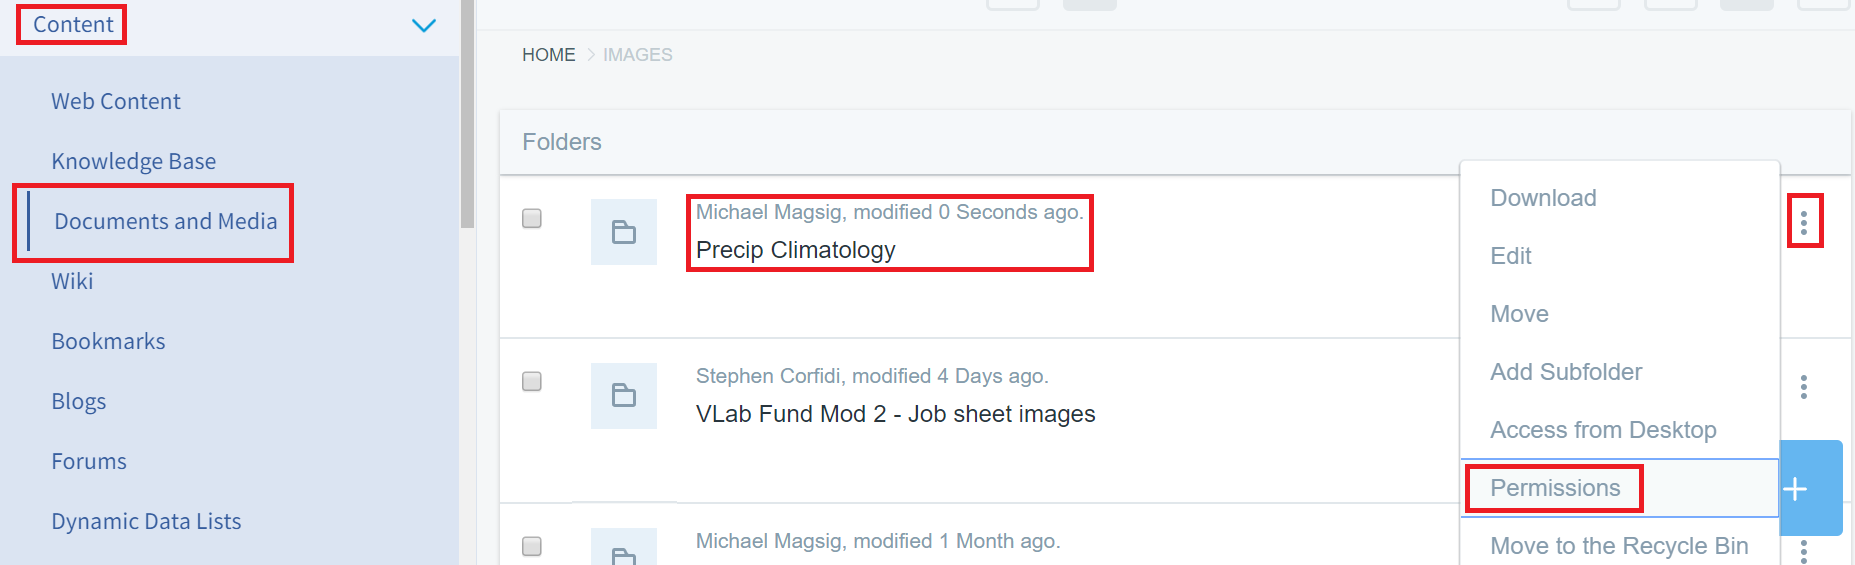
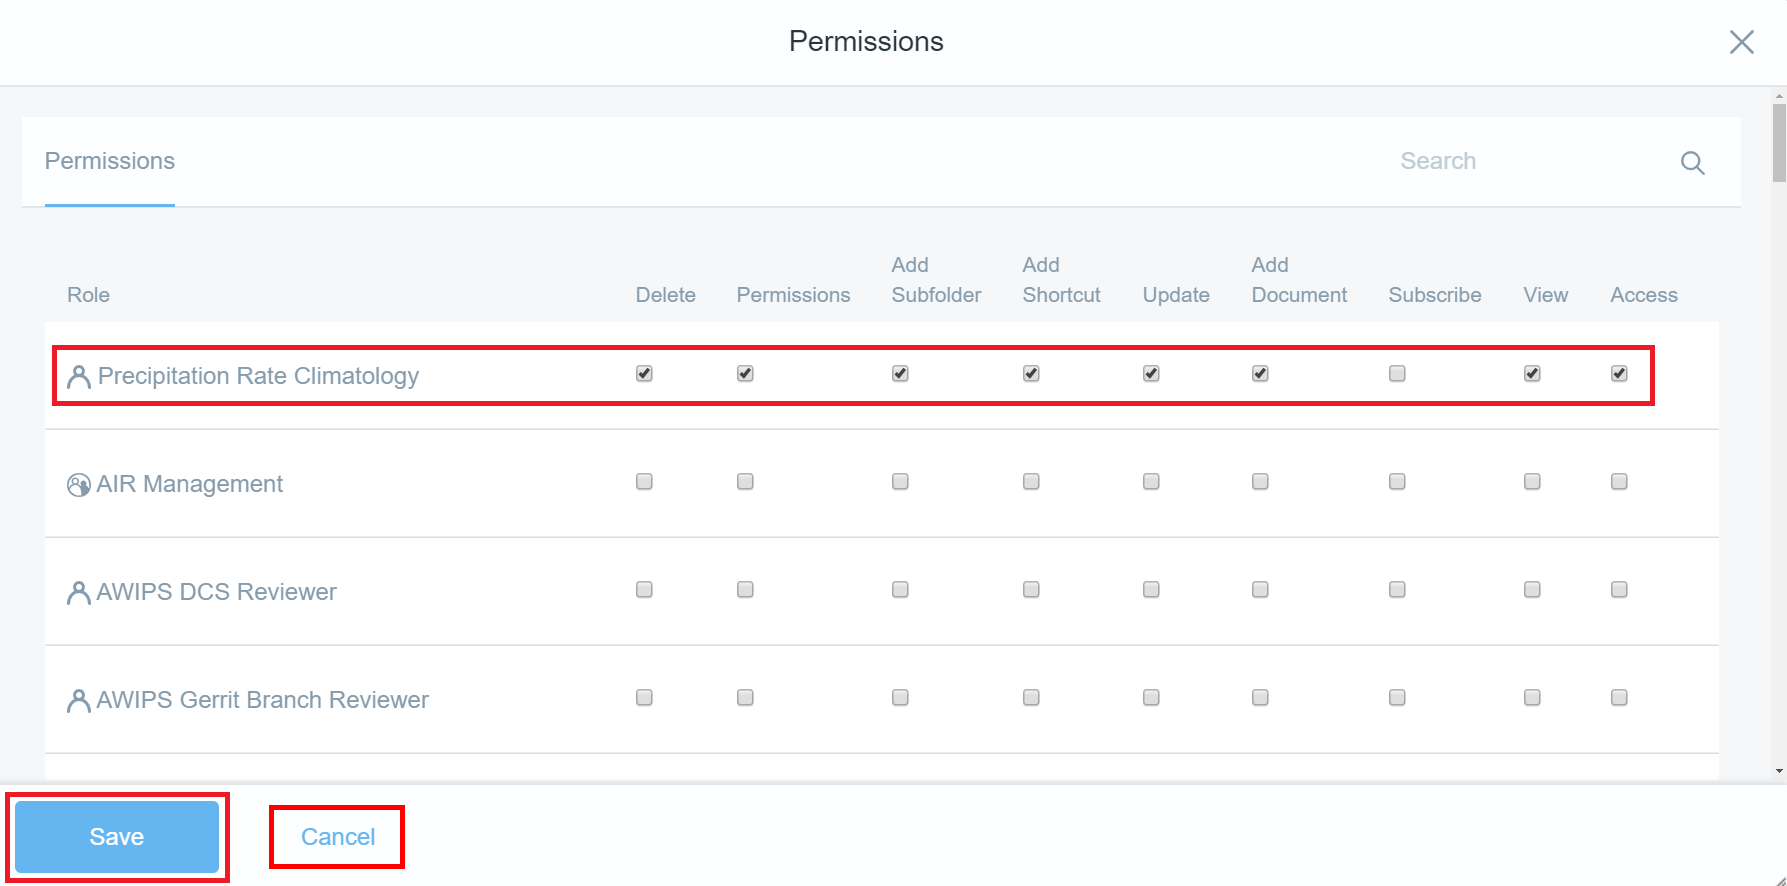
- For the folder you just created, you can assign permissions using your team. Select the three-dot ellipsis to the right of your folder name and select Permissions.
- Assign most of the permissions for this role. Click Save and then click Cancel.
- The command is done when the green success popup occurs.

- Your team now has authority to upload files and work in this folder. Other similar things you can do with teams include assigning a web content space and a page to your team. This will allow the team to work in one section of your community, but not others.
- To create a web content space for this group, on the left-side Content menu, select Web Content.

- Navigate to the location you would like to create a folder in and then click on the plus sign in the blue box on the lower right part of the page. In the popup menu click on the Folder menu (or Subfolder menu if you are not in the root folder) .

- Type in the Name of the folder to organize the web content for this team and click Save.

- To the right of the web content folder's name, click on the three-dot ellipsis and select Permissions.

- Check all the boxes for permissions to give full permissions to this team and hit Save. Then hit Cancel.

- Then click on the folder name to enter the web content folder.

- Click on the plus sign in the blue box on the lower-right corner and select Basic Web Content to add web content to this folder.

- Enter the Title of the web content and under the Content section, enter some text.

- Click on the Publish button on the bottom of the page to save the web content.

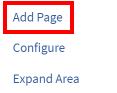
- Next we will create a page and menu at the top for the team to work with. Under the Navigation menu on the left-side of the page, select the three-dot ellipsis next to Public Pages. Then click Add Page.

- Enter a page Name for this team to work under. Ensure No is selected under Hide from Navigation Menu and select 1 Column for the page format. Then click Add Page at the bottom. This menu will show up at the top of your community and will be their space to add menus and sub-pages without cluttering up the rest of the site. The permissions can be set so the team will be the only members of your community to see the menu initially.

- The name of your page should show up as a menu at the top of your community if you selected NO under the hide option. Click on the menu name for your page to make sure you have that empty page loaded.

- Click on the plus sign in the upper right of the page to add content to your page.

- Under the CONTENT menu on the upper-right part of the page, identify your web content. If you just created it, it should be listed under Recent.

- Drag your web content and drop it on top of your page near the top. You will notice a blue bar will illuminate when the page has detected you are ready to drop content on to the page.

- Your web content will display on the page after you drop it.

- To modify the permissions of the page, you have to go into the configuration for the page to trigger the appropriate three-dot ellipsis to appear. To restore the left navigation after adding web content, click on the menu icon in the upper left. On the left side Navigation menu, select the three-dot ellipsis next to your new page.


- In the popup window, select Configure Page. This will make the three-dot ellipsis show up in the upper-right part of the page.

- In the upper-right part of the page, select the three-dot ellipsis and select Permissions to set the permissions of the page.

- Select all the permissions for your team to give them permissions on this page.

- Deselect the Guest View permissions, so the public won't see the page initially. Note if you have multiple pages of options, do not page forward before saving your modifications because the settings changes will not be remembered when changing pages.

- Click Save, and then click Cancel.

- Load your page by clicking on your page name under Navigation on the left navigation. Hover over the portlet on your page, and on the upper-right of the gray portlet bar, click on the three-dot ellipsis that pops up to reveal the portlet permissions and content permissions menus.


- Click on the top Permissions menu to edit the portlet permissions. Select all the permissions for your team.

- Click Save and then Cancel.

- Next, hover over your portlet again and click on the lower Permissions menu (from step 36) in the three-dot ellipsis of the portlet in order to modify the web content permissions. Select all the permissions for your team.

- Click Save and then Cancel.
- Now you have set up a working environment for your team. They have a Documents and Media folder to store files in. They have a web content folder to store web content in. They also have a page that they can add web content to. In summary, the key steps for teams is to define a team and their members. Then assign that team's permissions to the Documents and Media folder, web content folder, web content, portlet, and page. The permissions menus are accessed using the three-dot ellipsis in the portlet and the Navigation menu.

- Jobsheet complete!


