


All Tilts Jobsheet - OCLO
All Tilts Jobsheet
Summary: This jobsheet reviews the new D2D all-tilts SAILS navigation introduced in 16.1.1 and the old D2D all-tilts navigation that can be toggled with the “Enable SAILS Frame Coordinator” checkbox in the Radar Display Controls.
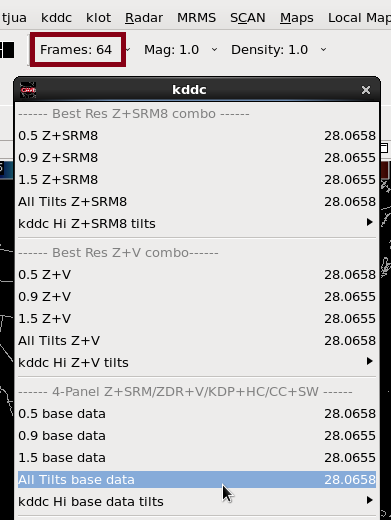
- When your radar is in VCP12 or 212 and collecting SAILS data, set your Frames: count in D2D to 64 and load the All Tilts base data menu option for your local radar (e.g. kddc; Fig. 1).
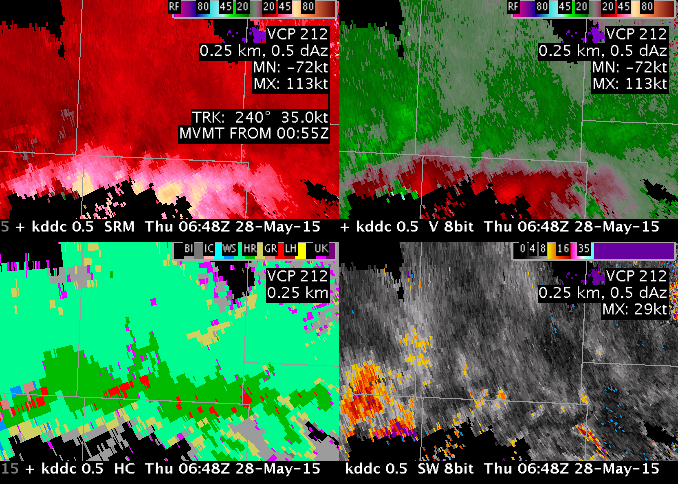
- Click on the Del key on the keypad to toggle to velocity, and use the up and down-arrow keys to navigate to 0.5 degrees. Then use the left-arrow key to navigate from frames that have “SAILS” in the upper-right part of the text images to a 0.5 tilt that does not have the “SAILS” label in the upper right (Fig. 2). Identify the time stamp in the product legend (e.g. 06:48Z); this represents the beginning of the volume scan time, and all the higher tilts are assigned this time. Extra 0.5 degree SAILS tilts will have time stamps more recent than the volume scan start time.
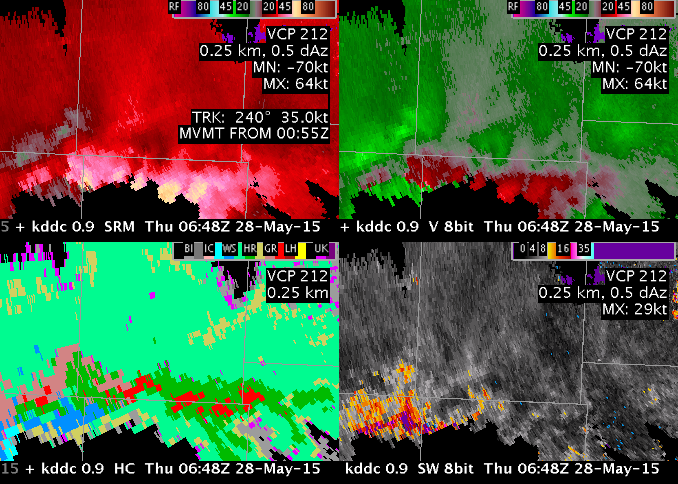
- Use the up-arrow key to tilt to the next highest tilt and notice the time stamp on the text legend does not change because it is the beginning of the volume scan (Fig. 3).
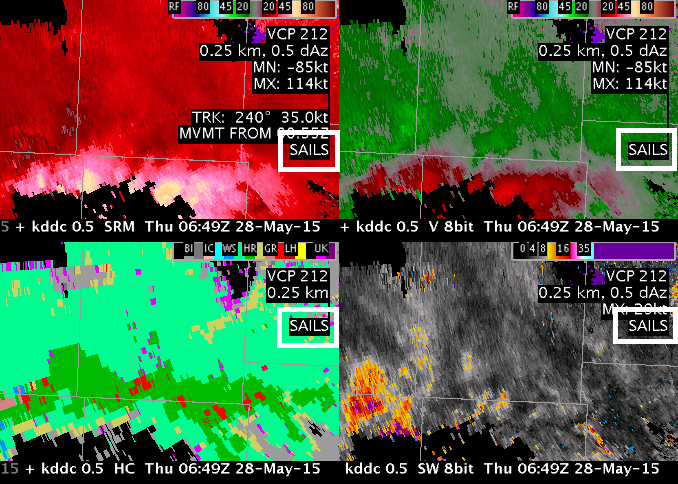
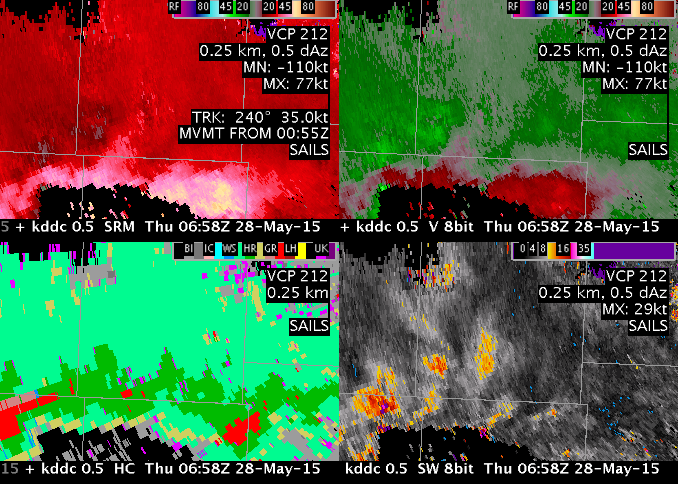
- Tilt back down to 0.5 degrees and then step forward in time to a SAILS tilt. The text “SAILS” will appear in the upper right part of the velocity product (Fig. 4).
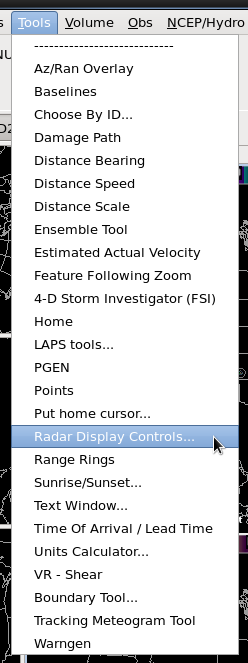
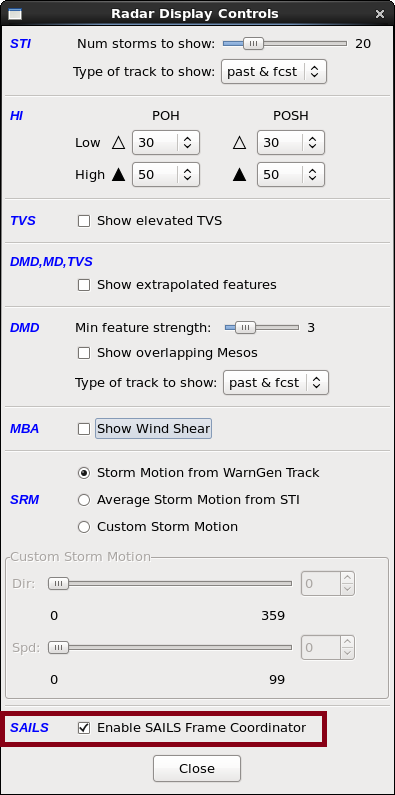
- Under the Tools menu load Radar Display Controls and make sure the Enable SAILS Frame Coordinator box is selected (Fig. 5, Fig. 6).
- With the 0.5 degree SAILS tilt loaded, click on the up-arrow key and notice the product steps to the next higher tilt from the beginning of the volume scan (e.g. 0.5 06:49Z to 0.9 06:48Z). Then return to the 0.5 degree SAILS tilt. Note for the editor to respond to arrow keys you need to make sure and click on the CAVE window to make it active when switching between the CAVE editor and the Radar Display Controls (Fig. 7, Fig. 8).
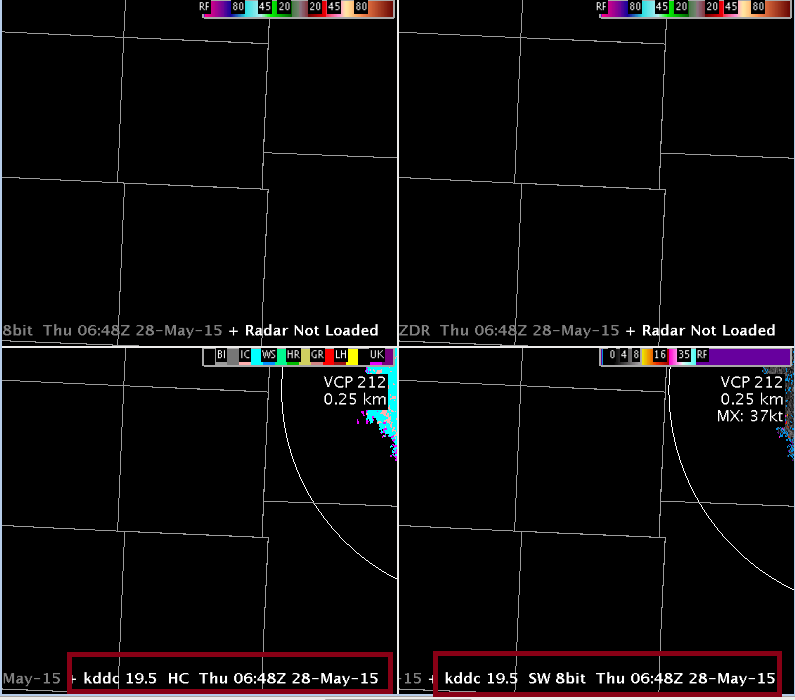
- With the 0.5 degree SAILS tilt loaded, uncheck the “Enable SAILS Frame Coordinator” in the Radar Display Controls. Click on the up-arrow key and notice the data does not change (pre 16.1.1 behavior). Make sure you have the CAVE window selected when attempting the All-Tilts navigation (Fig. 9, Fig. 10).
- With the “Enable SAILS Frame Coordinator” still unchecked (old navigation), click on the Ctrl and right-arrow keys to advance to the most recent tilt. This will navigate to the most recent extra 0.5 degree SAILS tilt (due to the more recent AWIPS time stamp) and not the more-recent high tilts (Fig. 11, Fig. 12).
- Use the left-arrow keys to navigate backward in time at 0.5 degrees to an earlier tilt and then select the “Enable SAILS Frame Coordinator” option in the Radar Display Controls (Fig. 13, Fig. 14).
- With the “Enable SAILS Frame Coordinator” selected, click on the Ctrl and right-arrow keys to advance to the most recent tilt. This will navigate to the most recent tilt (e.g. 19.5 degree 655z) regardless of the time stamp on the extra 0.5 degree SAILS tilt (e.g. 658z in step 8). If your most recent frame command results in an extra SAILS tilt, you can wait a minute for the radar to tilt back up and provide higher tilts that will show you the behavior (Fig. 15).
- Use the left-arrow keys to navigate backward in time and down-arrow keys to navigate to an earlier 0.5 degree SAILS tilt. With “Enable SAILS Frame Coordinator” still selected, use the Ctrl and up-arrow keys to jump to the top of the volume scan displayed (Fig. 16, Fig. 17).
- Use the Ctrl and down-arrow keys to navigate back down to the extra 0.5 degree SAILS tilt, and in the Radar Display Controls, deselect the “Enable SAILS Frame Coordinator”. Use the Ctrl and up-arrow keys and notice it does not go anywhere (Fig. 18, Fig. 19).
- In the Radar Display Controls, restore “Enable SAILS Frame Coordinator” to its default setting to be able to utilize the more convenient keyboard shortcuts (Fig. 20).
- With the Enable SAILS Frame Coordinator checkbox selected, practice the keyboard shortcuts you are unfamiliar with:
- Left and right-arrow keys - time navigation
- Up and down-arrow keys - vertical tilt navigation where 0.5 degree SAILS tilt navigates to next higher tilt in volume scan
- Ctrl + right-arrow keys - most recent tilt, not using AWIPS time stamp
- Ctrl + left-arrow keys - oldest lowest tilt
- Ctrl + up-arrow keys - highest tilt in volume scan displayed
- Ctrl + down-arrow keys - lowest tilt in volume scan displayed (remembers the last 0.5 degree tilt you displayed)
- Shift + Ctrl + up-arrow keys – highest tilt in most recently completed volume scan
- Shift + Ctrl + down-arrow keys – lowest tilt in most recently completed volume scan