


VLab Community Management for AIR - OCLO
Default Jobsheet Viewer
Purpose:
This jobsheet, designed for SOO/DOH/ITOs at NWS field offices, explains the procedure for initial access to their default, office-specific VLab community, as well as community management actions relevant to AIR, such as how to add additional members, and how to designate roles to each user for the purpose of submitting content to the community or allowing them to register references with AIR.Tasks:
Prerequisites:
- This jobsheet is specifically designed for SOO/DOH/ITOs in an NWS field office, or a person designated as a site owner/admin for one of those communities.
First-time community setup specifically requires LDAP login to VLab, explained in steps 1 and 2, or proper admin rights may not be recognized for the SOO/DOH/ITO.
- [ESSENTIAL FOR FIRST-TIME USE OF COMMUNITY] Go to the VLab home page at https://vlab.noaa.gov/ and make sure you are signed out.
- If you see your name on the top-right of the page, you are currently logged in. To log out, click on your name and select "Sign Out" from the drop-down menu.
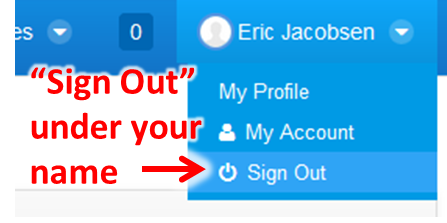
- If you see your name on the top-right of the page, you are currently logged in. To log out, click on your name and select "Sign Out" from the drop-down menu.
- Sign in to VLab through the method below which describes you:
- If you are accessing your community for the first time: Using the fields to the right in the "Sign In" portlet, enter your LDAP username and password, then click the "Sign In" button (your LDAP username is what appears before the @ in your noaa email). This one-time step, which requires the LDAP sign-in, will automatically assign you to the appropriate field office community, based on your LDAP credentials.
- DO NOT click on the "Google" button for "Single Sign-on" (SSO). ONLY LDAP sign-in triggers automatic assignment (future VLab updates are expected to include this functionality with SSO as well).

- DO NOT click on the "Google" button for "Single Sign-on" (SSO). ONLY LDAP sign-in triggers automatic assignment (future VLab updates are expected to include this functionality with SSO as well).
- If you have already used LDAP to log in to your new community before: You may use either form of authentication (LDAP or SSO) to log in. Note that SSO requires you to be logged in to your Google account.
- If you are accessing your community for the first time: Using the fields to the right in the "Sign In" portlet, enter your LDAP username and password, then click the "Sign In" button (your LDAP username is what appears before the @ in your noaa email). This one-time step, which requires the LDAP sign-in, will automatically assign you to the appropriate field office community, based on your LDAP credentials.
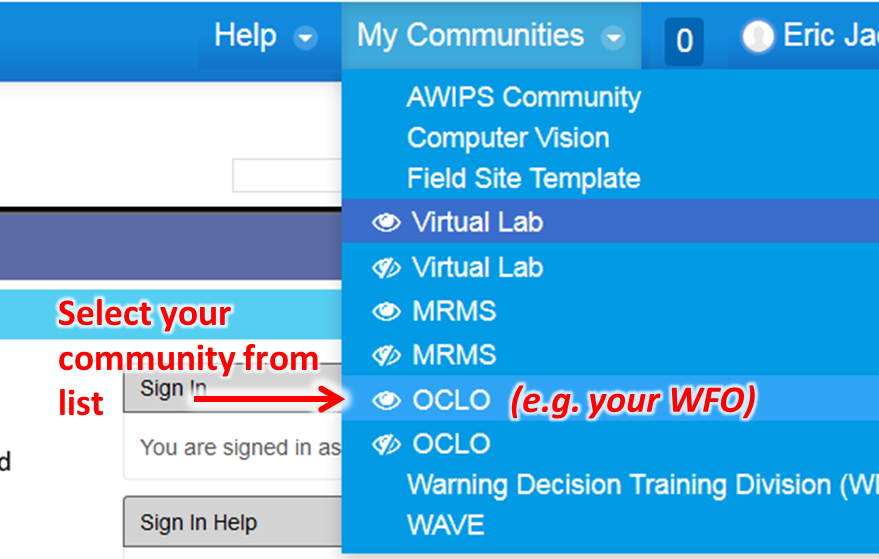
- To verify that you have been added to a community for your local field office, click on the "My Communities" drop-down menu at the top-right of the page, and click on the listing with your office name.
- If your community is not listed, verify that you have used LDAP at least once to log in for step 2 (NOT single sign-on), and if you did then contact the VLab admin for further help at vlab.admin@noaa.gov
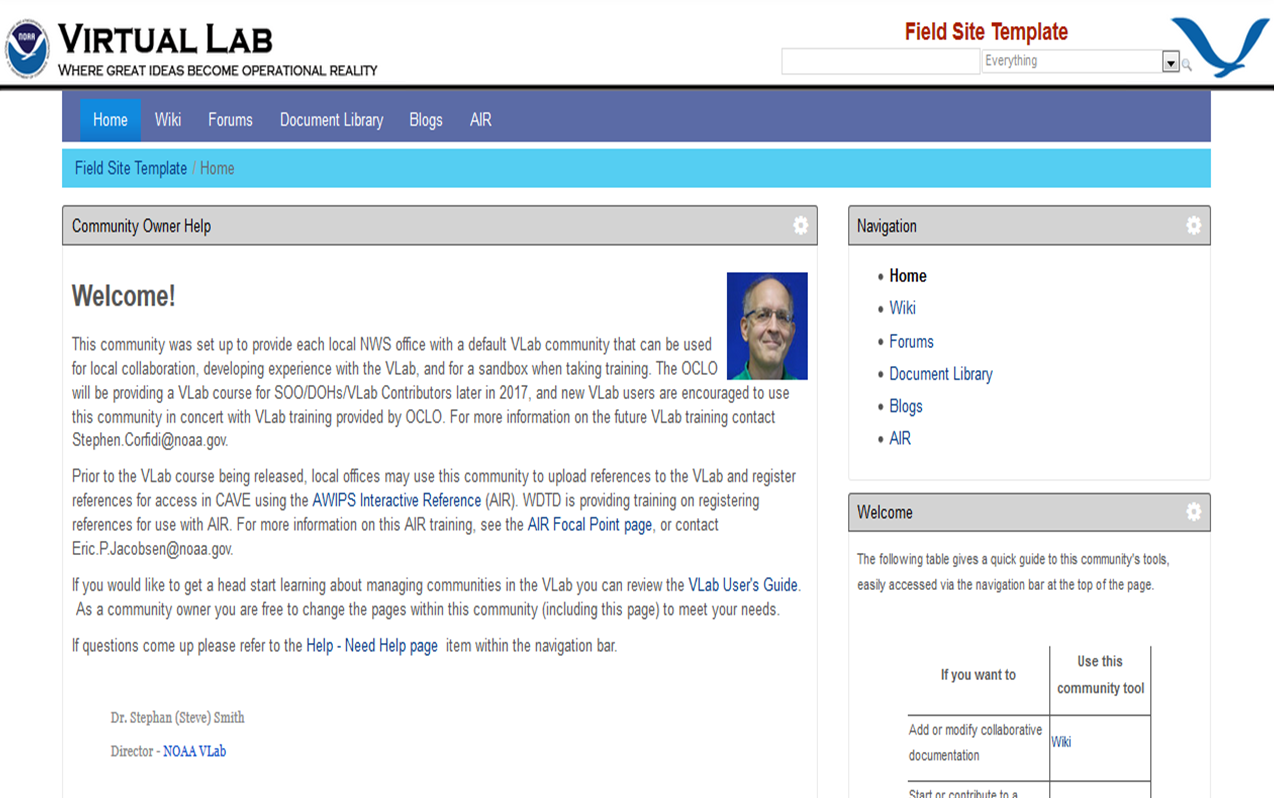
- If successful, and if your office did not previously have a VLab community, then you should see a page with a template similar to the following:
- Proceed to the next steps only if you are a SOO/DOH/ITO or community admin.
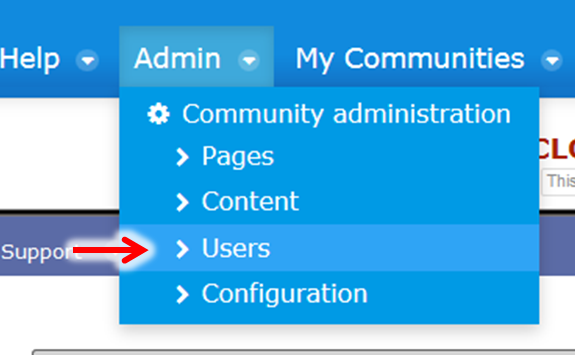
- If you are a SOO/DOH/ITO, from the "Admin" drop-down menu at the top right of your community's VLab page, click on "Users" to proceed to the user administration interface.
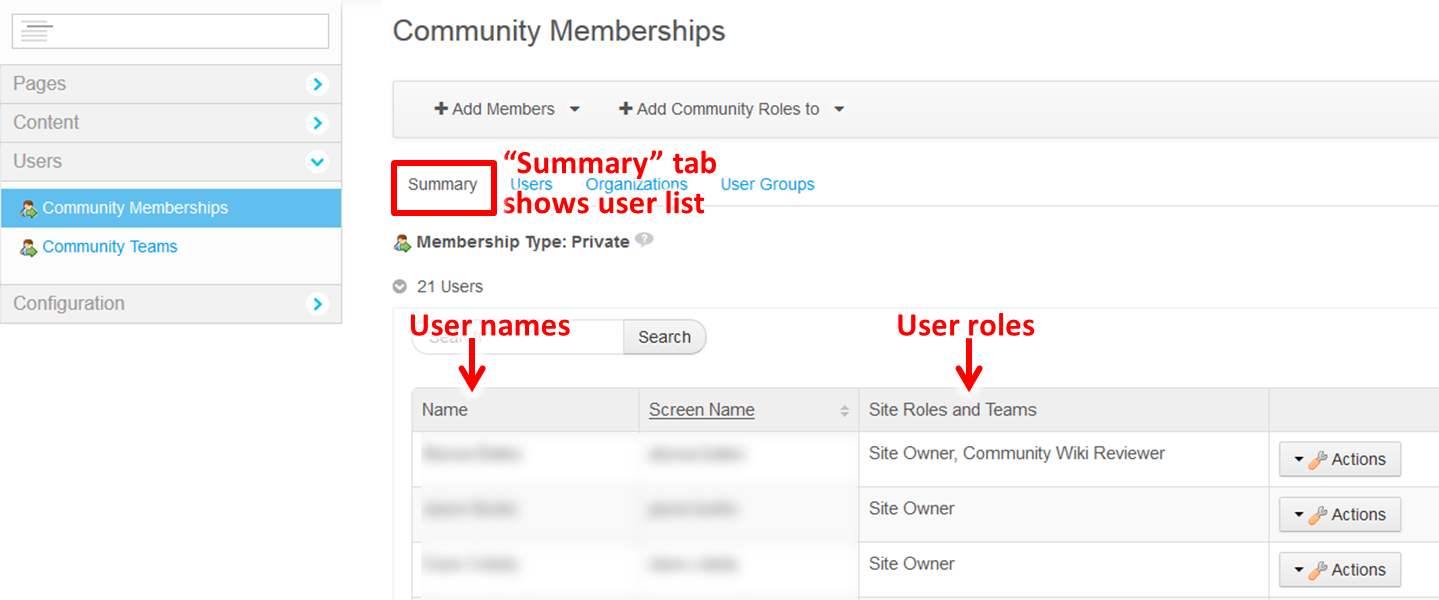
- Review the "Summary" tab for a list of users currently enrolled in your community (in the "Name" column), as well as the permissions assigned to each (in the "Site Roles and Teams" column).
- Your name should appear with "Site Administrator" and "Site Owner" in the "Site Roles and Teams" column.
- Your name should appear with "Site Administrator" and "Site Owner" in the "Site Roles and Teams" column.
- Click on the "Add Members" button above the "Summary" tab, then select "User" from the drop-down menu
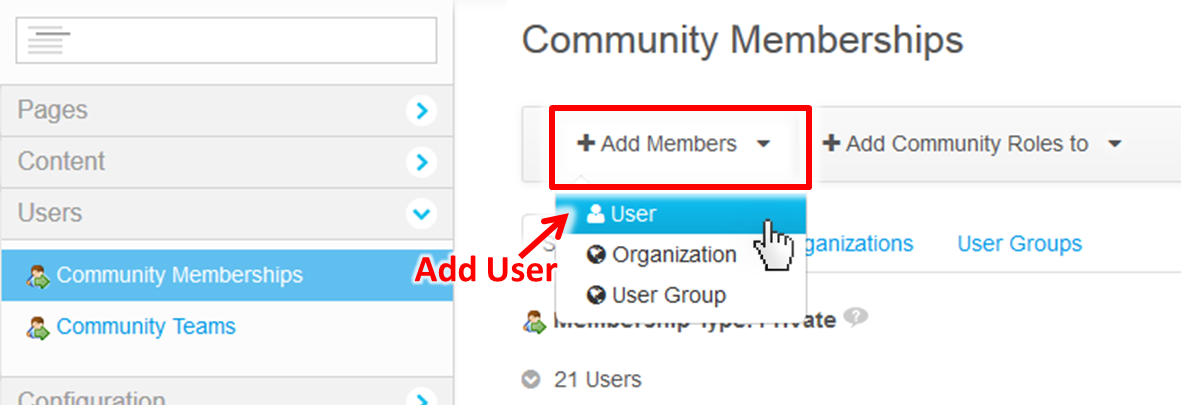
- In the "Add Members: Users" interface, you may enter a staff member's name in the "Keywords" field, then click the "Search" button to search for names to add to your local community
- Important: Until future VLab updates, not all staff will be found in this search. ONLY staff who have already used VLab are in the VLab database. Staff who do not appear must log in to VLab through the LDAP authentication process in steps 1 and 2 of this jobsheet to be assigned to your community.
- To add a local staff member, check the box next to their name, then click the "Save" button below the results table.
- Staff who are already members will already appear with a checked box next to their name
- Back on the "Community Memberships" admin interface, and within the "Summary Tab," find the new user and note what appears for them under the "Site Roles and Teams" column
- New community members (unless SOO/DOH/ITO) should have nothing in this field, because they receive a default "Site Member" status, which allows viewing of all community content but includes no site roles to start with (such as permissions for creating content in the community).
- To update the roles for a user, click on the "Actions" drop-down button to the right of the user, and select "Assign Community Roles"

- It is recommended that you start with very limited role assignment until you have a comfortable plan for managing your VLab community
- In the "Edit Community Roles" GUI for the selected user, check(/uncheck) the desired boxes to assign(/remove) roles for the user. For AIR, the following roles are relevant:
- Community Content Reviewer: This role, when checked, allows the user to upload or create content in your VLab community. However, it does not include permissions for using the "Consolidated Reference Management" (CRM) tool to register content with AIR, in order to allow more limited access to the registration of references (see next role).
- AIR Management: This role specifically enables use of the CRM tool, which allows the designated user to register community content with AIR. Note that the "Community Content Reviewer" is still required for any user who wishes to first create content in the community, since the "AIR Management" role does not encompass those permissions.
- Click on the "Update Associations" button to save your changes for the user.
- Verify that any new roles appear under the "Site Roles and Teams" column for the updated user.
- Jobsheet complete!