


Manually Toggling and Looping Single Elevation Angle Products in Time - OCLO
Purpose:
This task will discuss the different ways that you can examine the different frames of an image or graphic product loop loaded in the main display panel.Tasks:
Assumptions:
- You will need to have loaded a product with a frame count of more than one.
- Toggle backward in time using one of the following methods:
- Method 1: Left-click on the “<” button in the tool bar.
- Method 2: Use the LEFT-ARROW keyboard shortcut.

- Toggle forward in time using one of the following methods:
- Method 1: Left-click on the “>” button in the tool bar.
- Method 2: Use the RIGHT-ARROW keyboard shortcut.
- Going to the first frame in the loop using one of the following methods:
- Method 1: Left-click on the “<<” button in the tool bar.
- Method 2: Use the keyboard shortcut <CTRL> + LEFT-ARROW.
- Going to the last frame in the loop using one of the following methods:
- Method 1: Left-click on the “>>” button in the tool bar.
- Method 2: Use the keyboard shortcut <CTRL> + RIGHT-ARROW.
- Toggle Looping using one of the following methods:
- Method 1: Left-click on the Toggle Looping button from the toolbar.
- This method works only to toggle loops on and off.
- Method 2: Use the keyboard shortcuts <Page Up> or <Page Down>.
- Press the <Page Up> button to toggle the loop on.
- Press the <Page Up> and <Page Down> buttons to speed up and slow down the loop, respectively.
- NOTE: When using the <Page Down> button to slow the loop, if the button is pressed enough times to where the Forward Speed = 0, then the loop will stop playing. Pressing the <Page Up> button will reactivate the loop at a Forward Speed = 1.
- Press the right or left arrow keys on the keyboard to stop the loop.
- Method 1: Left-click on the Toggle Looping button from the toolbar.
- Opening the Loop Properties GUI using one of the following methods:
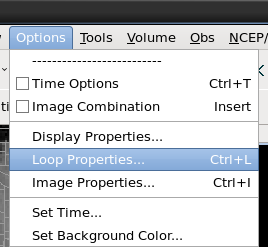
- Method 1: From the Options menu, select Loop Properties.
- Method 2: Use the keyboard shortcut <CTRL> + L.
- Method 3: Left-click on the Loop Controls button in the toolbar.

- Method 1: From the Options menu, select Loop Properties.
- Adjusting Loop Properties GUI values using one of the following methods:
- Method 1: Drag the slider bars for the different parameters using the mouse.
- Method 2: Use the arrow keys on the keyboard. Left click on the slider bar corresponding to a parameter and use the arrow keys to increase/decrease parameter value.

- Use the keyboard shortcuts <Tab> and <SHIFT> + <Tab> to toggle between the different slider bars.
- If you were to toggle beyond the first or last items in the GUI (“Forward Speed” and “Looping”), then the thin black rectangle that focus on the property will disappear. You will have to repeat Step 7.2.1 to recover the focus rectangle.
- Use the keyboard shortcuts <Tab> and <SHIFT> + <Tab> to toggle between the different slider bars.
- Task Complete!