


Tropical Jobsheets - Tropical AWIPS Information
New Tropical Jobsheets
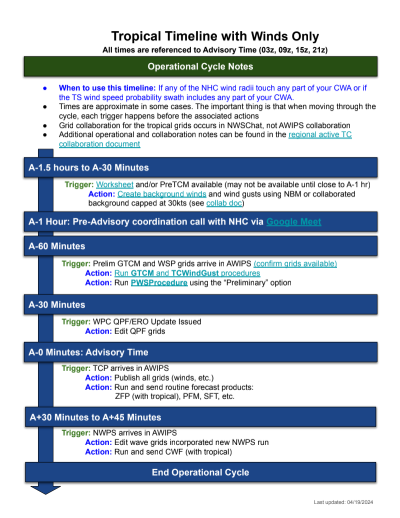
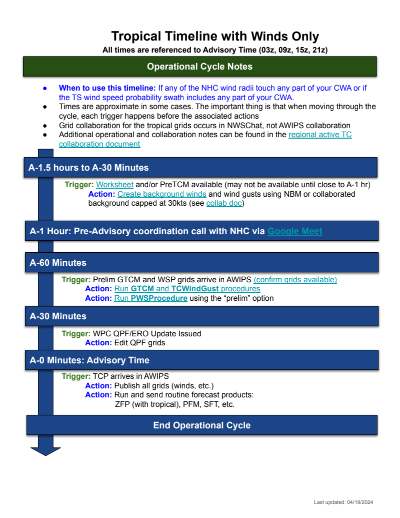
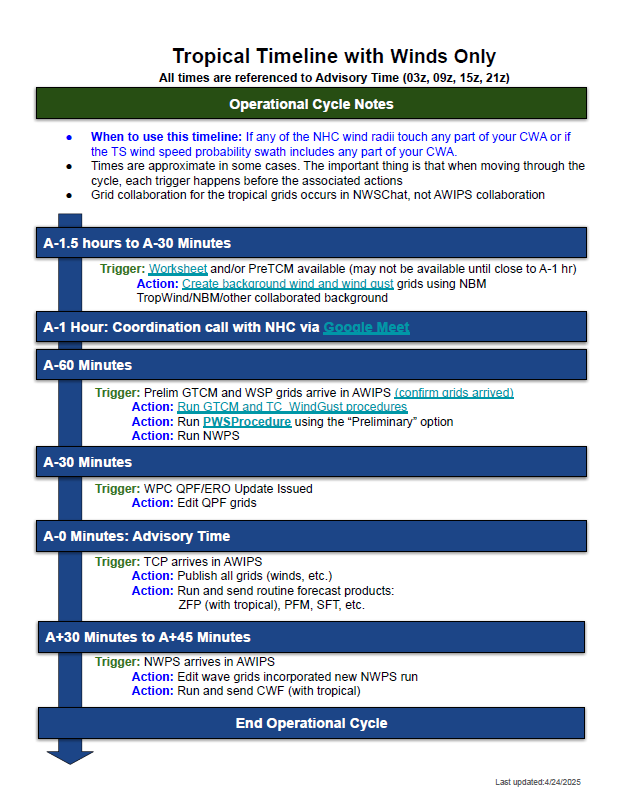
Operational timeline with winds only, no HTI, no Hazards:
Coastal Offices Inland Offices WR Offices
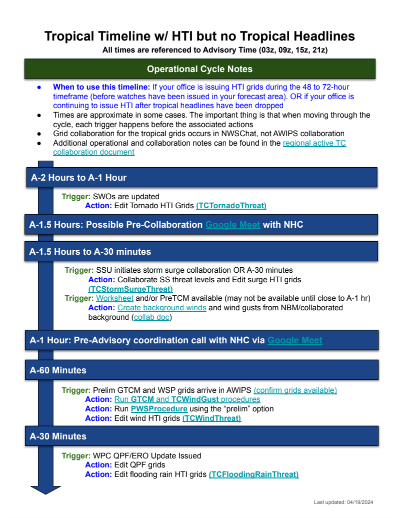
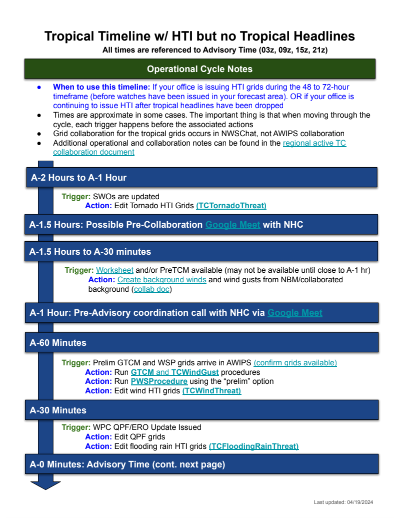
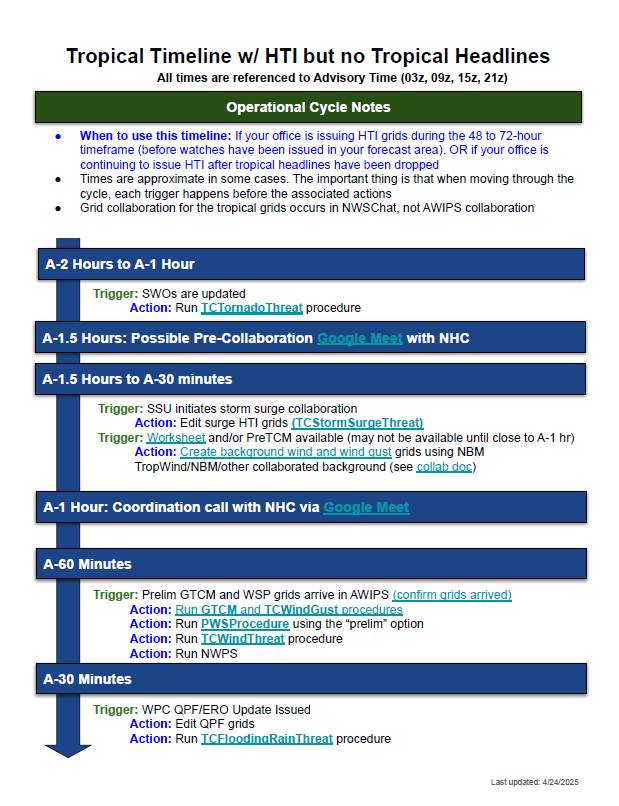
Operational timeline with wind and HTI, no hazards:
Coastal Offices Inland Offices WR Offices
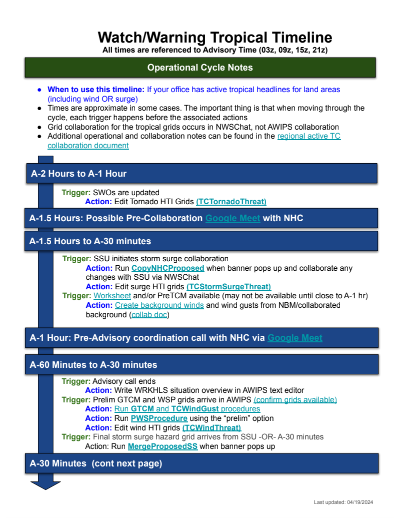
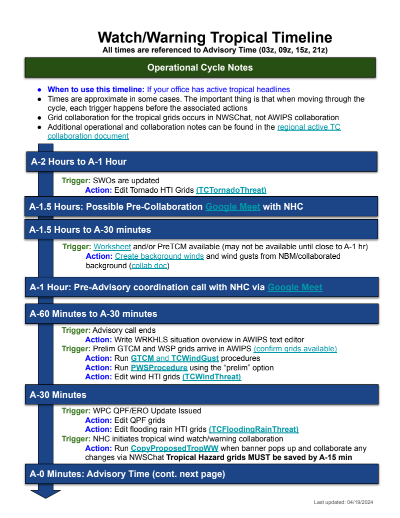
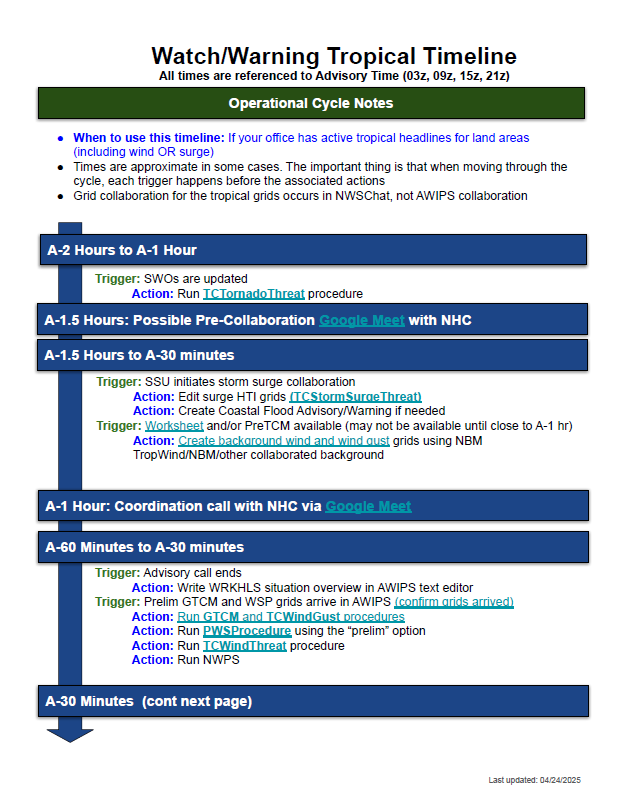
Operational timeline with tropical hazards in effect:
Coastal Offices Inland Offices WR Offices
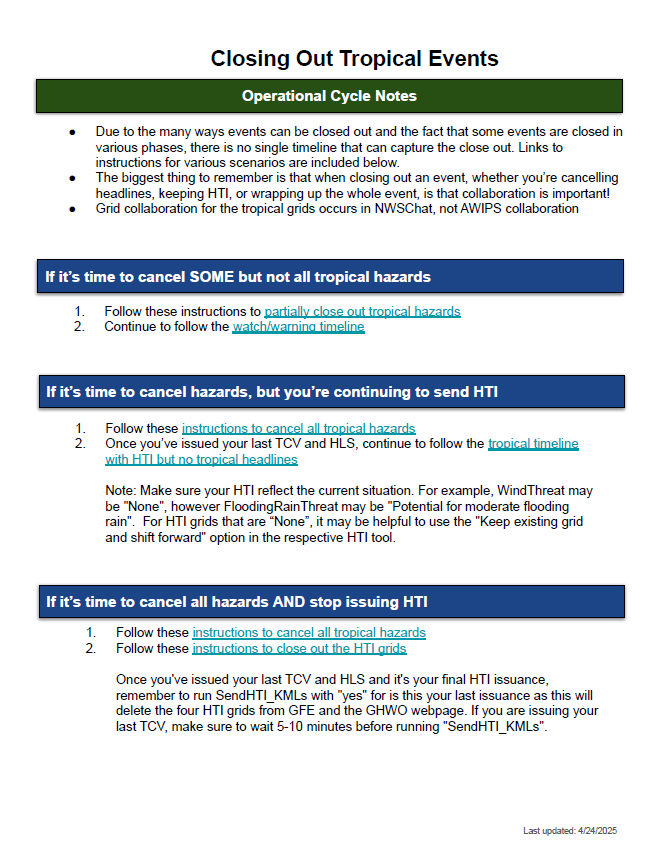
Closing out tropical events
Coastal Offices Inland Offices WR Offices
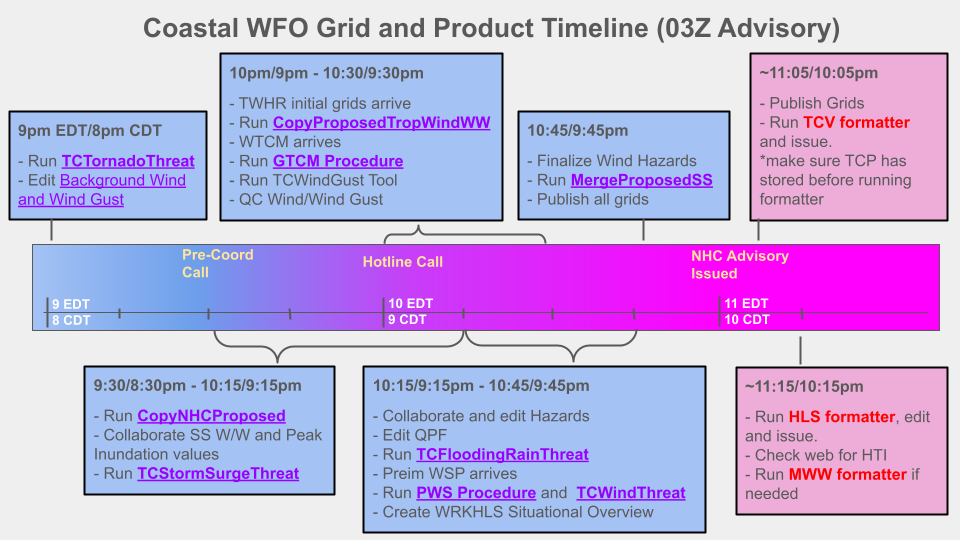
Graphical Timelines
Intermediate Advisory Timeline for all offices
Dynamic Tropical Operations Checklist
Old Tropical Jobsheets (These are no longer updated after the 2024 season)